Hello all, …
Here I am back with a new boards-sandwich mounted in a DIY-Case…
…like my previous VIM2Pro+vTV+TONE-BOARD…
… So, if you want to build youself a VIM3+TONE2 Pro all-in-one assembly,…
Just have a look down here !  …
…
IMPORTANTE NOTE :
Because of the “complexity” of this assembly (I should have said “length” because nothing is very complex in this mod ! ), I divided it into 3 topics:
-
DIY-Case tuned housing VIM3 + Modified TONE2 Pro (PHASE 1)
Modification of the Tone2 Pro by adding a 40-pin header. -
DIY-Case tuned housing VIM3 + Modified TONE2 Pro (PHASE 2)
The assembly of the VIM3 and the modified Tone2 Pro in the also modified DIY-Case. -
DIY-Case tuned housing VIM3 + Modified TONE2 Pro (PHASE 3)
The tests and operational problems of the finished assembly.
… Let’s go for the first phase of this assembly !!! …
GENESIS :
Since 2 years, I enjoy my VIM2Pro+vTV+TONE1 (Android 7.1-Nougat) wired on a NAD Home-theater, greatly playing streamings movies and musics !
I use it a few times a week and during all days on the week-end, working non-stop for at least 10 hours a day (S912 is stable heat at 65°C, 70°C is the MAX !!!).
With the start of production of the VIM3Pro, embedding A311D, I thought it was the opportunity to upgrade my audio-video system with a new Homebrew, less heating, DIY-Case-boards-sandwich…
DOING IT BUT HOW ?
…Order a VIM3Pro and a purple DIY-Case…
Firstly, I thought of dismantling the DIY-Case-VIM2Pro-vTV-TONE1 boards-sandwich to insert a VIM3Pro, instead of the VIM2Pro…
But in the end, as the vTV-Board is not compatible with the VIM3, I dropped this idea and went for a new complete VIM3Pro+TONE1 assembly in a new DIY-case … On April 12, 2020, I ordered from Khadas a VIM3Pro and a purple DIY-case…
Once the brand new VIM3Pro arrived, like my VIM2Pro+vTV+TONE1, I set out to install Android on it, so everyone at home has a familiar environment, like on their smartphone. For the VIM3Pro, this will be version 9.0 (Pie) of Android.
…Then, I had 2 possibilities …
Temporarily disassemble my VIM2Pro+vTV+TONE1 boards-sandwich to try out Tone1 with VIM3Pro or buy a new Tone1 VIM edition to mount on the VIM3Pro in the new purple DIY-case …
The first solution temporarily deprived me of music in the living-room through my home-theater  …
…
So I opted for the second solution and finally didn’t disassemble my magnificent VIM2Pro+vTV+TONE1 boards-sandwich which took me so long to study the assembly…
…So the option is to buy a new Tone1, … unless …
At the same time we started to talk about the Tone2Pro…
So I delayed my VIM3Pro+TONE1 project to see what this project would look like on this famous Tone2Pro, anyway, I still have my VIM2Pro+vTV+TONE1 boards-sandwich which still allow me to listen to music in the living room, therefore, there is no rush and then, VIM3Pro+Tone2Pro in a DIY-case sounded good to my ear …
So no more hesitation, it will be VIM3Pro+Tone2Pro, even if it means upgrading my installation, as well as upgrading the SBC and the sound card at the same time!
…Tone2 Pro, Tone2(Pro) VIM édition…
So I inquired about the Tone2Pro, unfortunately the Tone2Pro was only in the pre-order state, as for the Tone2 (Pro) VIM edition was only in a project state.
But looking more closely at the Tone2Pro circuit board, the location of the 40-pin header was present!
Why not solder a 40 pin header on the Tone2Pro and transform it into a Tone2Pro VIM edition !!!
All that was enough to convince me to get a Tone2Pro.
… Tone2 Pro, the pre-order…
On December 12, 2020 I pre-ordered a black one …
On December 17, 2020, order the Tone2Pro from HiFiGo upon receipt of the pre-order return email.
On January 23, 2021, reception of the precious merchandise!
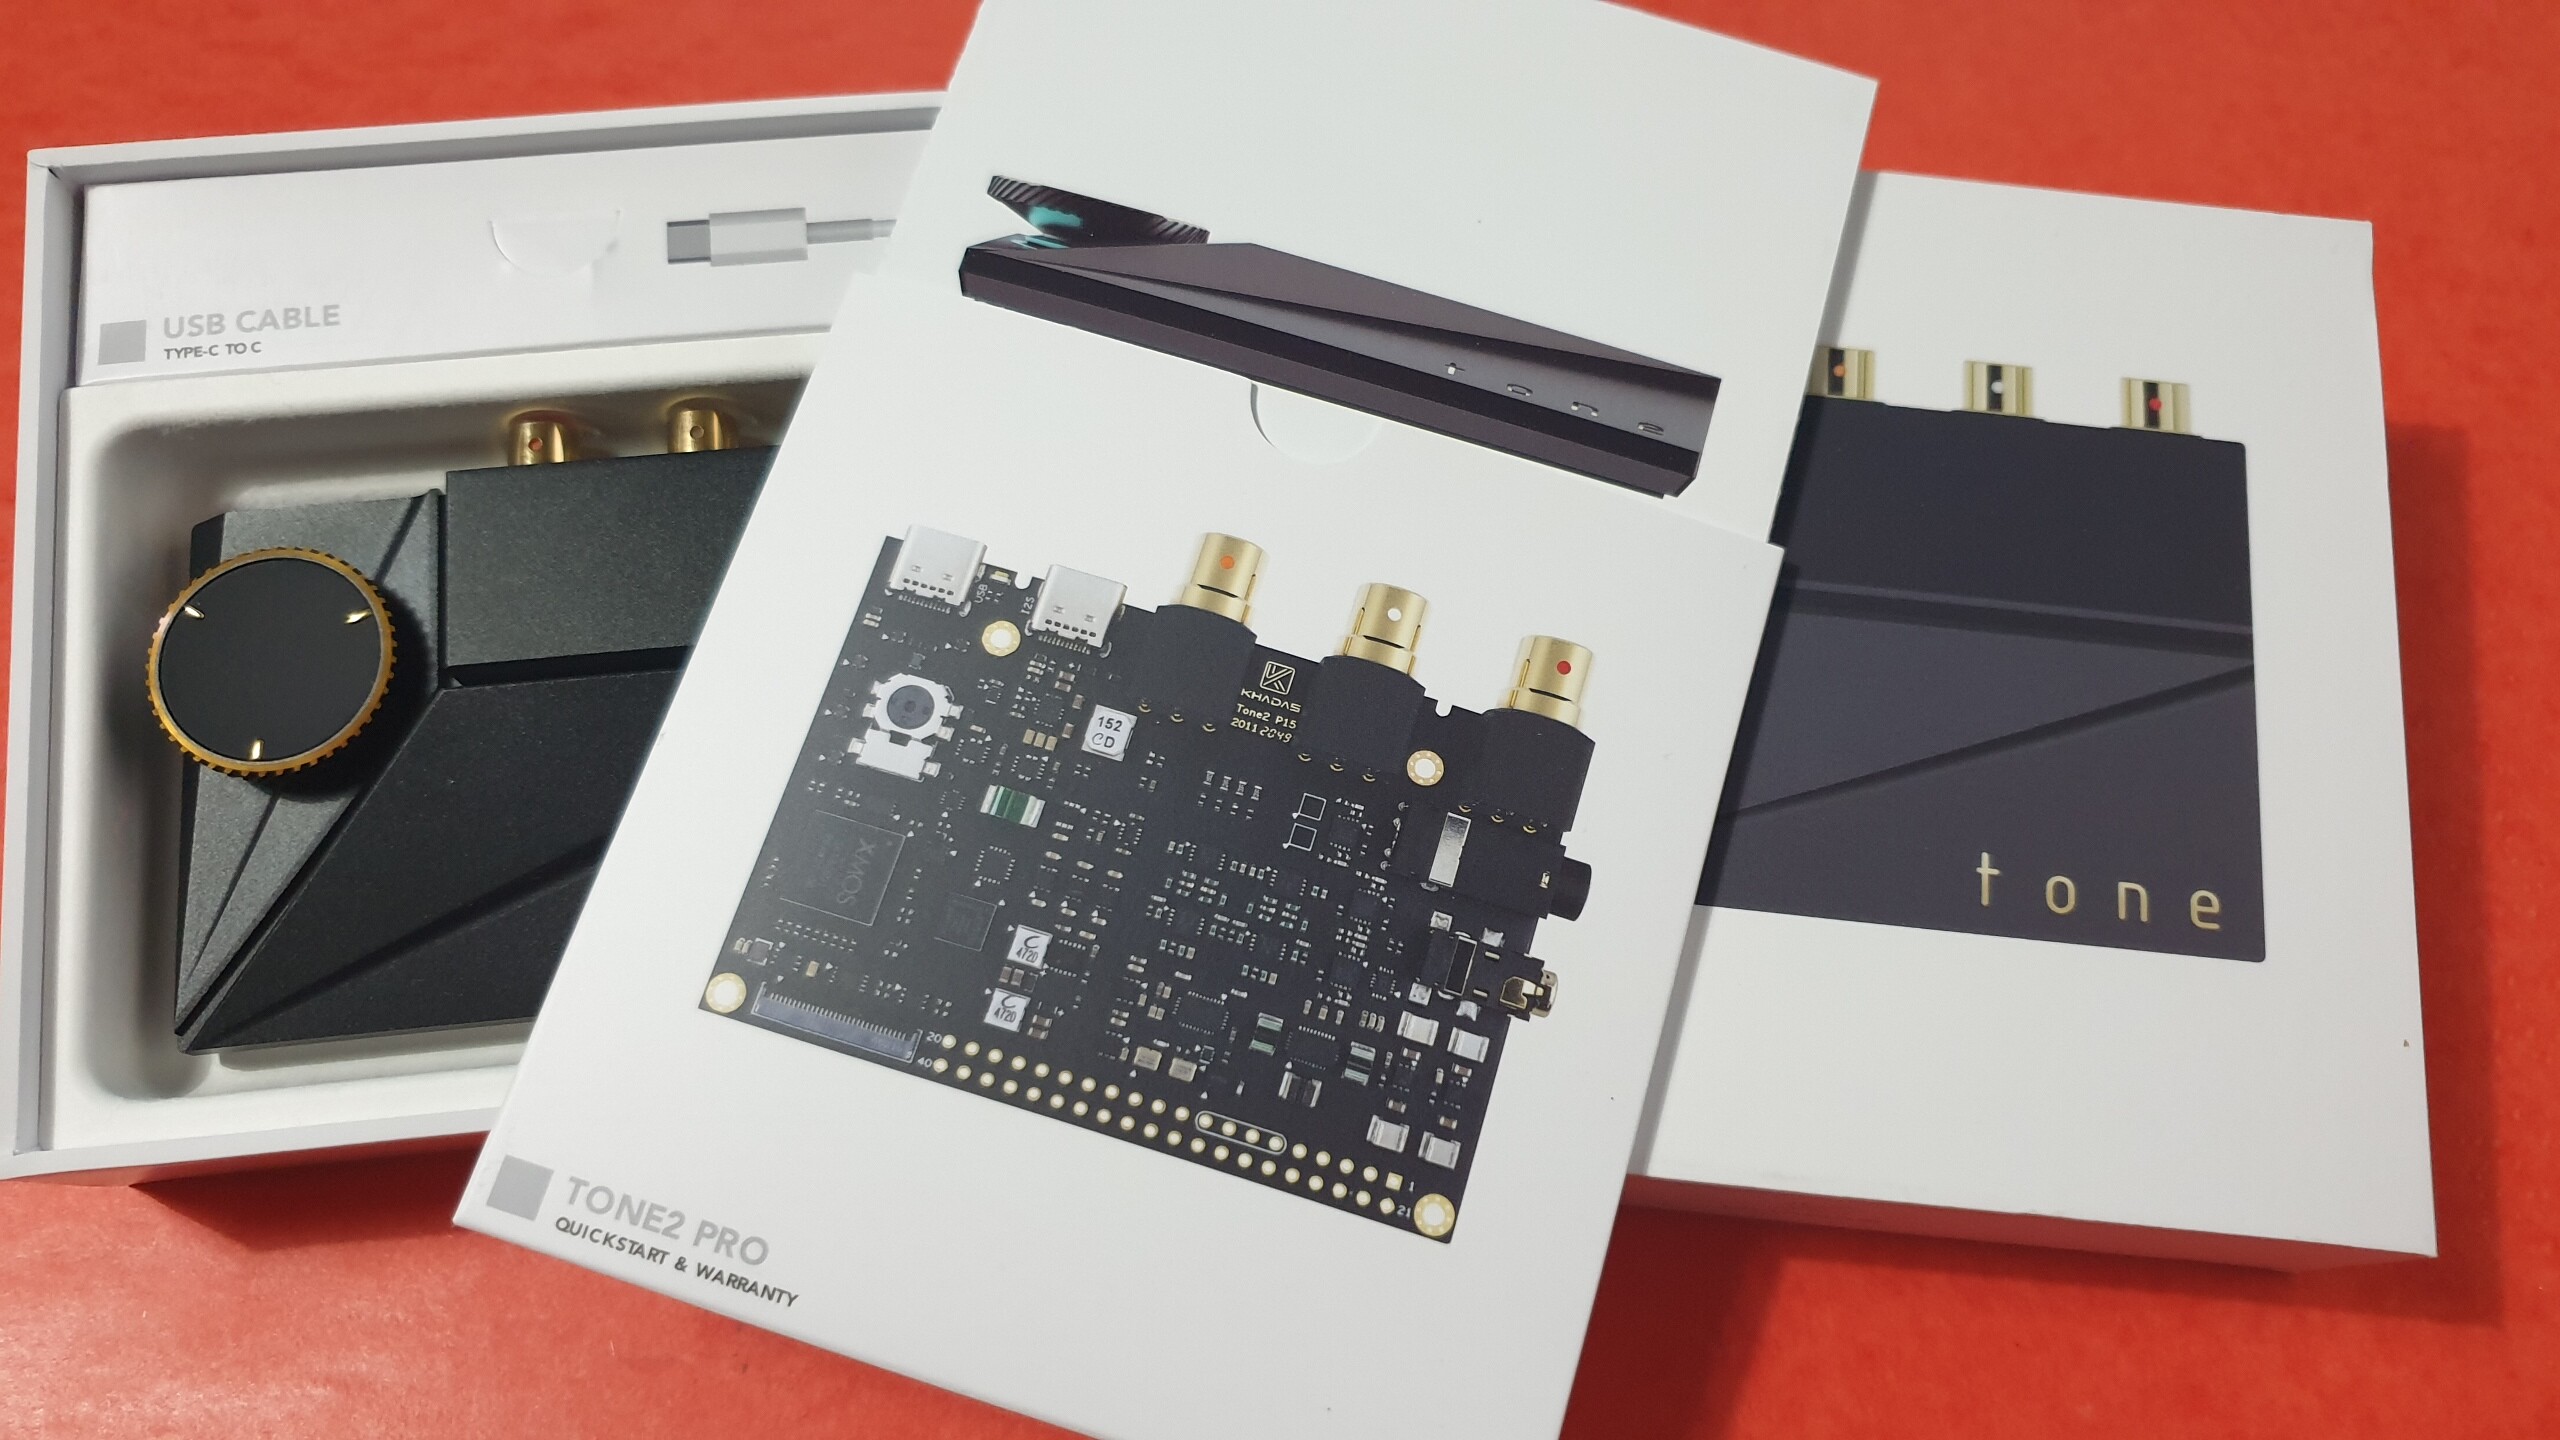
…Assembly simulation…
Then, I did an assembly simulation with VIM3Pro in the purple DIY-Case and the Tone2 Pro above …
I won’t hide from you that the purple central part of the DIY-Case wasn’t the most beautiful effect under the black Tone2Pro !!!
-
( no picture, too
 )…
)…
On March 7, 2021, let’s go for a new order from Khadas for a red DIY-Case, its central part is black and will remain in the color of the Tone2Pro !
…In the meantime in various forum topics…
In the meantime in various forum topics and blogs, it appeared that the Tone2 VIM edition would be equipped with the same 8-core XMOS XU208 processor (no co-processor) as the Tone1 and not the 16-core XMOS XU216 processor (STM8S003 co-processor) of the Tone2Pro, that the Tone2 VIM edition will not be offered at the better than around the 1st quarter of 2021, which says Tone2, says, no headphone outputs, no configuration rotary button, so many options less because of the MQA license forcing Khadas to produce a stand-alone module.
THE TESTS :
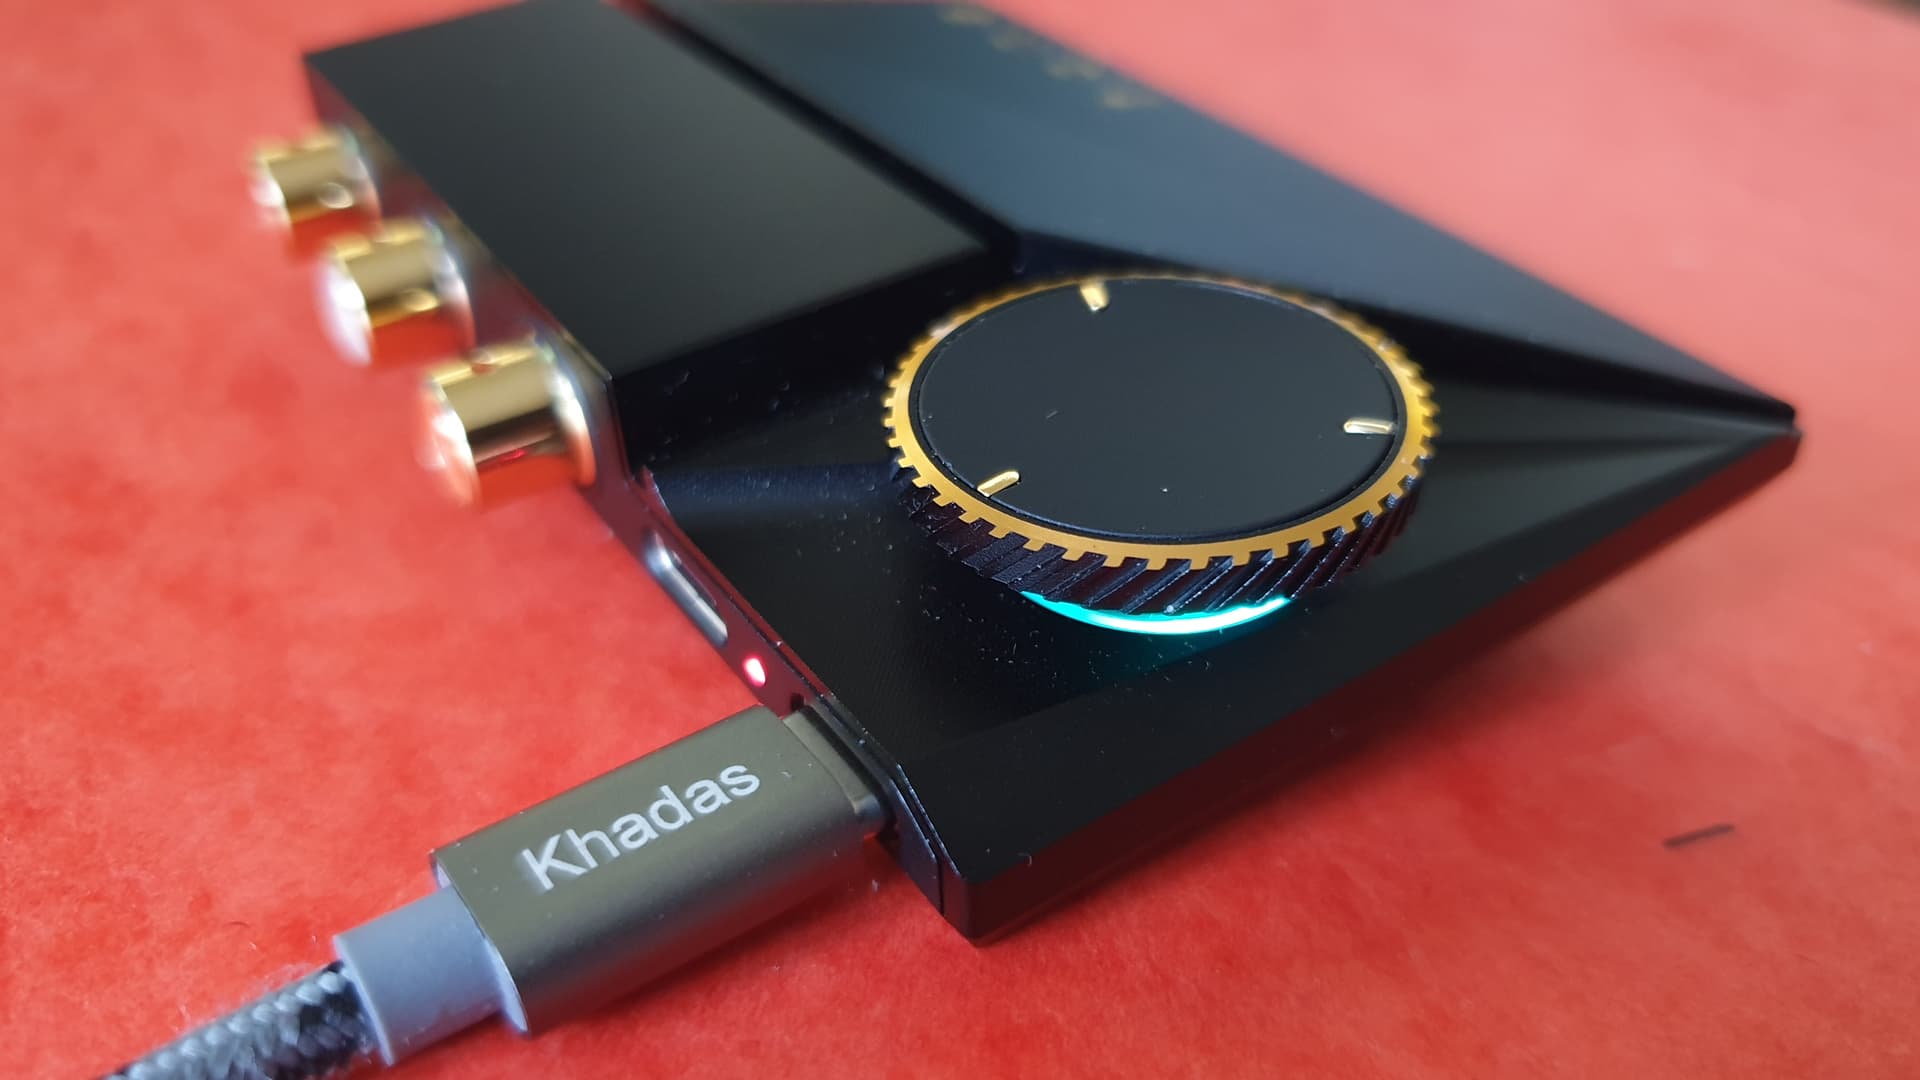
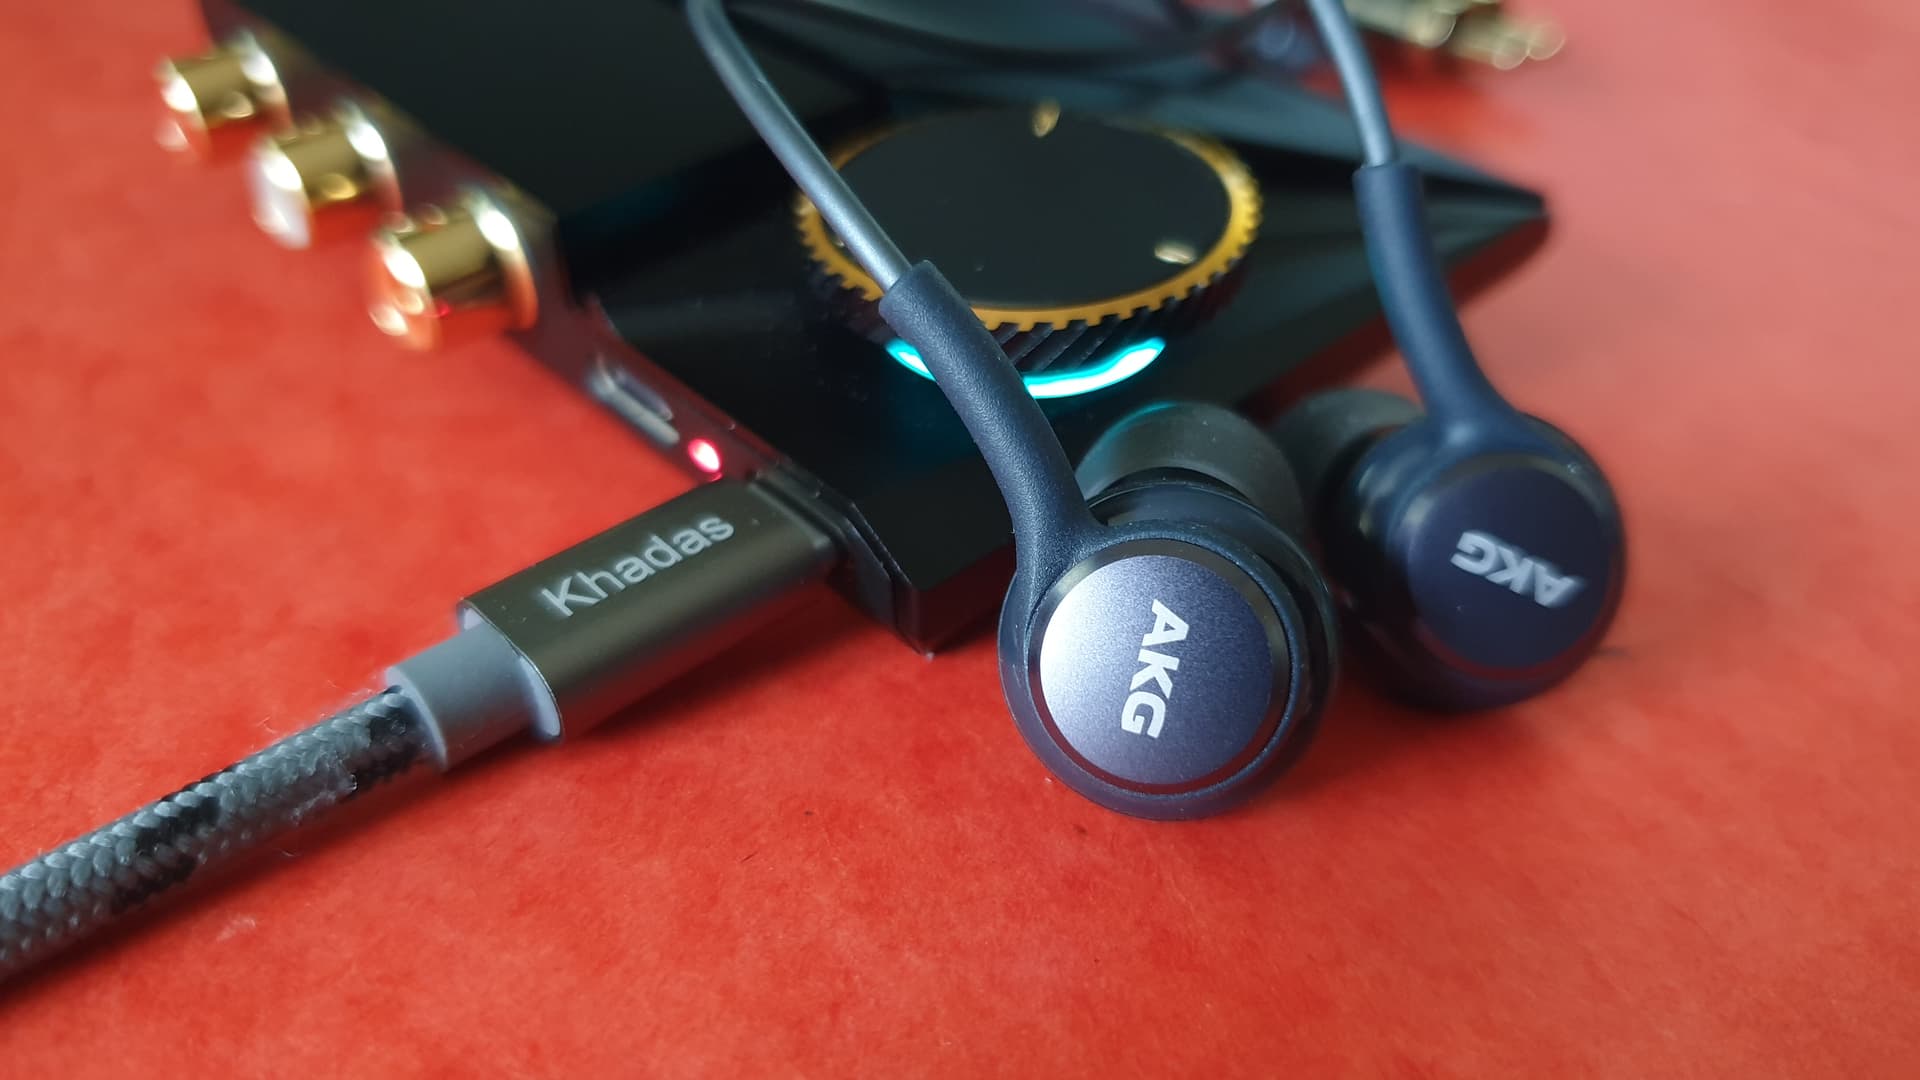
After a few Tone2 Pro solo tests with my computer + my AKG headphones and some other wired trough RCA to my Home-theater, according all that I could read ablout it, I could appreciate the new version of the Tone board.
…now is the time to get down to business…
THE JOB :
=> Dismantling the Tone2Pro :
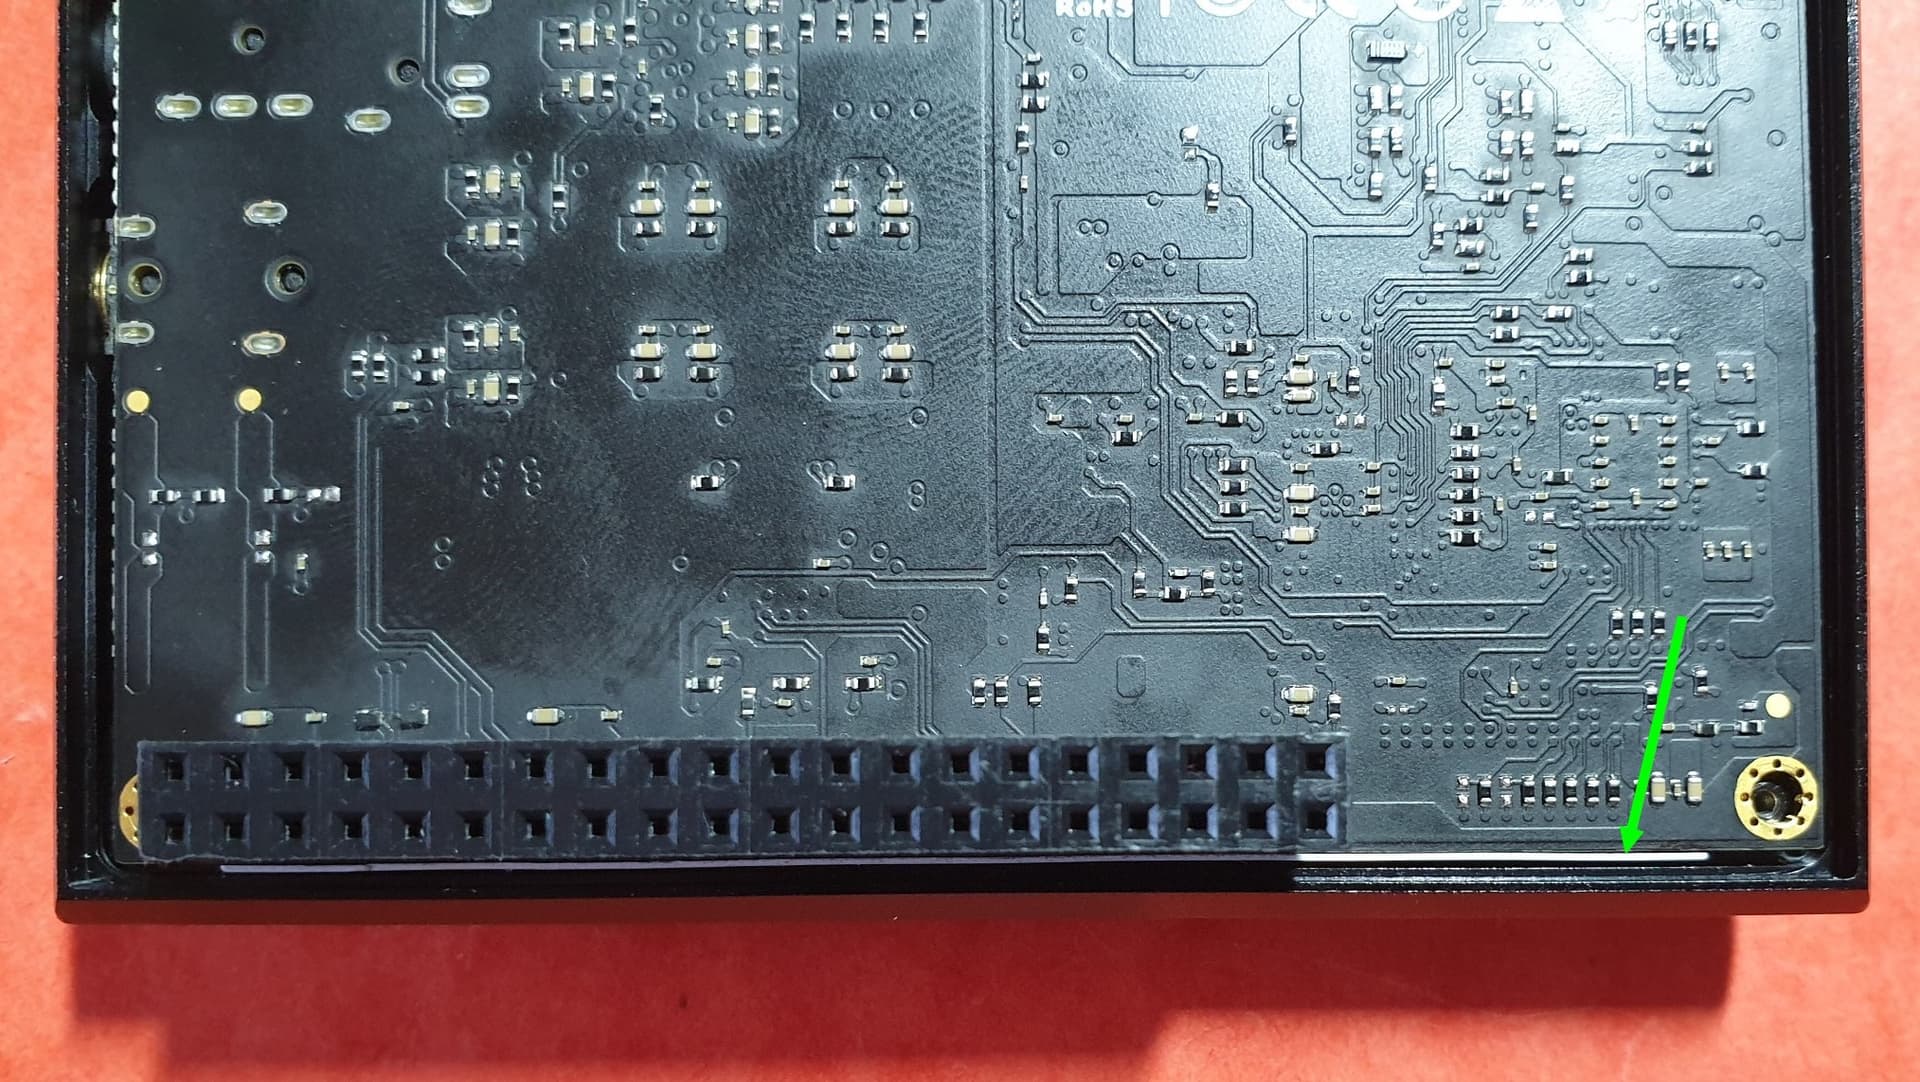
…back side…
The silicone underside peels off easily as long as you take your time.
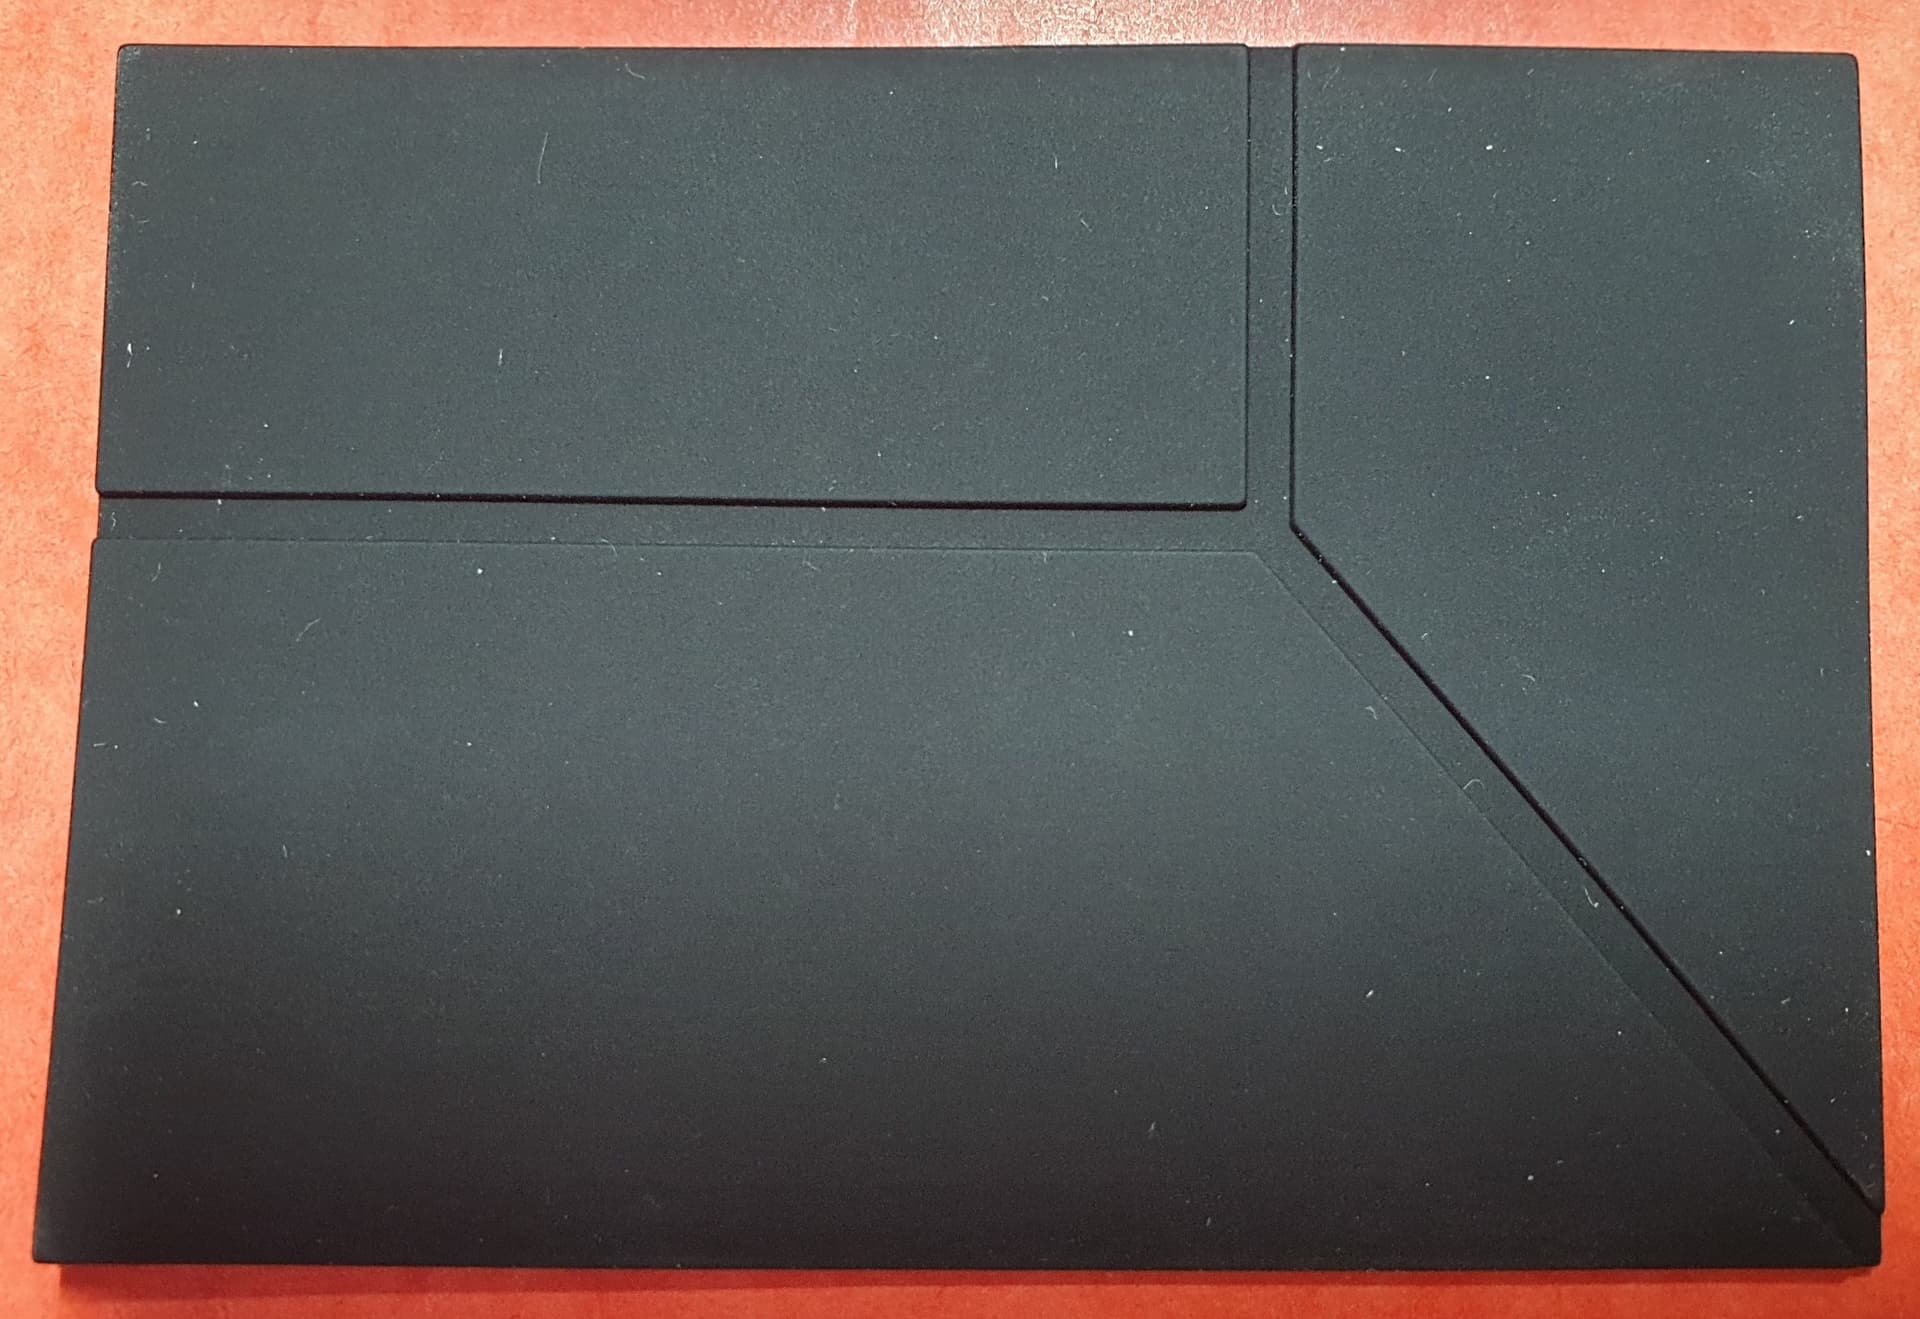
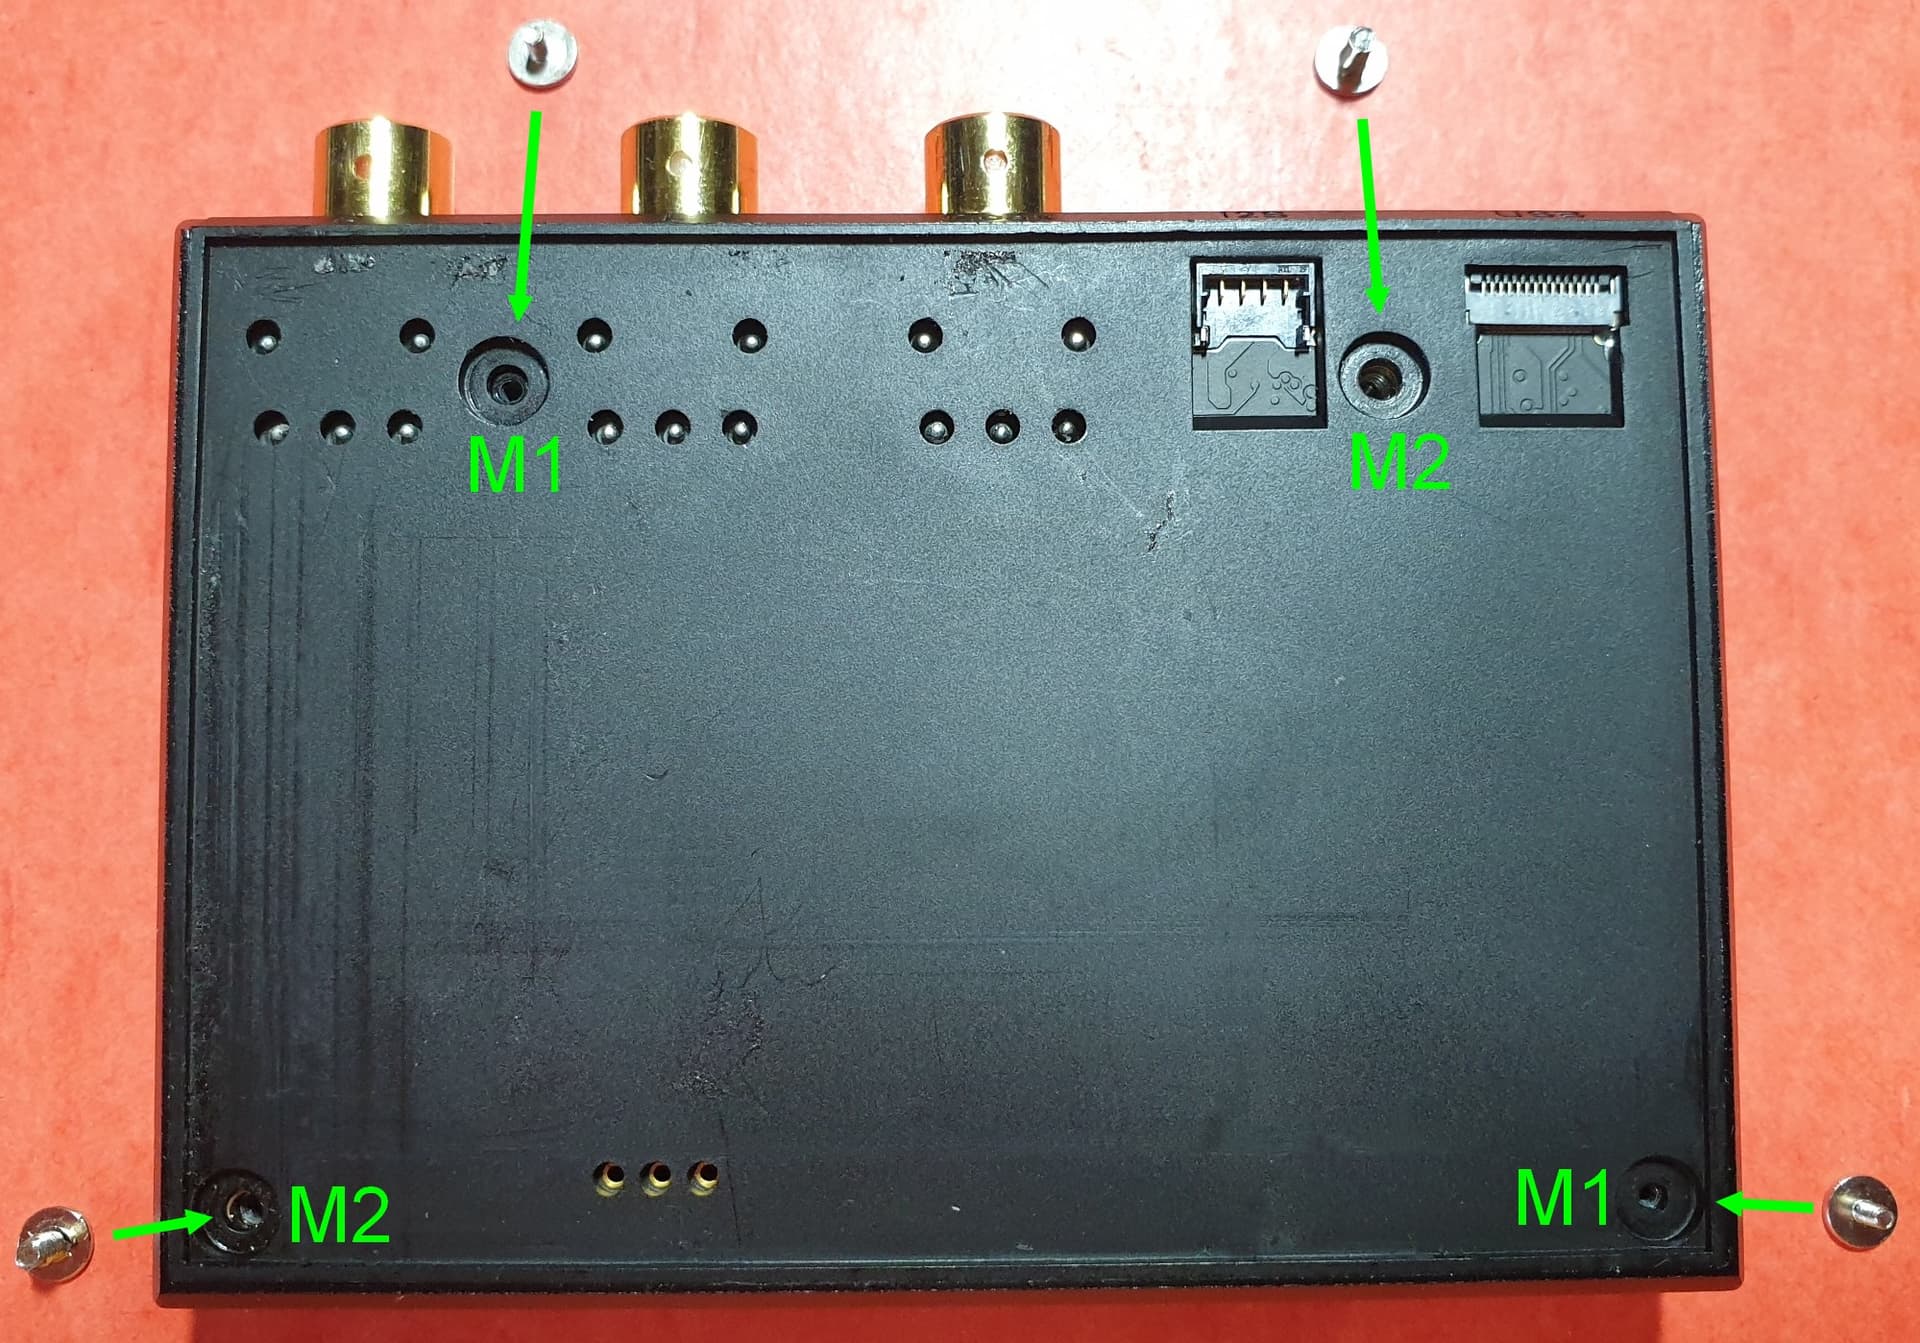
It reveals the plastic underside of the Tone2Pro (which also includes the rear) held in place by 4 screws.
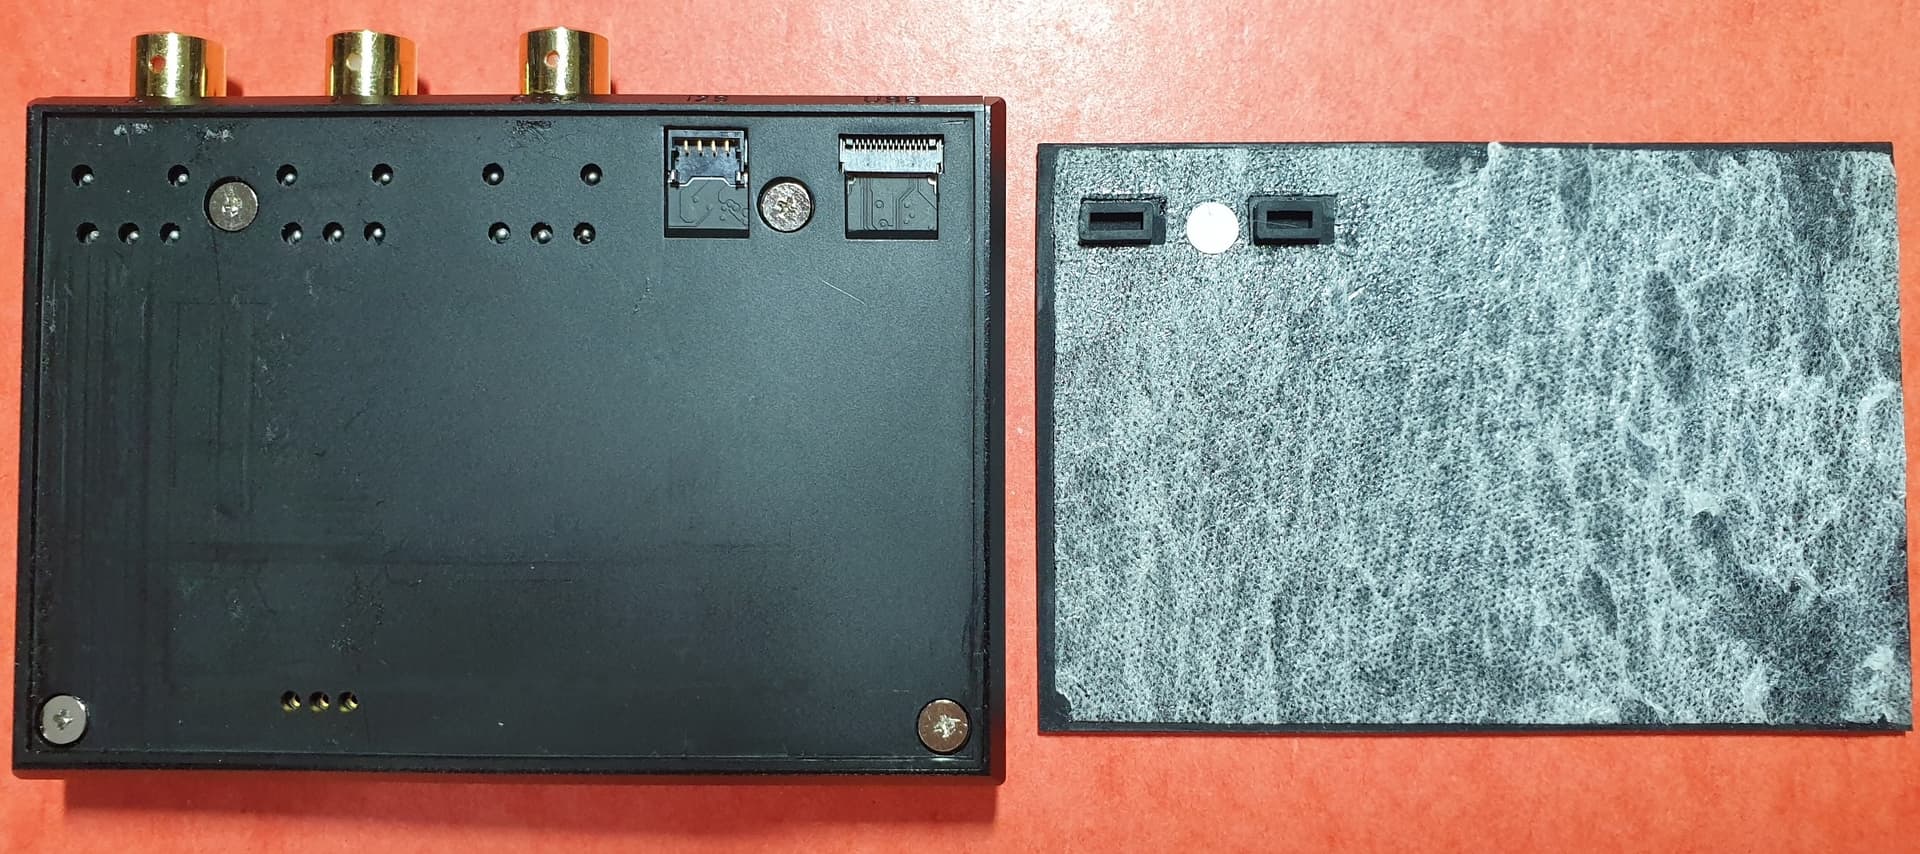
…the connectors…
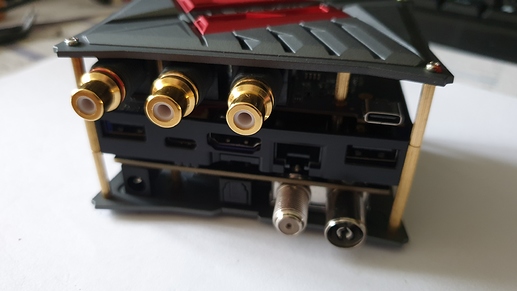
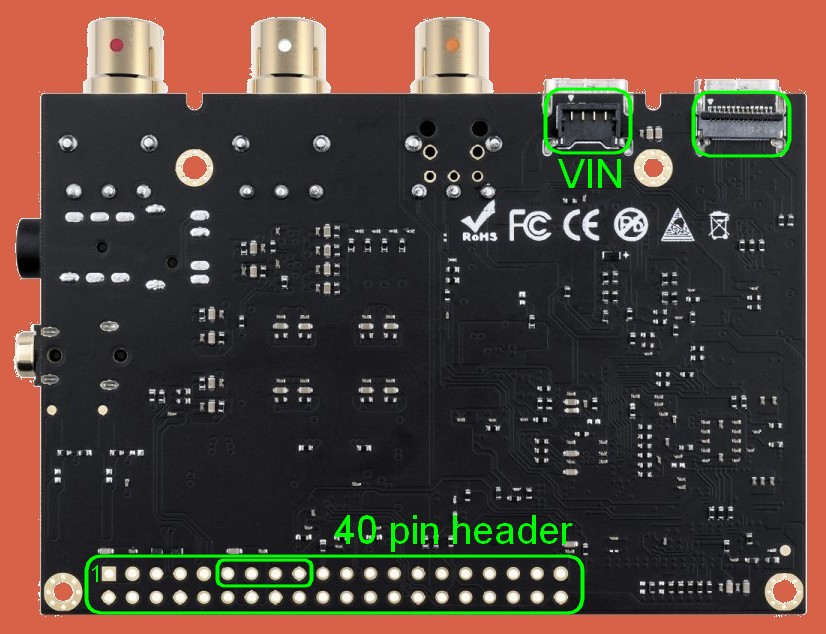
2 connectors are accessible there, the one more in the top center (under I2S connector) looks like a VIN connector (System Power Input),
the other directly on the right (under USB-C connector) is [ connector info will come later ].
At the bottom, there are 3 holes which allow the NRST-SWIM-GND signals to be reached from the 40-pin connector (used for Tone2Pro MCU upgrade, see Tone2Pro - Firmware v1.2 for XMOS & MCU).

…the screws…
To remove the plastic bottom, the 4 screws must be removed.
When unscrewing, we are surprised to see that there are two M1 and two M2 screws…
Why this choice ? Certainly because of the two centering studs which would have been too thin with M2 screws.
Then tire-up and push backward to remove the Back-bottom plastic part.
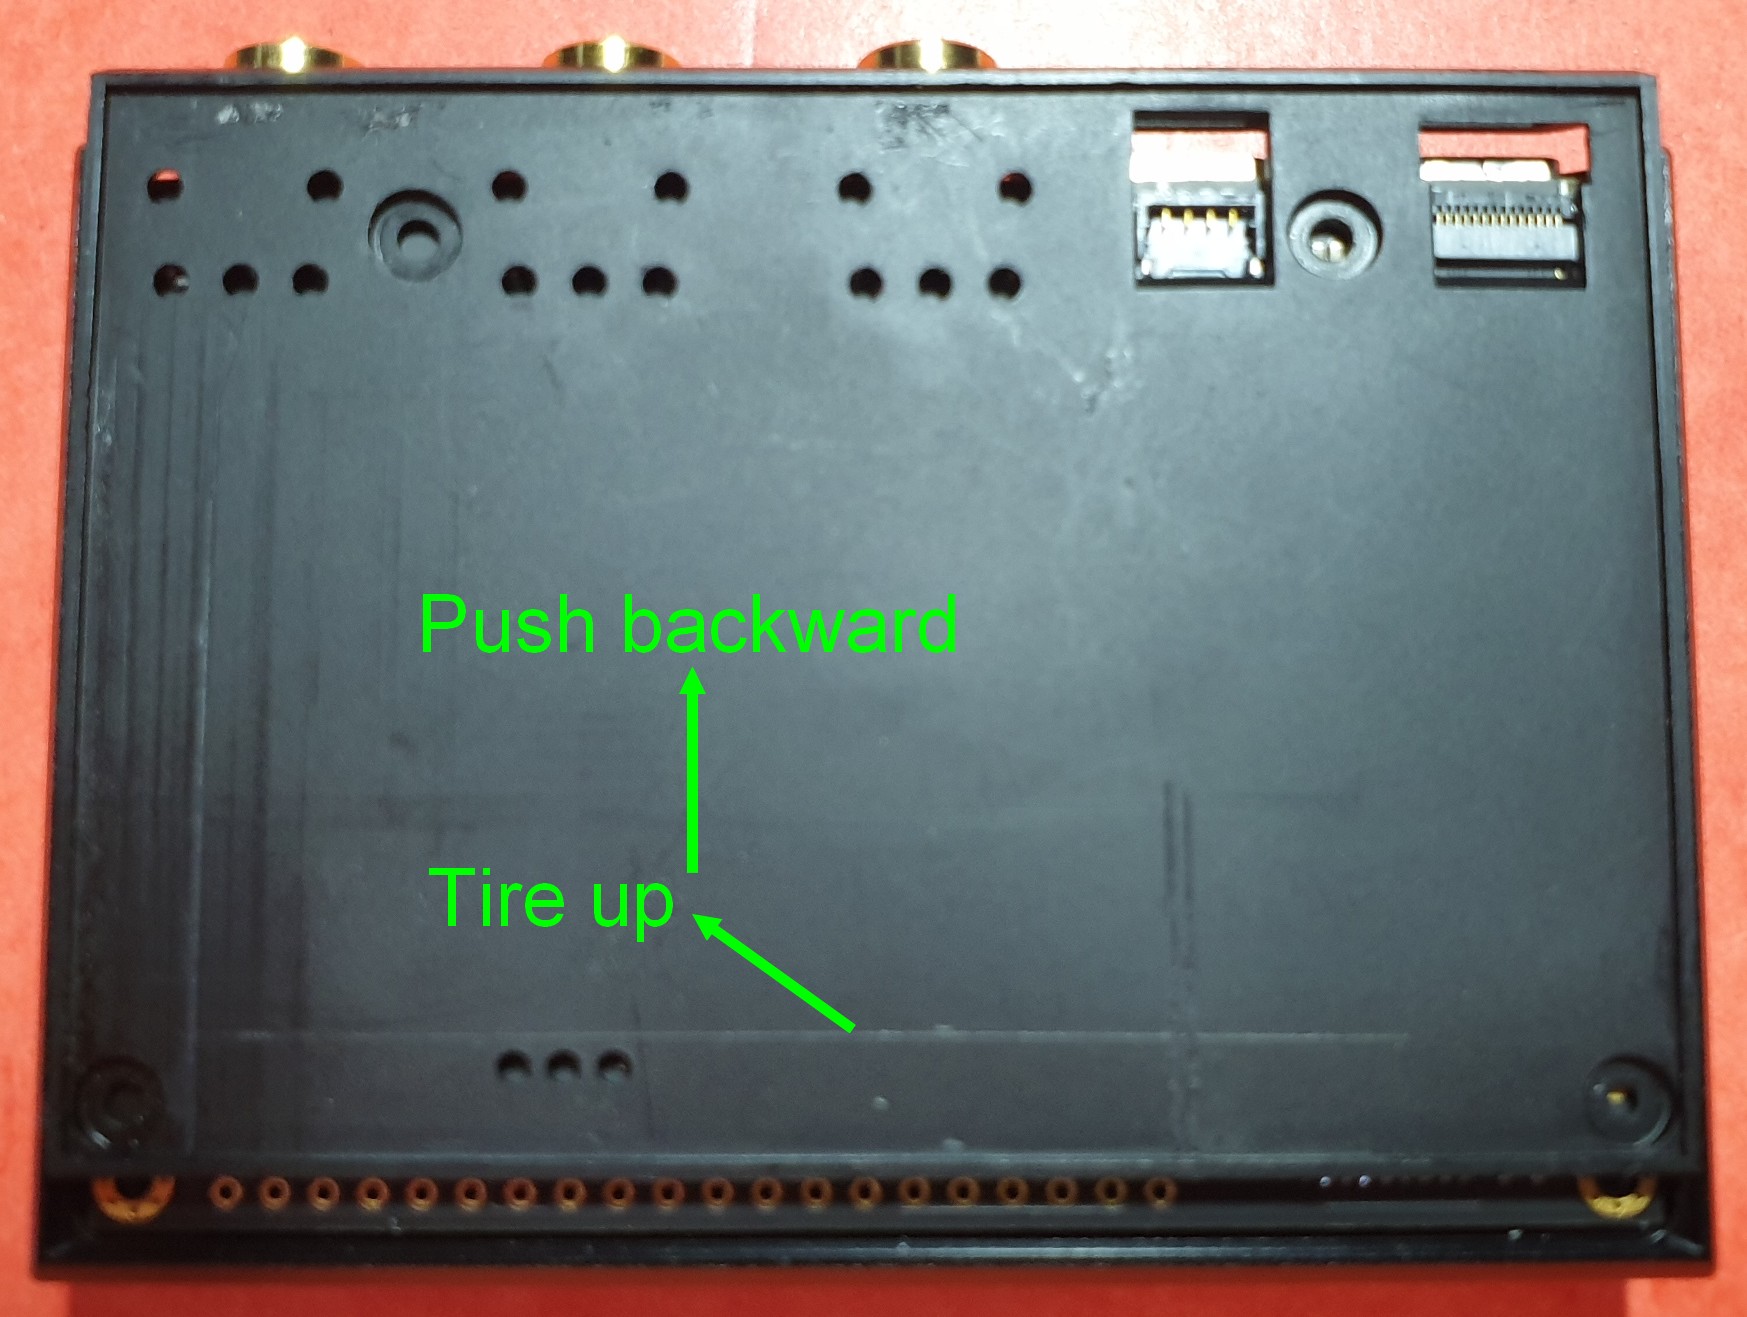
Then we gently remove the electronic card and you’re done.
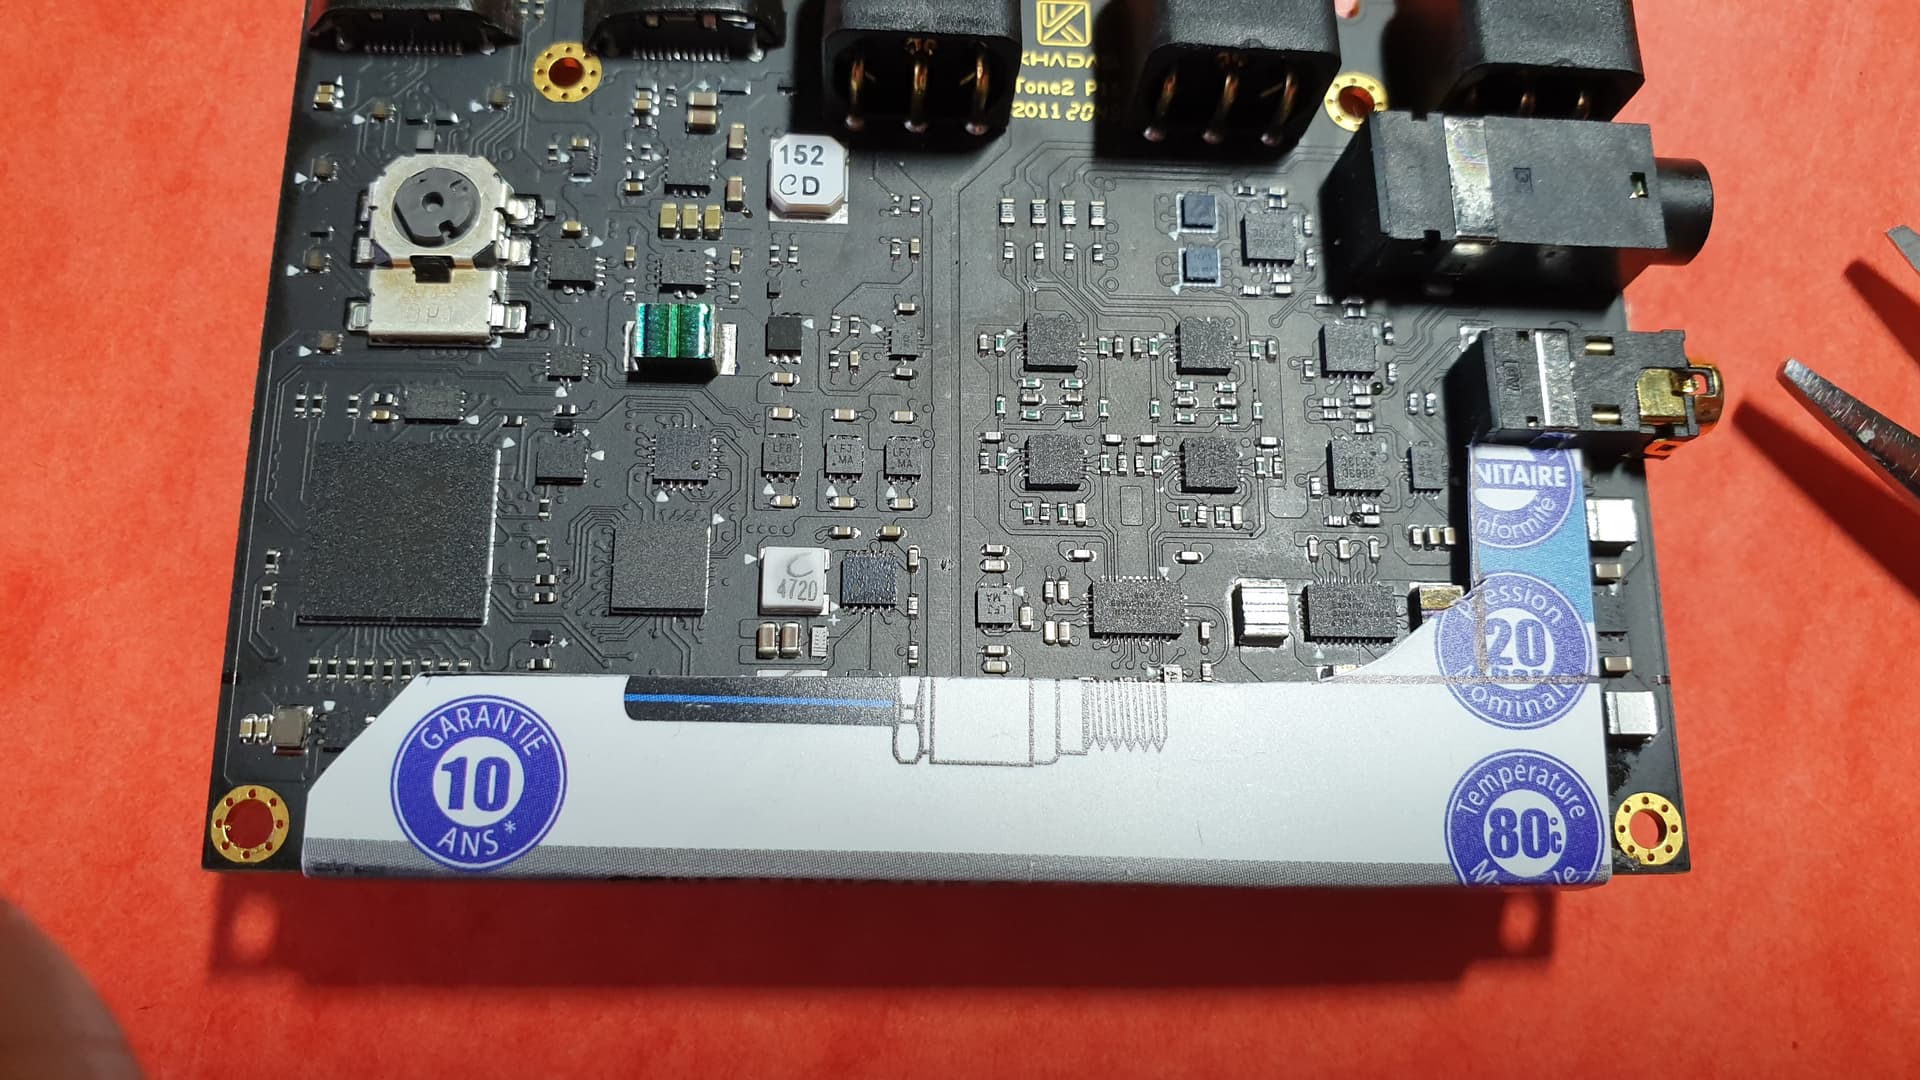
…Informations on the electronic card…
Very little information is given to us on the Tone2Pro electronic card.
Its version, the numbering of PIN 1, 20, 21 and 40 of the 40-pin header with identification of PIN 6 to 9,
the materialization of pins 1 of the others connectors.
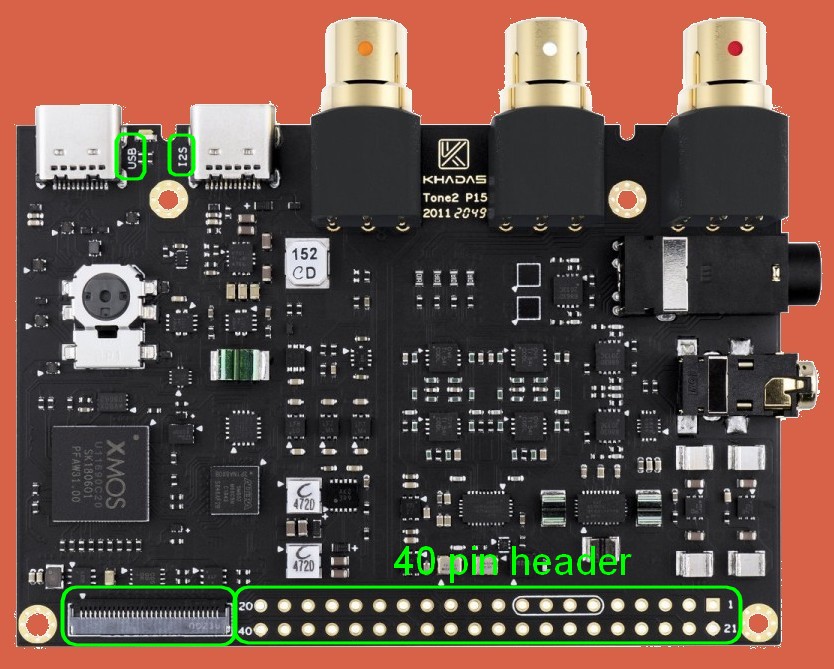
(credit photo : www.audiophonics.fr)
(credit photo : www.audiophonics.fr)
HEADER CHOICE :
…8.5mm (standard) or 11mm 40 pin header ? …
Important question, the height of the 40-pin header! Should we stay on a standard model (8.5mm ie Tone1 VIM edition) or switch to a higher model (11mm) usually used as an extension header for the 40-pin Raspberry-Pi headers! …
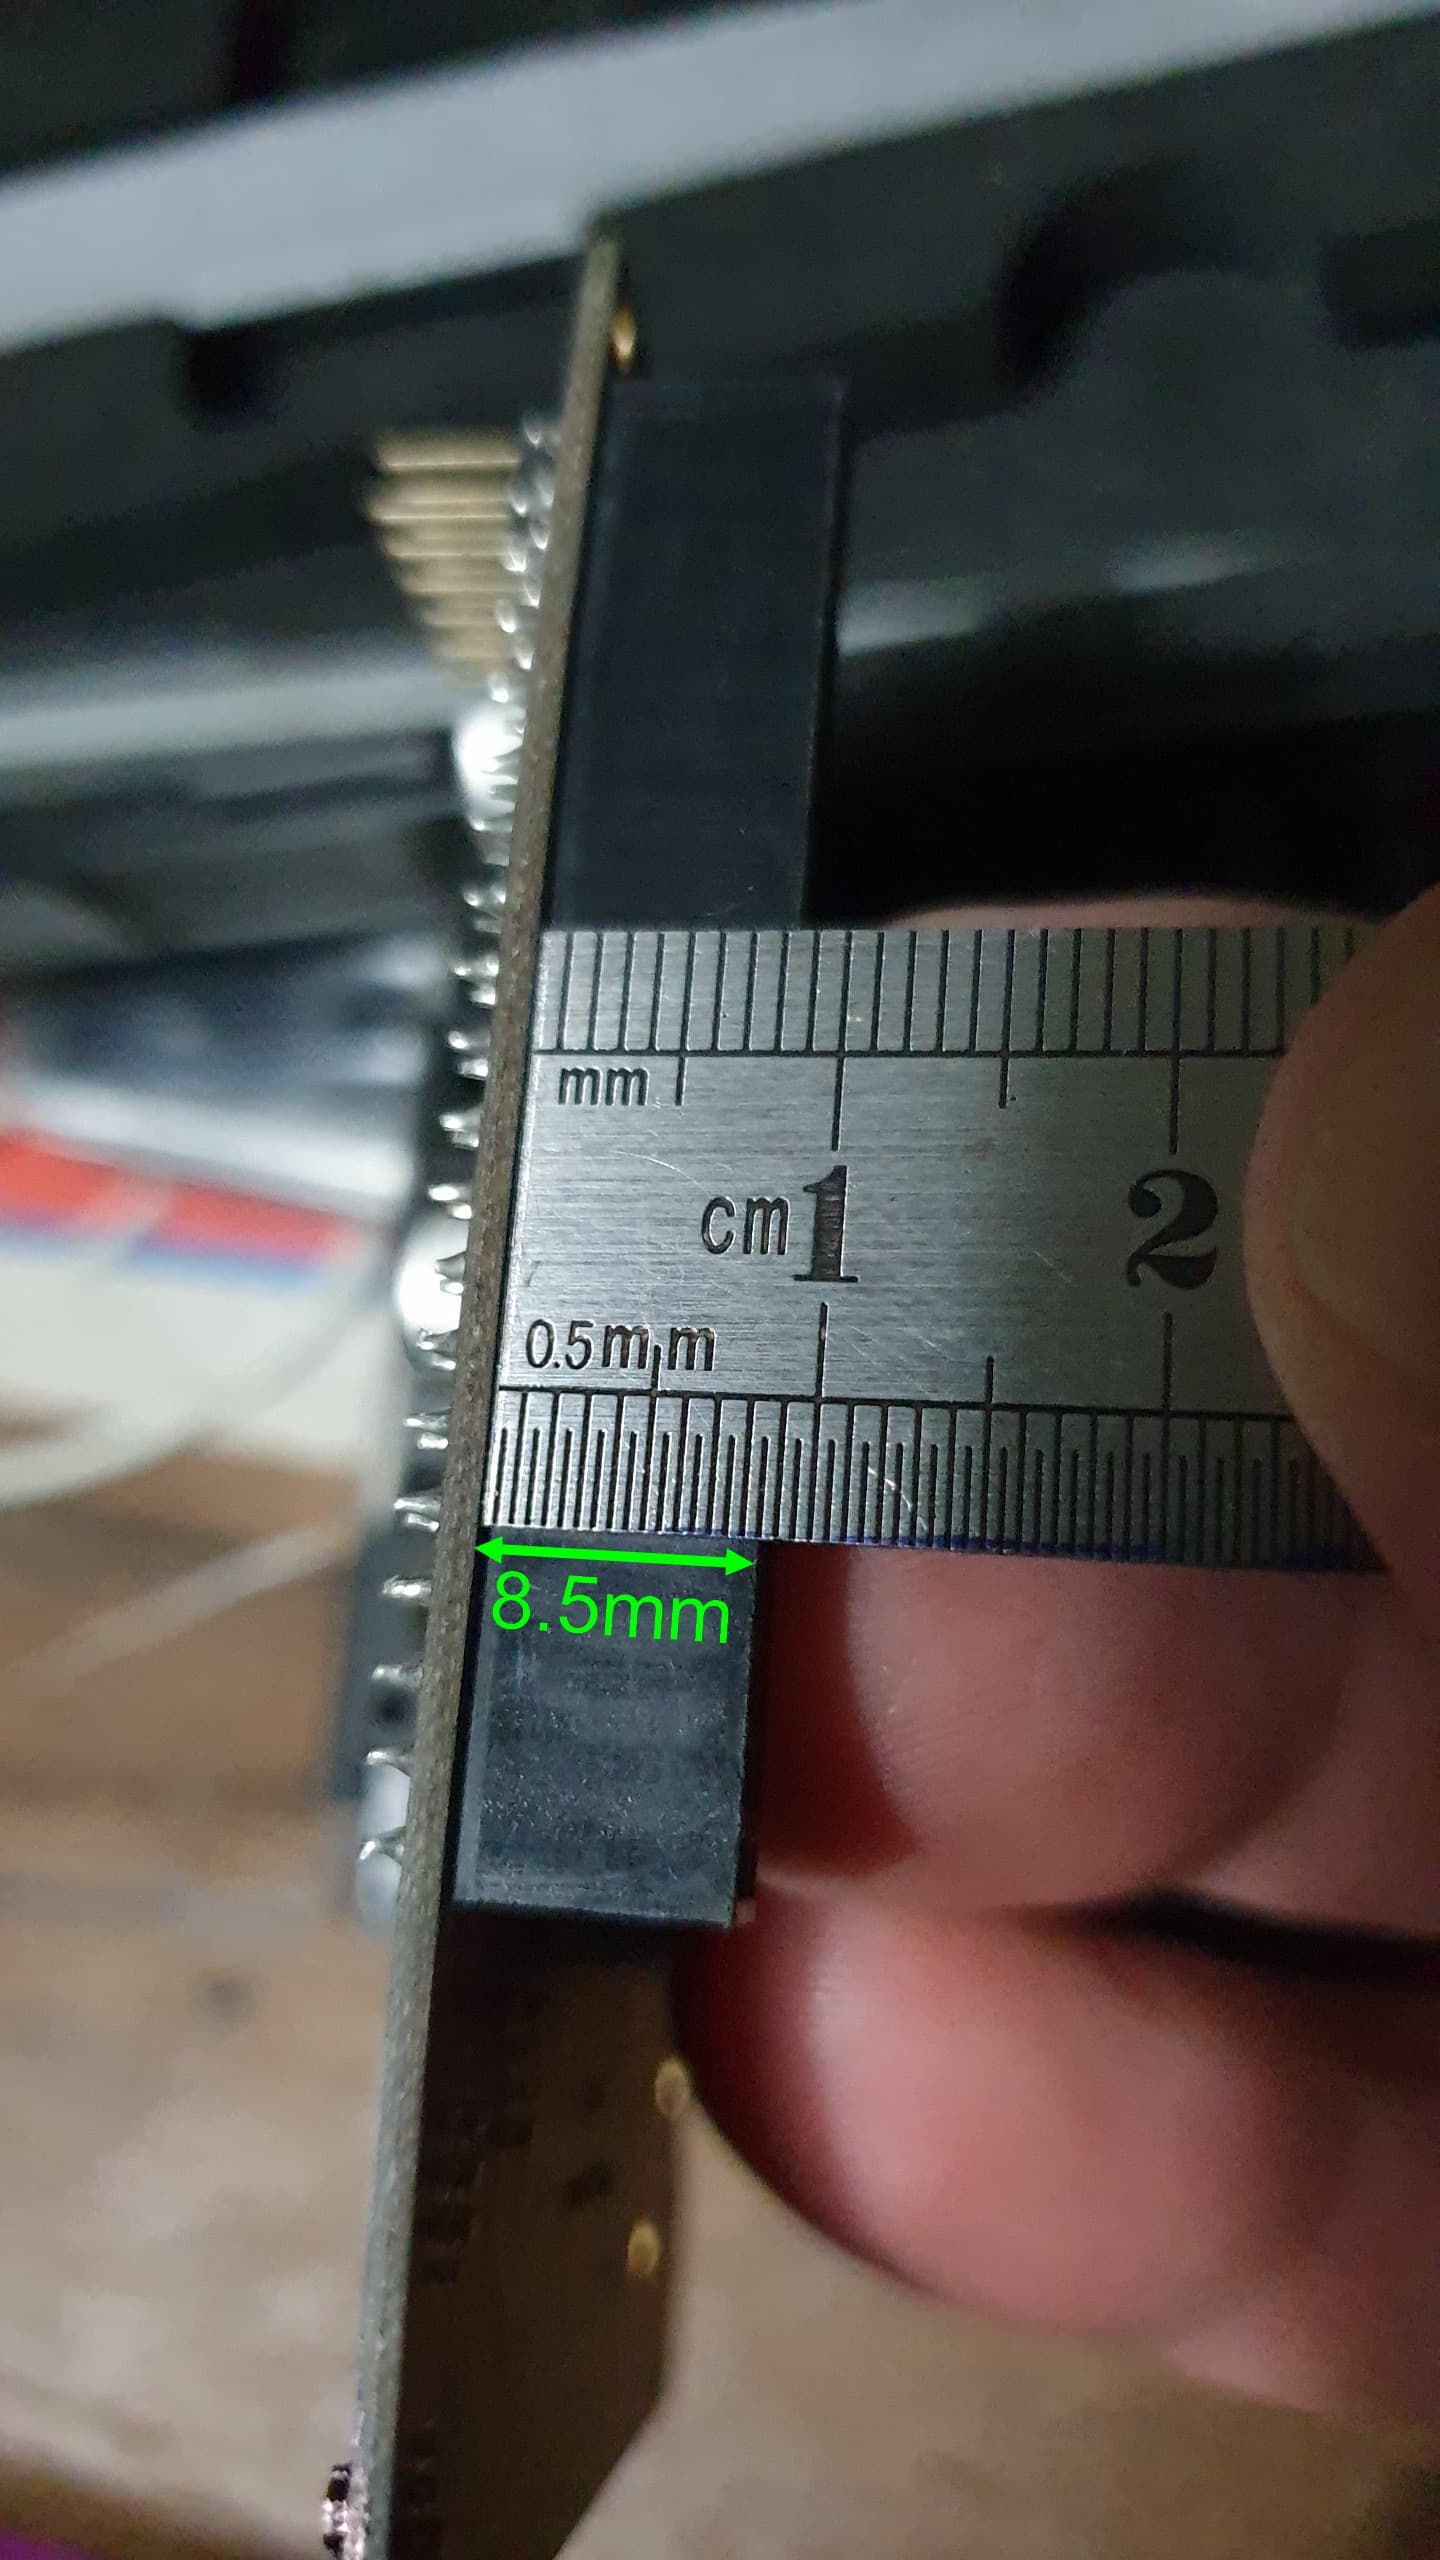
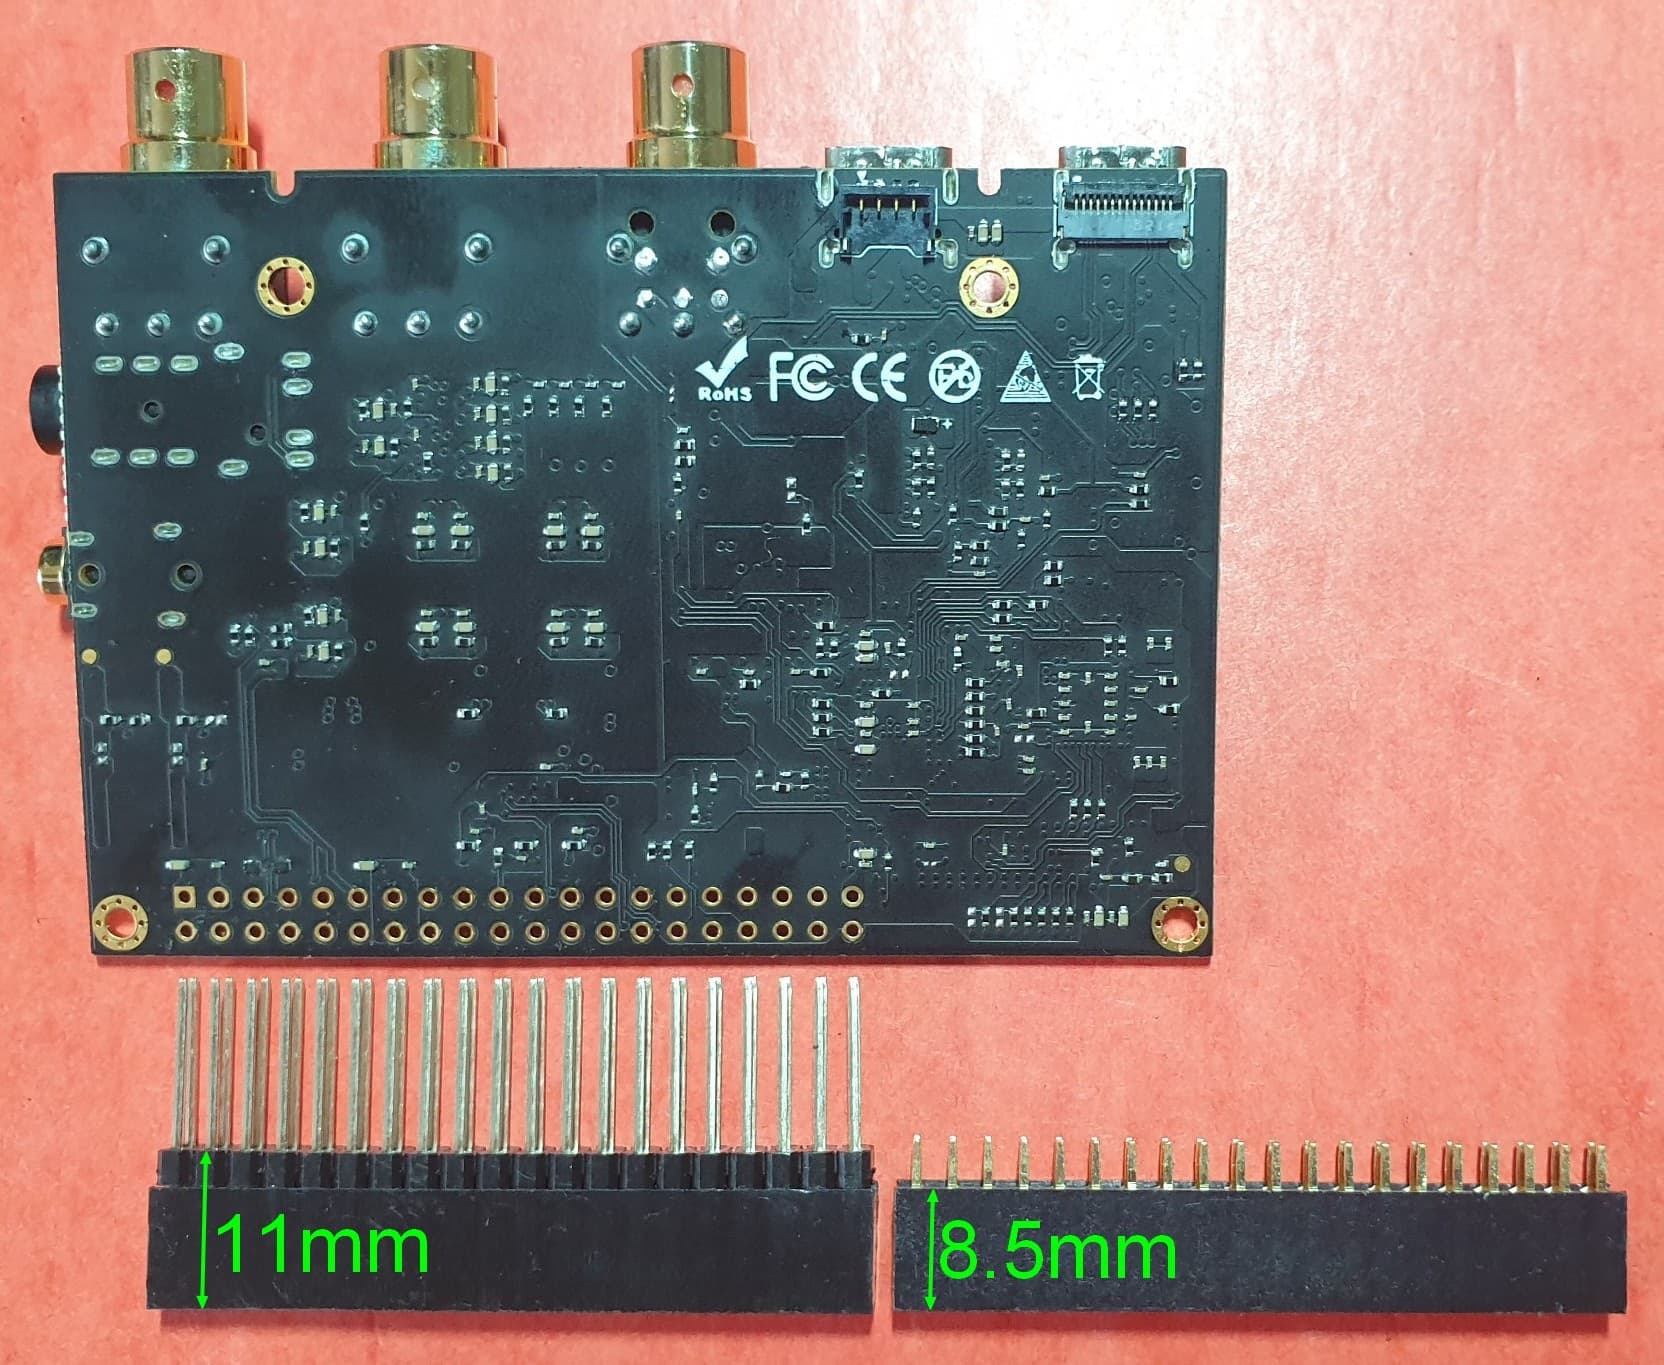
After ordering and testing both models, it turns out that the taller model, 11mm high, is ideally the one to use as it leaves more room for the air convection of the VIM3Pro venti-rad.
…11mm 40 pin header soldering…
We can switch now to soldering the header on the Tone2Pro !
SOLDERING :
Some basic tips for a successful weld …
Soldering is very easy, even if you are not used to it, the rules are very simple :
- (advice) A solder should not exceed 4 to 6 seconds, because then, the temperature may spread to the electronic components with a risk of destruction and to the plastic parts with a risk of melting them.
- Wait until the soldering iron is at the right temperature, between 180-210°C (it seems obvious but I say it anyway ;-))
- Once at the right temperature, clean the soldering iron thoroughly on a damp sponge, soak it in a special soldering cleaning solution or pre-tin it with tin filled with cleaning solution and then wipe it again on a damp sponge. The iron is then ready to solder… (remember, thoroughly clean the soldering iron between each solder on a damp sponge)
- Pre-tin the soldering iron just before welding.
- Heat the two parts to be welded at the same time with the pre-tinned soldering iron to obtain a uniform temperature.
- Present (ideally) the tin on the two parts to be soldered at the same time, otherwise place it between the soldering iron and one of the parts to be soldered.
- Wait until the molten tin well encompasses the two parts like shape of a volcano with slopes and remove the soldering iron, do not stay too long (remember, 4 to 6 seconds)…
- (advice) If the weld is not perfect, it can happen (drop-shaped sticking phenomenon), move on to the next one and come back to it when it has completely cooled. Once the solder is cold, go back on it with the soldering iron well cleaned and pre-tinned, the tin present on the iron and on the solder will melt at the same time and all heat the same temperature, it will correct the solder.
Fist, positionning the header and the electronic card…
Then solder pin 1 and pin 40, check that the header is positioned vertically against the electronic board, then soldering every 38 others pins (remember, 4 to 6 seconds,180-210°C)…
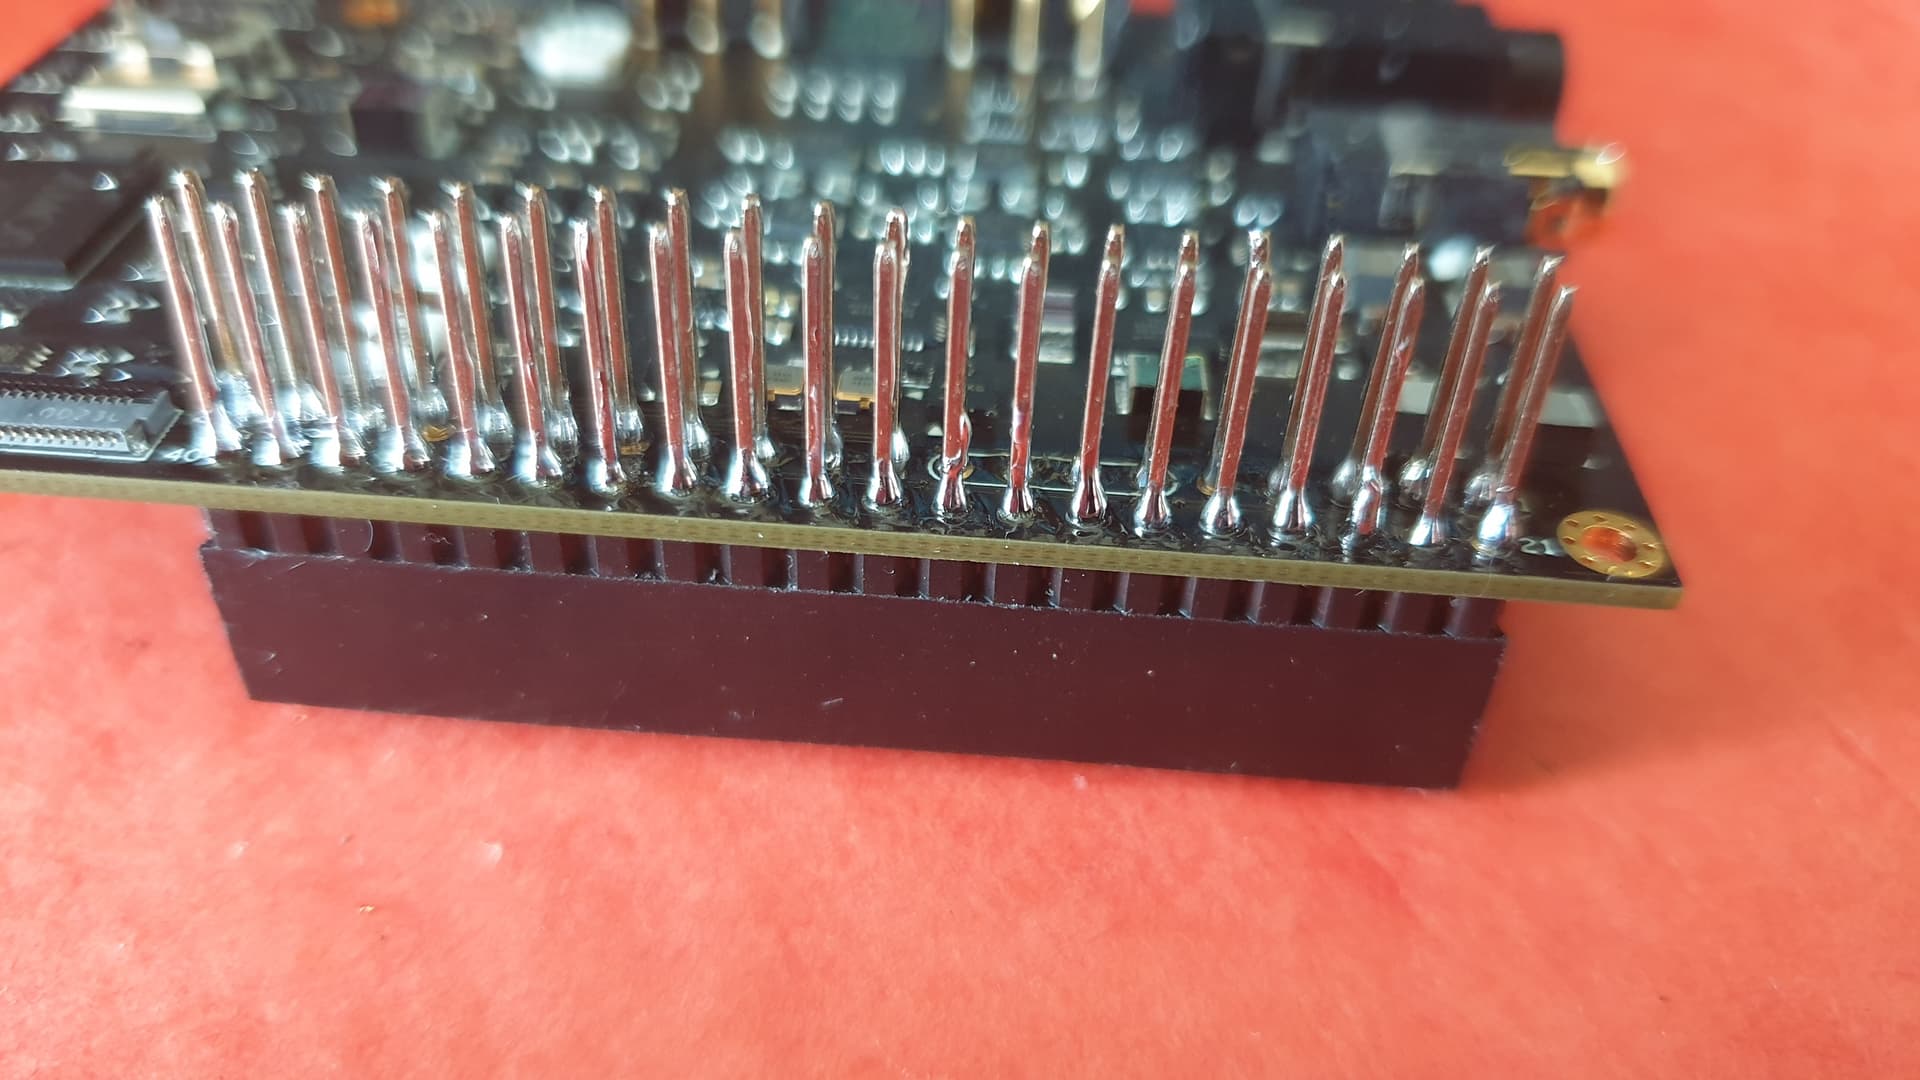
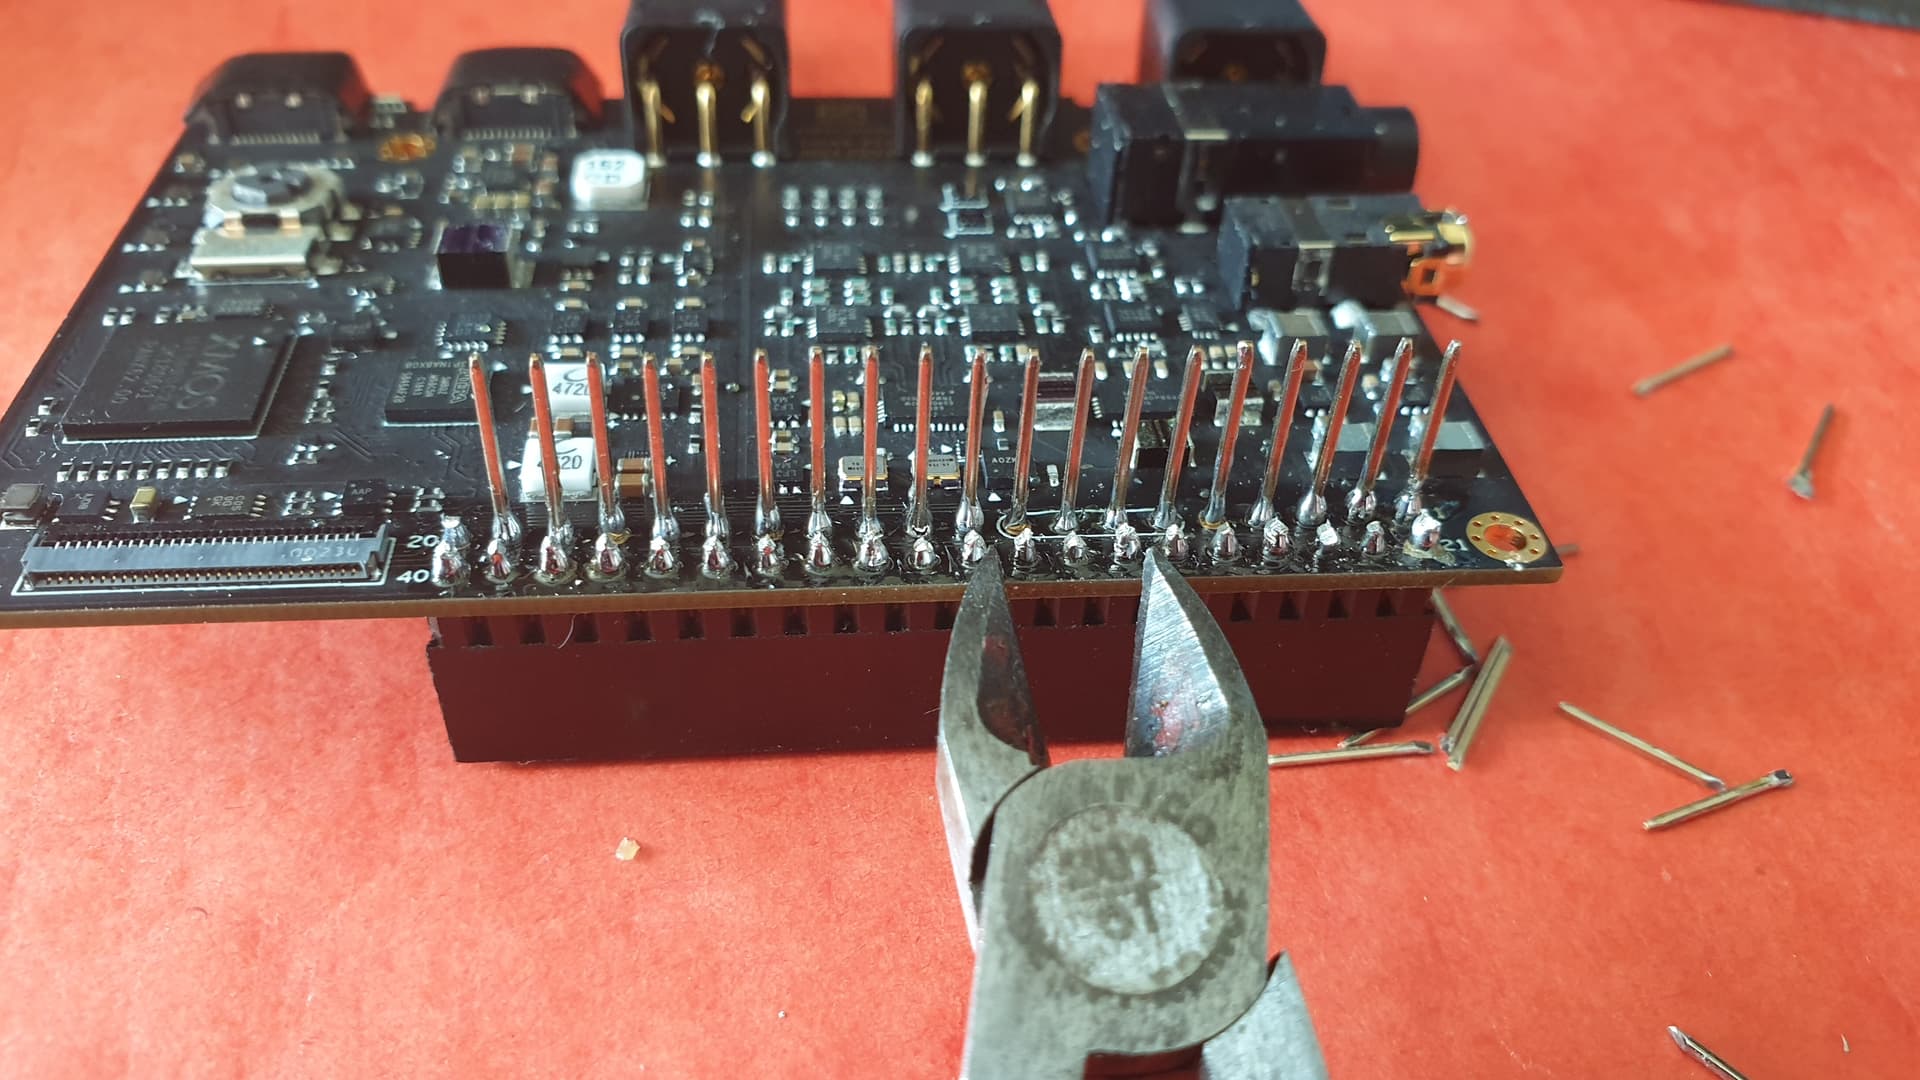
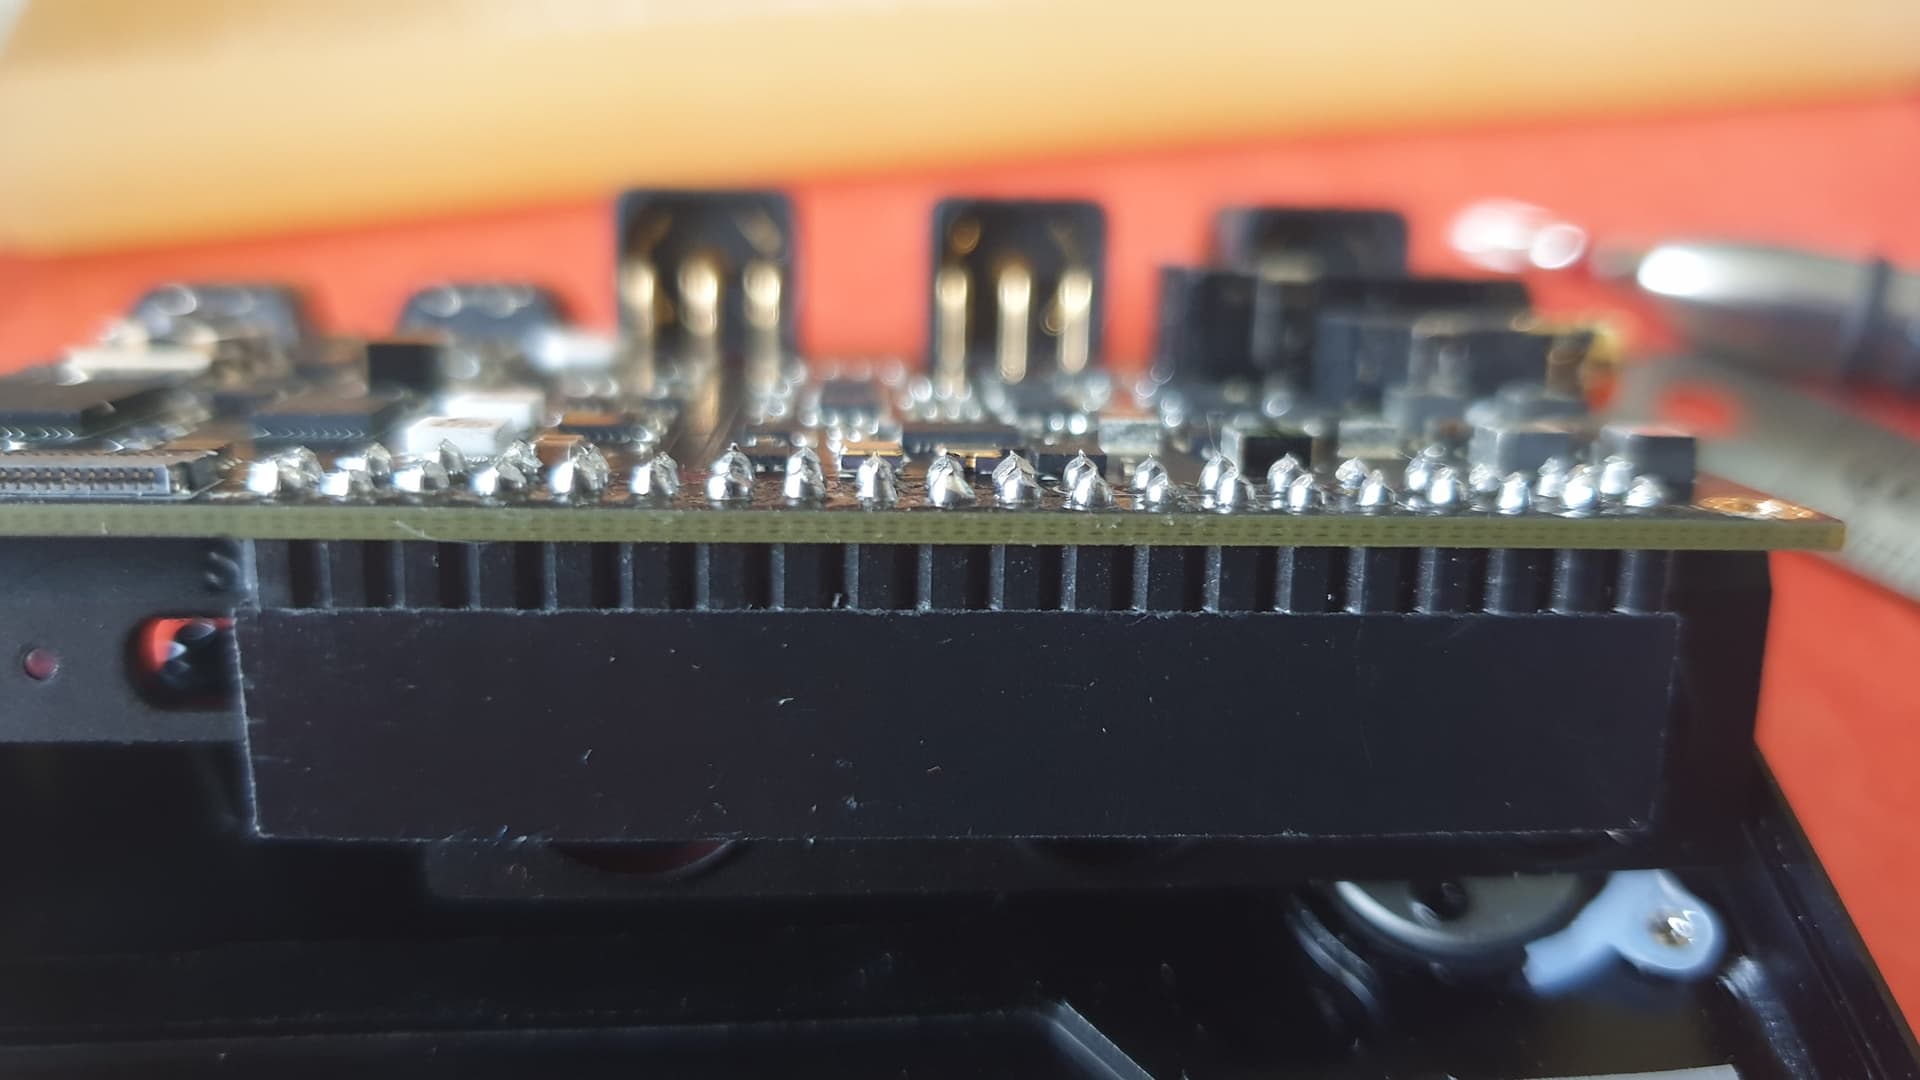
Once all the pins have been welded, check the quality of each weld (remember, no drops but the shape of a volcano with slopes), if everithing is ok, then cut the excess part of each pin …
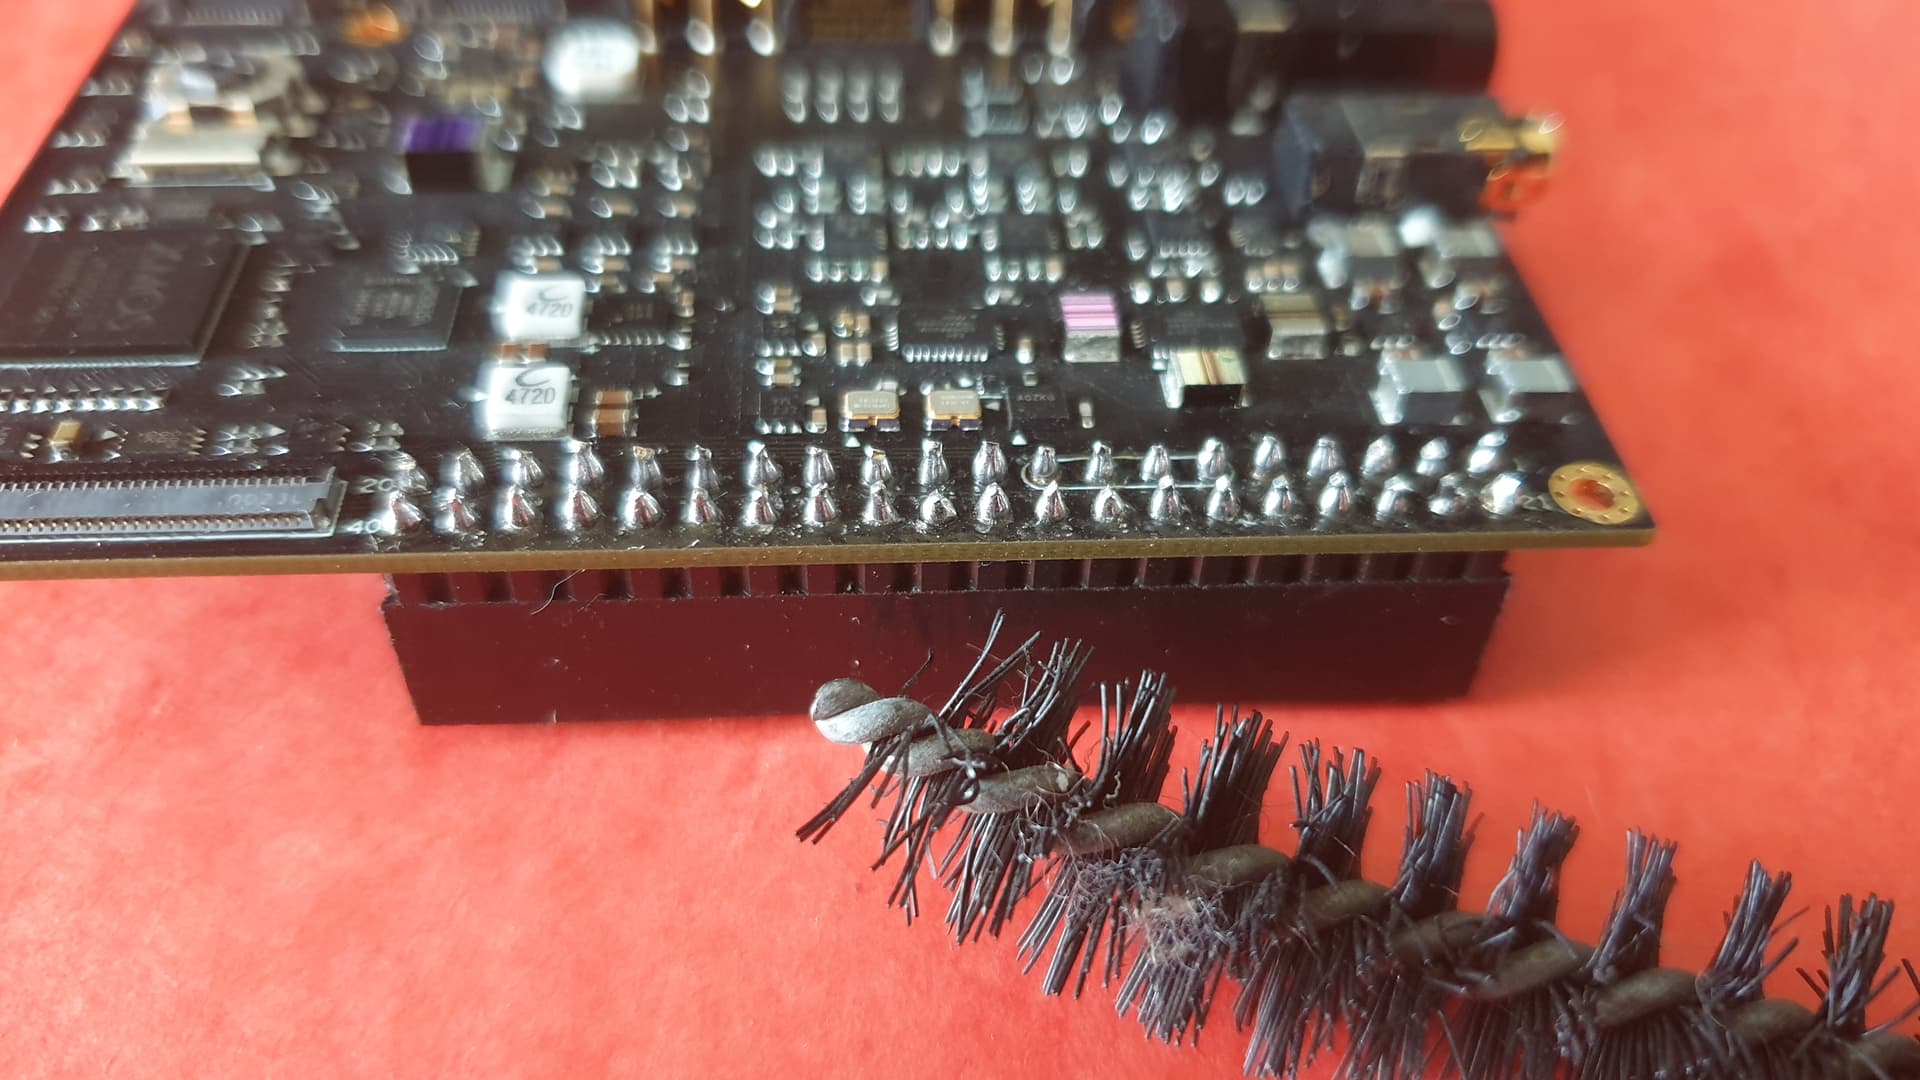
After welding there is a residue of soldering cleaning solution on the electronic board,…
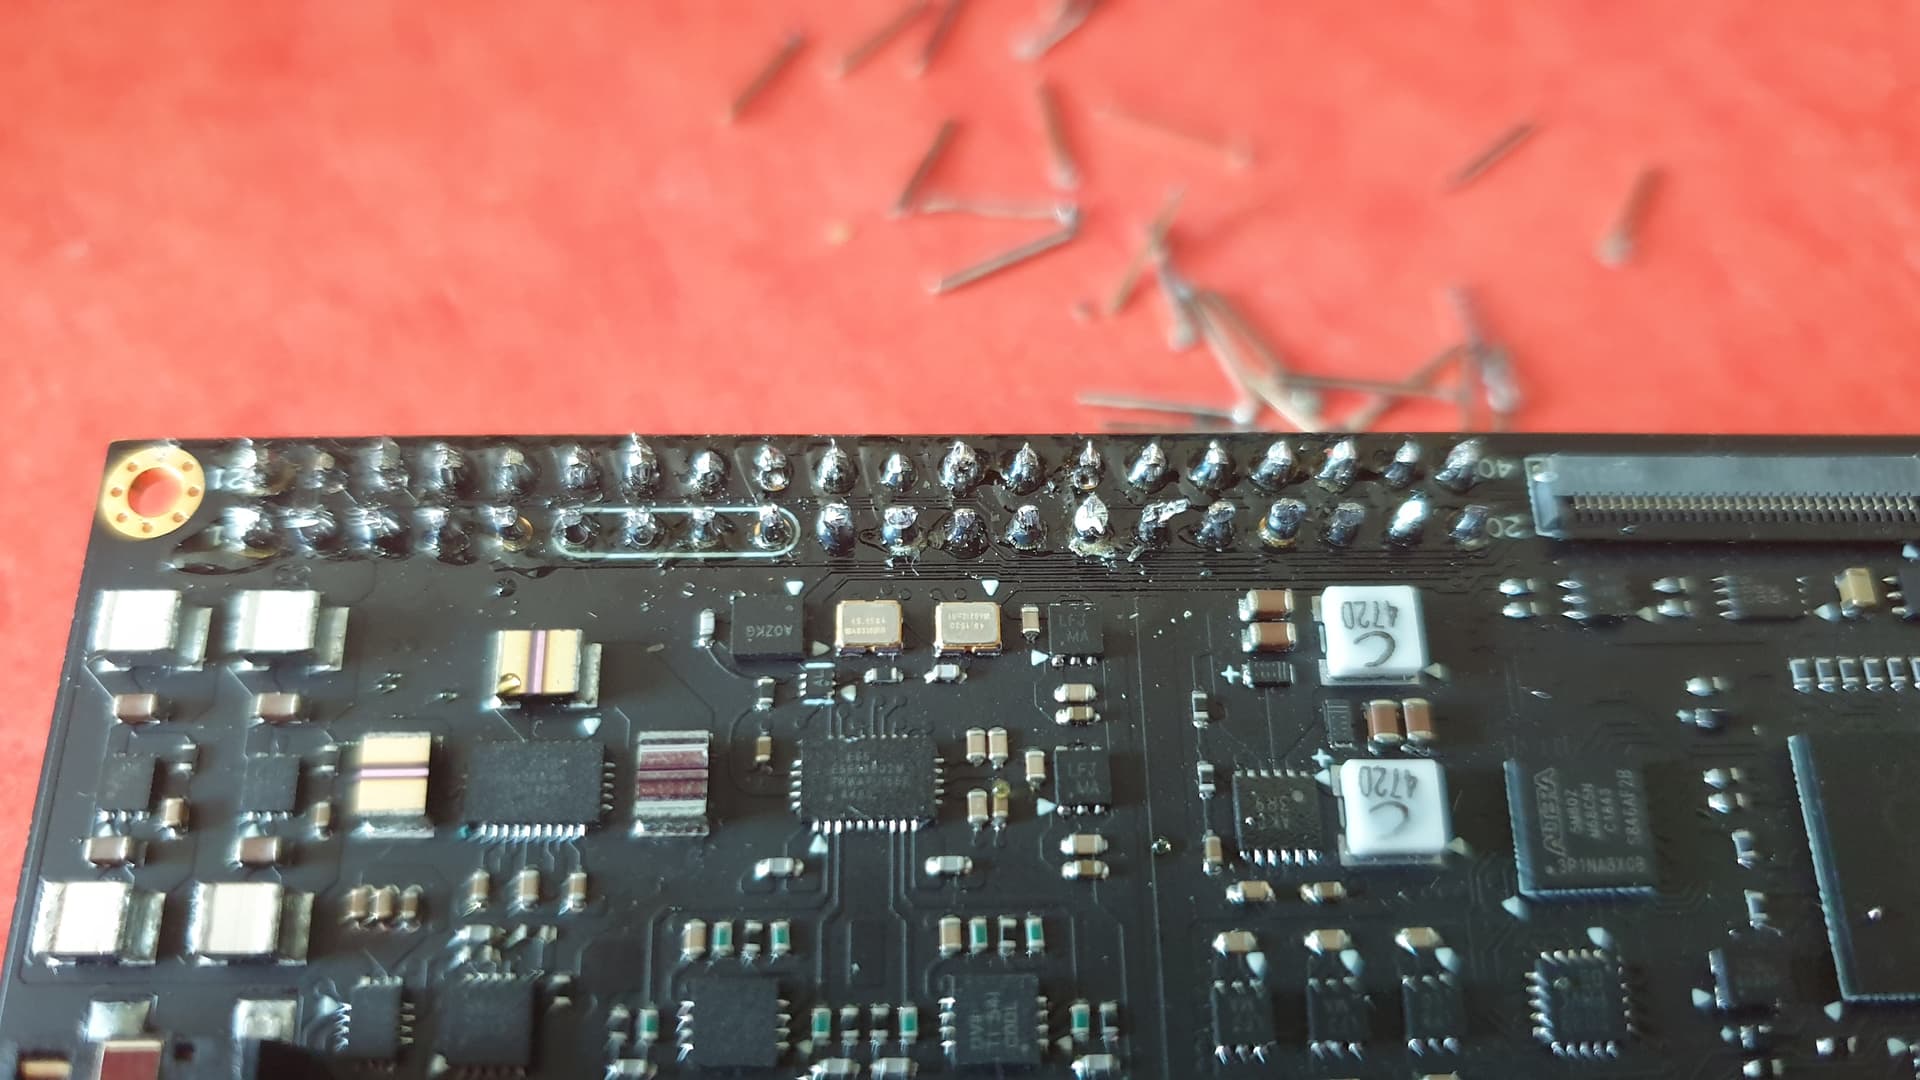
…it can be removed with a semi-hard brush…
Finish the trimming of each weld of each pin, we’ll see later that’s very important to limit the height …
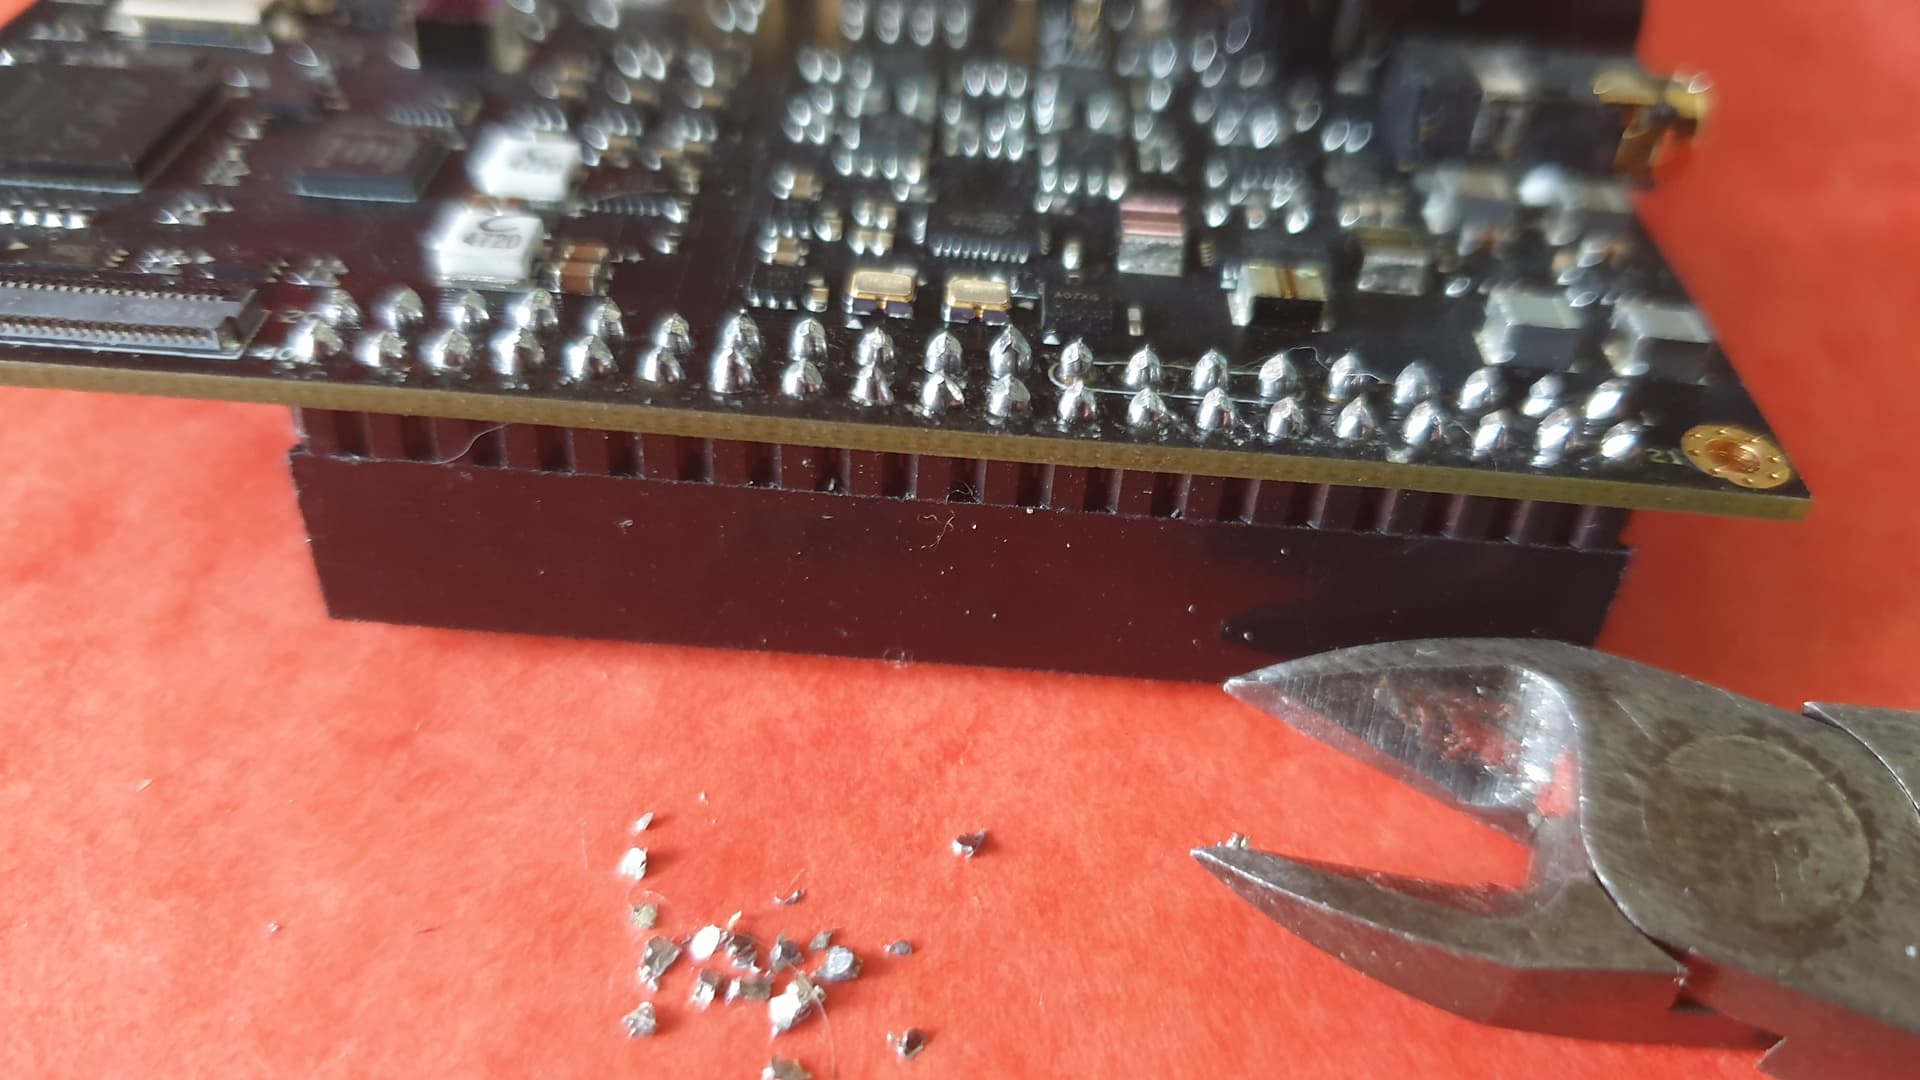
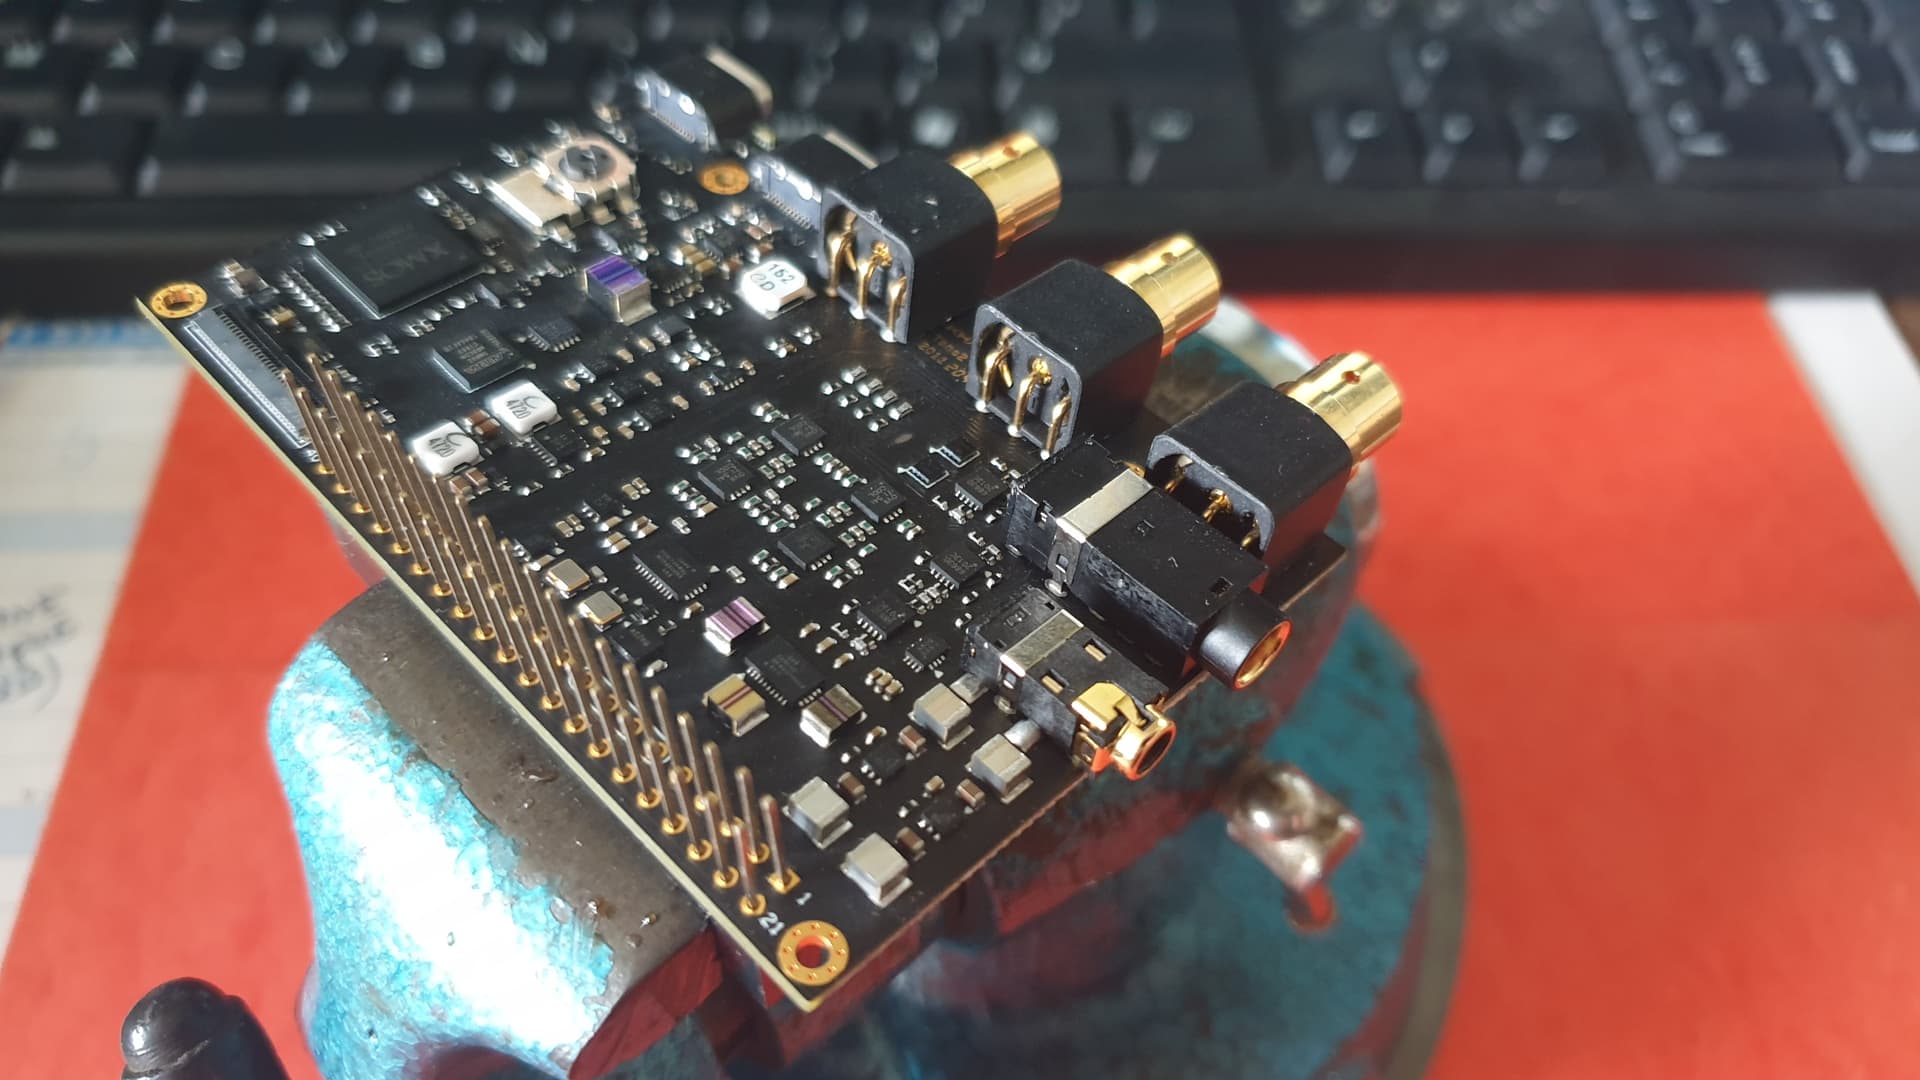
The final result…
ISOLATING :
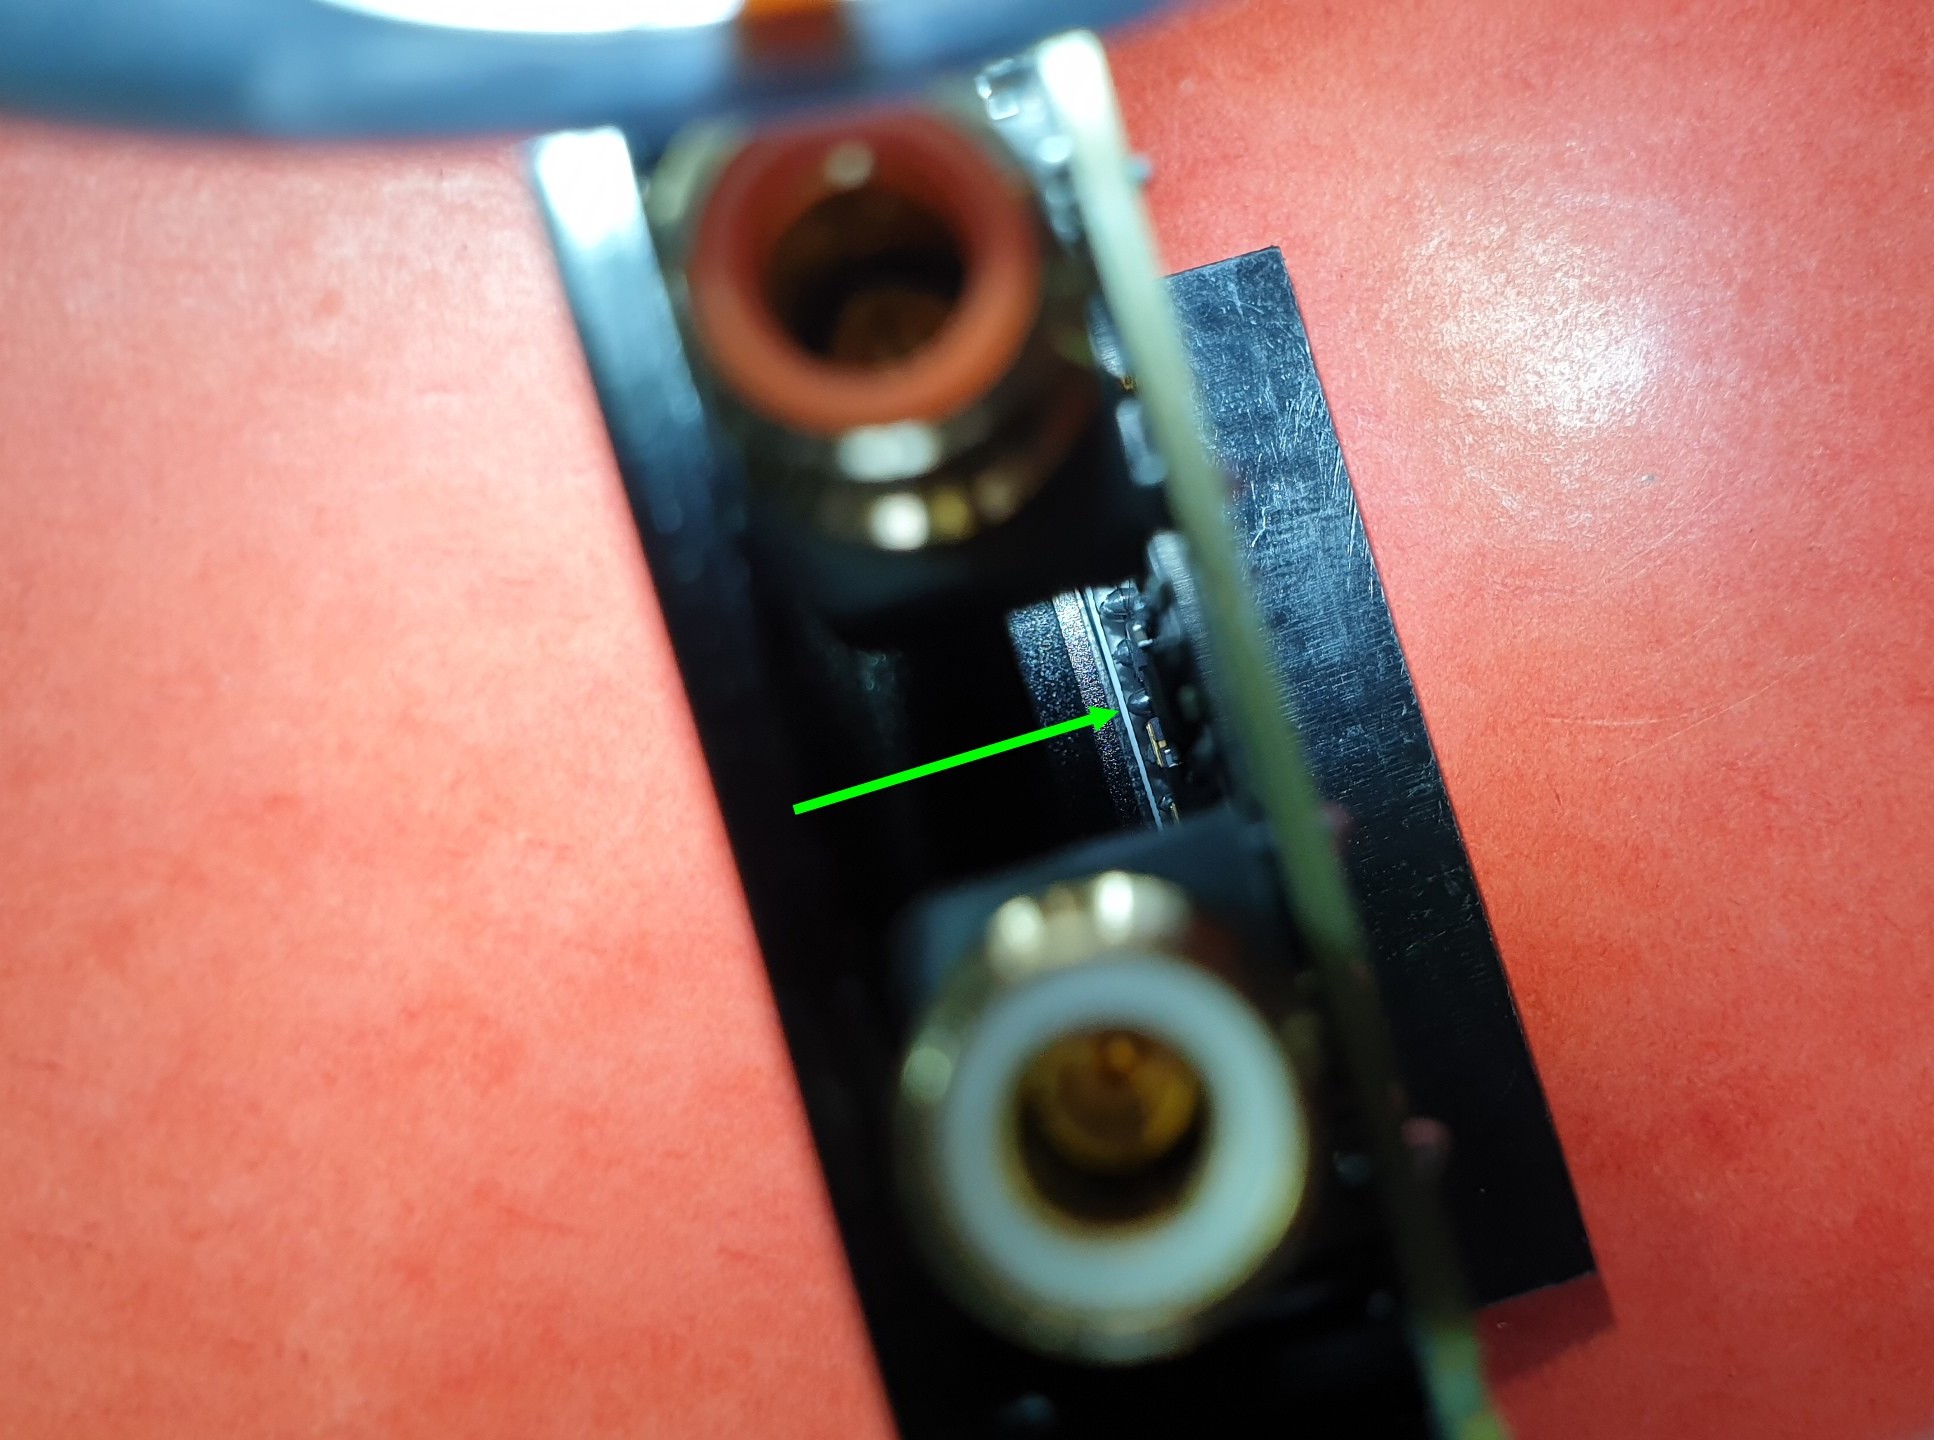
…Will the welds touch the aluminum shell or not ? …
That’s it, it’s over for the 40-pin header soldering phase, after checking that no pin is short-circuited with its neighbor, i asked miself another question…
“Will the welds touch the aluminum shell or not ?”
After checking, no, the welds should not touch the aluminum shell of the Tone2 Pro, but to be sure and to prevent this from happening later, because of the little space between the welds and the aluminum shell, I decided to position an isolating plate between the two parts… (we never know)
…realization of the isolating part…
The isolating part must be able to stay in place without being fixed, so I simply took the option of folding it.
Tracing of the part to be bent…
Folding to 4mm…
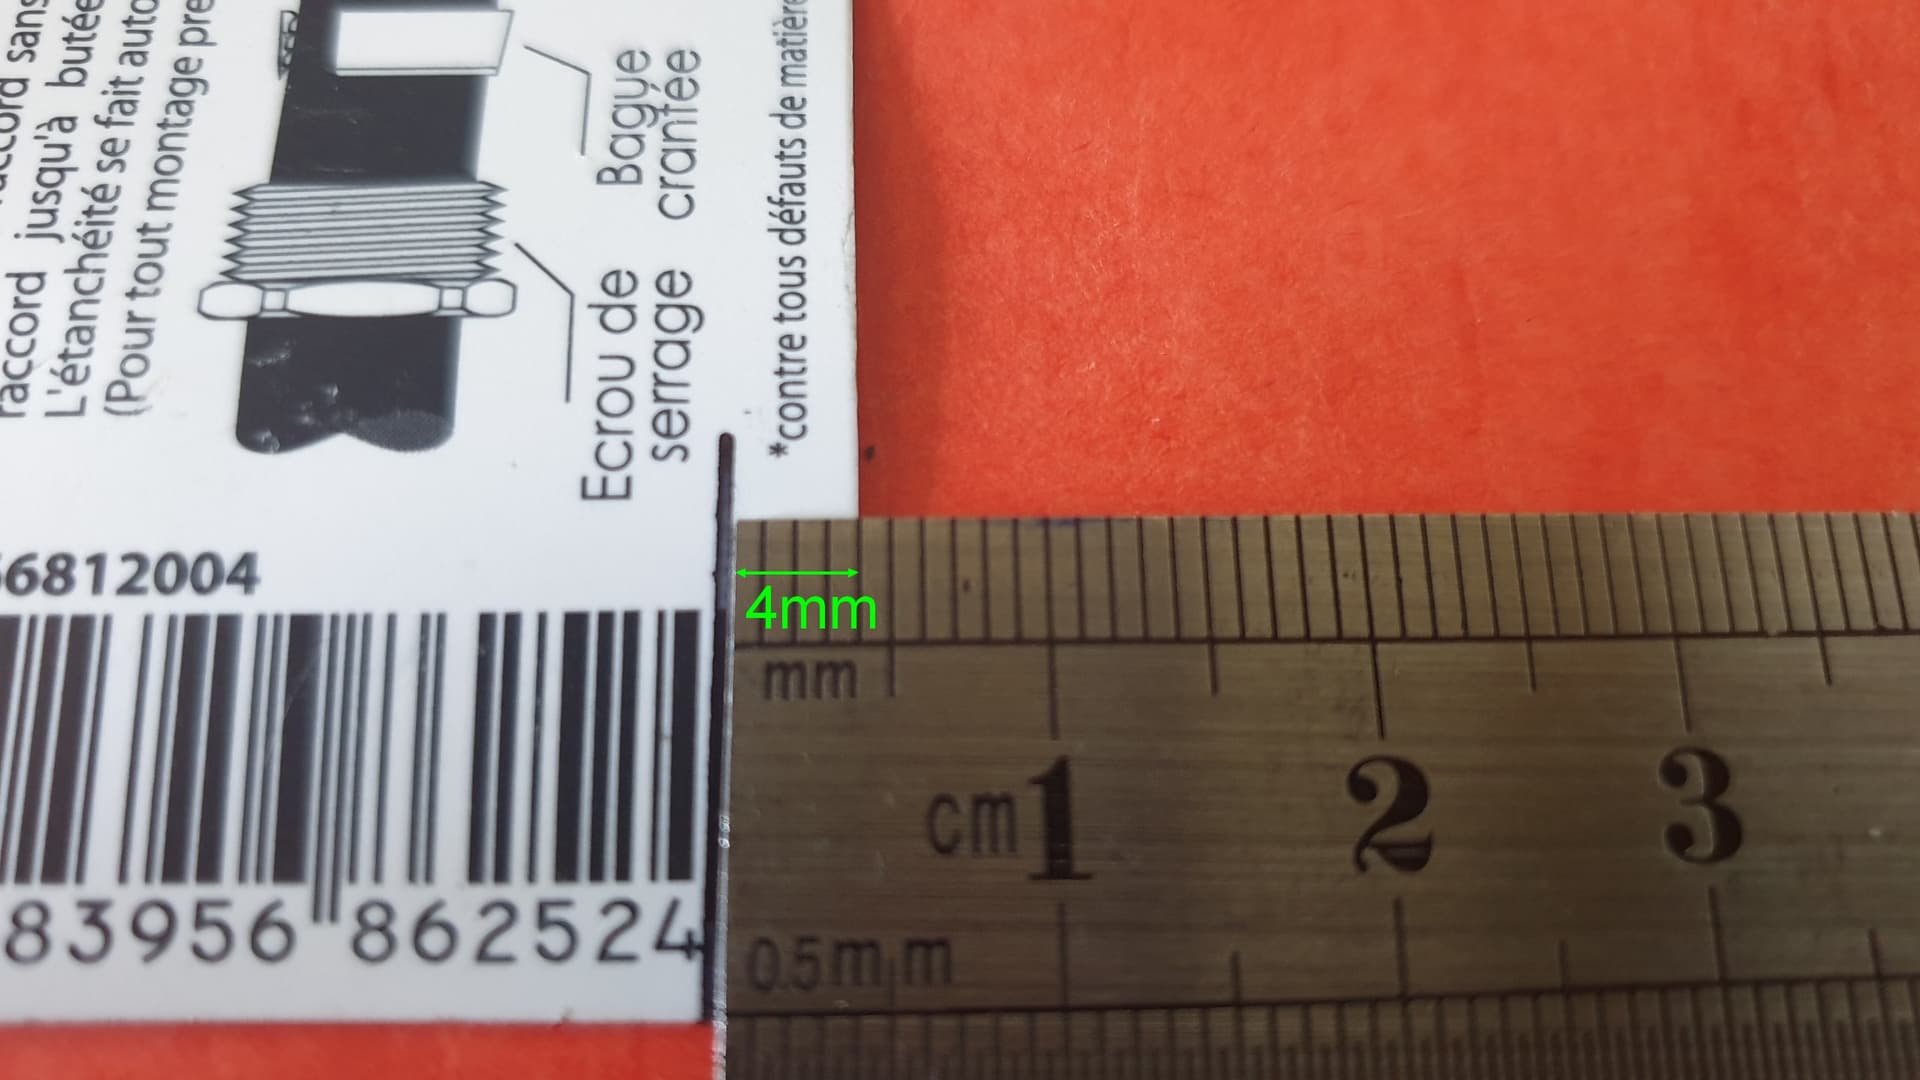
Folding…
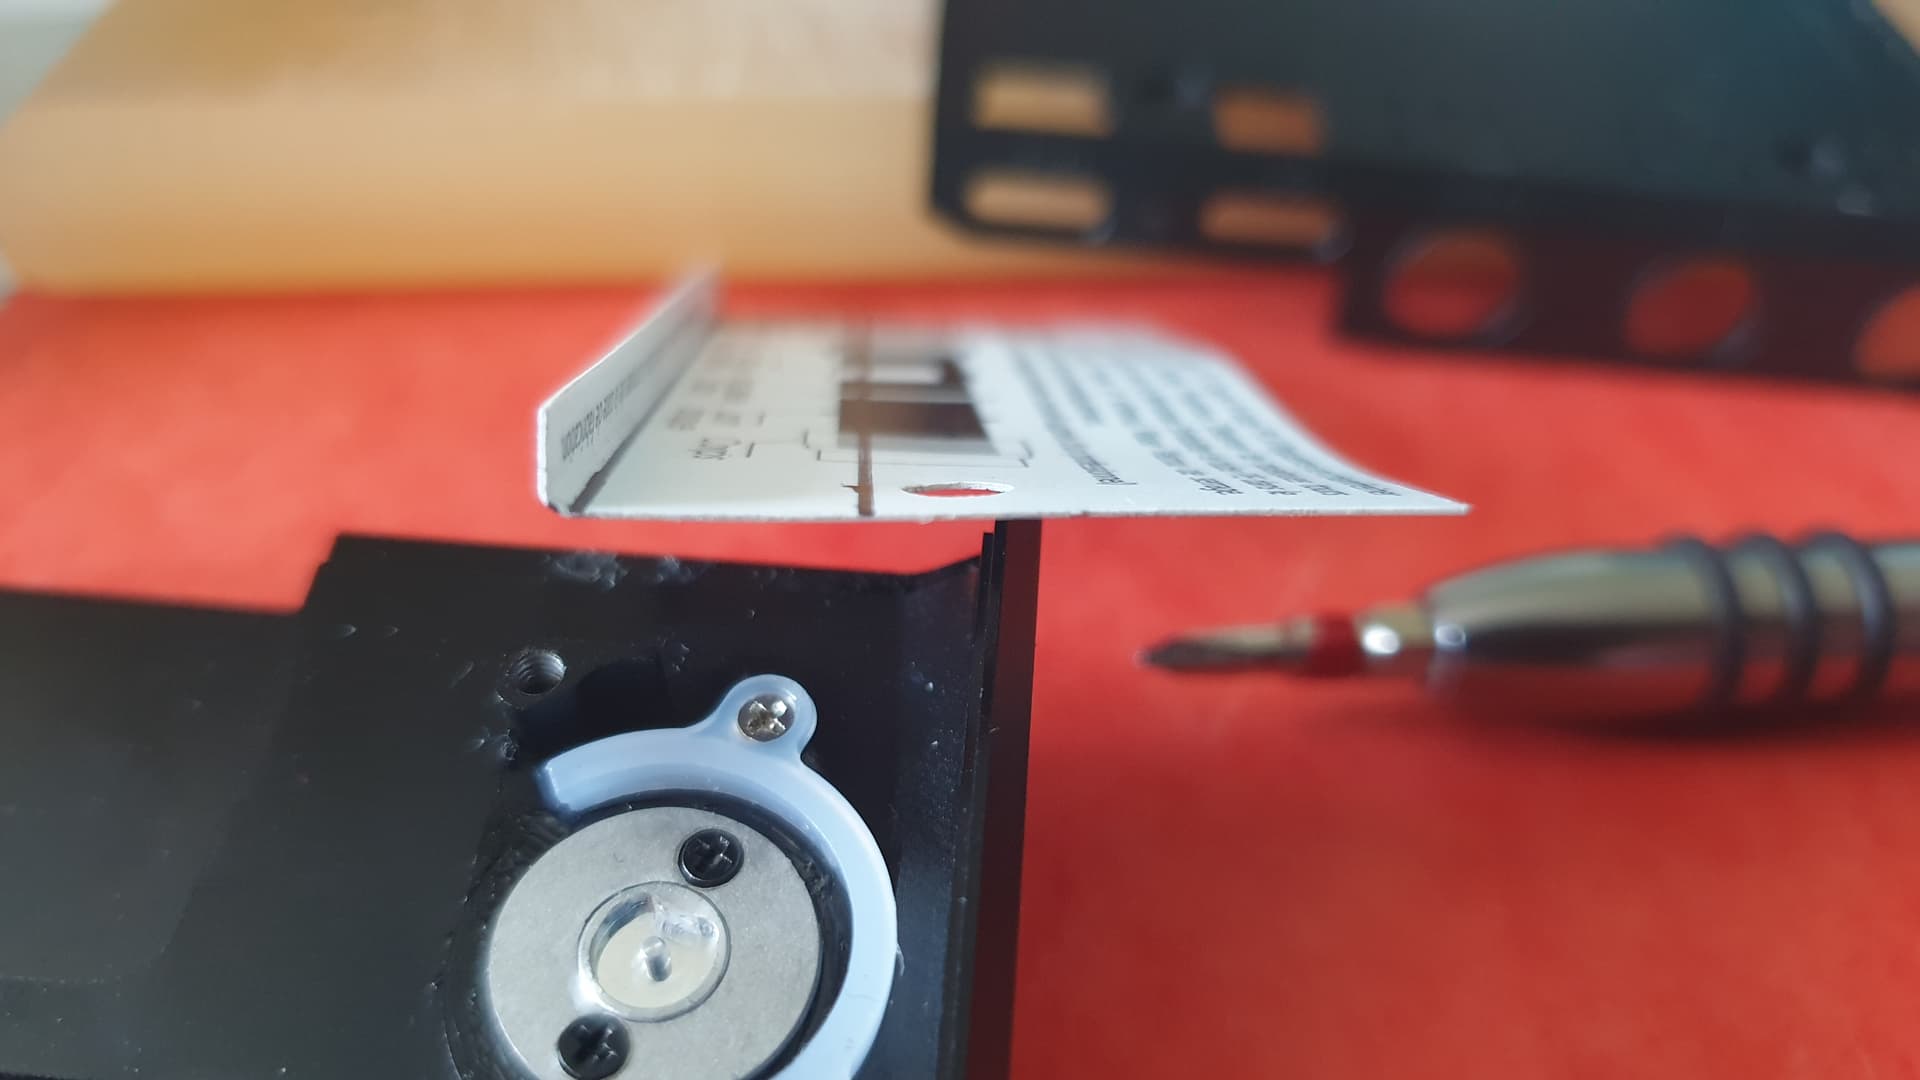
Positioning and adjoustment…

Cutting to the final shape…
Verifications…
…Putting back the eletronic board in its aluminum shell…
To do this, pre-position the rotary switch in the same direction as the rotary switch which is on the electronic board, then position the electronic board in the aluminum shell, exert a light pressure with a finger on the electronic board and at the same time carry out rotational movements of the rotary switch until you feel that the two elements fit into each other.
When done, we can check that the isolating part is well placed…
REASSEMBLY :
… Putting back the botton-rear plastic part of the Tone2 Pro…
No problems to put the lower-rear part of the Ton2 Pro back in place, just reverse the disassembly described above…
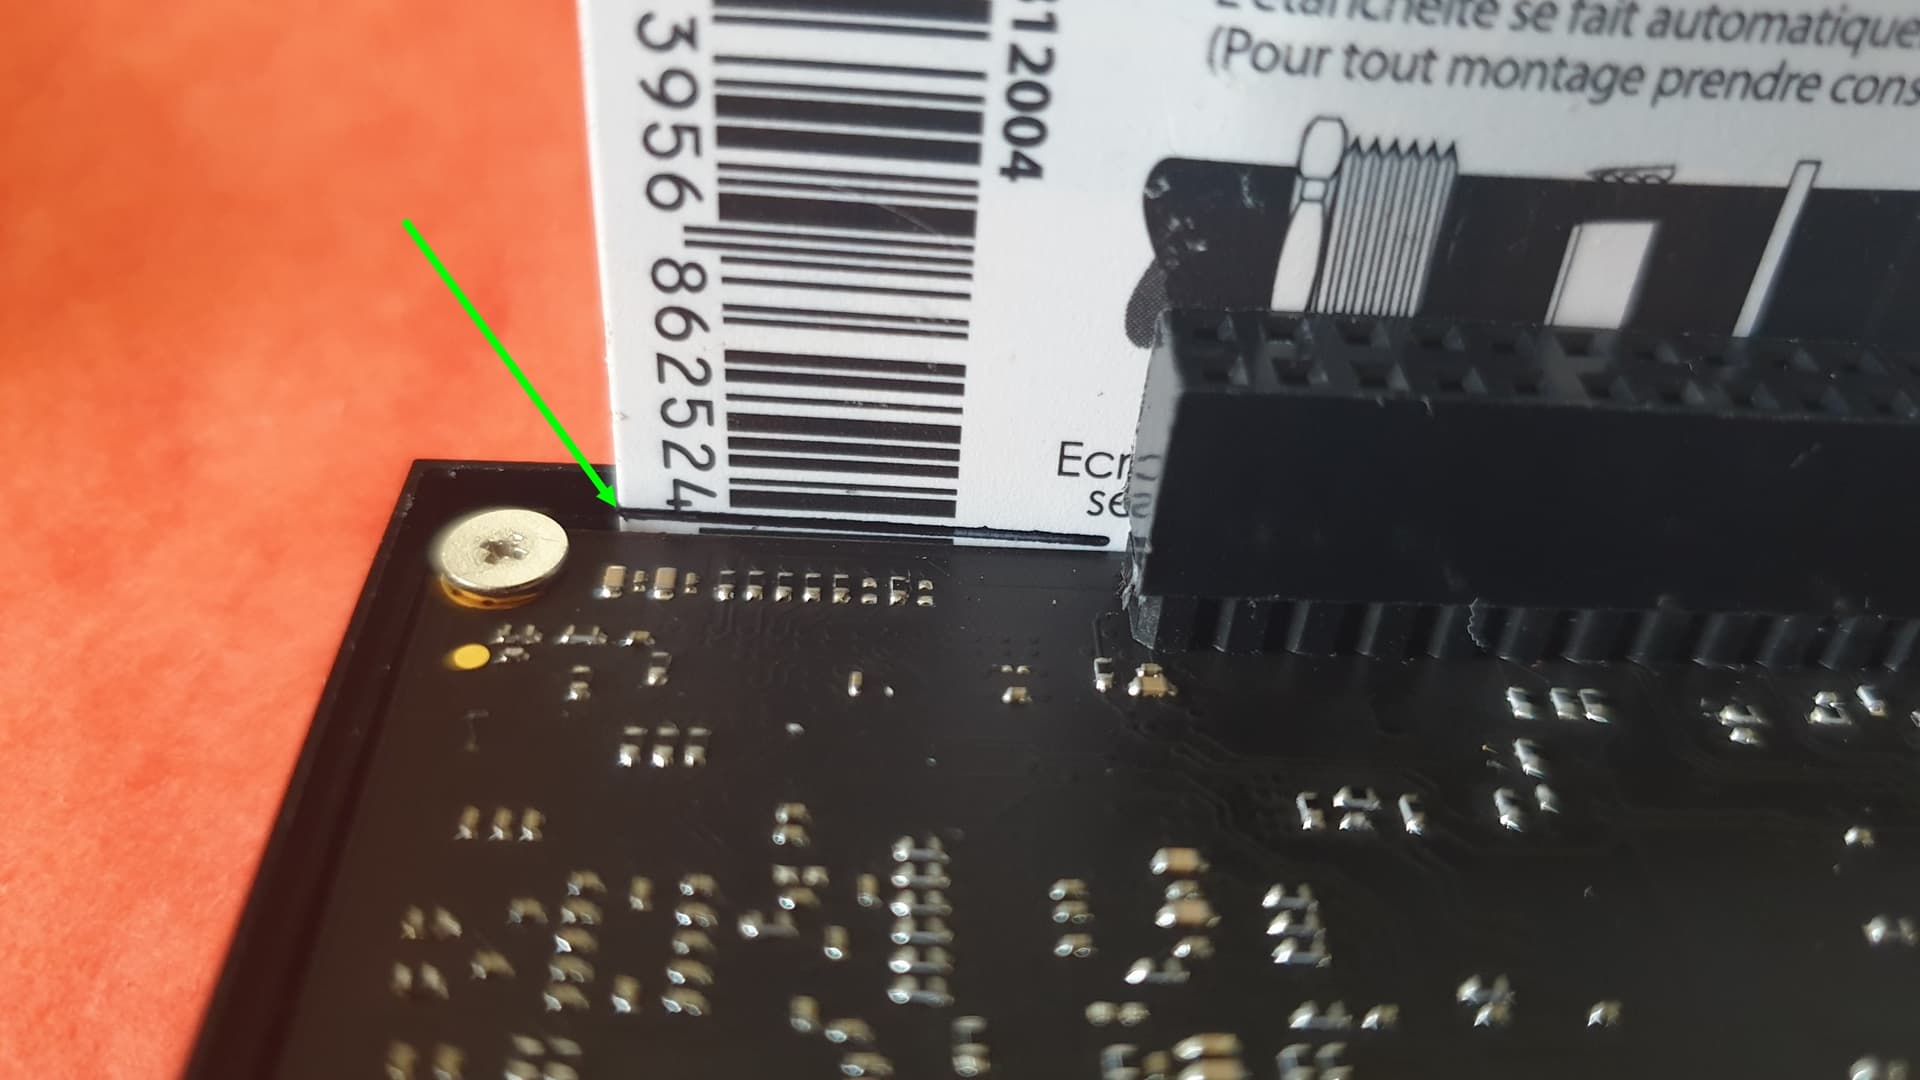
Except that, as we have perfectly adjusted the cutout for the 40-pin header and as the plastic part is positioned diagonally, it does not work…
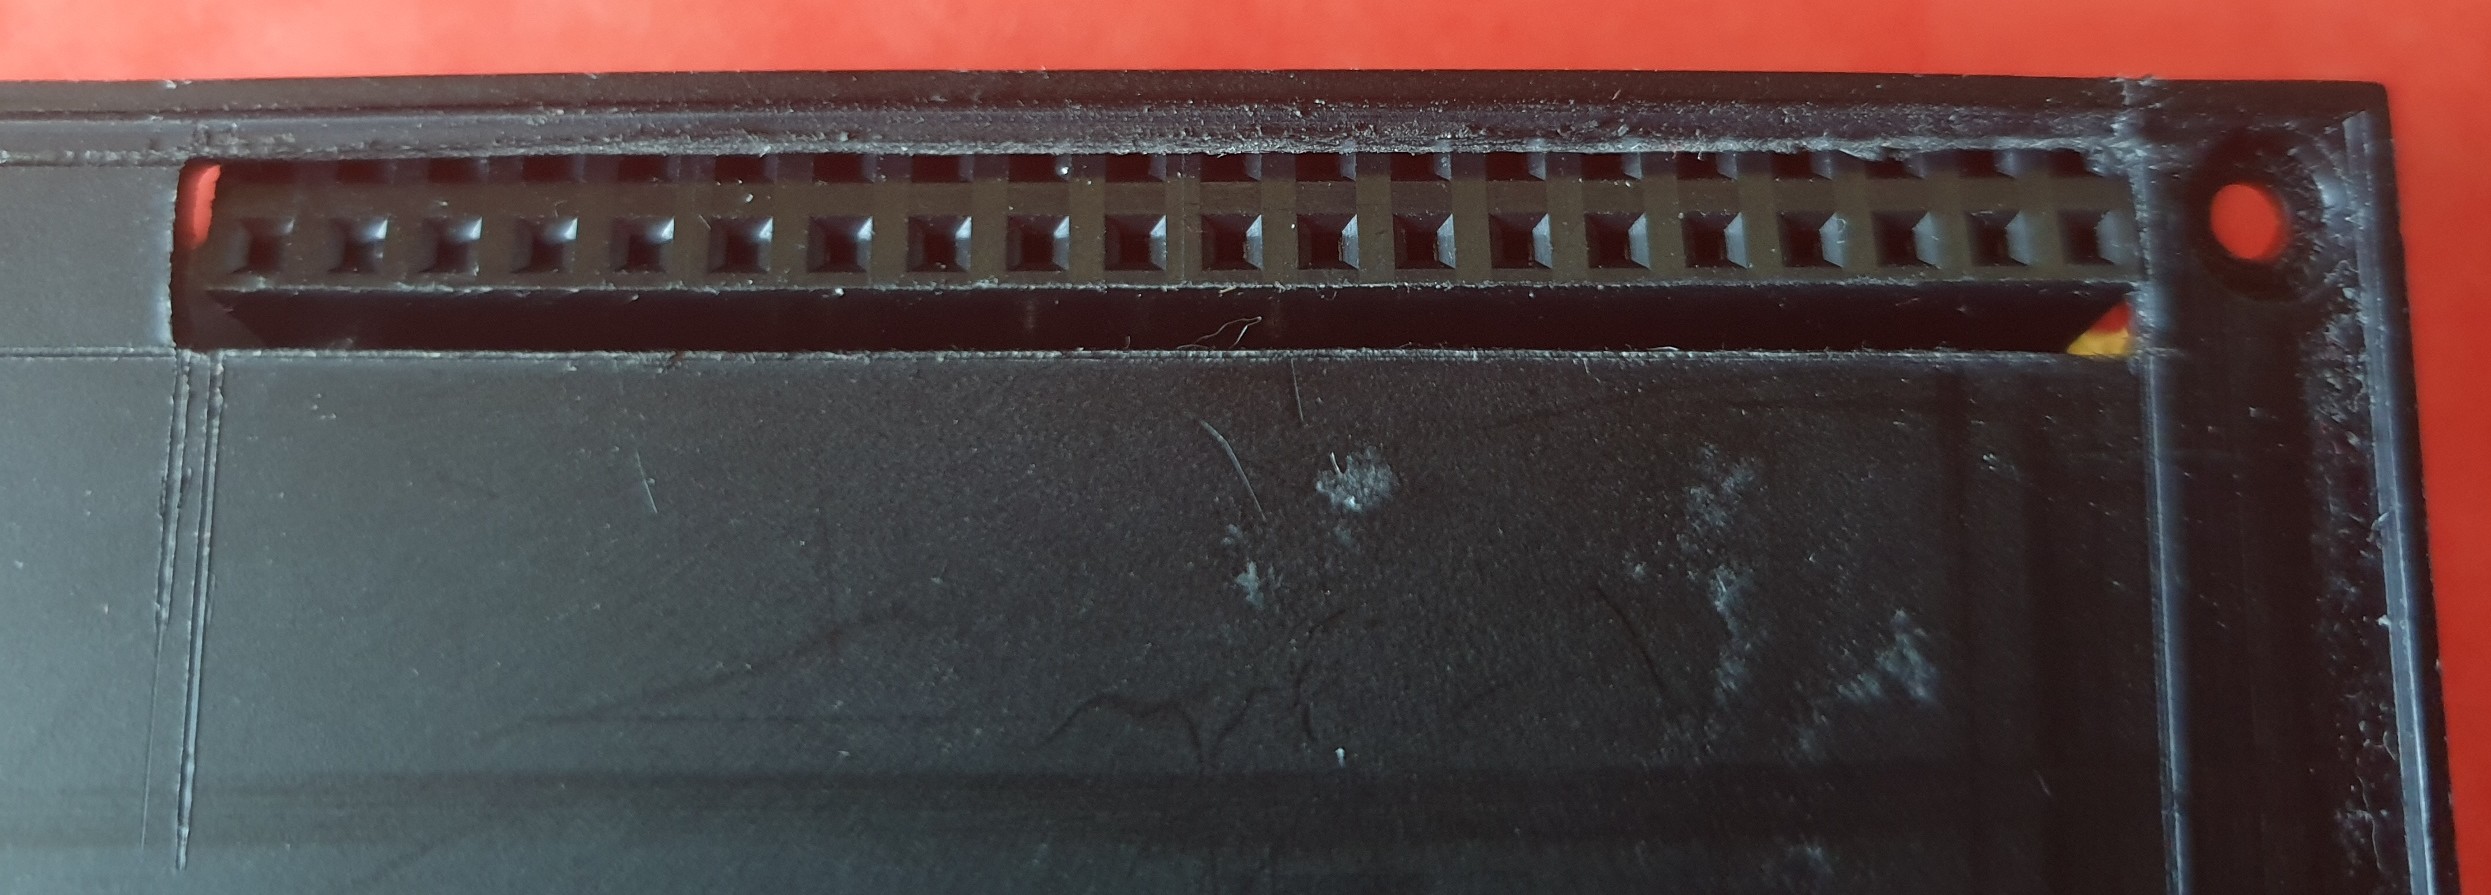
We had left during the previous cut a small strip 0.7mm wide between the header and the edge of the plastic part of the Tone2 Pro…
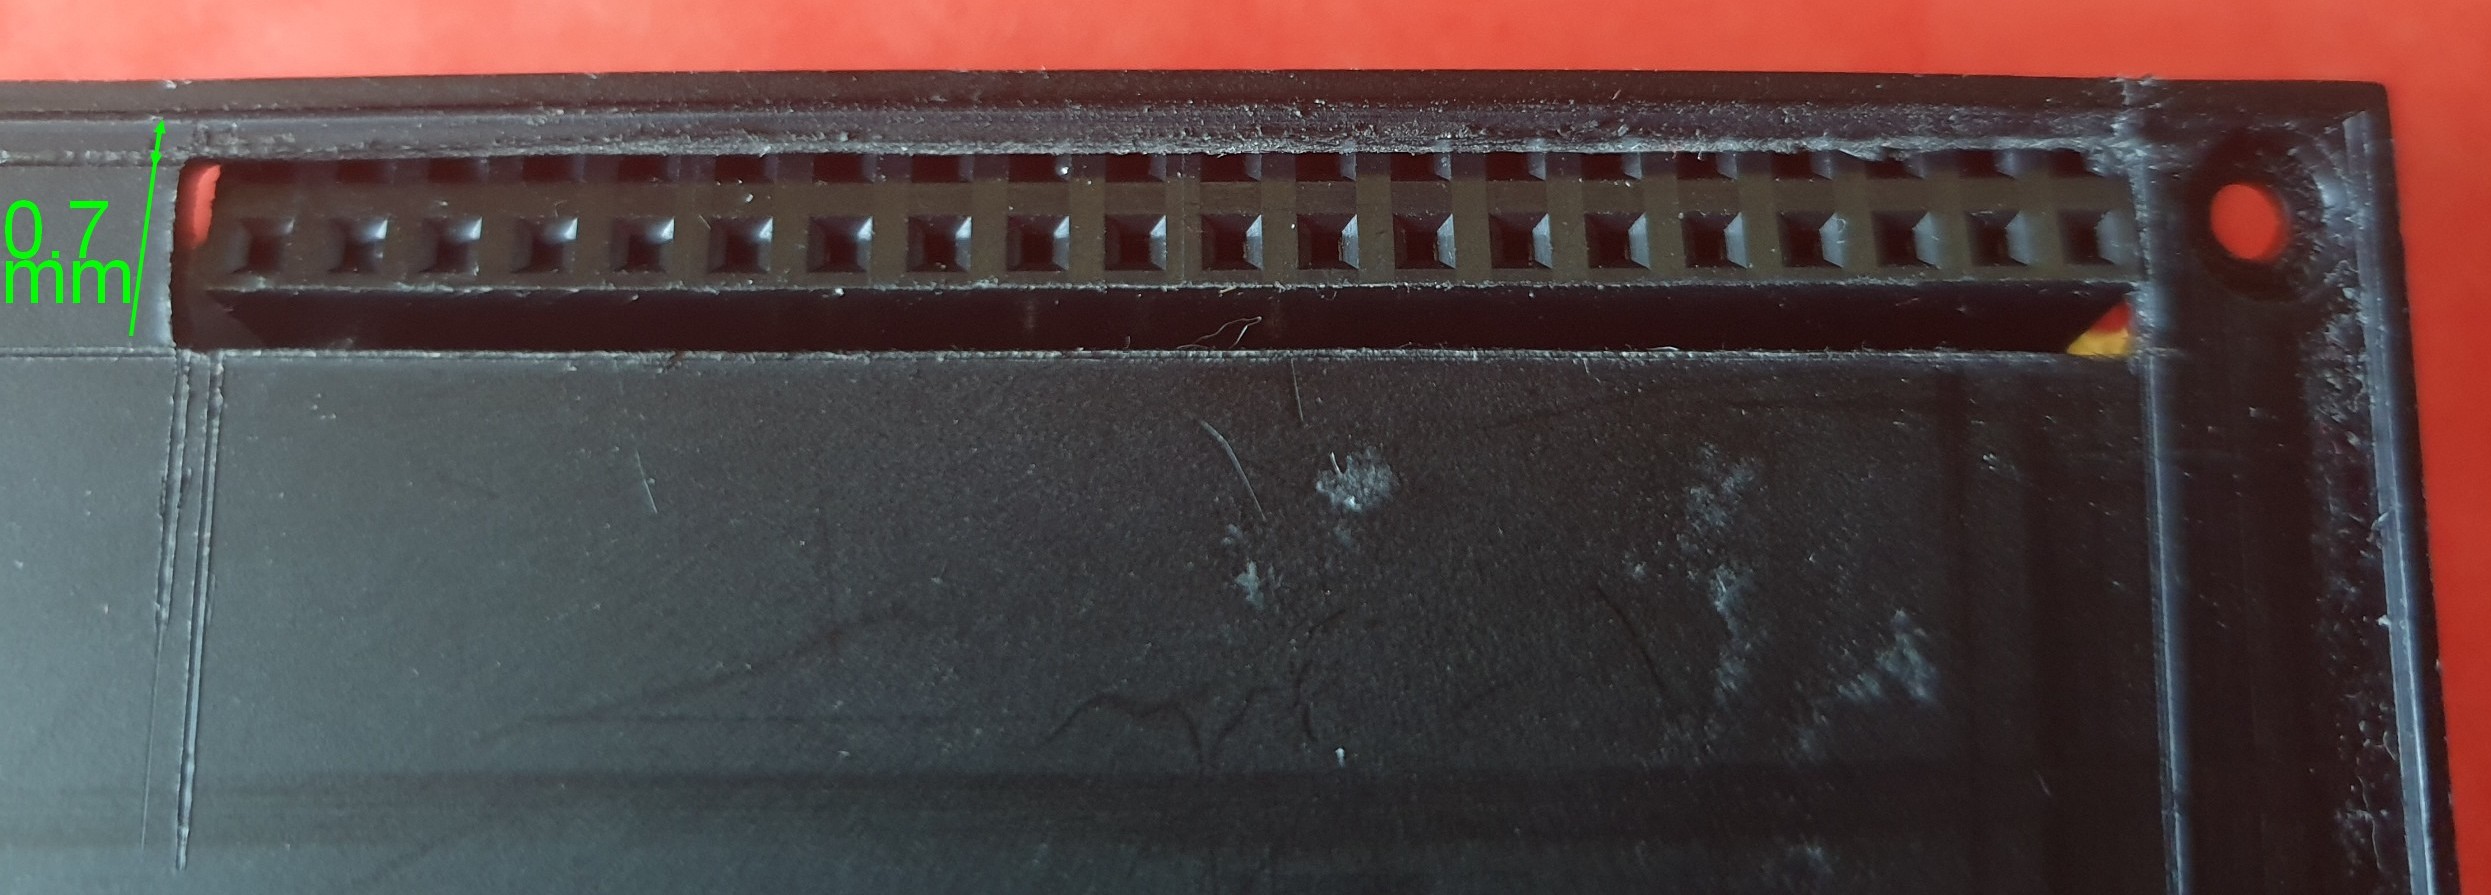
We will readjust by cutting again, these 0.7mm should be enough to allow the 40 pins header to pass…

It still forces a little to the passage of the header, but it passes…
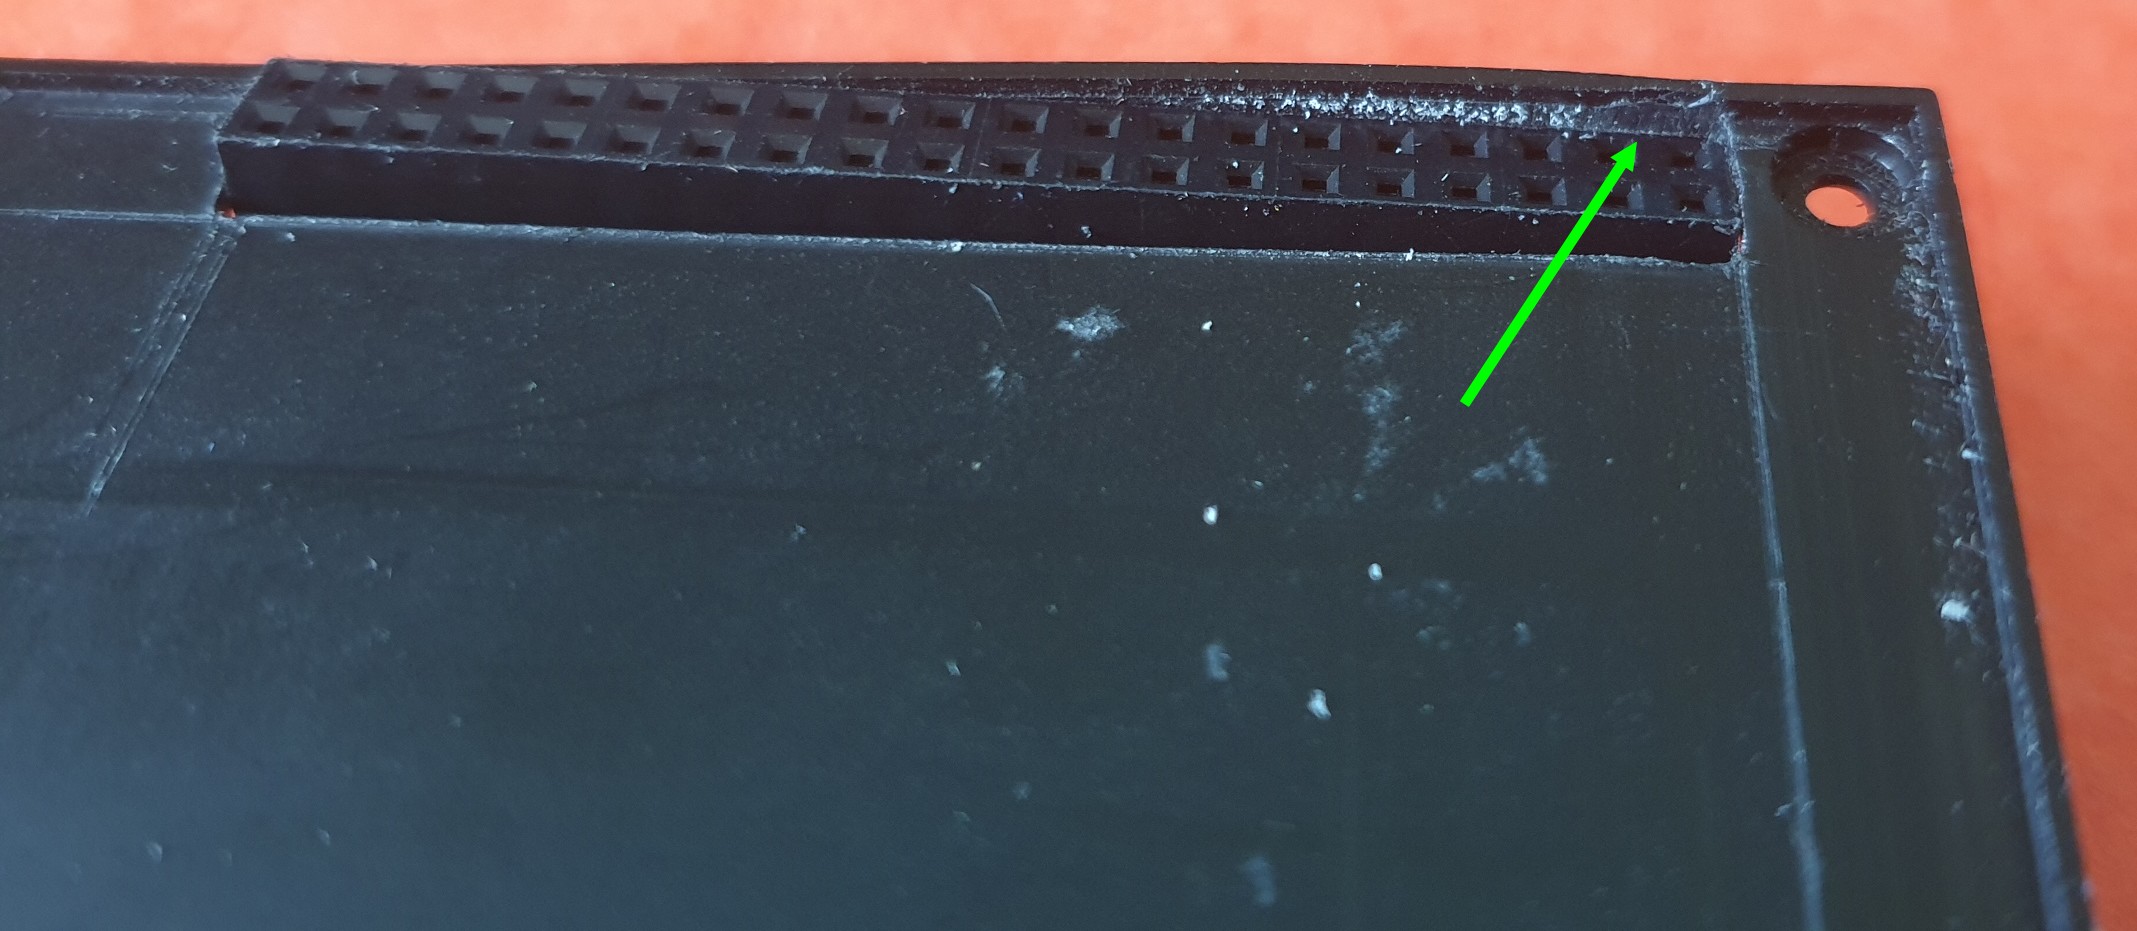
It’s “perfect !” the lower-rear plastic part is in place,…
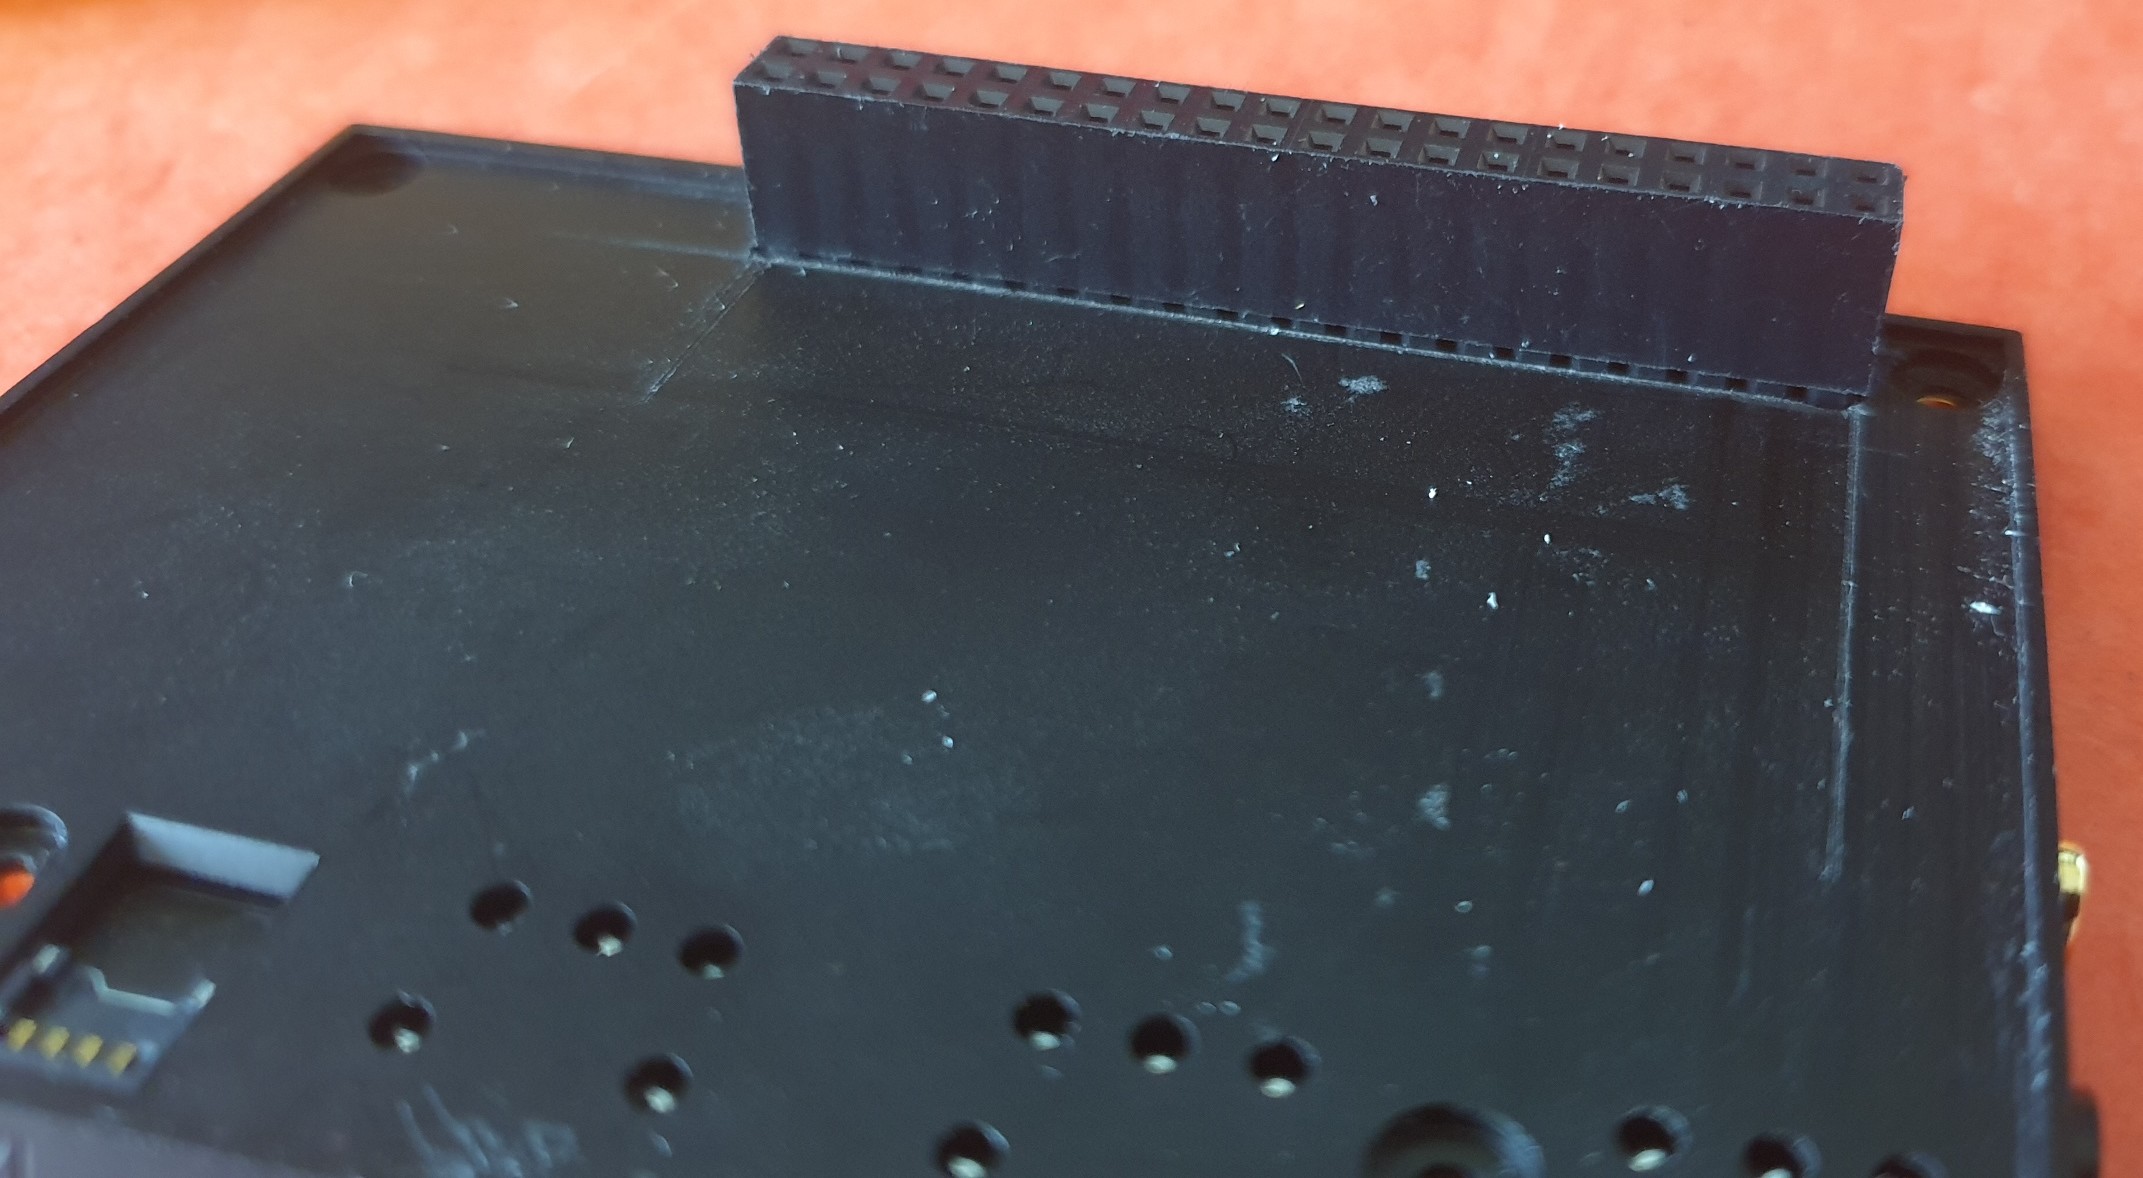
…we can replace the screws and go to the next step…

…We can now move on to the next phase…
ELECTRICAL TESTS :
As before the modification by adding the 40 pins header, the Tone2 Pro works perfectly in all its configurations…
…the rotator is ok and fully functional on all mode changes,…
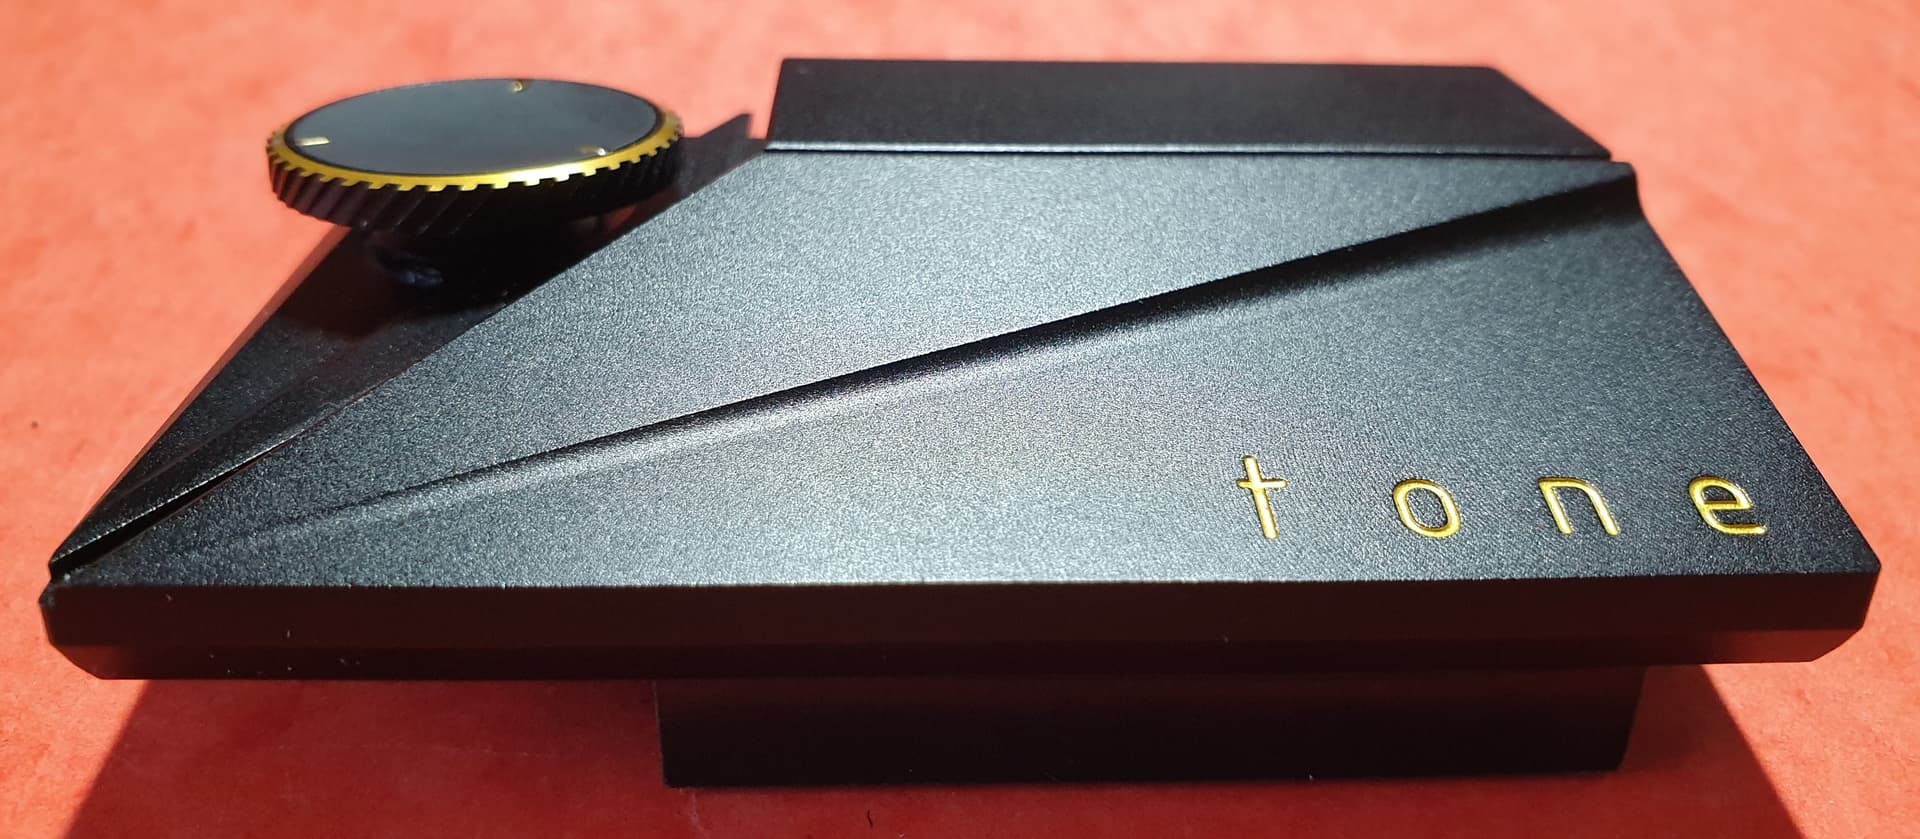
(Note the raised front of the Tone2 Pro because of the 40 pins header)
…using the headphones,…
…and RCA (unbalanced) outputs…
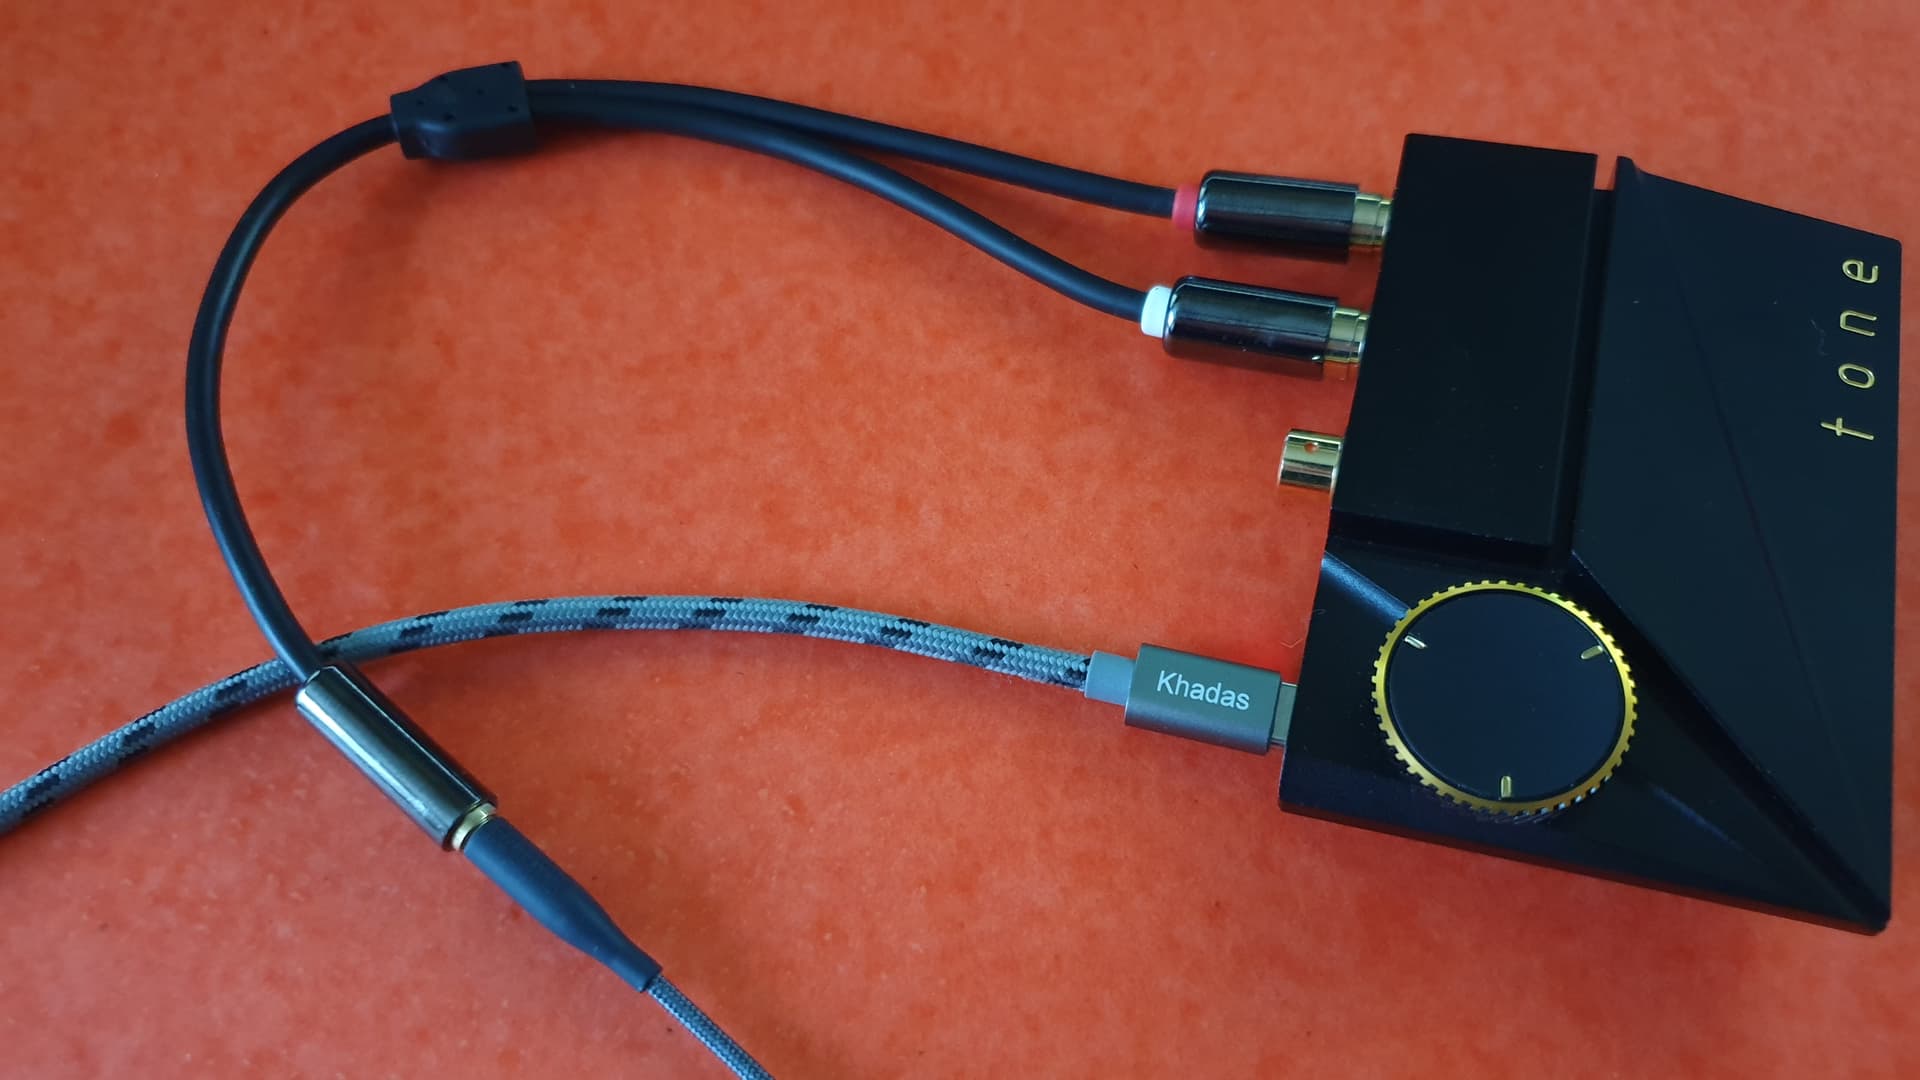
FINAL RESULT :
Here is the final result, ready to be mounted on the VIM3 in their DIY-Case …

List of what we needed :
BOARDS and CASE :
- Khadas Tone2 Pro
ELECTRONICS PARTS :
- 40-pins 11mm header (ordered 8 pcs = $6,04)
COSTS :
without boards and case = $6,04
I therefore give you an appointment for the following phase :
-
DIY-Case tuned housing VIM3 + Modified TONE2 Pro (PHASE 2)
The assembly of the VIM3 and the modified Tone2 Pro in the also modified DIY-Case.
See you soon !
DerFu