Hello all, …
Want to have a VIM2 + VTV + TONE-BOARD all-in-one assembly ?
Look down here !  …
…
GENESIS :
Since I have my KHADAS VIM2 PRO, I alwars wanted to buid something looking nice, so I bought a red DIY-CASE…That was fine for the VIM2 itself, but when I wanted to add VTV board That wasn’t good looking anymore… After a while, I bought also TONE-BOARD to have the possibility to connect to my DSP … Khadas VIM2 + VTV + TONE-BOARD was less and less good looking and Khadas team don’t proposes in DIY-CASE parts, any VTV or TONE-BOARD module to have a perfect enclosure…
KHADAS COMMUNITY FORUM QUESTION :
I’ve asked for modular assembly like a DIY-CASE with optional VTV board and TONE-BOARd modules in “DIY Case/Housing for VIMs” topic…
fred21 answed me with this link : Aluminum case for Khadas Tone-board (audiophonics.fr)
Tsangyoujun from Khadas Staff answered to fred21 :
“Oo that’s smart! Okay we shall take note of that for future casing designs.”
But I’m affaid that Tsangyoujun was talking about new generation Khadas boards, not old existing VIM2…
THE JOB :
So, inspired by the works of RDFTKV and Robert I decided to mount everything whith brass standoff to have a good old-clock looking module again, and I show you how to do so down below …
First I thought to do it with parts that comes with the VIM2, VTV, TONE-BOARD and DIY-CASE, but before that I have to do mesurements to find out what should be needed to mount all boards togather.
Let’s go !!!
CHAPTER ONE - MESUREMENT :
Lets separate this action un three parts …
Part one, VIM2 + VTV + BOTTOM DIY-CASE COVER.
Part two, VIM2 + TONE-BOARD + TOP DIY-CASE COVER.
Part three, TOP DIY-CASE COVER + (TONE-BOARd + VIM2 + VTV) + BOTTOM DIY-CASE COVER.
Part one :
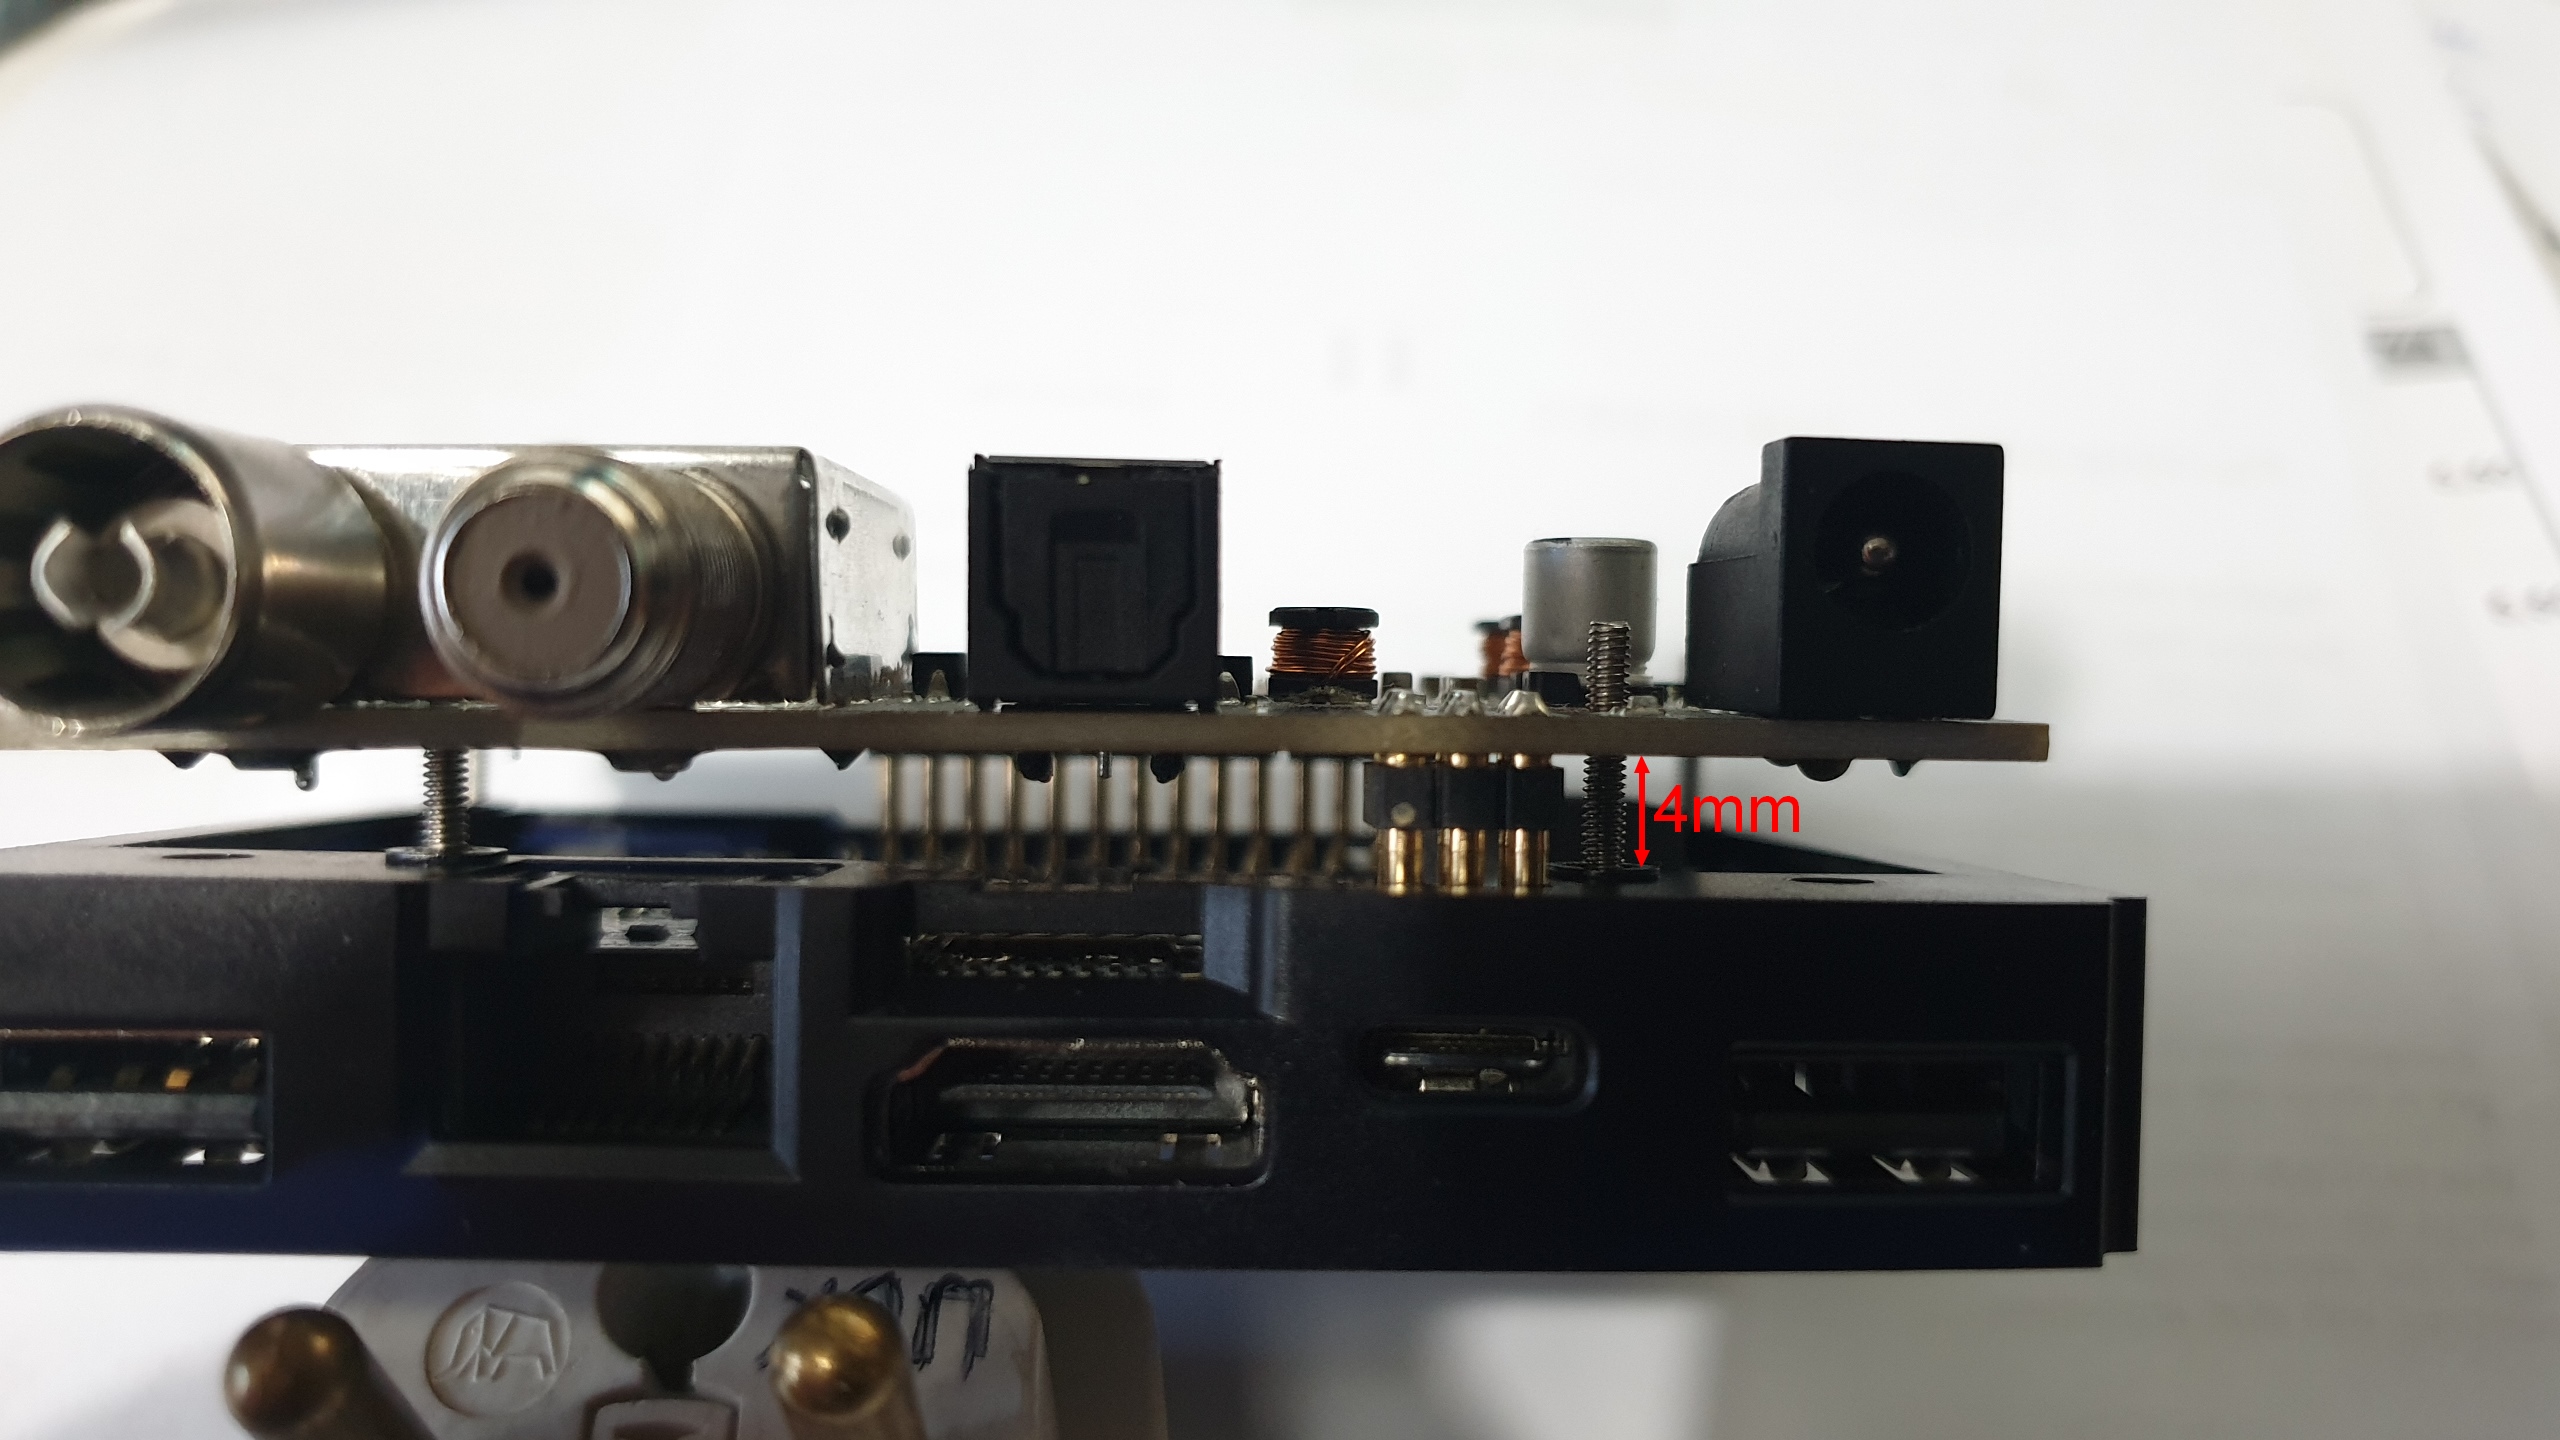
VIM2 + VTV mount need 4mm spacers (see picture).
VTV + BOTTOM DIY-CASE COVER need 12mm spacers (no picture - mesurement).
Part two :
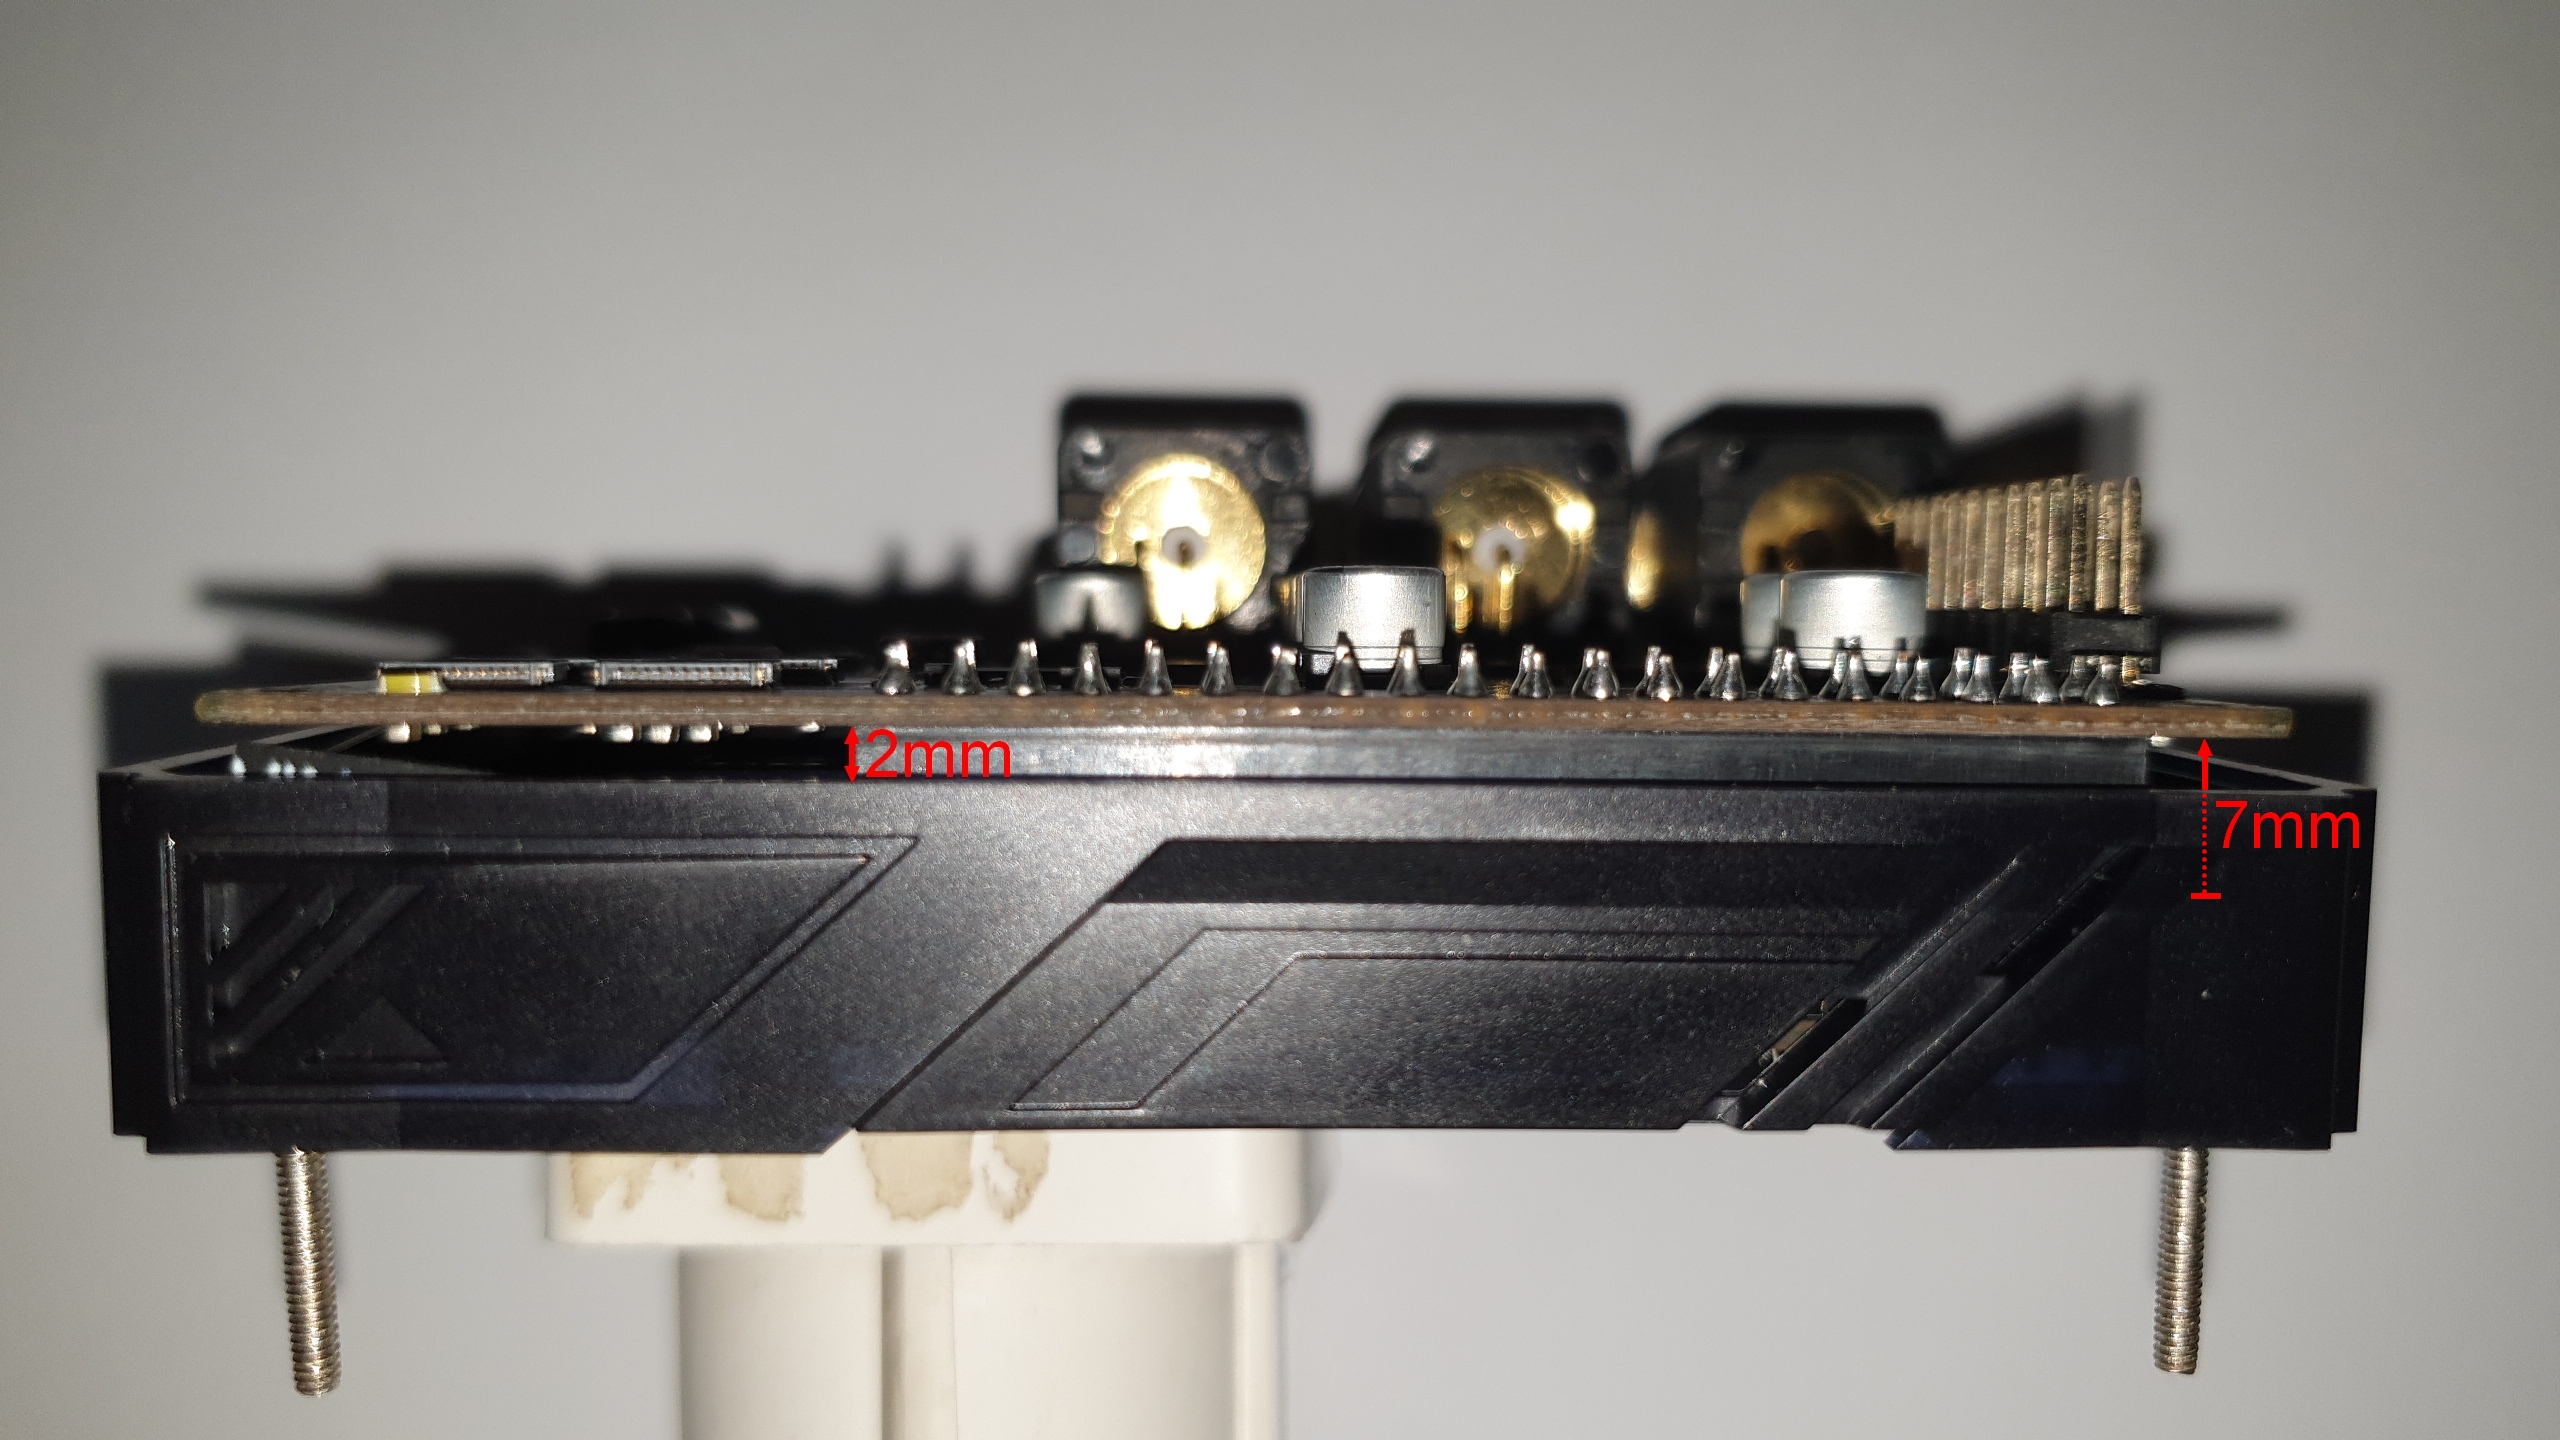
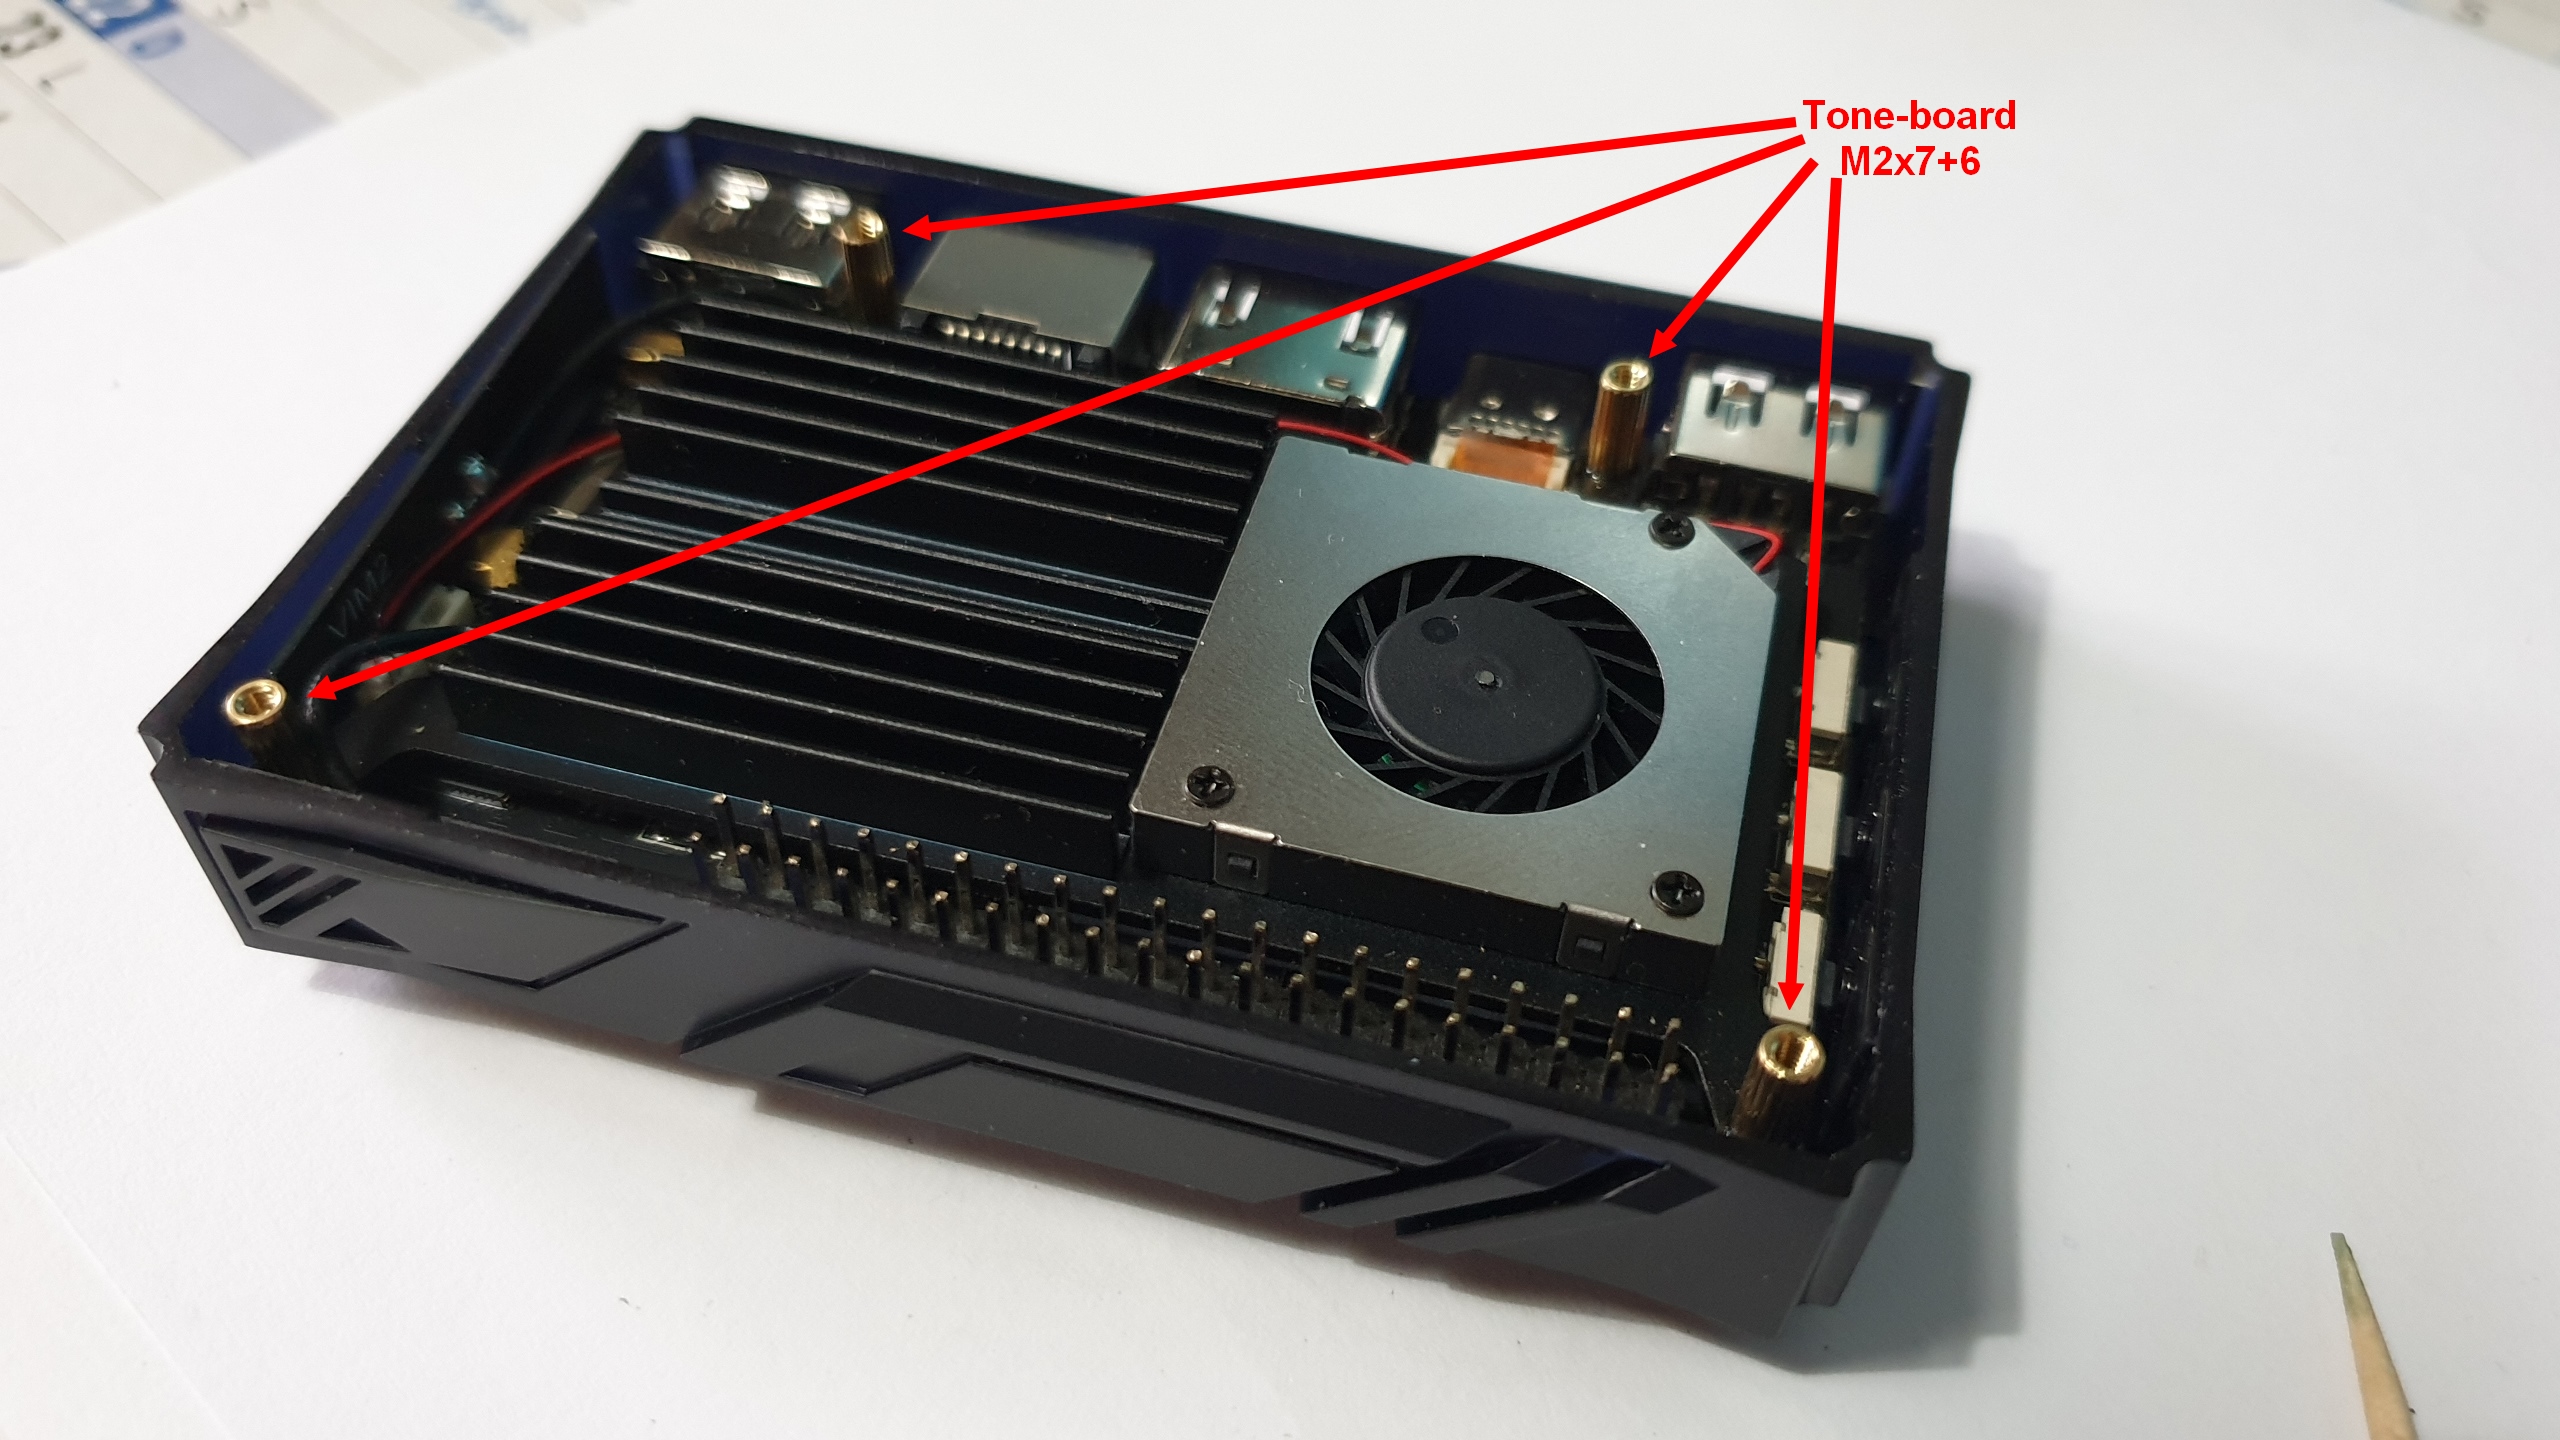
VIM2 + TONE-BOARD need 7mm spacers (see picture).
TONE-BOARD + TOP DIY-CASE COVER need 14mm spacers (no picture - mesurement).
Part three :
TOP DIY-CASE COVER + (TONE-BOARd + VIM2 + VTV) + BOTTOM DIY-CASE COVER need 48mm spacers (no picture - mesurement).
CHAPTER TWO - BOARDS AND CASE MOUNTING PARTS SELECTION :
In fact, as we can see, only some parts of VIM2, VTV, TONE-BOARD boards and DIY-CASE could be used, some others couldn’t …
In VIM2 and VTV boards parts I haven’t used anything.
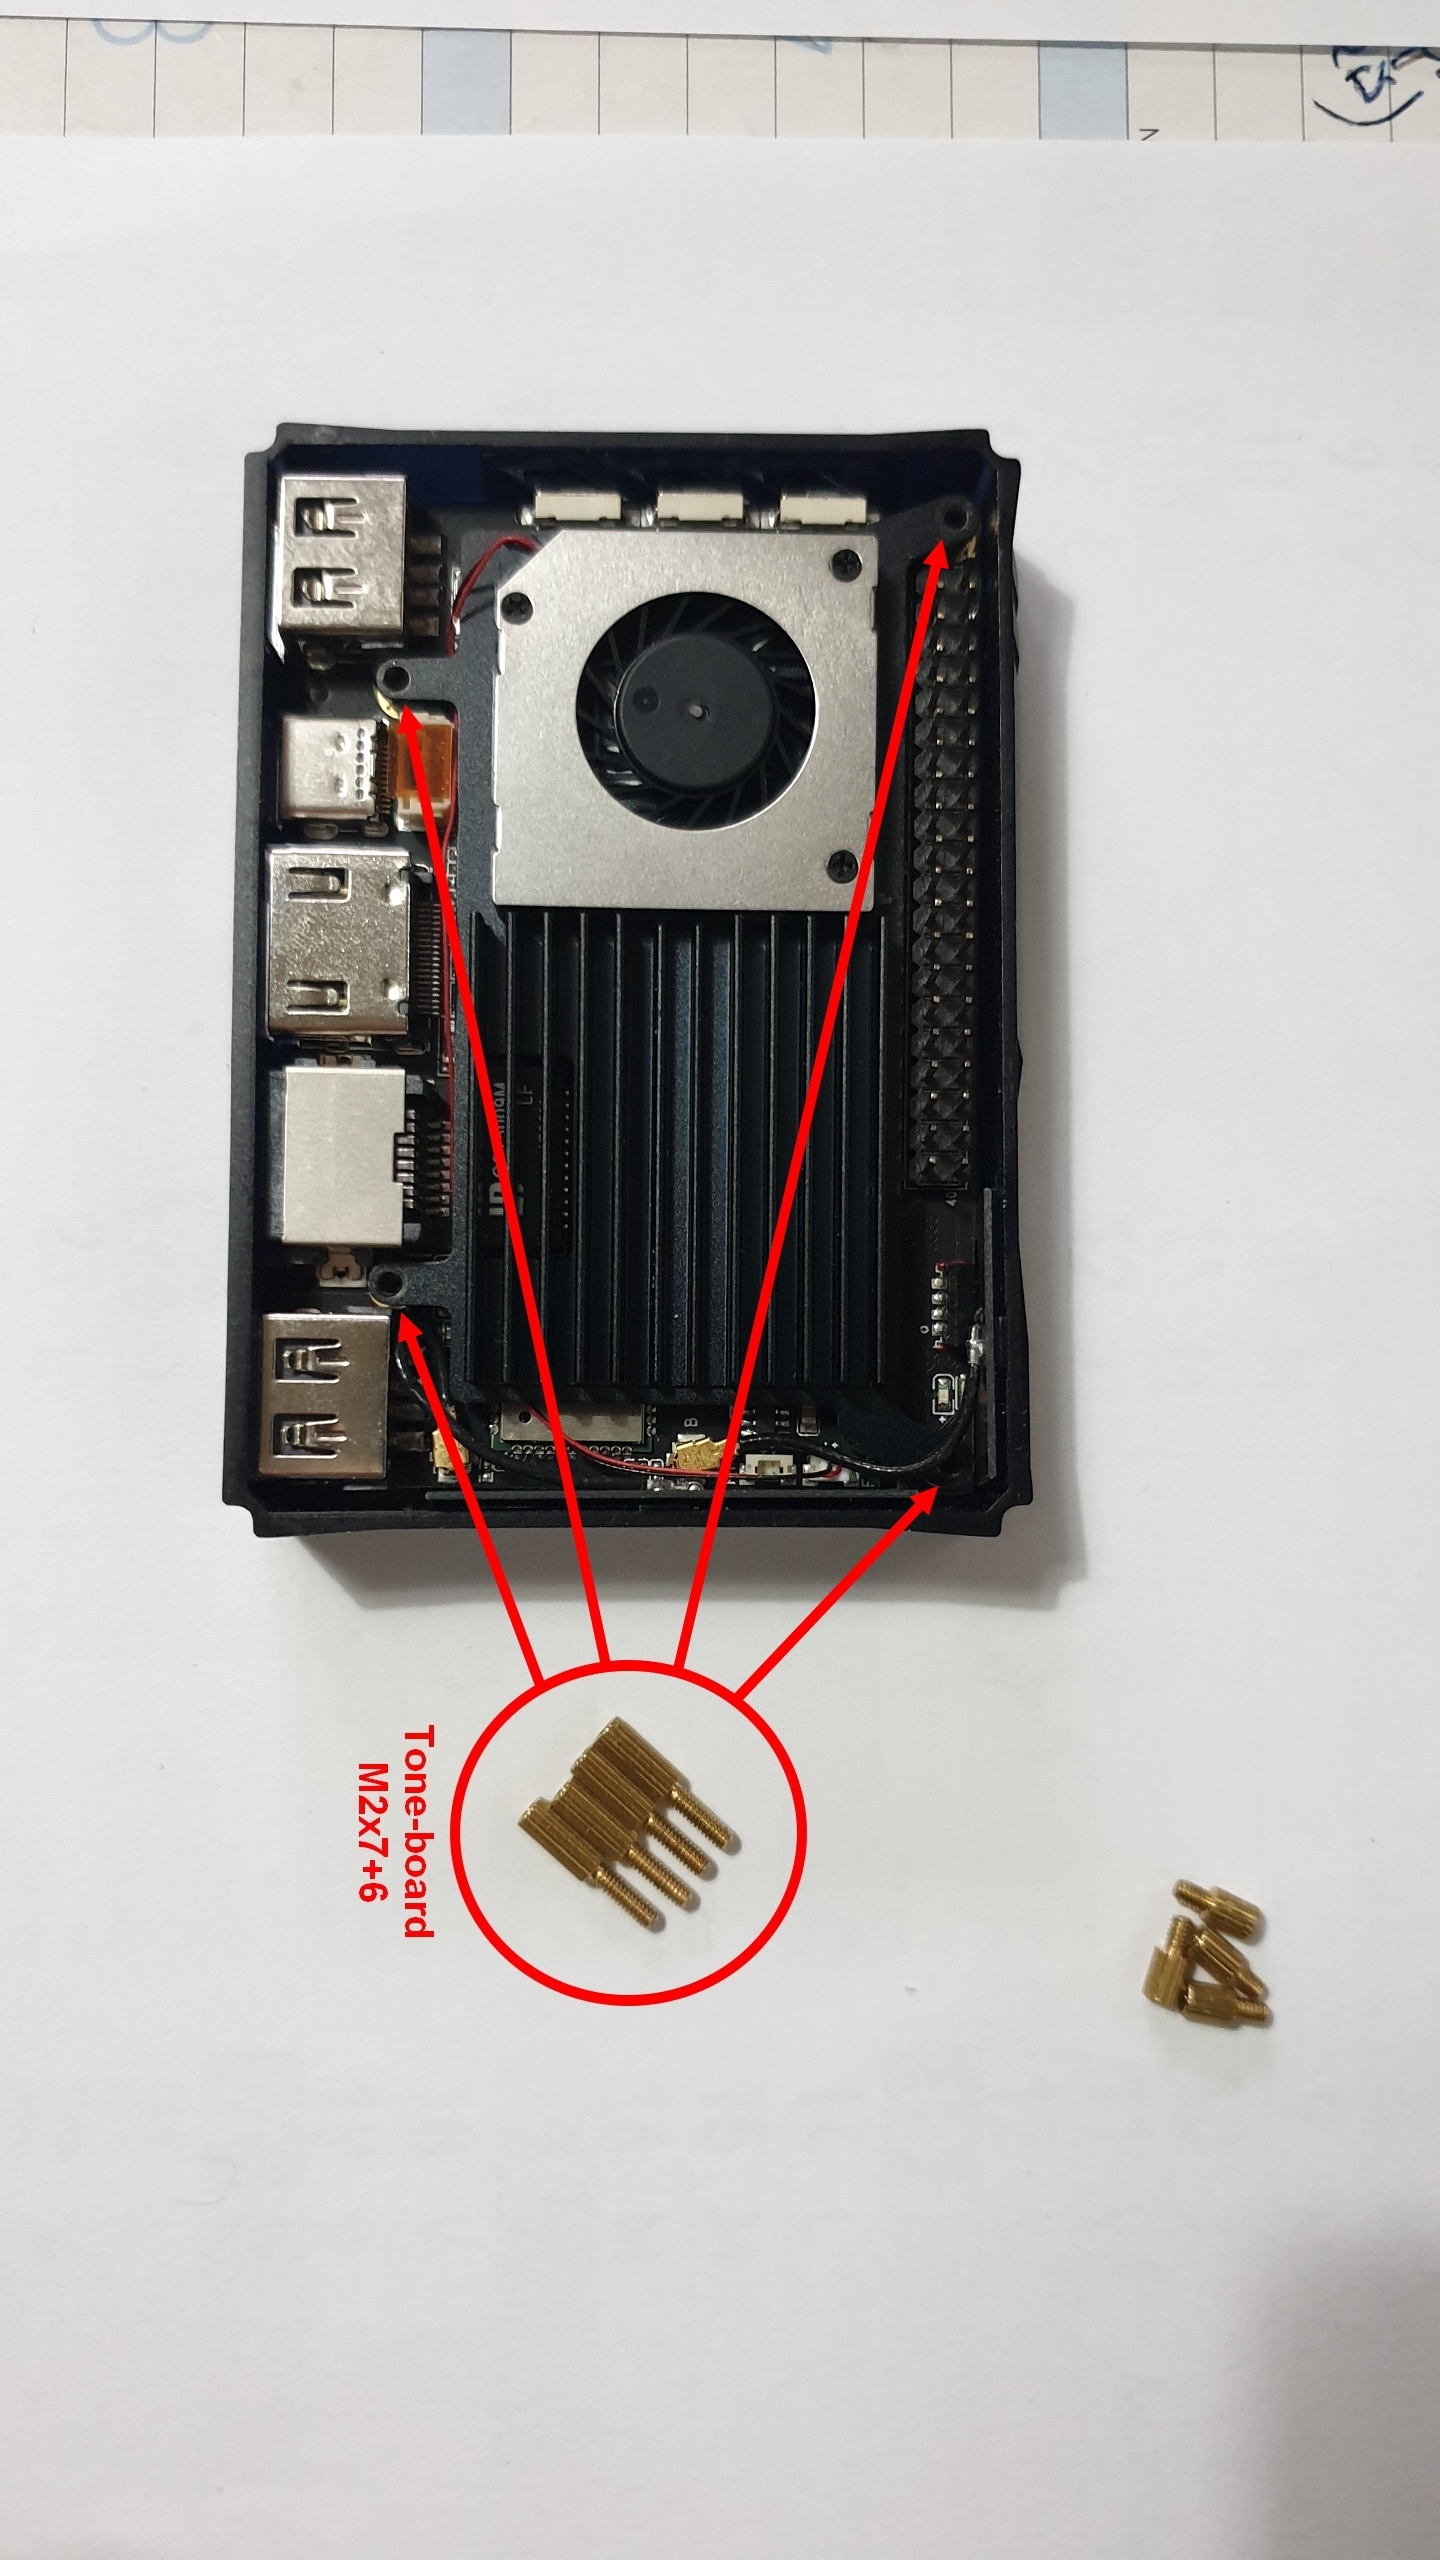
In TONE-BOARD parts I only used M2x7+6 brass standoff parts.
In DIY-CASE parts I only used screws …
CHAPTER THREE - ORDERING MISSING PARTS :
So I needed to order others parts to mount boards and case togather… (list at the end of this topic)
CHAPTER FOUR - MOUNTING :
To fix VIM2 in DIY-CASE centralr module,
use TONE-BOARD M2x7+6 brass standoff parts and screw them through the VIM2 heat sink to the DIY-CASE center module.
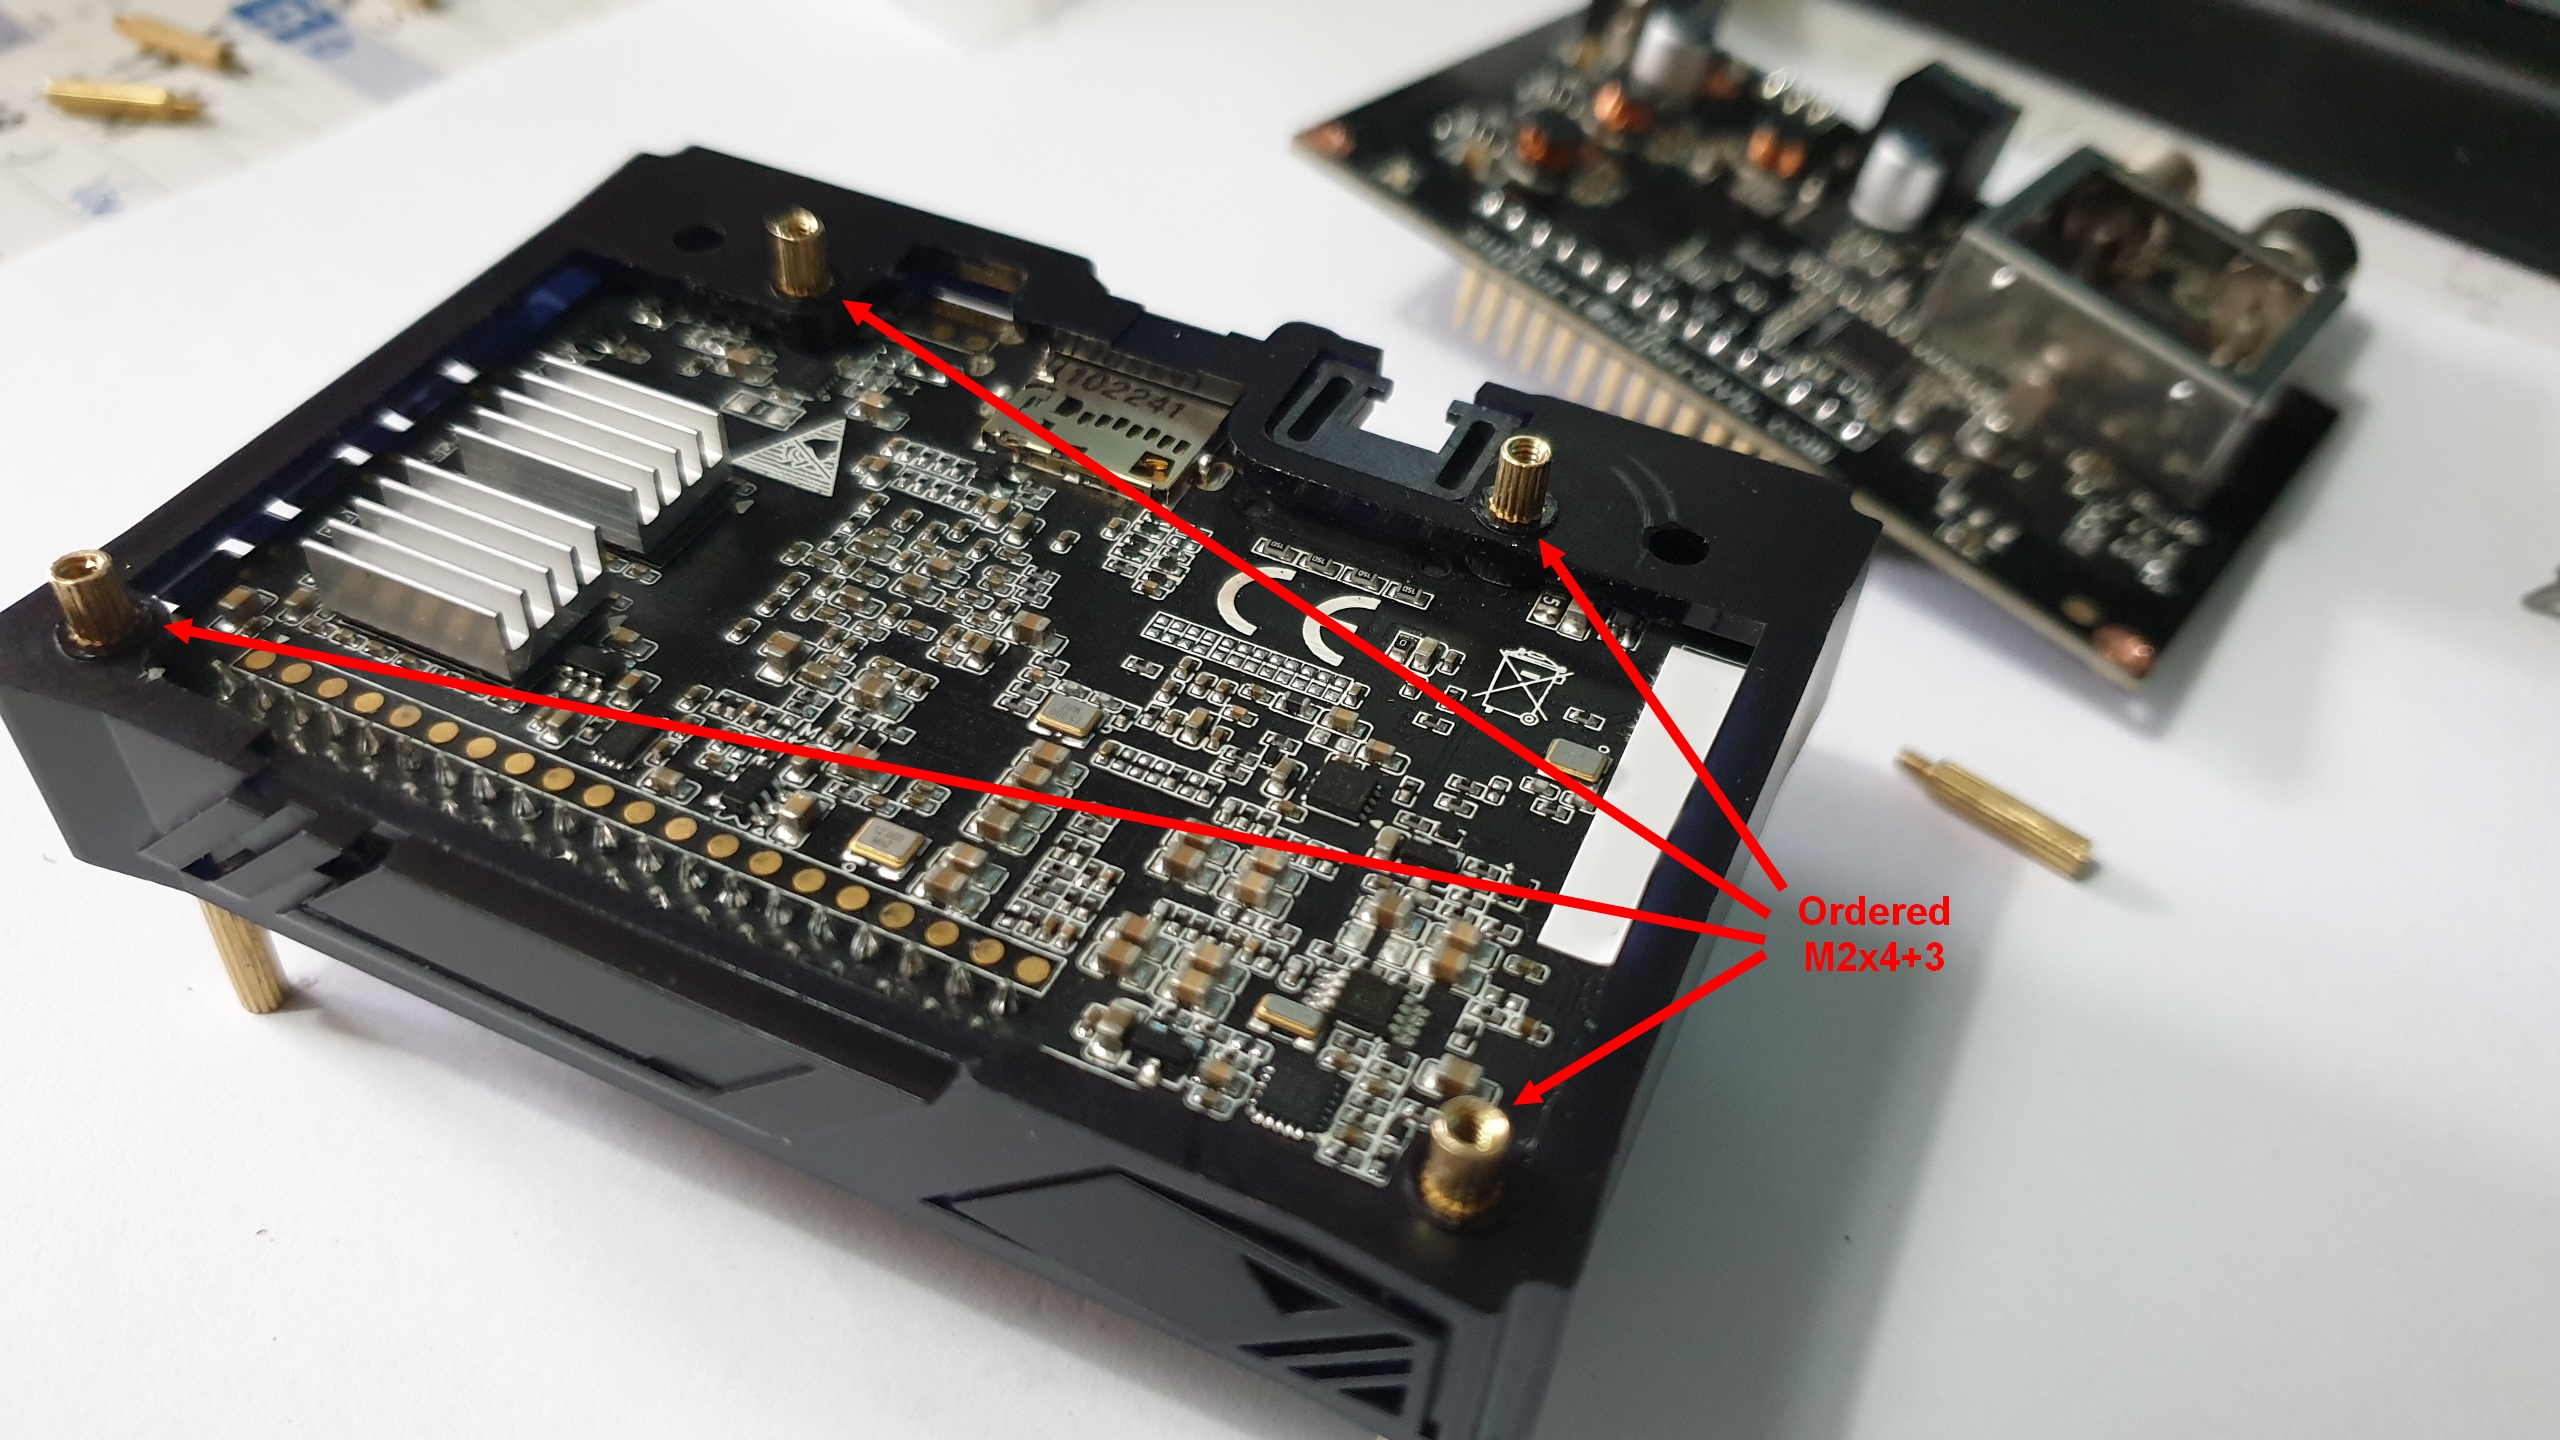
To fix TONE-BOARD on VIM2, DIY-CASE bloc,
use ordered M2x4+3 brass standoff parts …
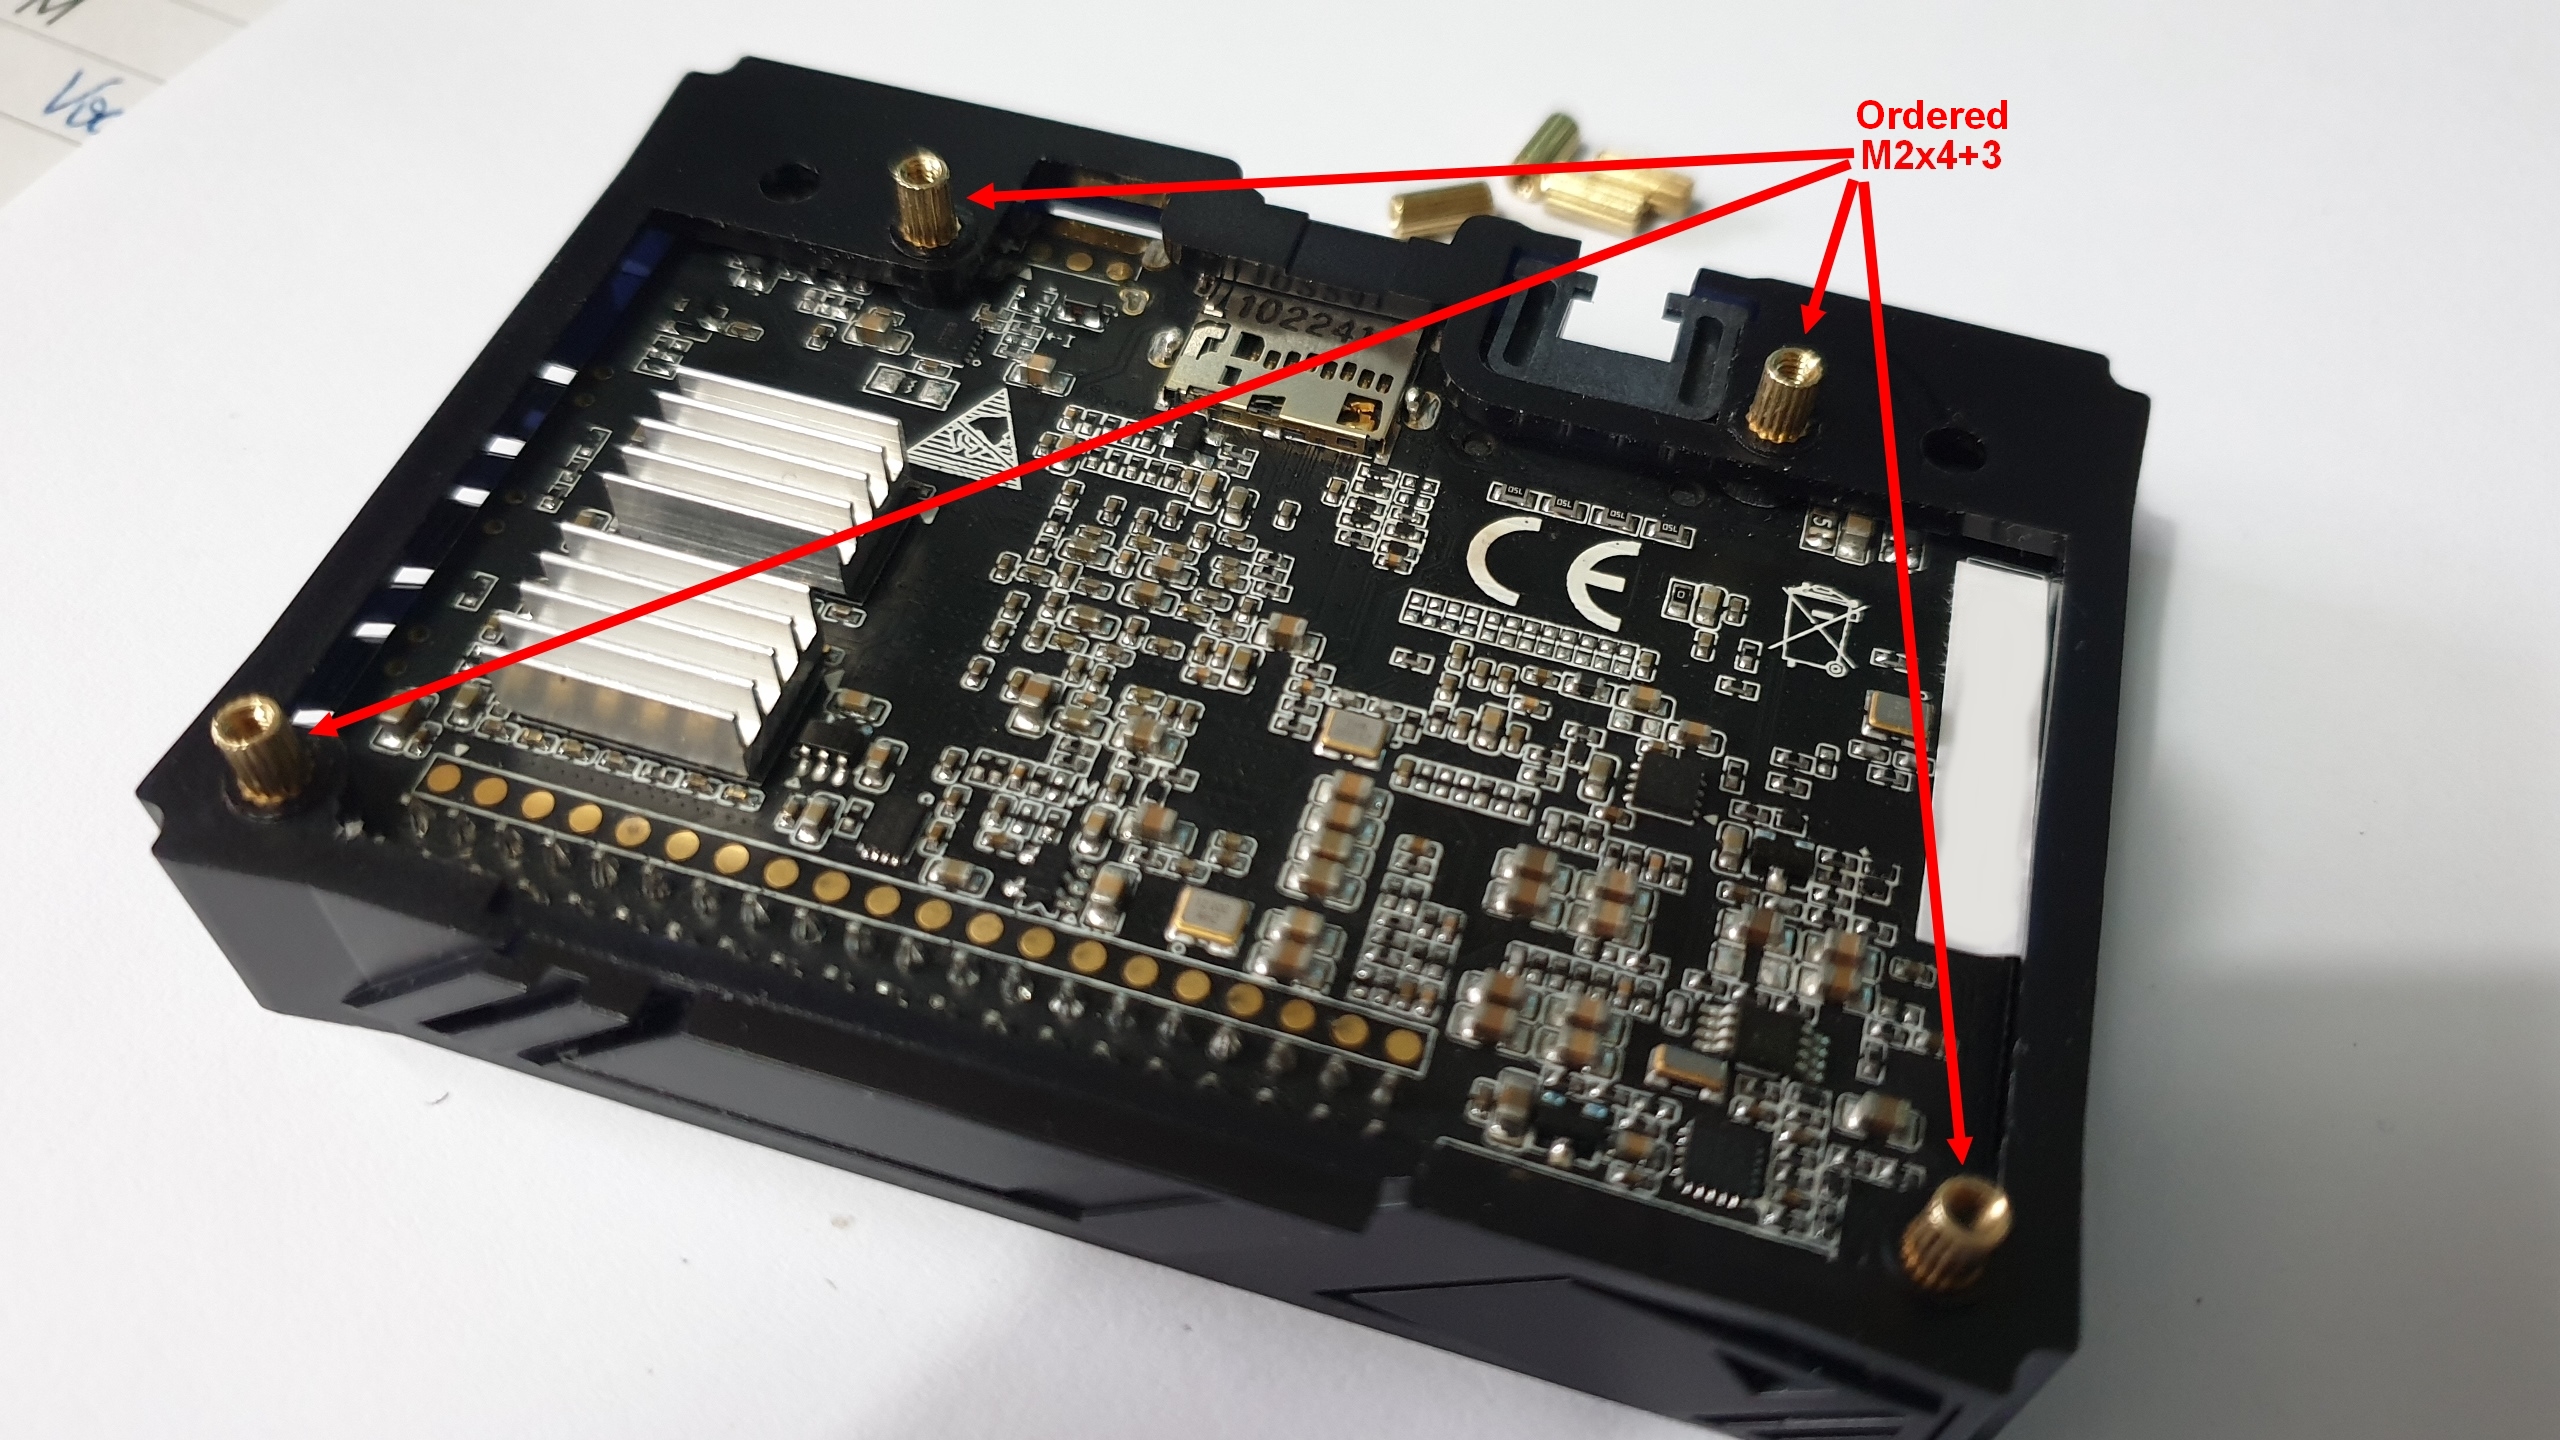
I’ve noticed that M2x4+3 standoff don’t fit exactly on DIY-CASE central module.
So I decided to file the threaded part of the TONE-BOARD M2x7+6 part…
/!\ IMPORTANT ADVICE :
Pay attention !!!
I’ve made a big mistake that made me lose time and needed extra work !!!
Don’t do that !!!
It’s an error !!!
TONE-BOARD M4x7+6 parts only screw 1.5mm in DIY-CASE center module !!!
Only the threaded part of the ordered M2x4+3 brass standoff MUST be filed to perfectly fit the DIY-CASE center module.
I repeat, ONLY ordered M2x4+3 standoff MUST have thier threaded part to be filed, NOT the TONE-BOARD M4x7+6 part !!!
Fortunatly, I’ve ordered M2x7 stanoff parts and found M2x20 screws in my garage !!!
So I cut 10mm threaded part of M2x20 screws, screwed them through the VIM2 heat sink to the DIY-CASE center module, then screwed the M2x7 standoff part on the 10mm threaded after putting some blocking varnish on it !!! The error has been corrected !
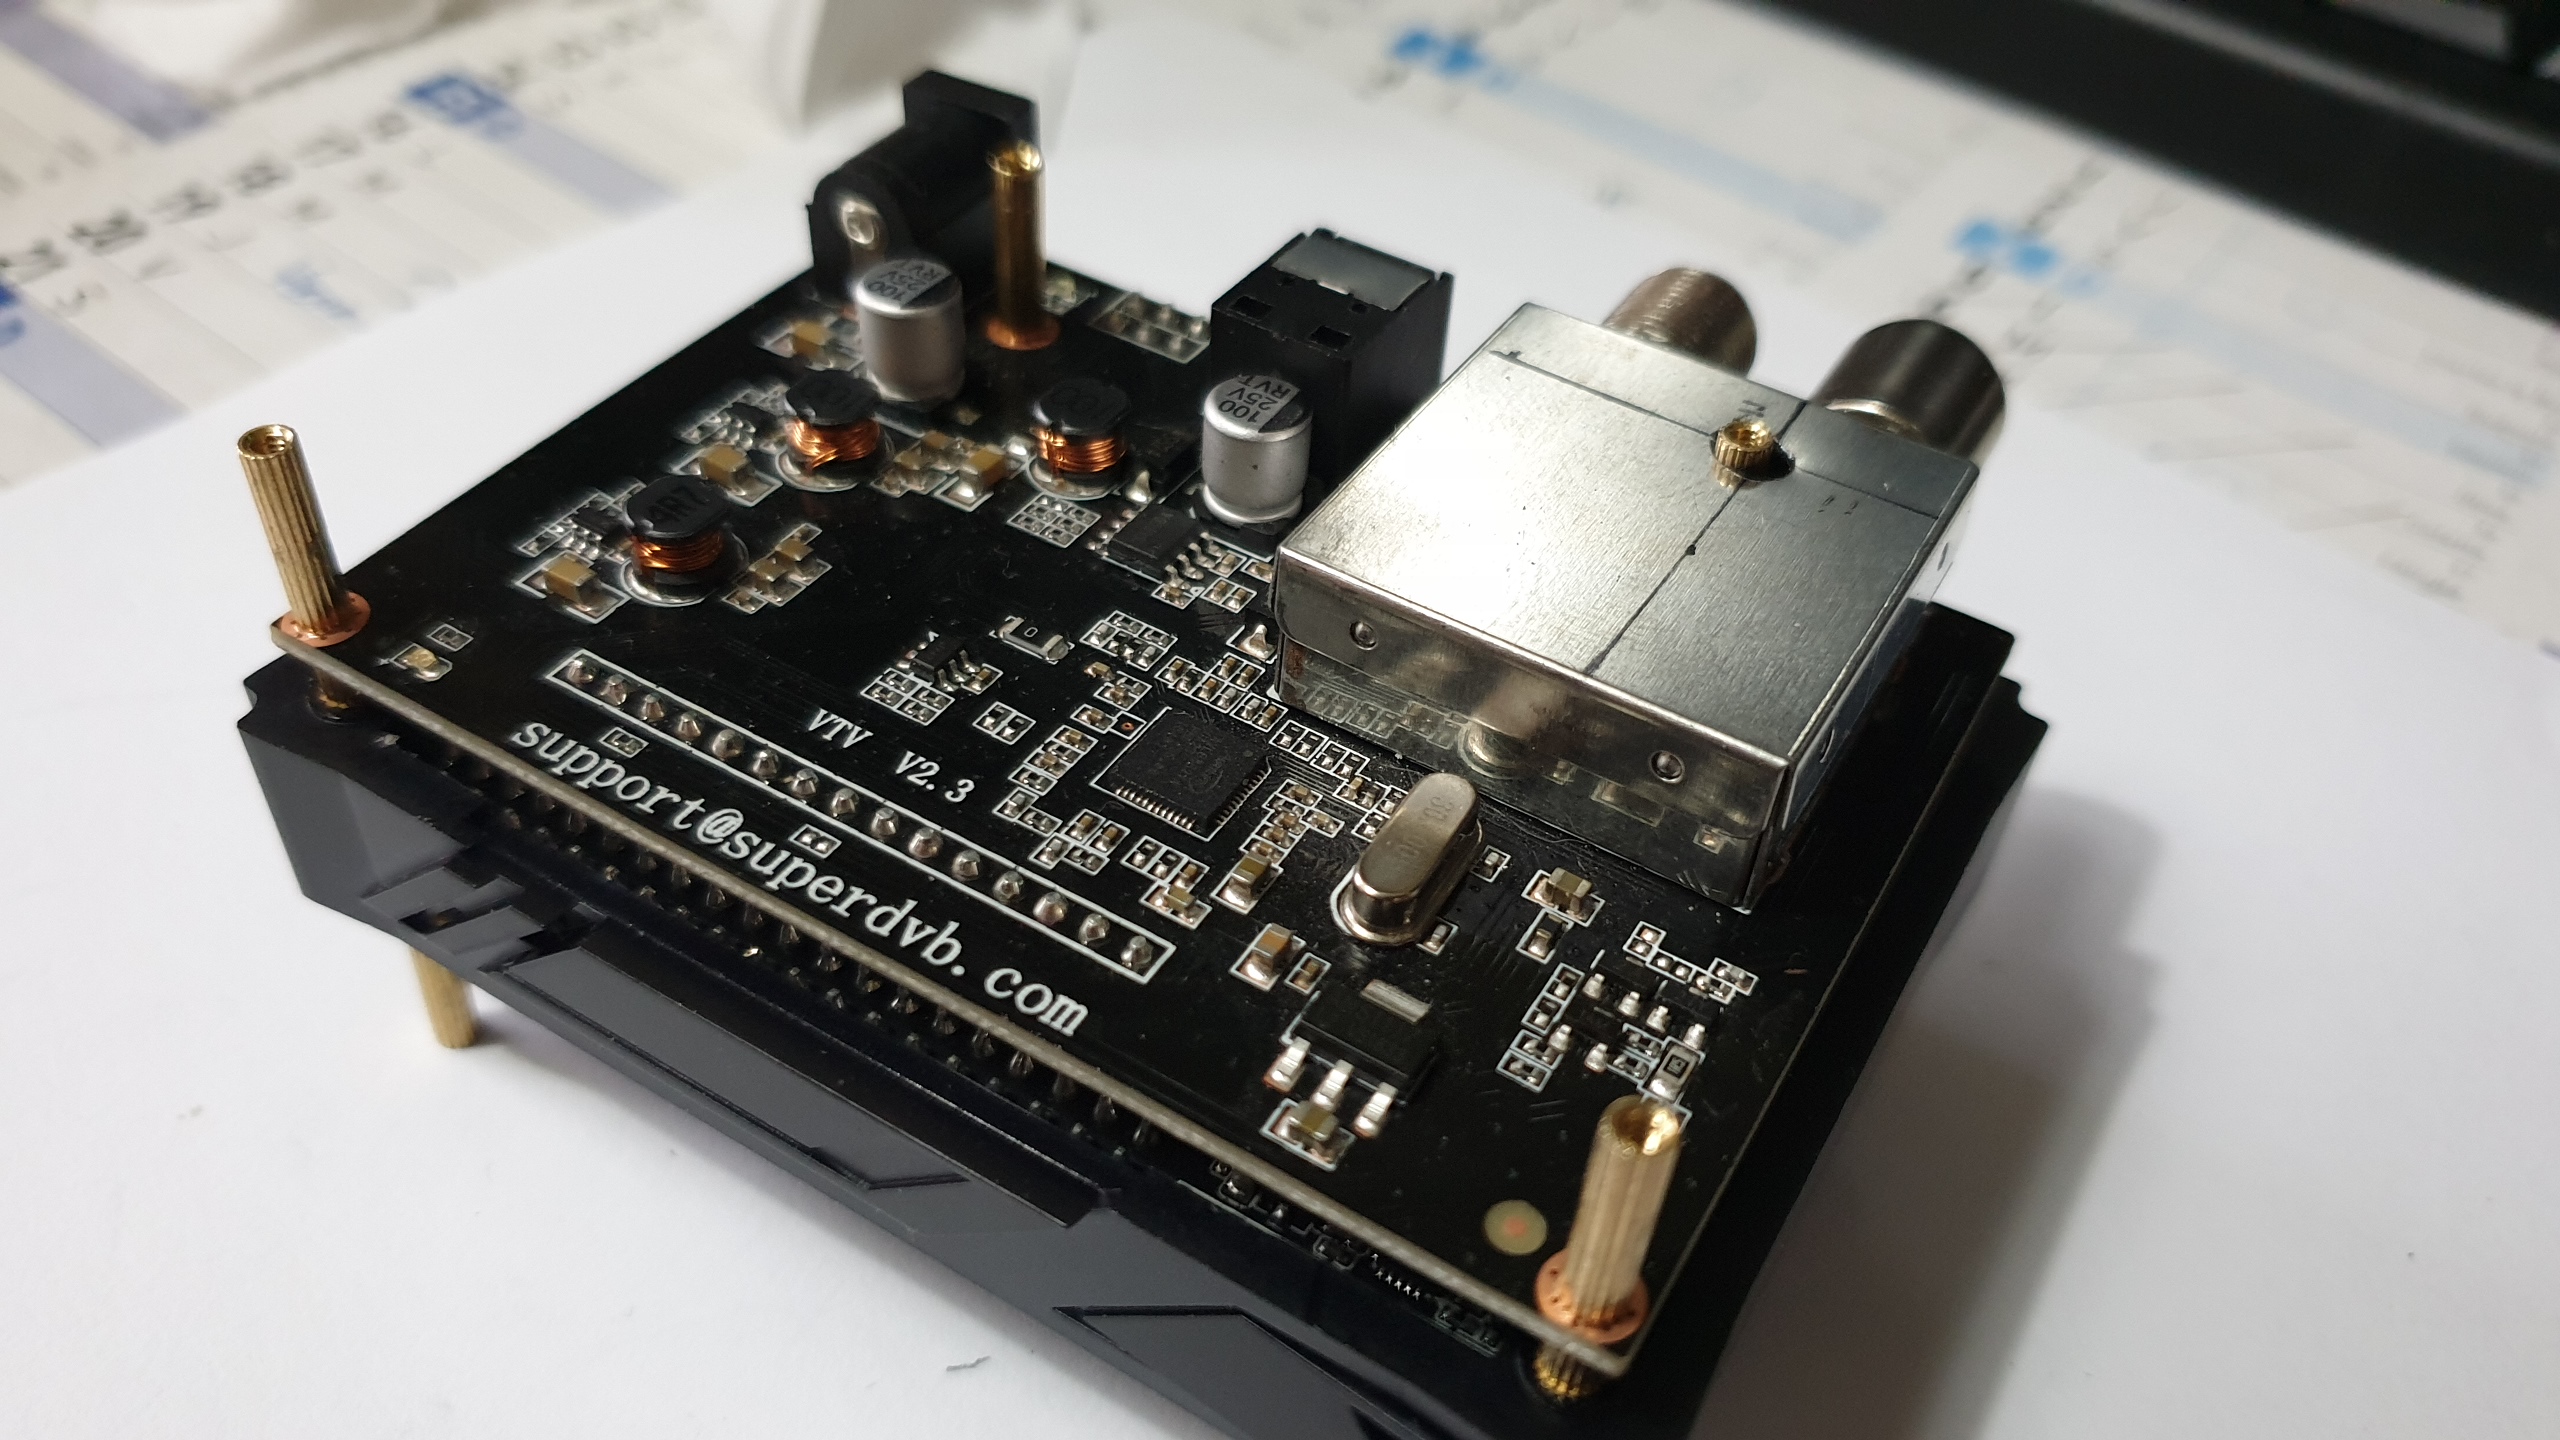
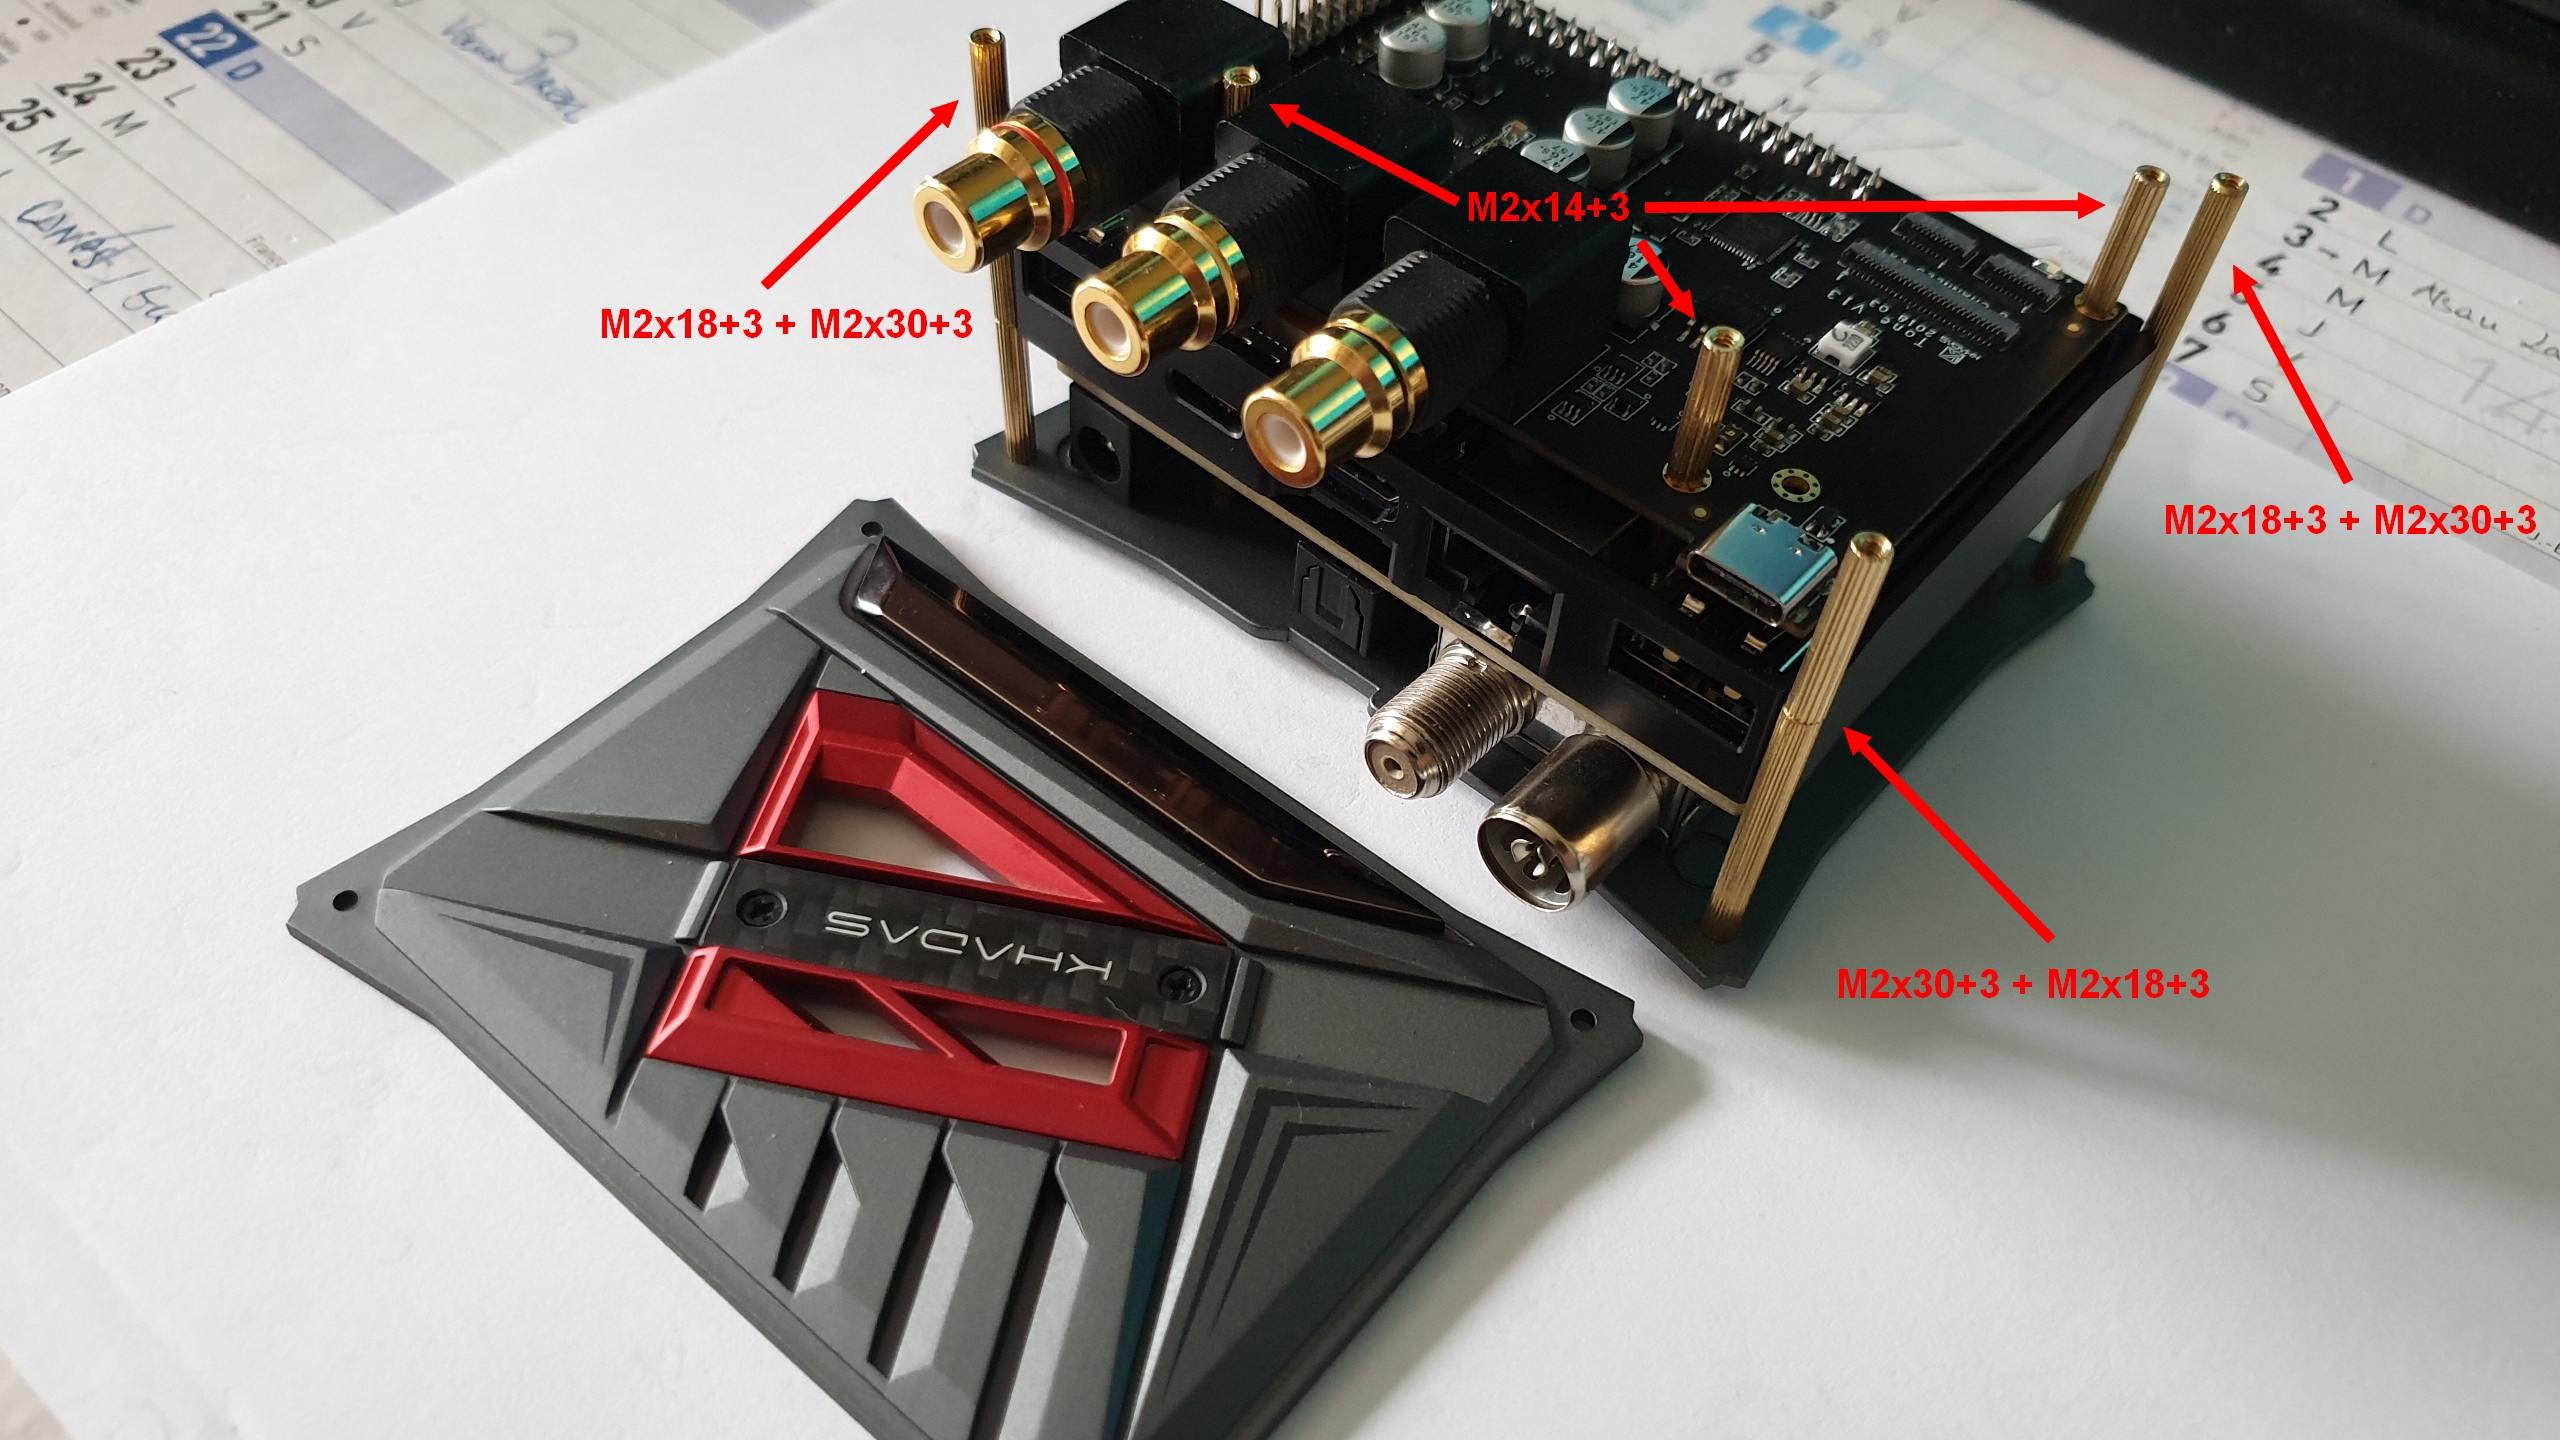
Next TONE-BOARD can be mounted on VIM2.
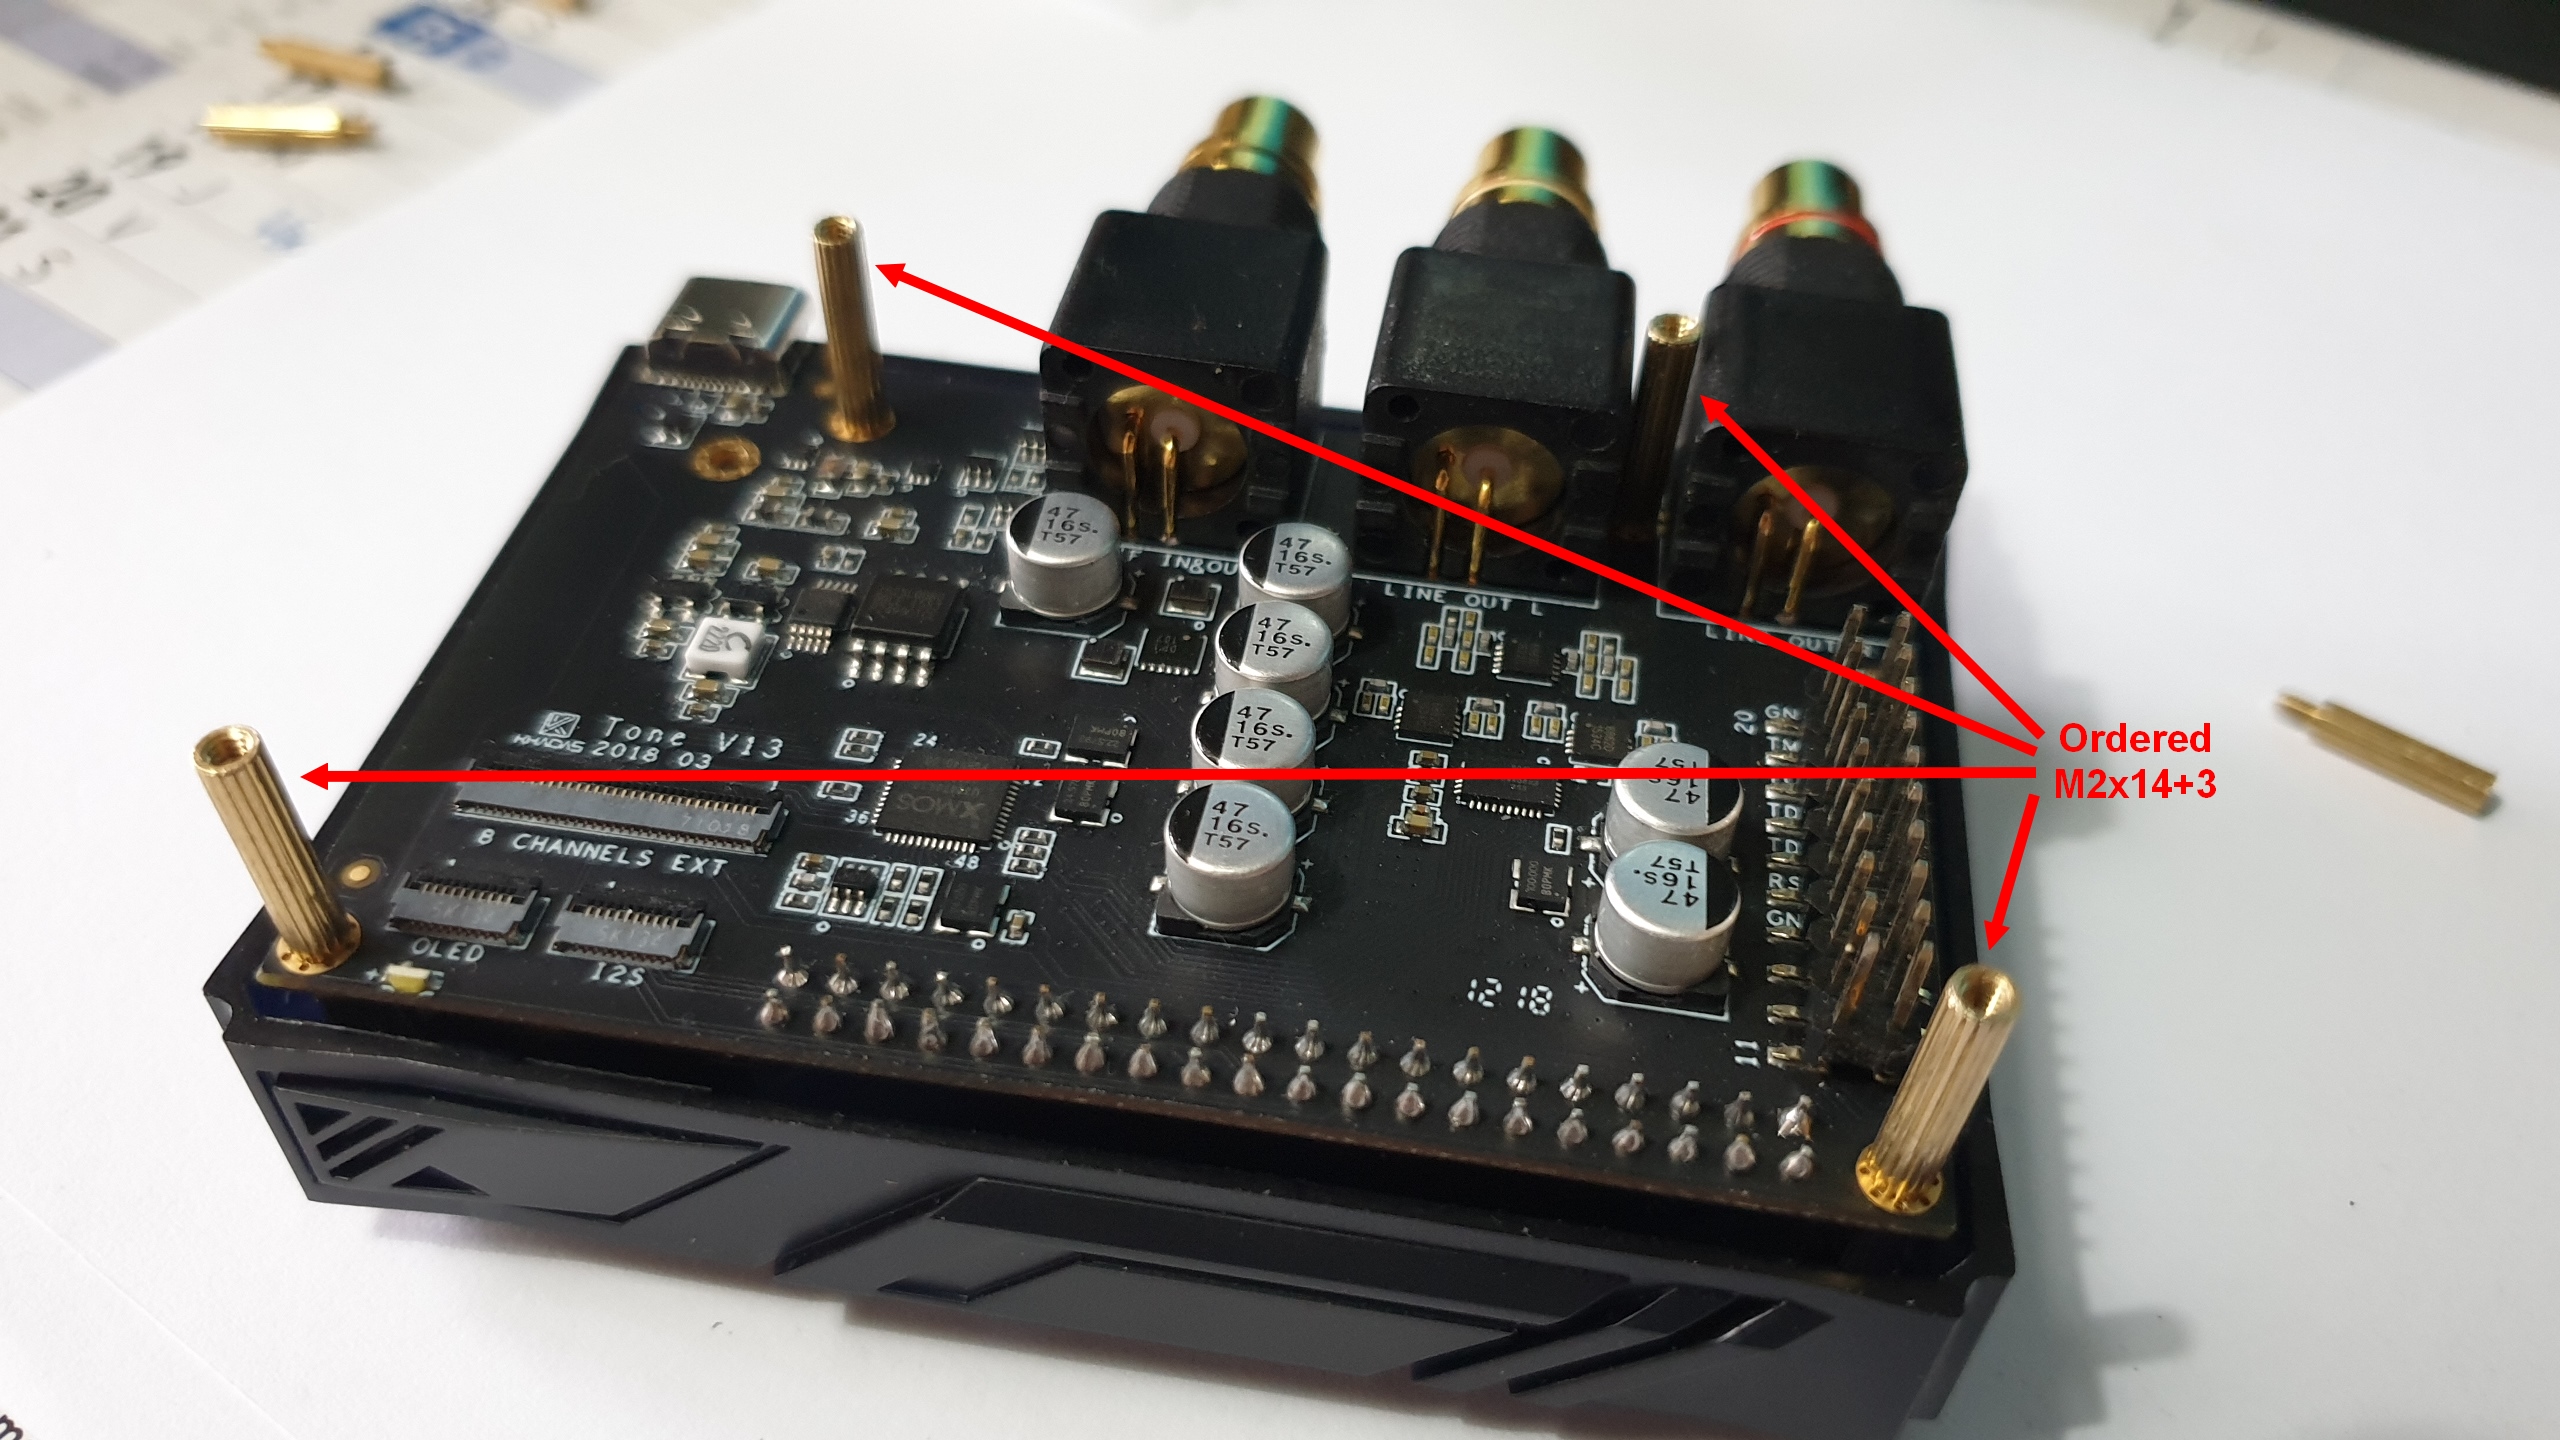
Use ordered M2x14+3 brass standoff and screw then into M2x7+6 TONE-BOARD parts screwed on VIM2 heat sink side.
Now it’s the VTV board to take place on VIM2.
Before doing this, cover of the DVB Sat & Terrestrial VTV plug module have to be removed.
Use ordered M2x12+3 brass standoff and screw them into ordered M2x4+3 parts on DIY-CASE center module side.
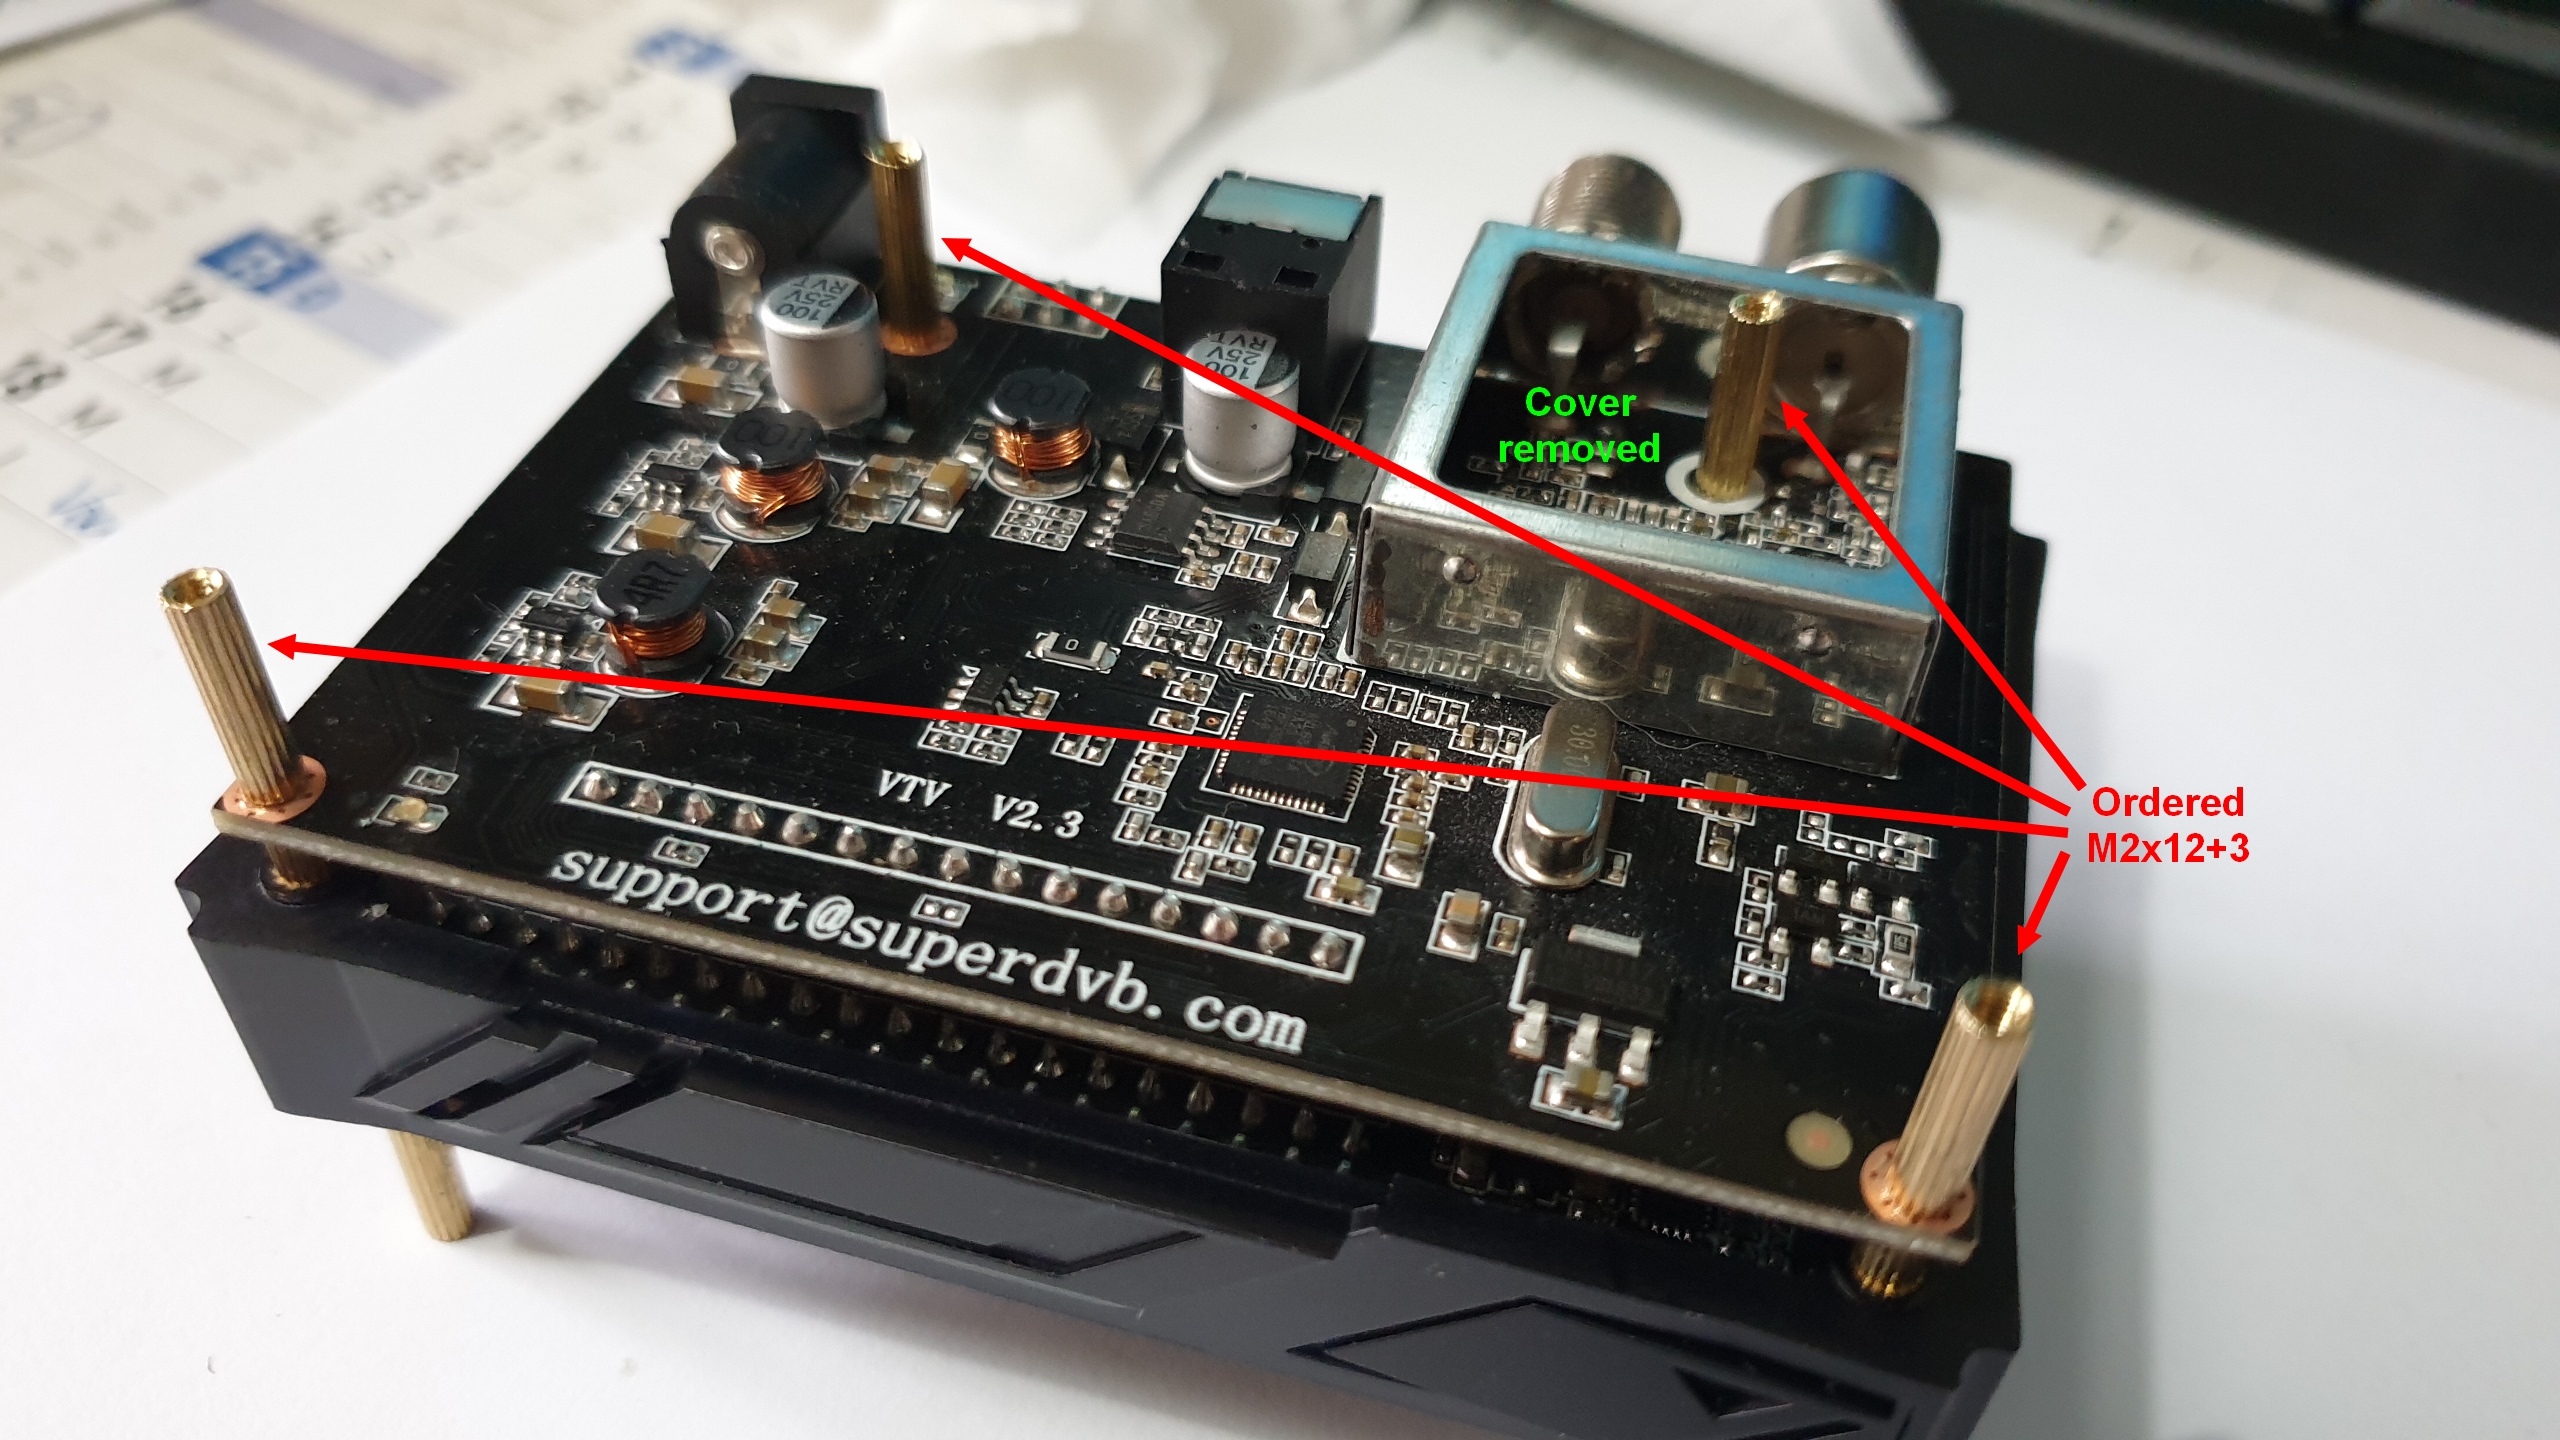
Trace a 11.8mm line from the side of the DVB Sat & Terrestrial VTV plug-in module cover and a 7.5mm line. at the cross-pont, drill a hole to let the M2x12+3 brass standoff to pass trough the cover
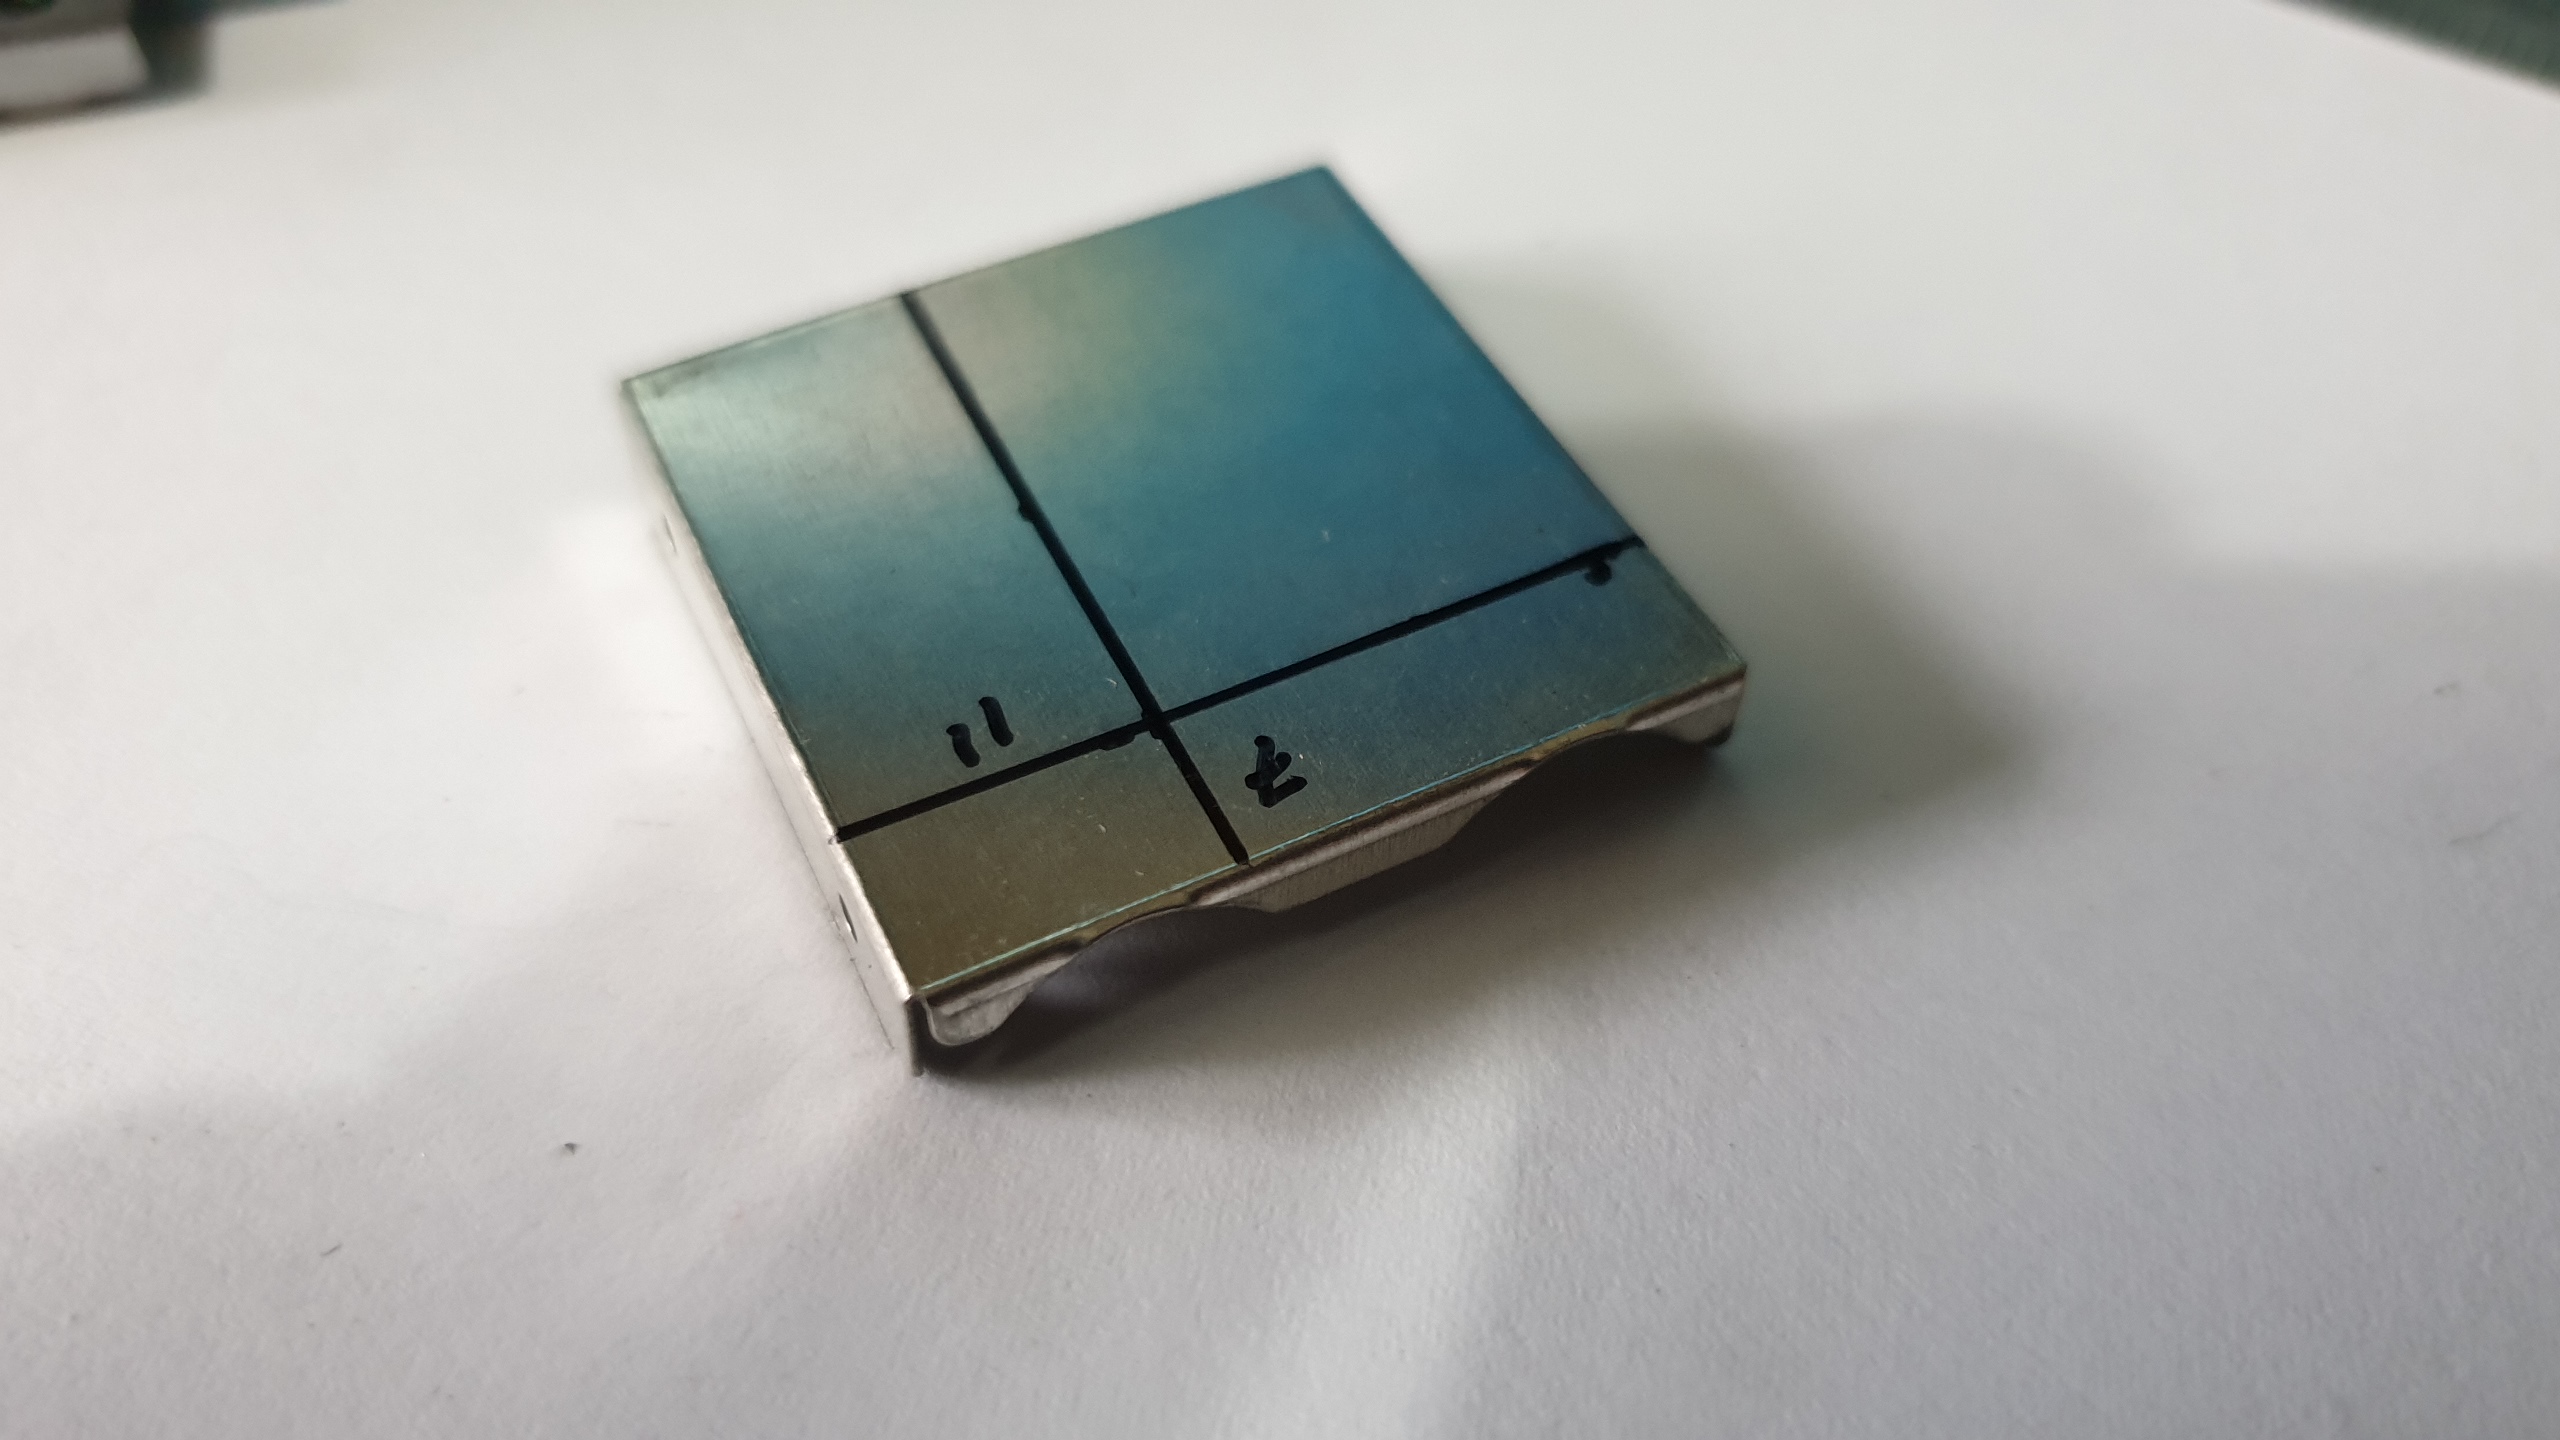

Note that the mesurements writen on the cover (11mm & 7mm) are wrong values !!!
==> Use 11.8mm and 7.5mm instead !
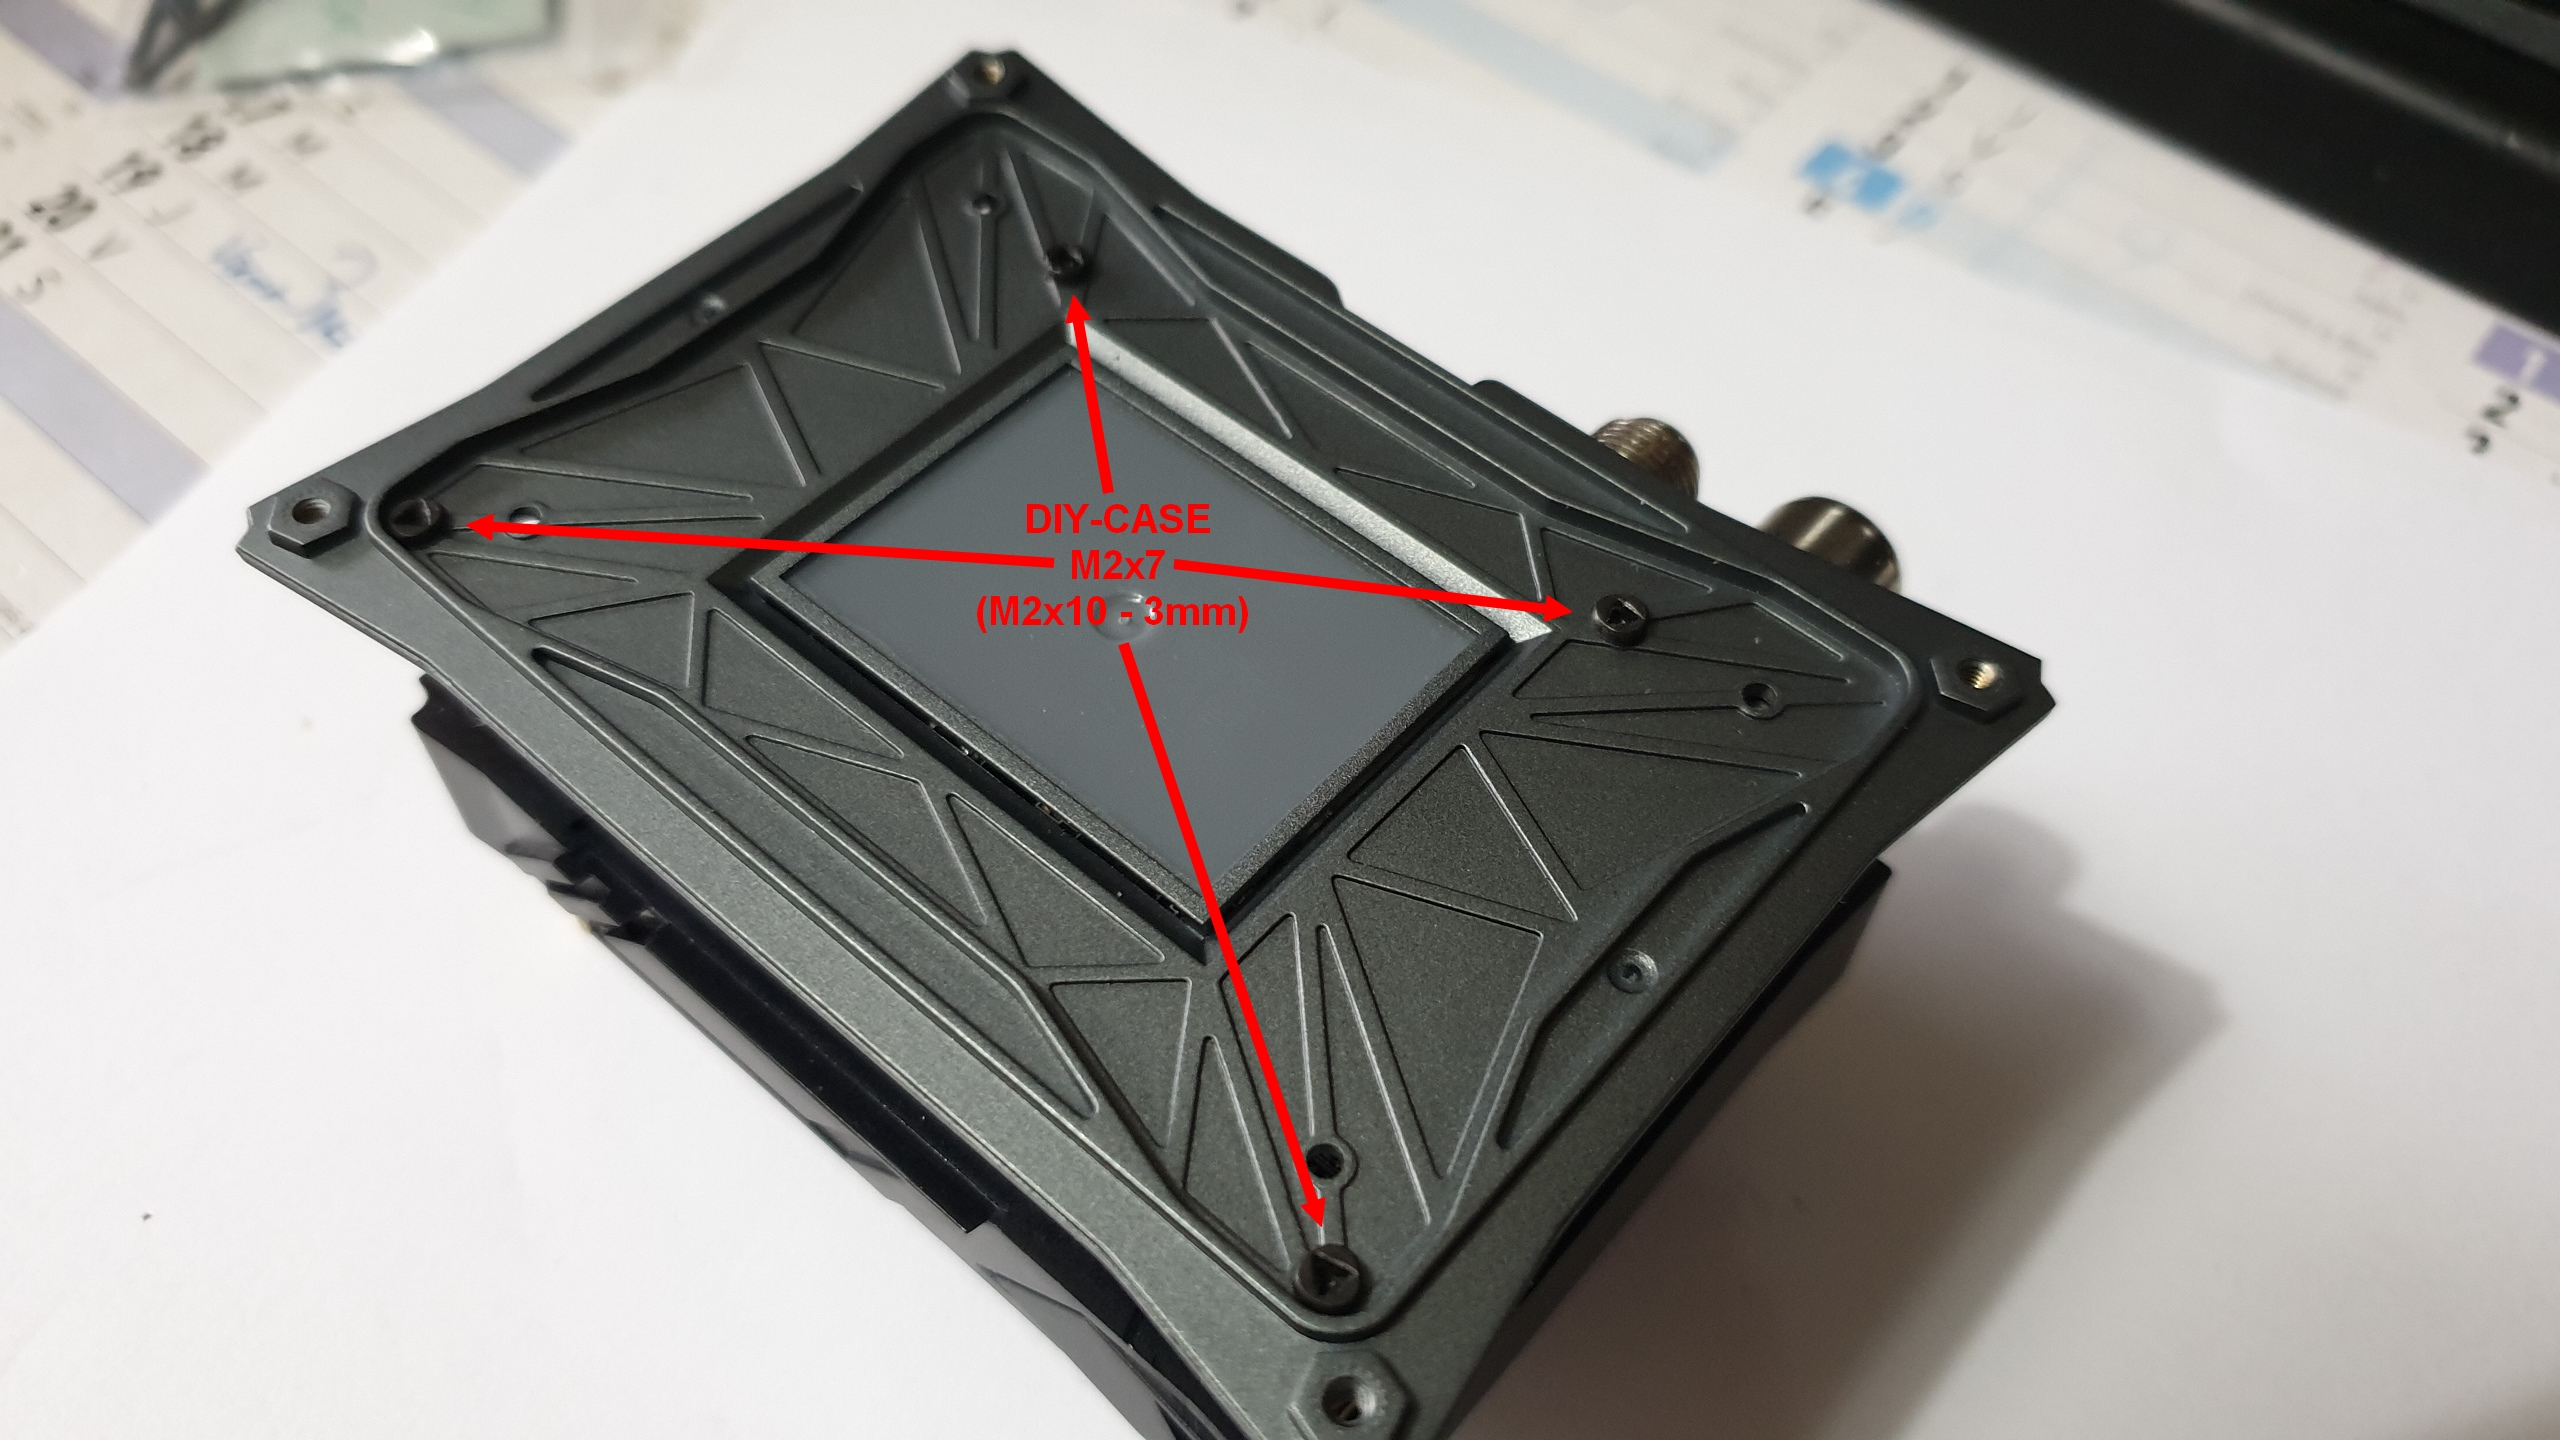
At this point, you have to do some cutting work…
Take DIY-CASE M2x10 screws and cut 3mm long…
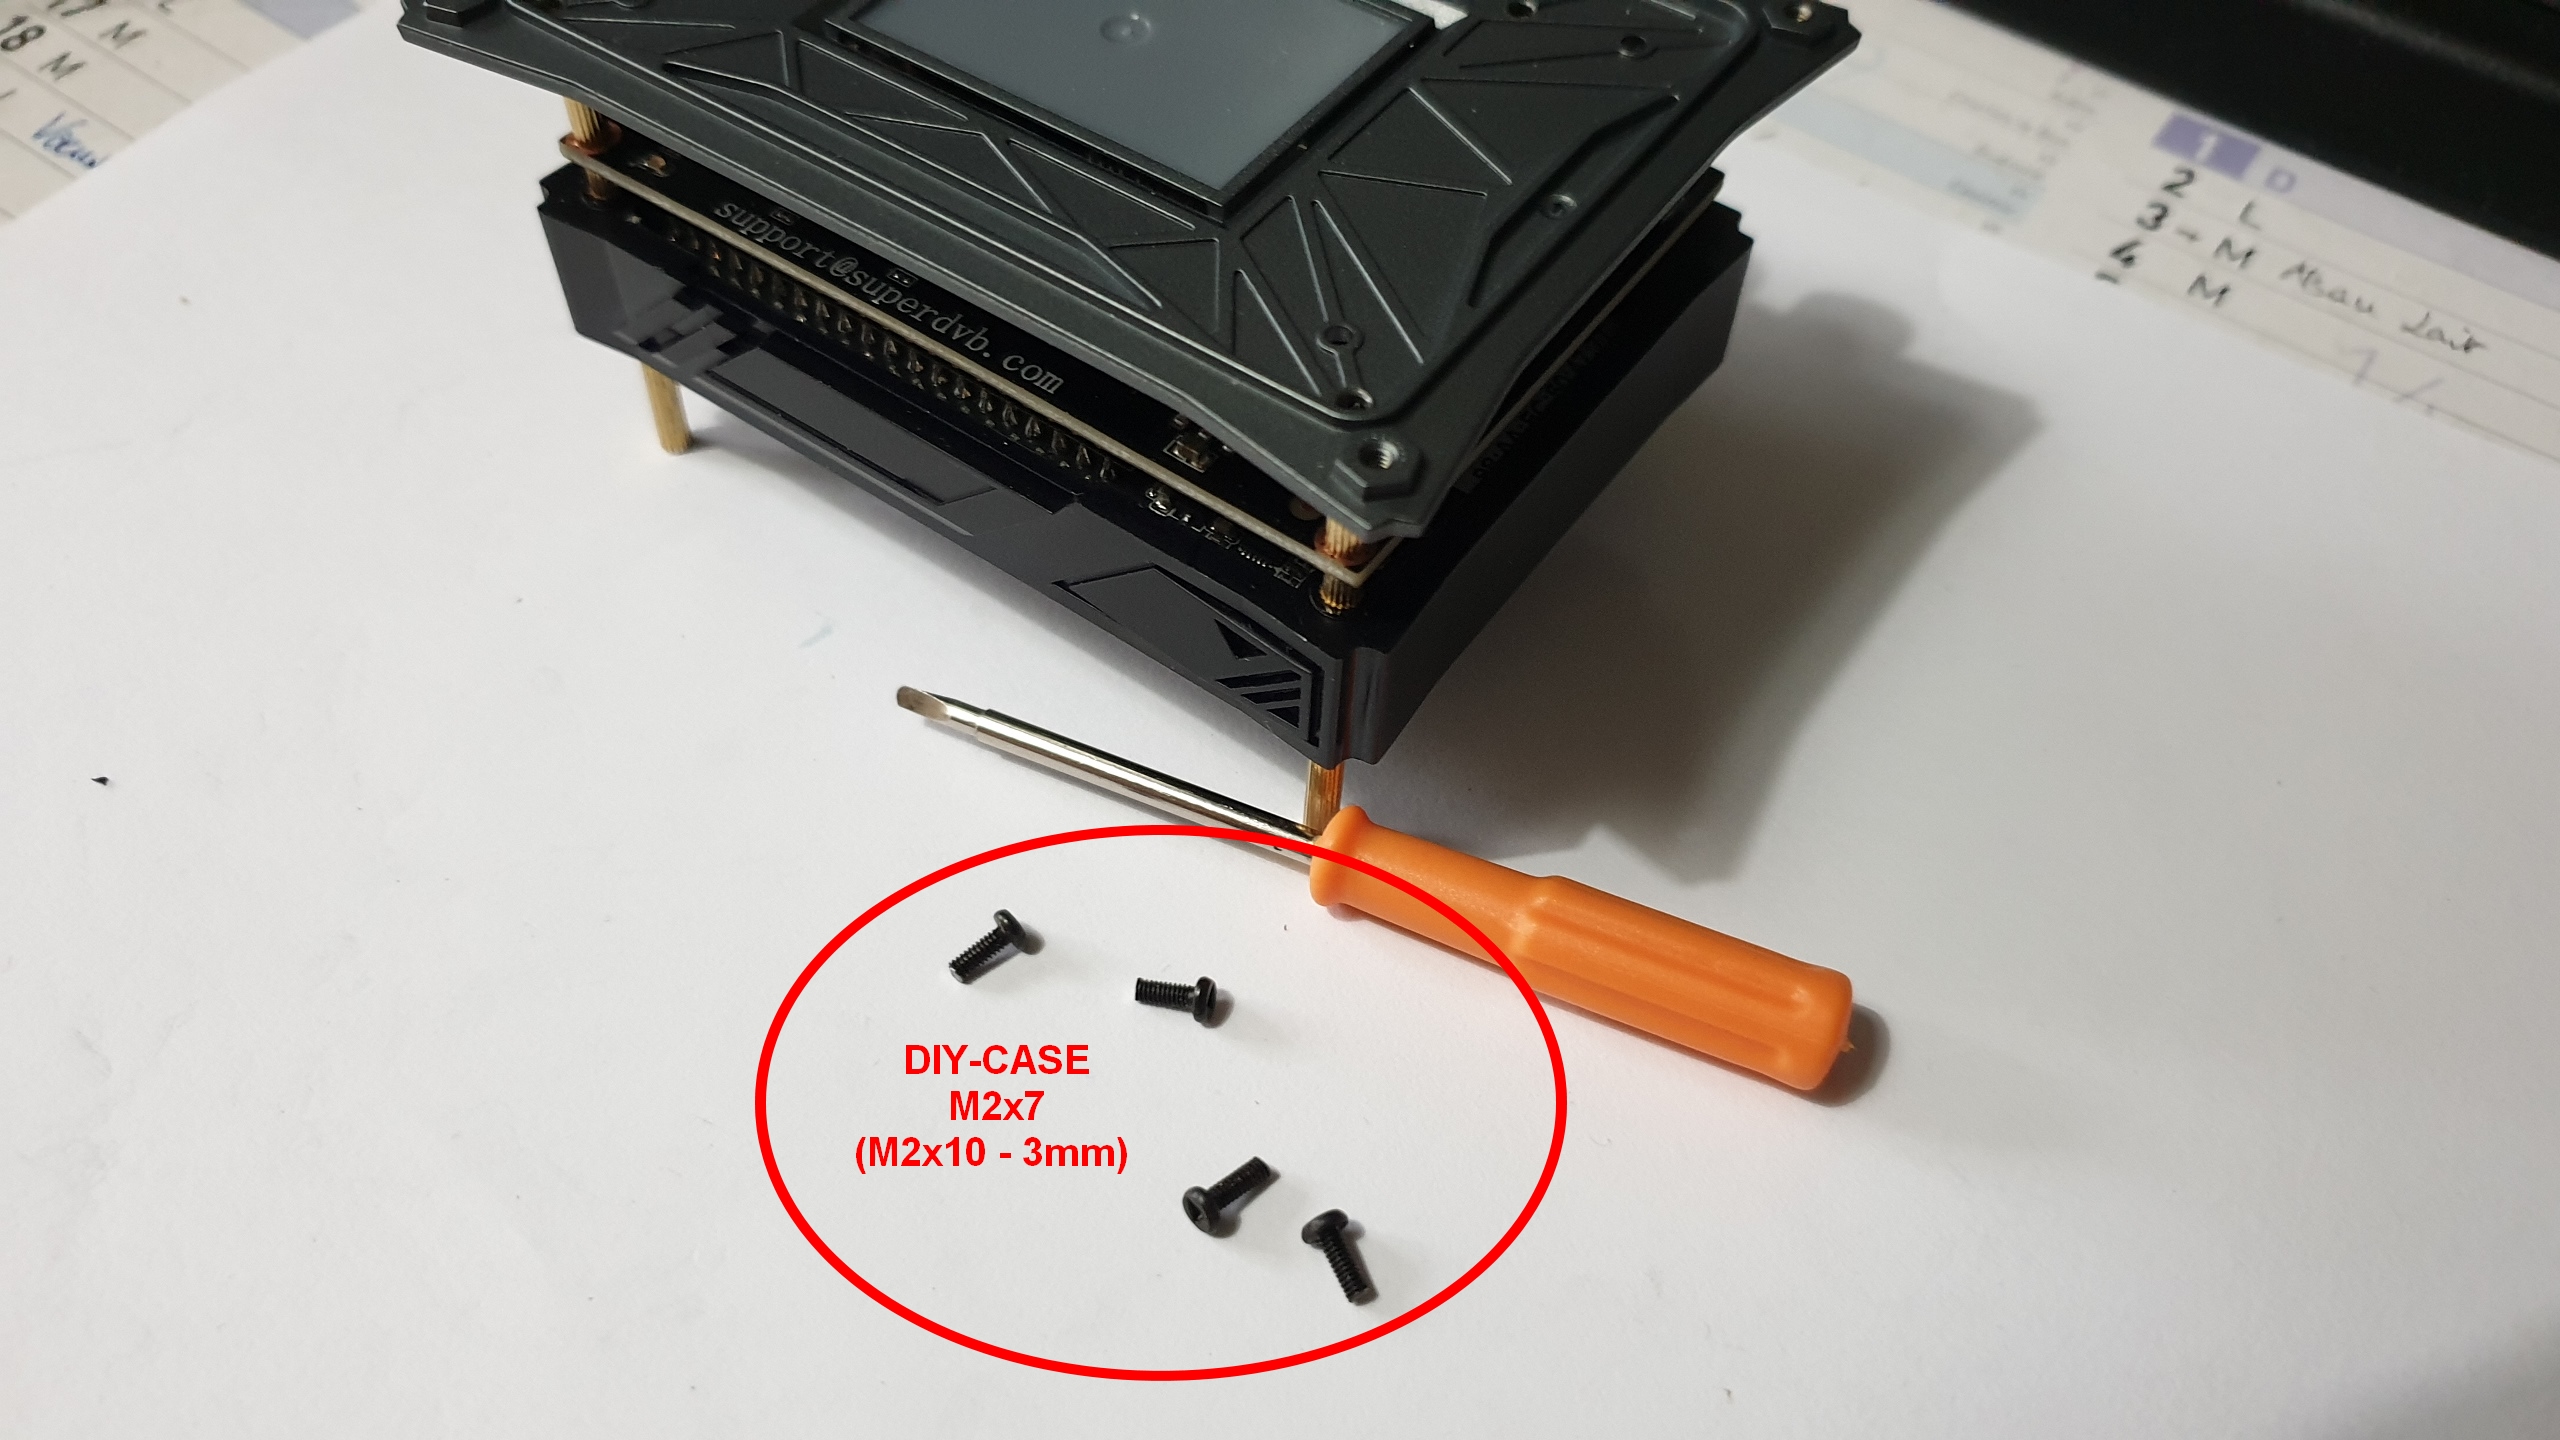
Place bottom DIY-CASE cover on ordered M2x12+3 brass standoff parts and screw these cutted M2x7 screws into the ordered M2x12+3 brass standoff on VTV side
Khadas DIY-CASE optional metal plate :
If ordered, Place metal plate onto bottom DIY-CASE cover, screw two ordered M2x4 CHC from inner DIY-CASE cover side to the metal plate.
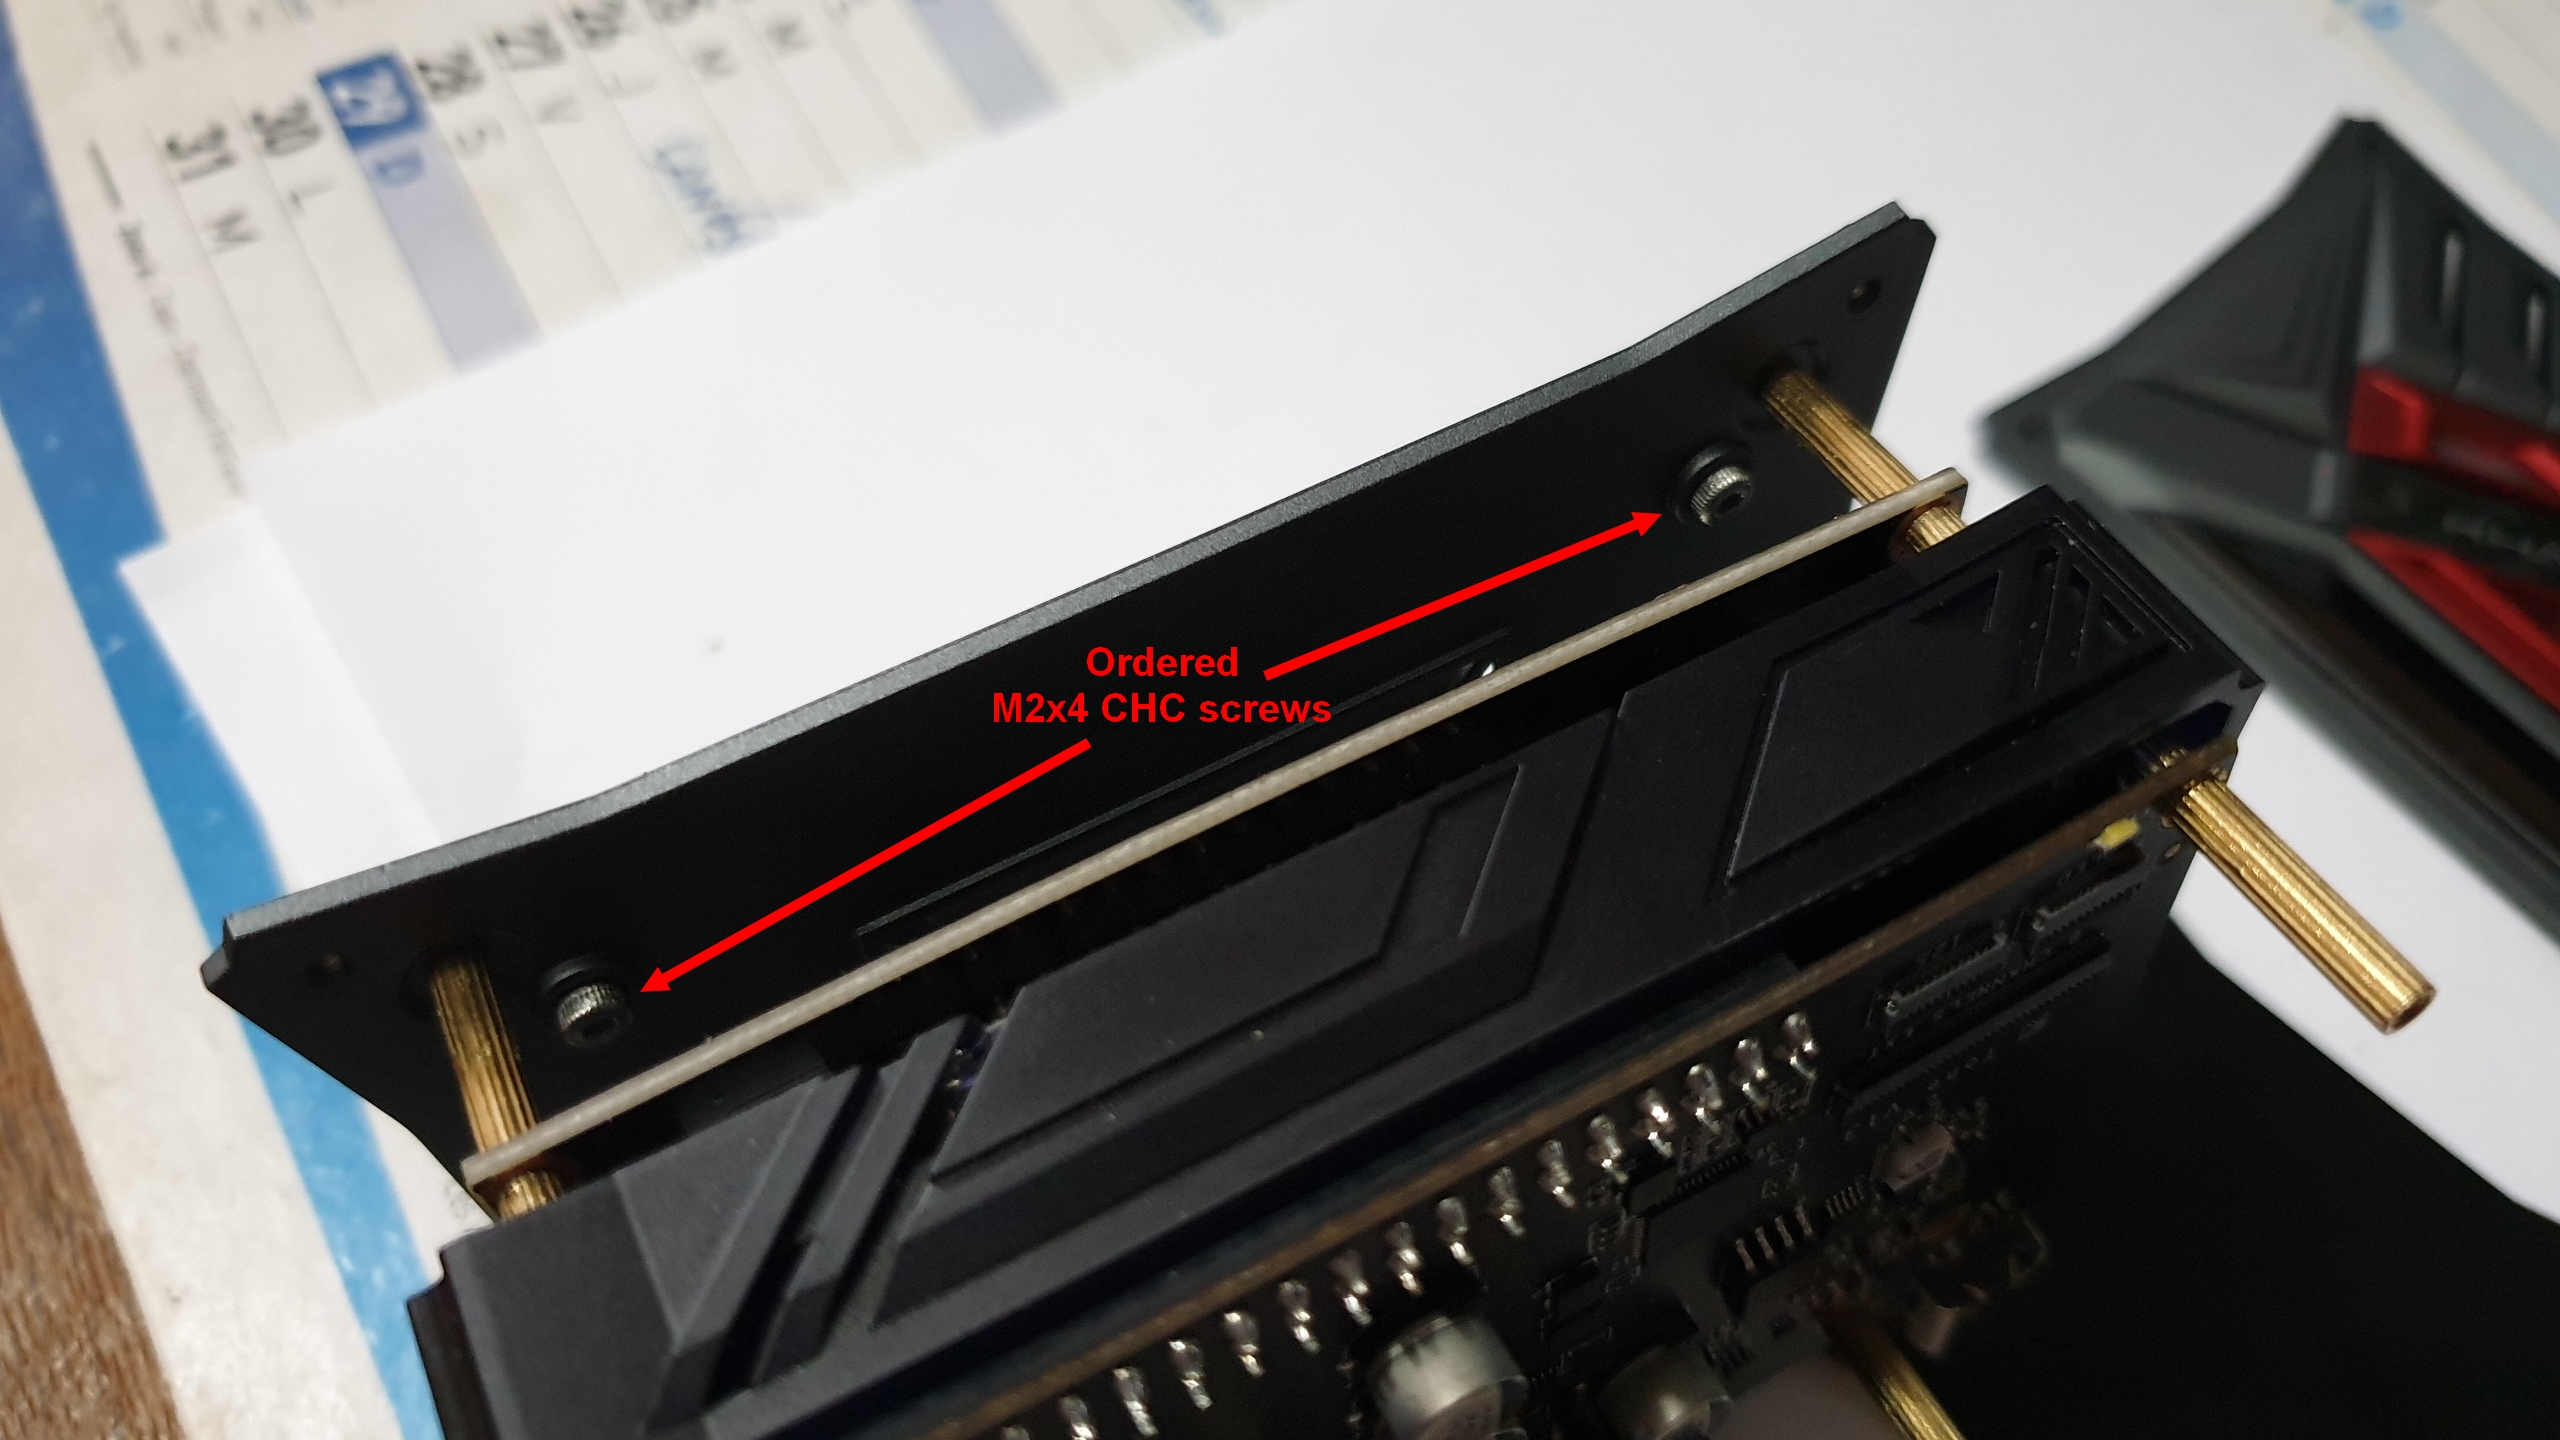
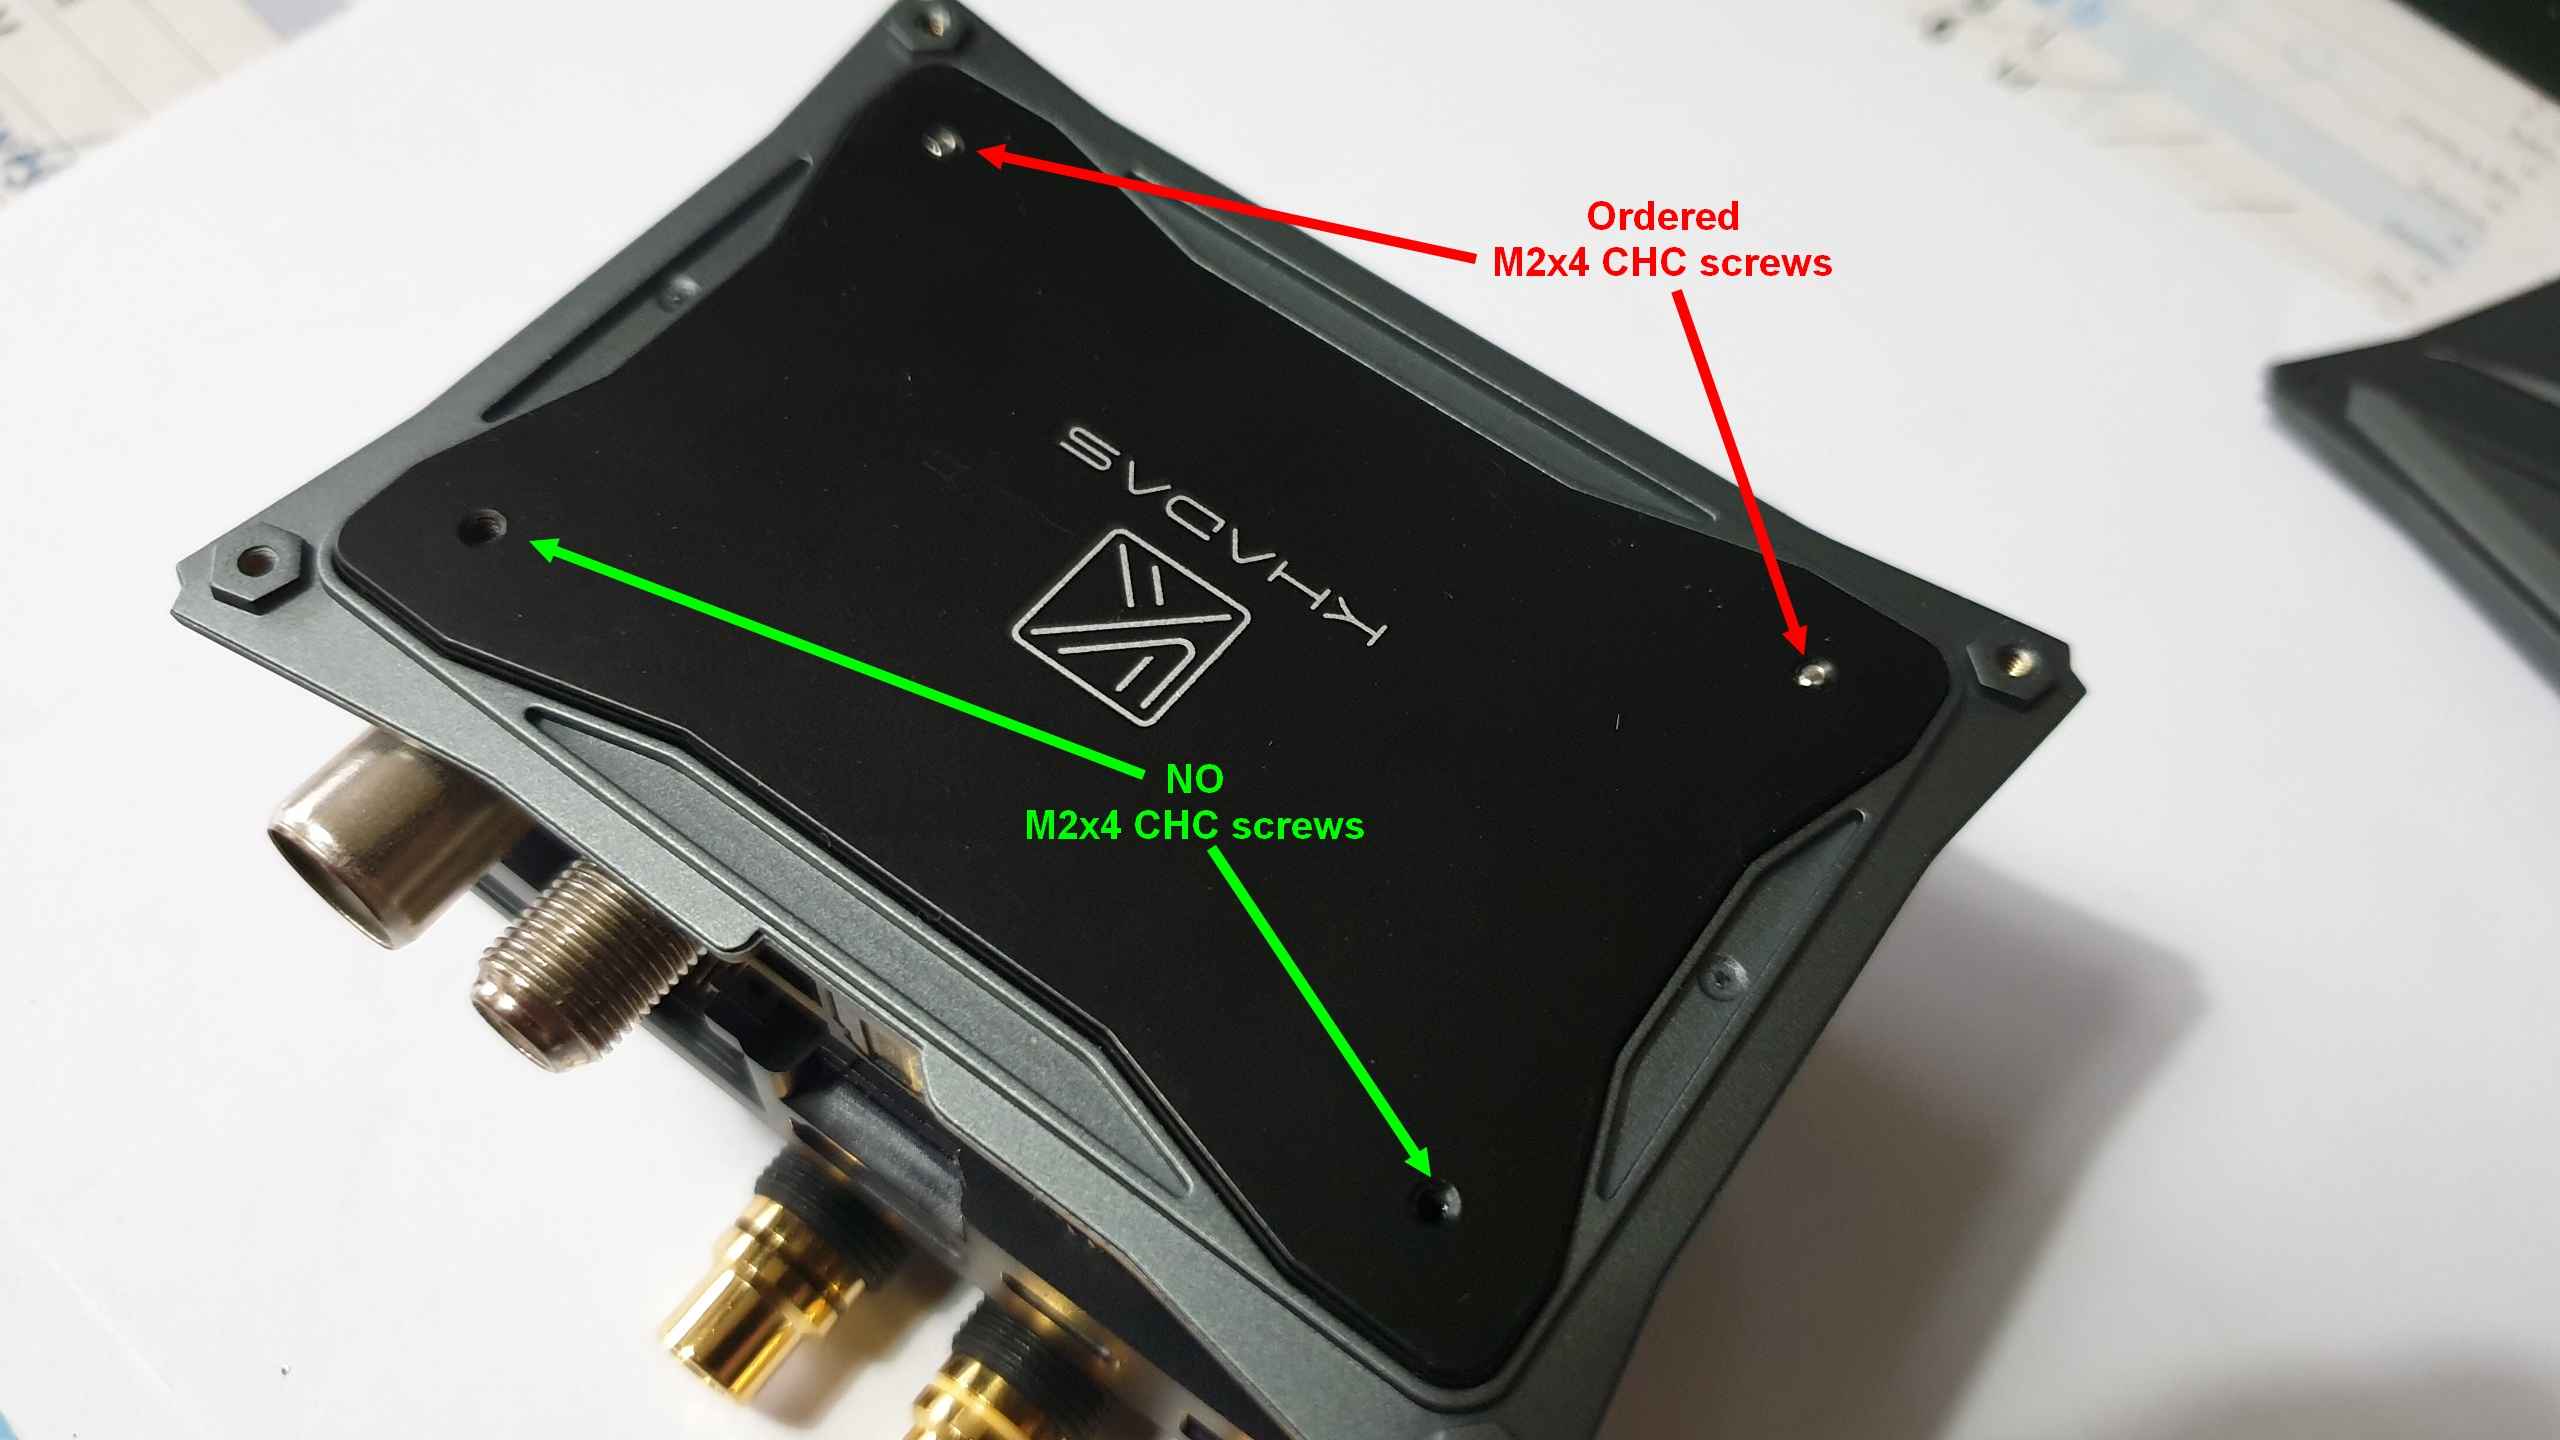
(The two other ordered M2x4 CHC screws can’t be screwed into the metal plate due to the VTV power socket and due to the VTV DVB Sat & Terrestrial VTV plugs module.)
Optional metal plate is not necessary needed, but the editing is much more stable with it…
Join bottom and top sides of DIY-Case :
We need now 48mm brass standoff … tried to find, but did’nt find in M2 size…
So I ordered four M2x18+3 and four M2x30+3 brass standoff…

… and now we have four M2x48+3 brass standoff !!!
Now take two ordered M2x18+3 brass standoff and screw them into M2x30+3 brass standoff…
Next take two ordered M2x30+3 brass standoff and screw them into M2x18+3 brass standoff…
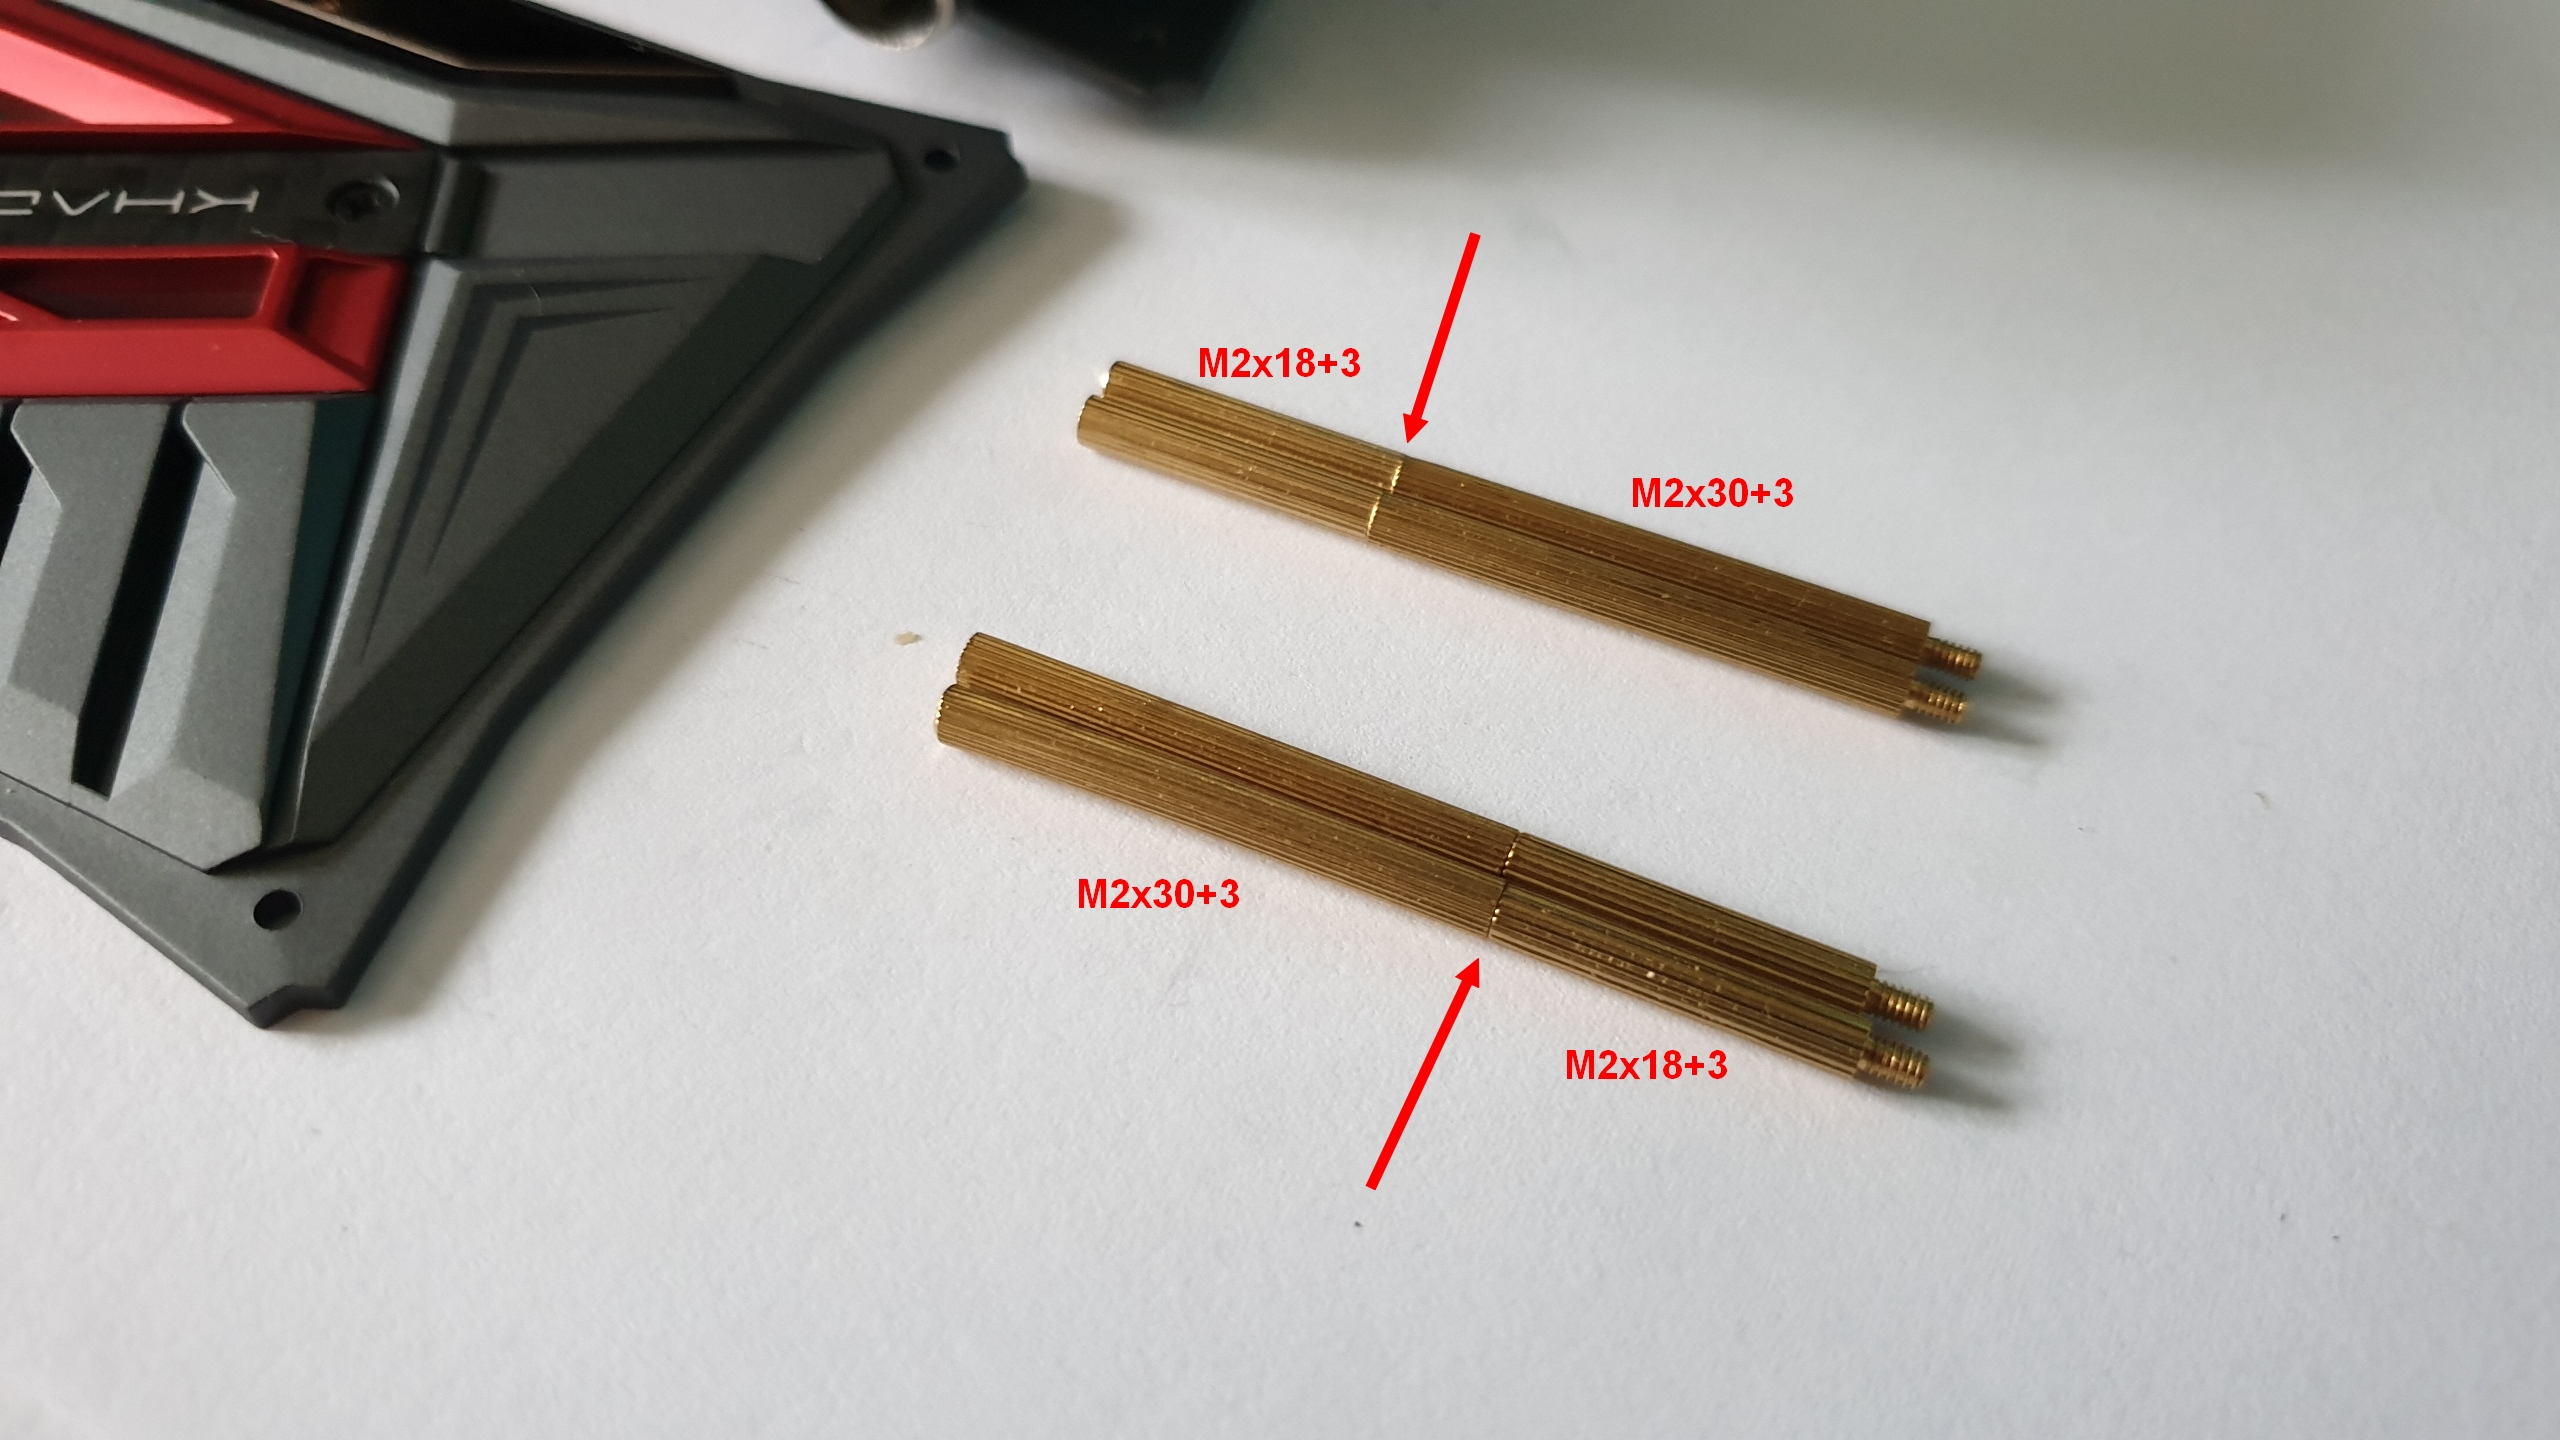
Screw alternatively 18+30 and 30+18 brass standoff into the four threded holes of the bottom DIY-CASE cover.
At this point you have to do some cutting work again…
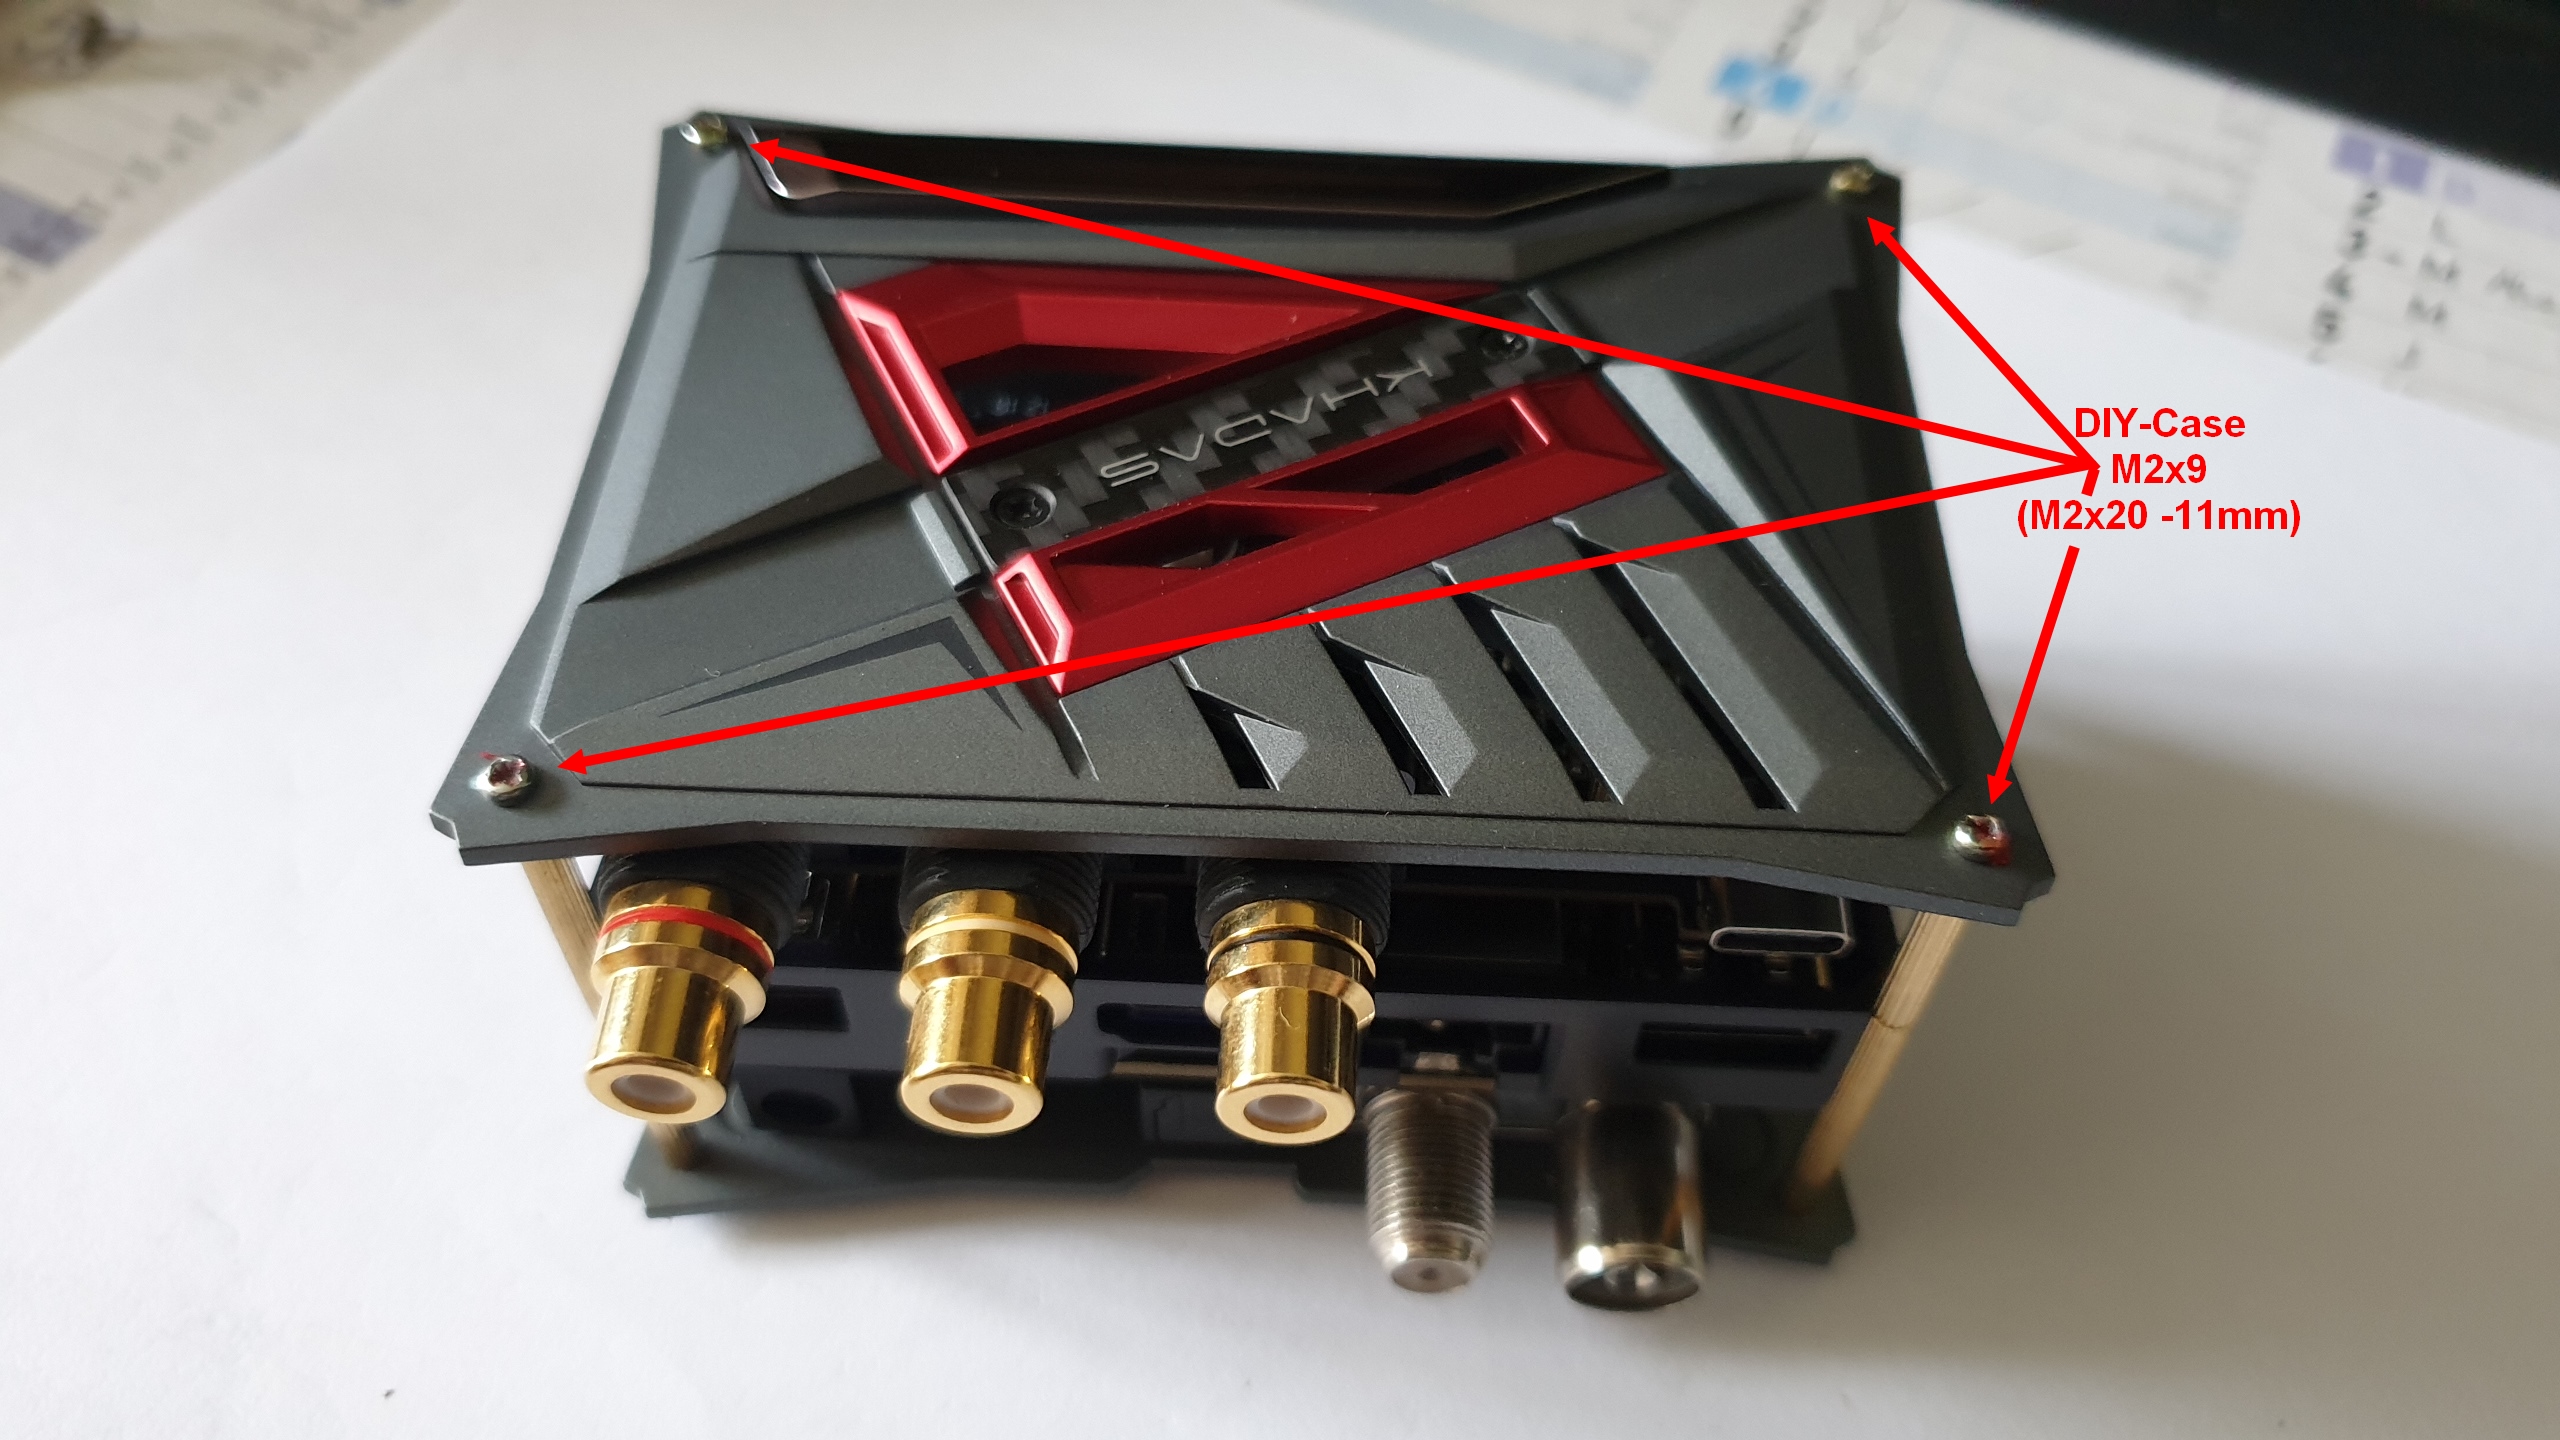
Take DIY-CASE M2x20 screws and cut 11mm long…
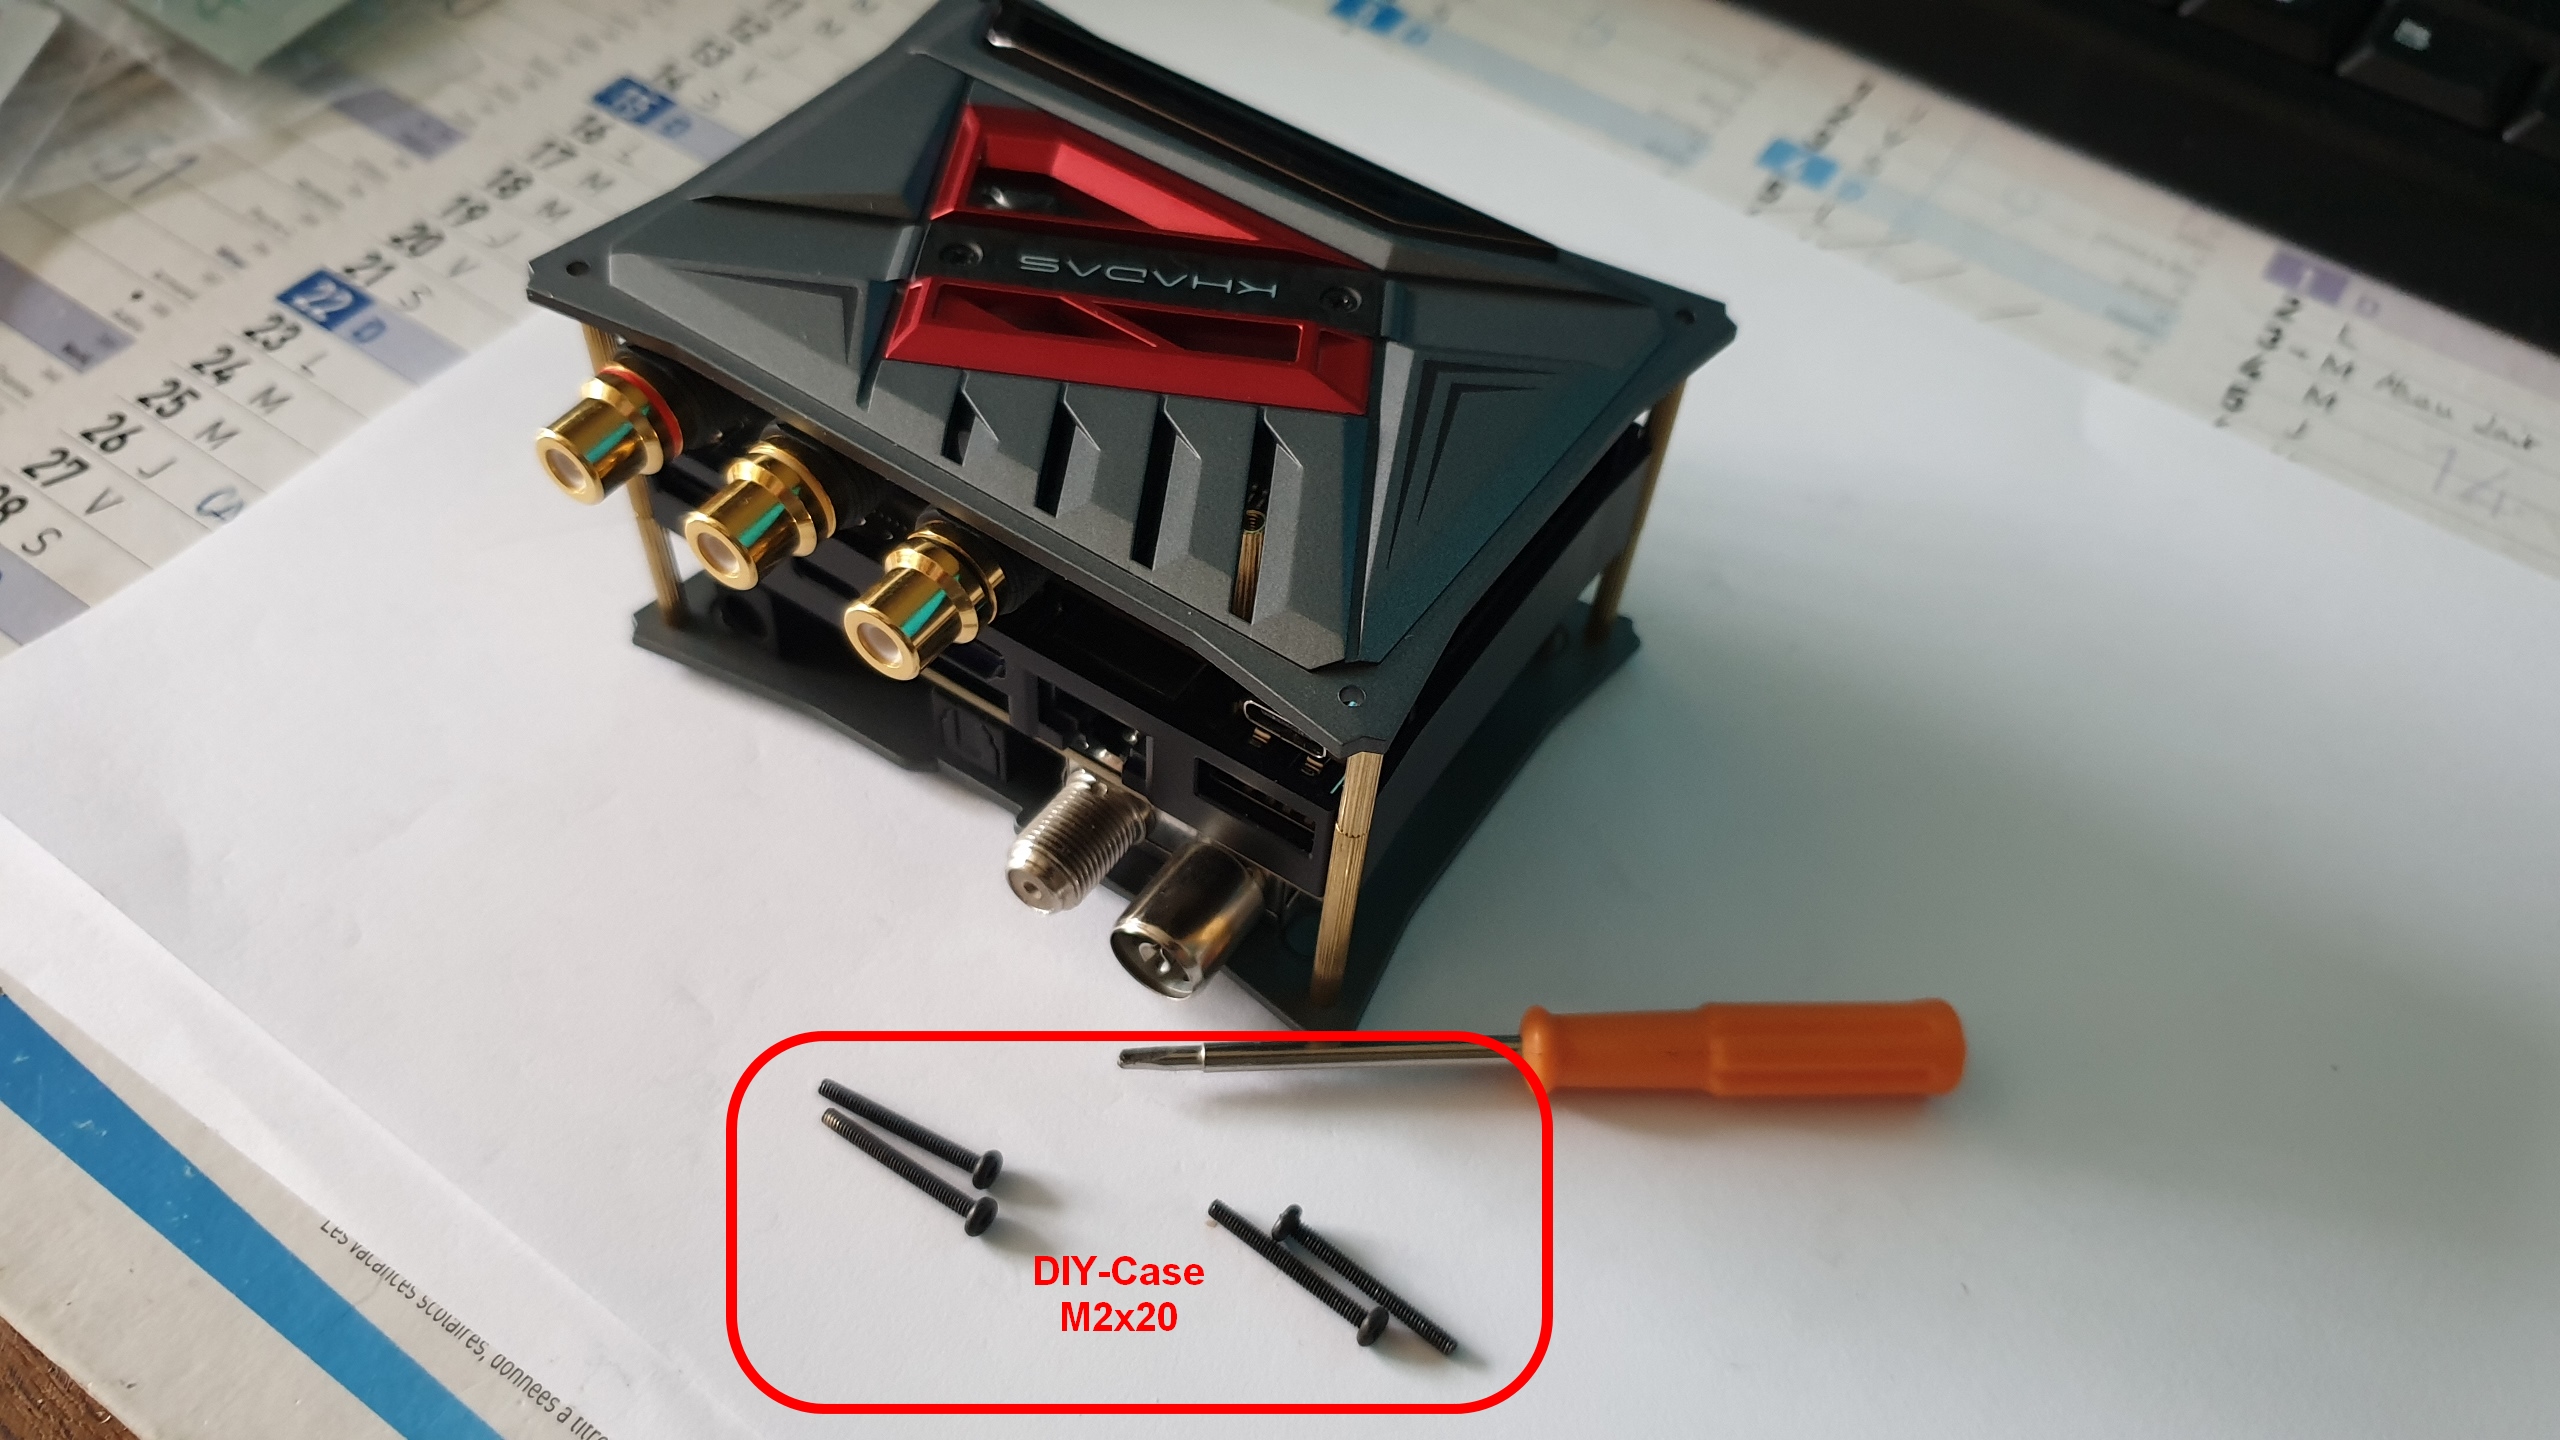
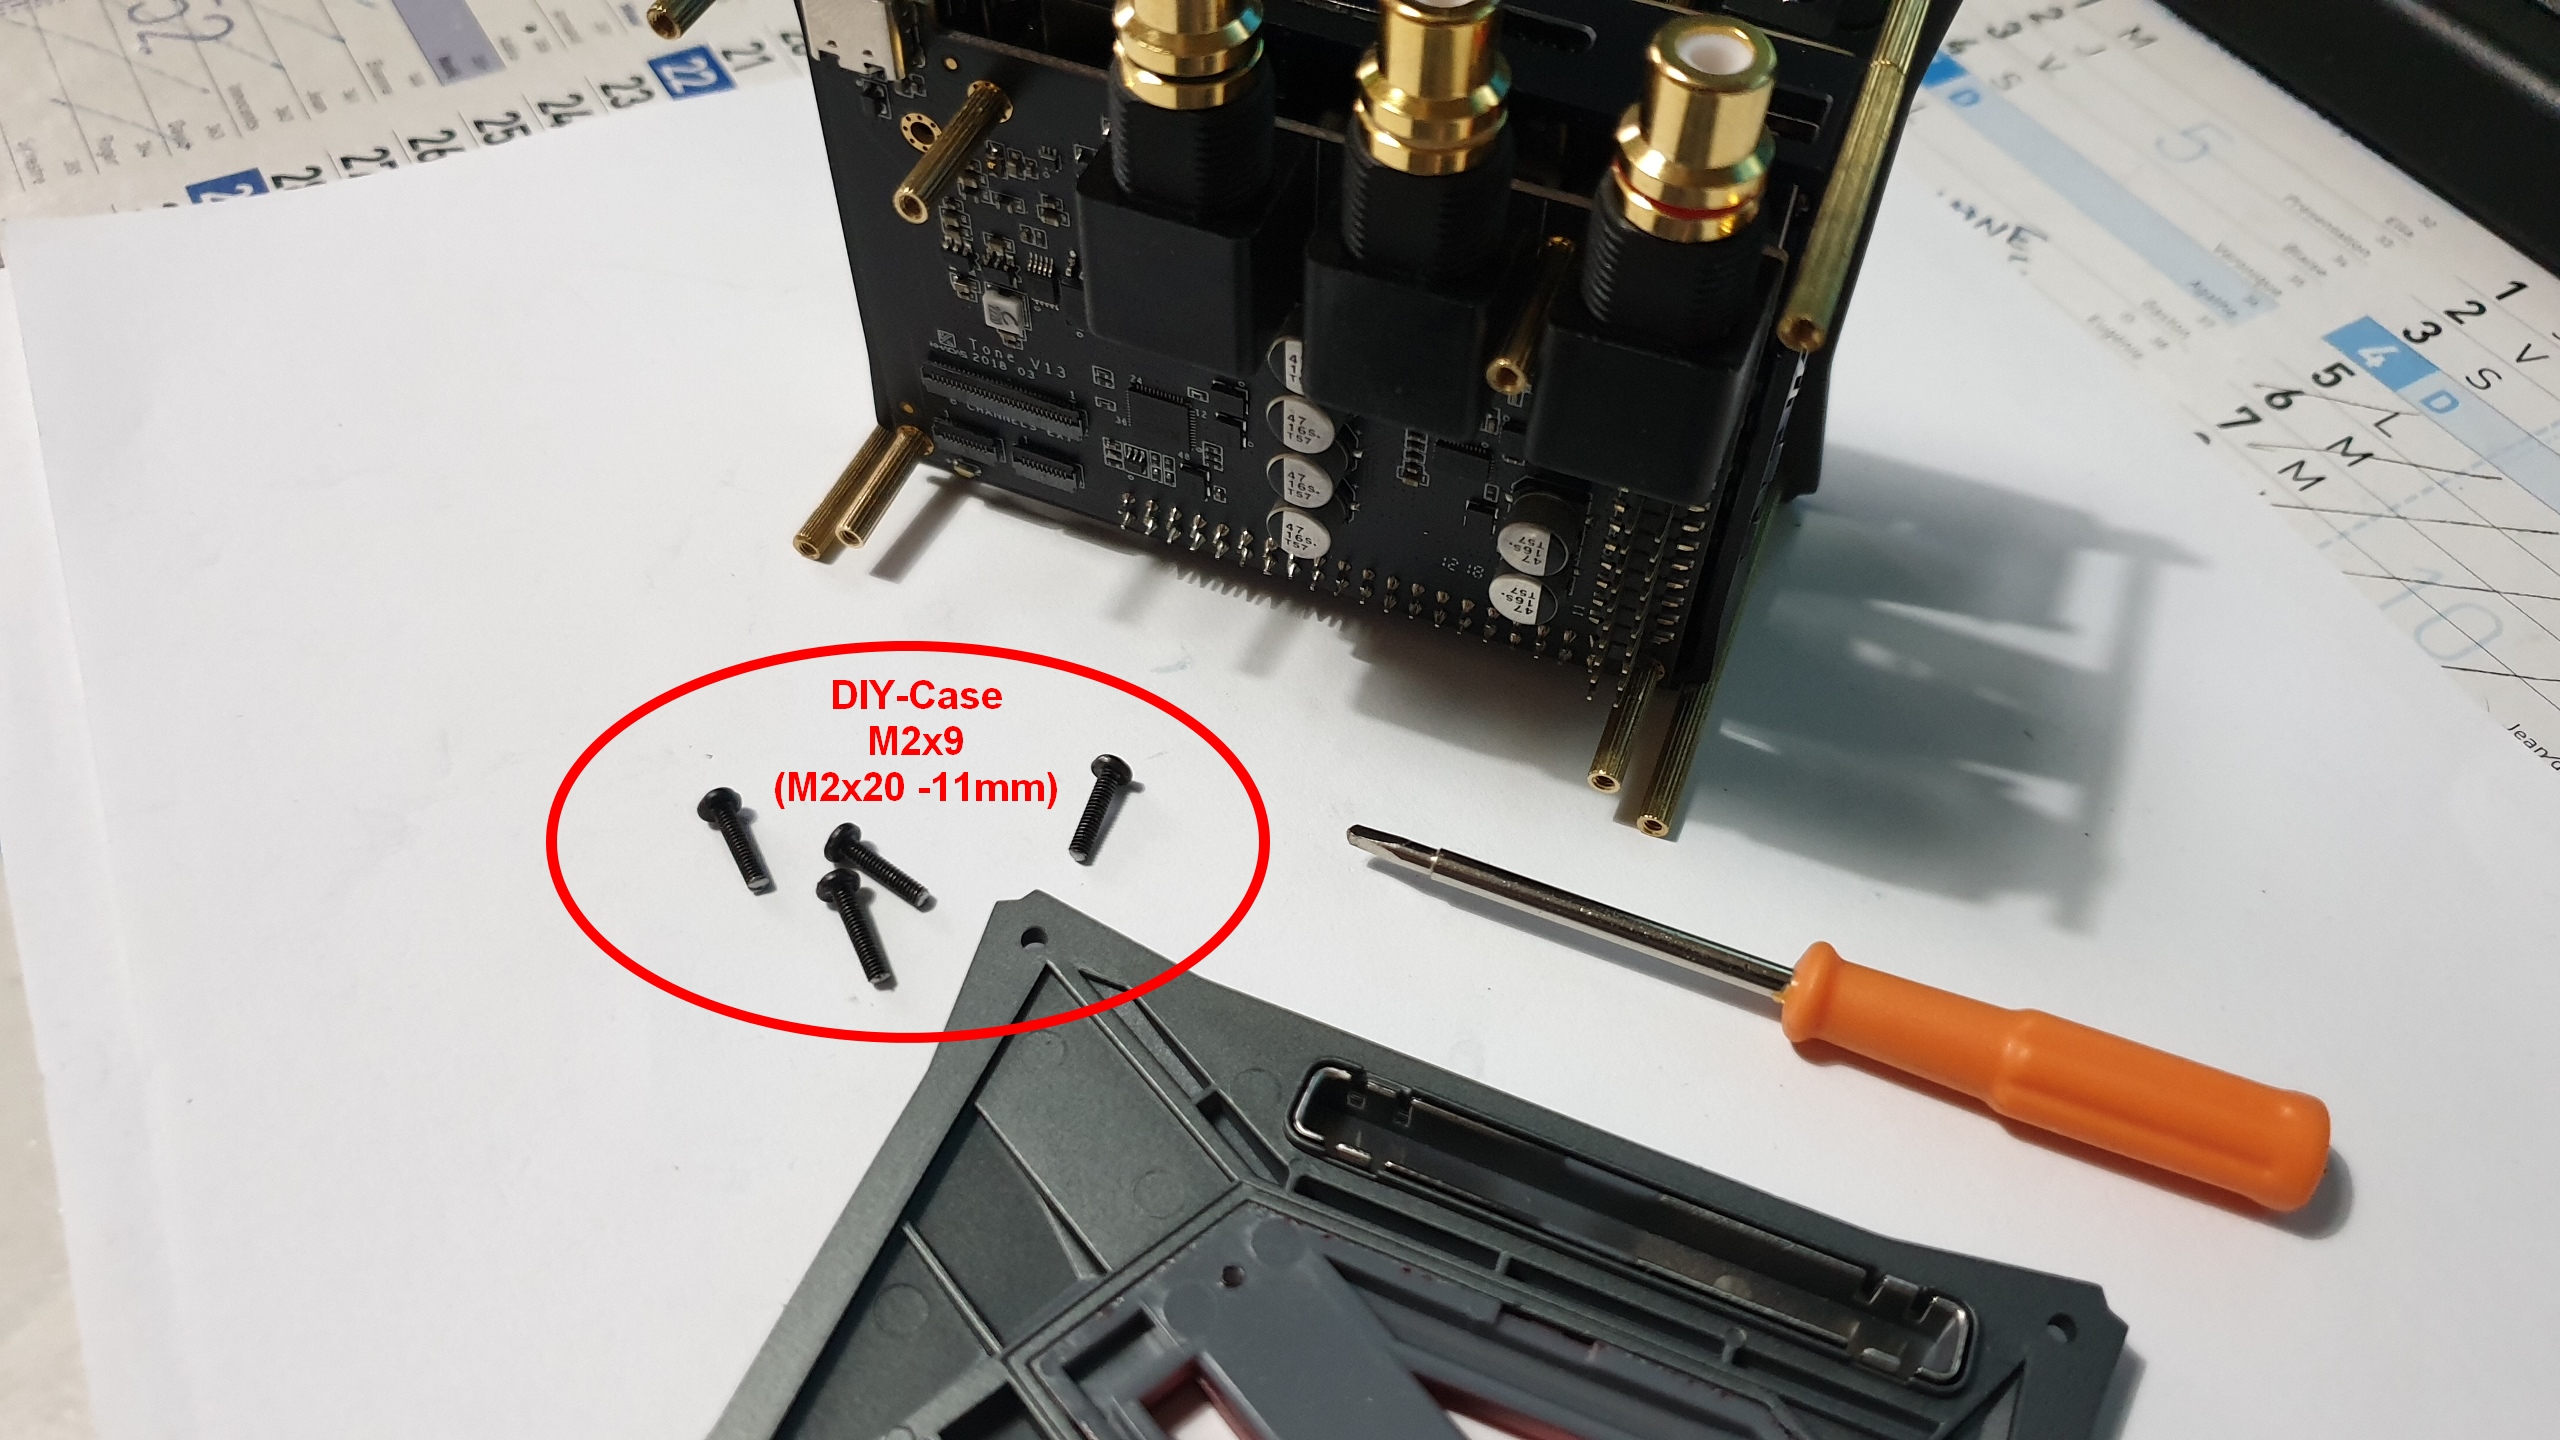
Place top DIY-CASE cover on the bottom screwed M2x48+3 brass standoff parts and screw these cutted M2x9 screws into these brass standoff on TONE-BOARD side.
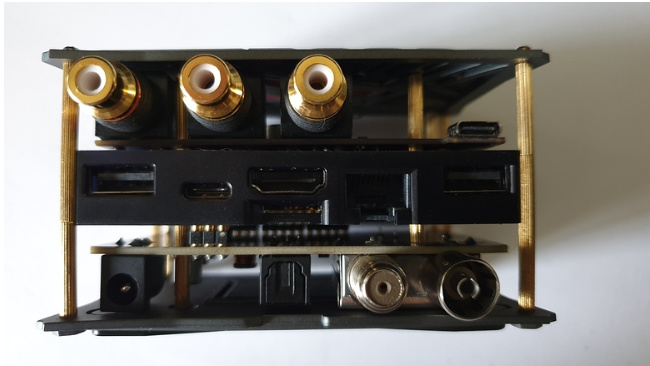
Job done ! …
Here we have a nice old-clock looking VIM2 + VTV + TONE-BOARD into a tuned red DIY-CASE !!! …
Soft buffers can be sticked on the optional Khadas metal plate side to have more grip …

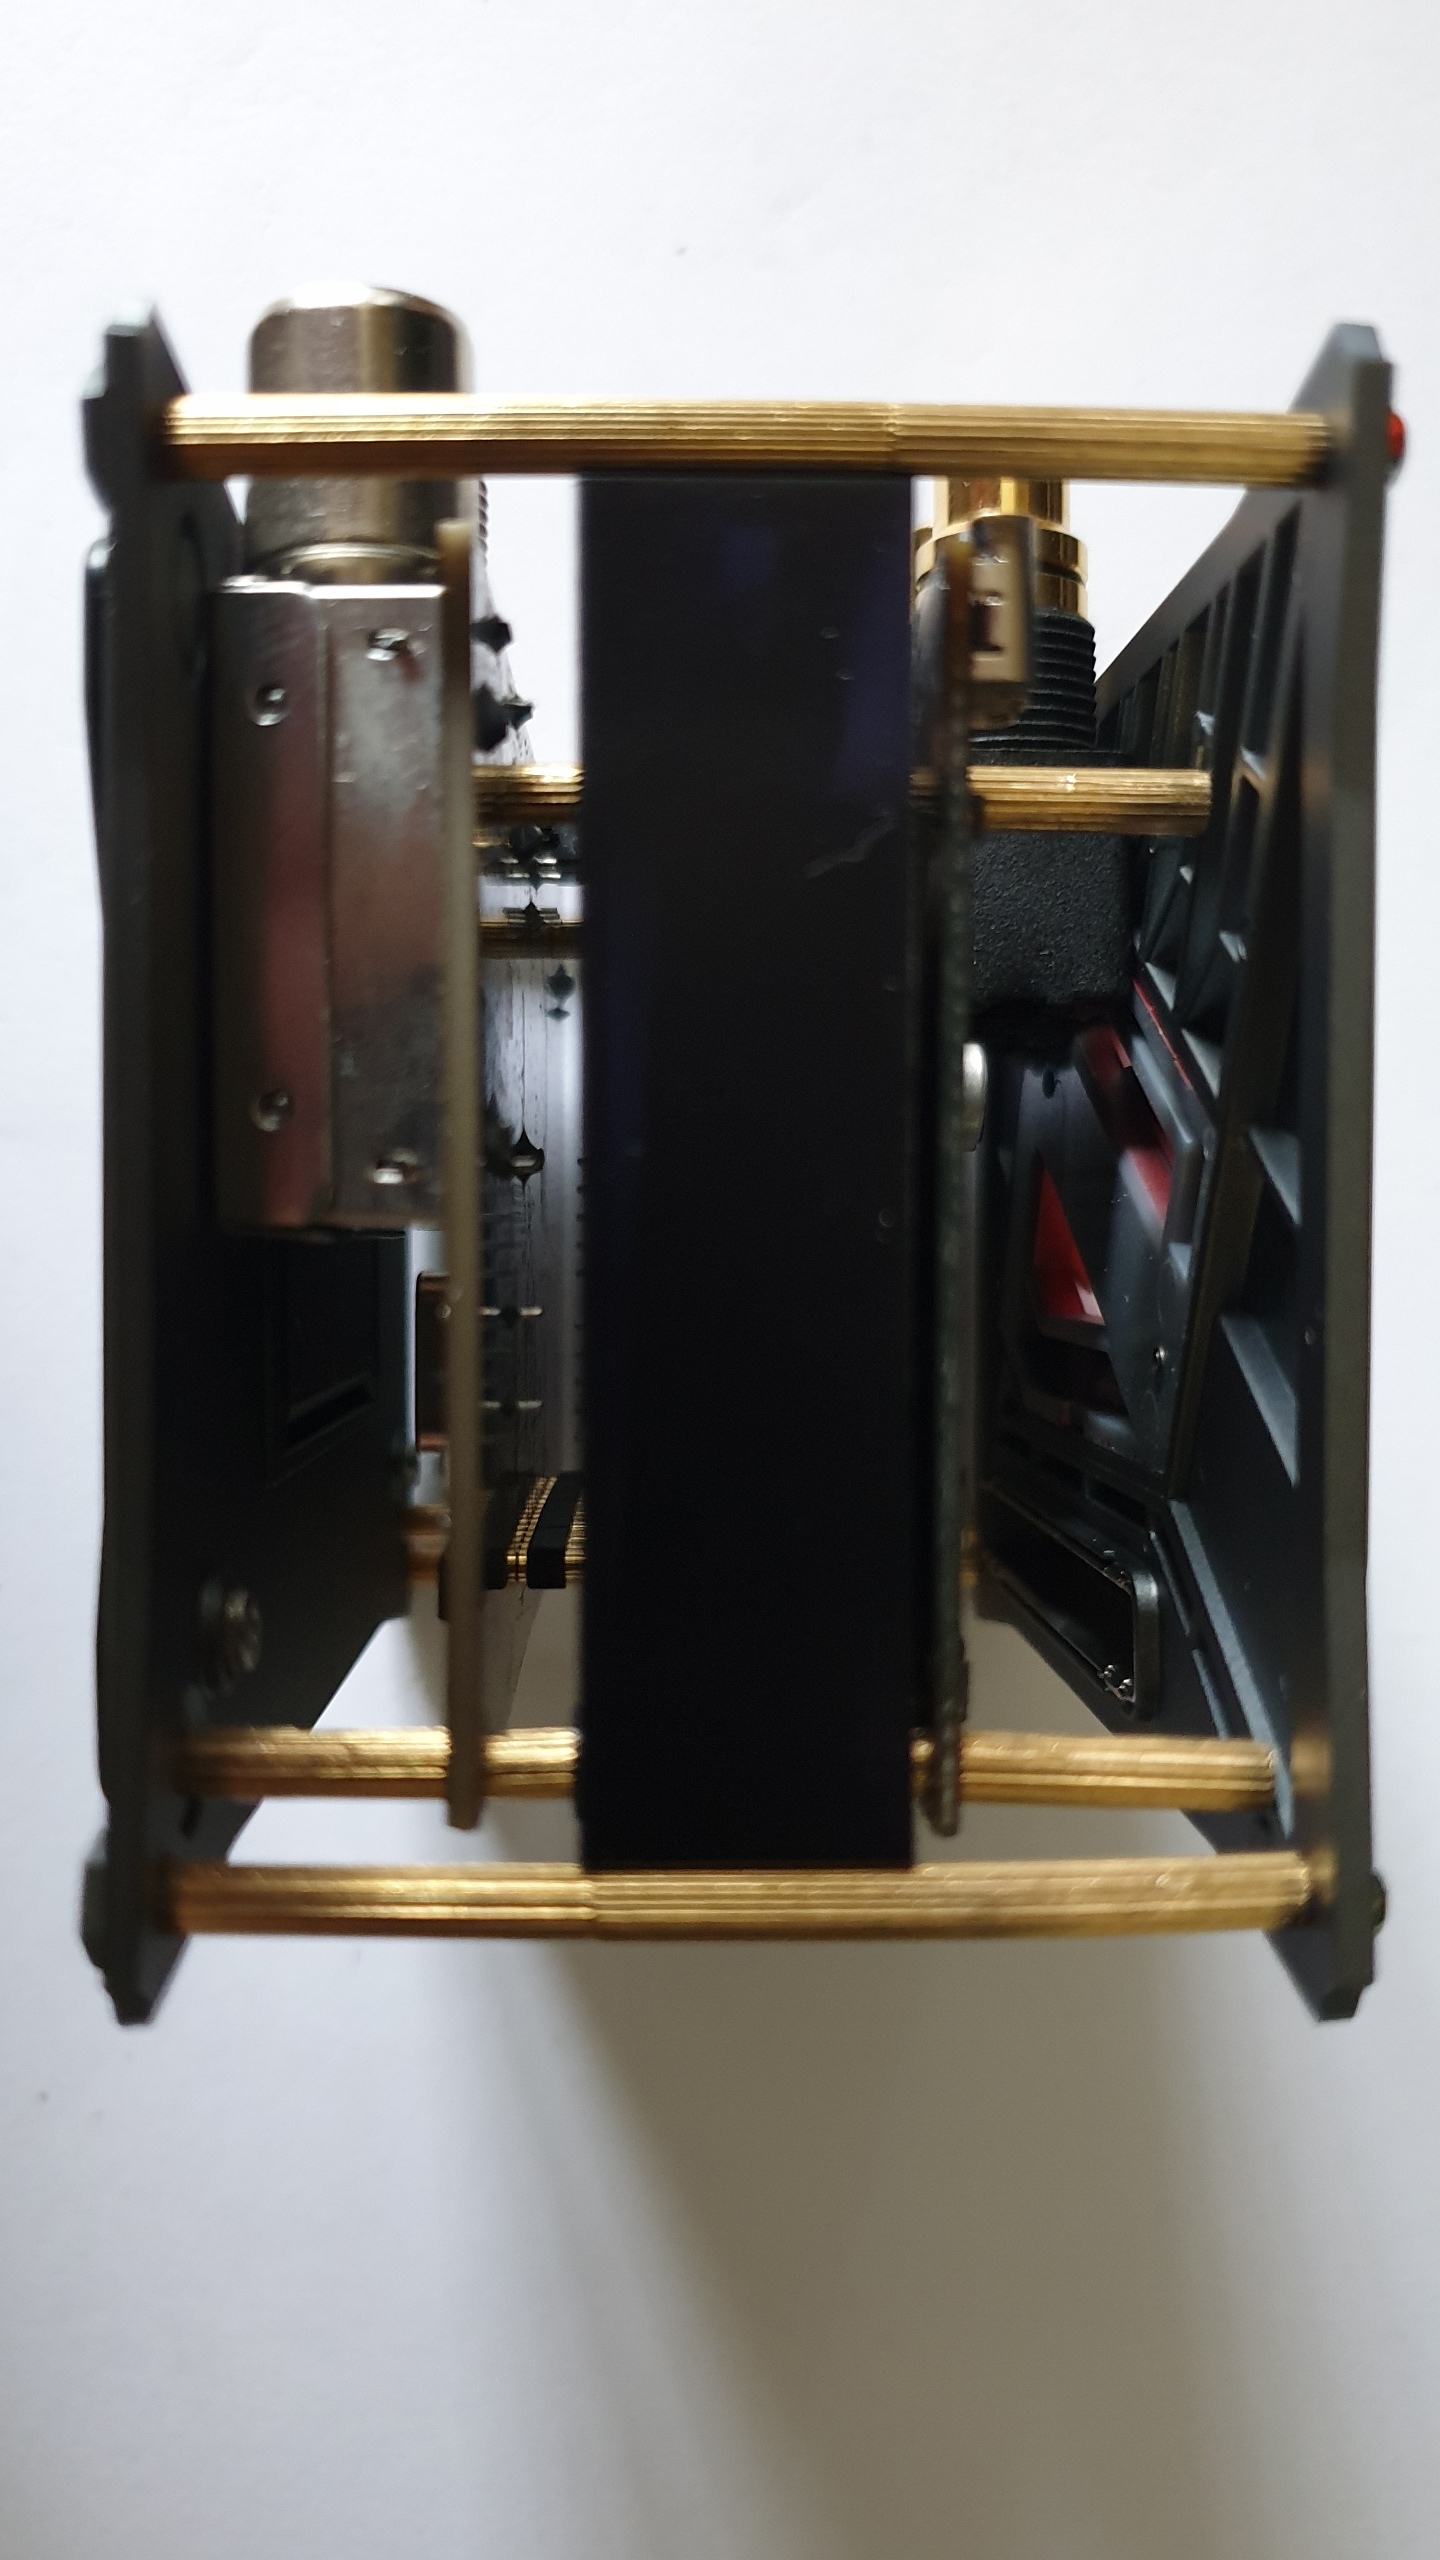
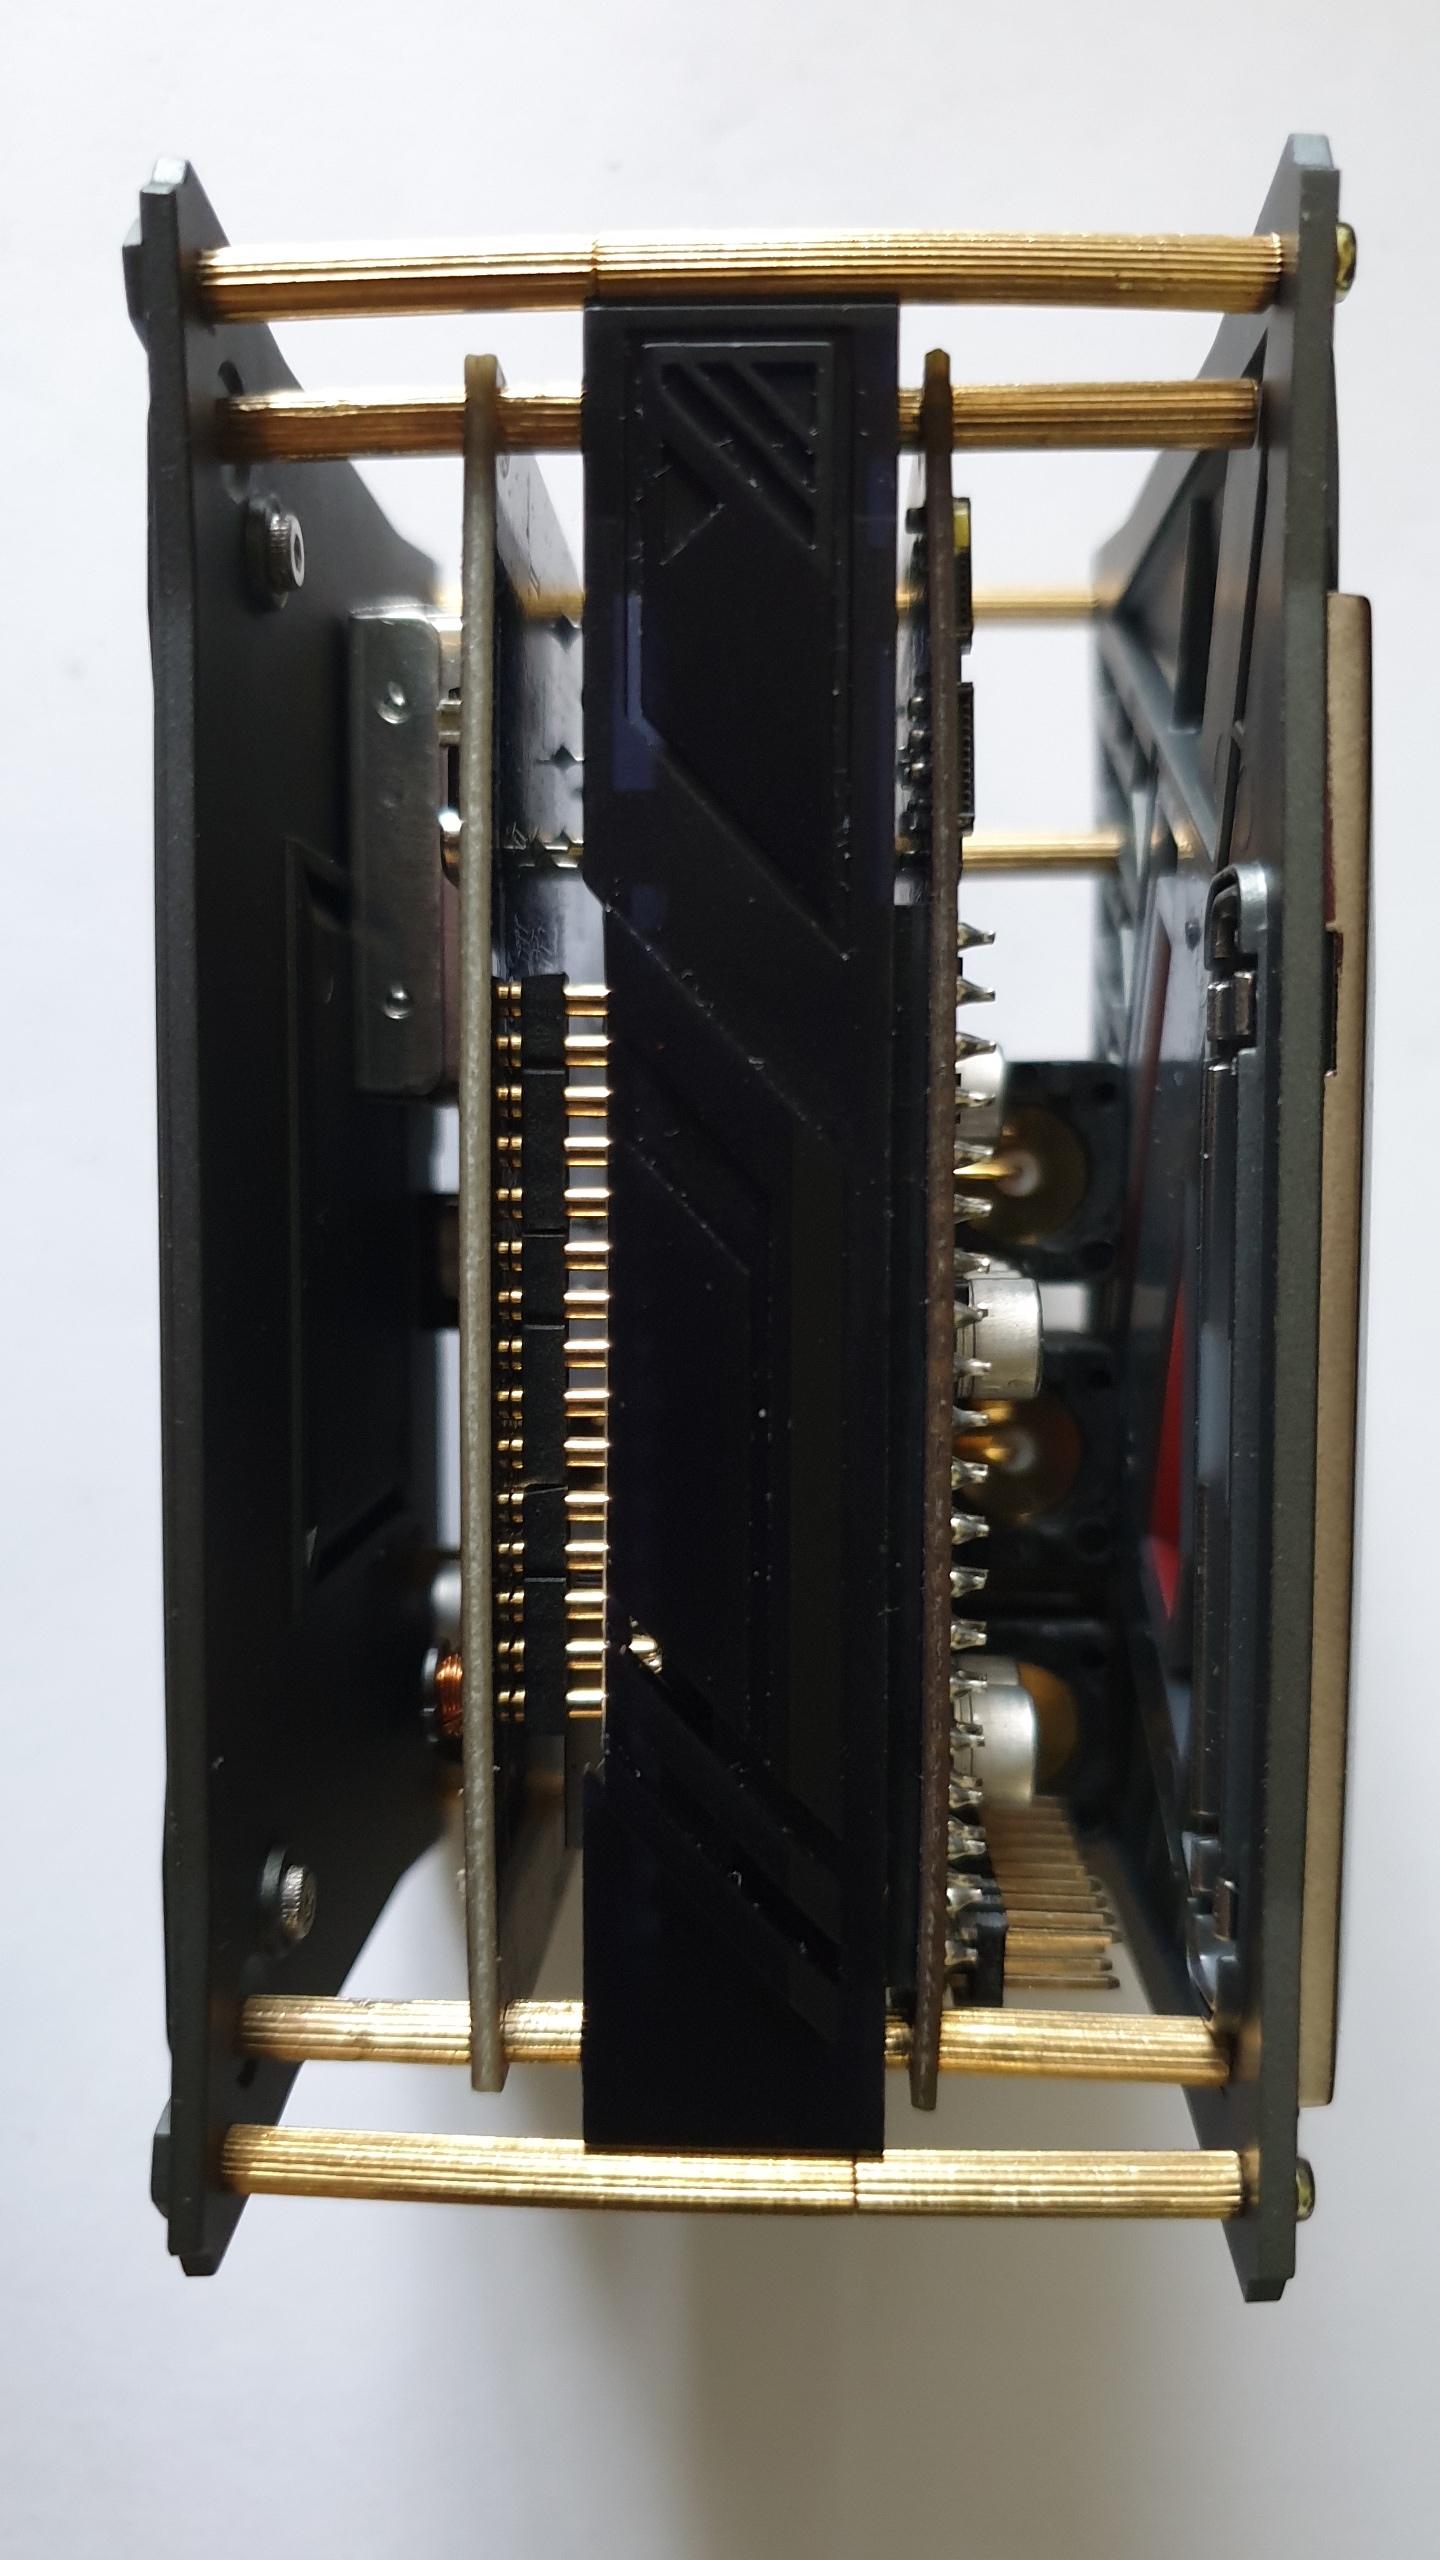
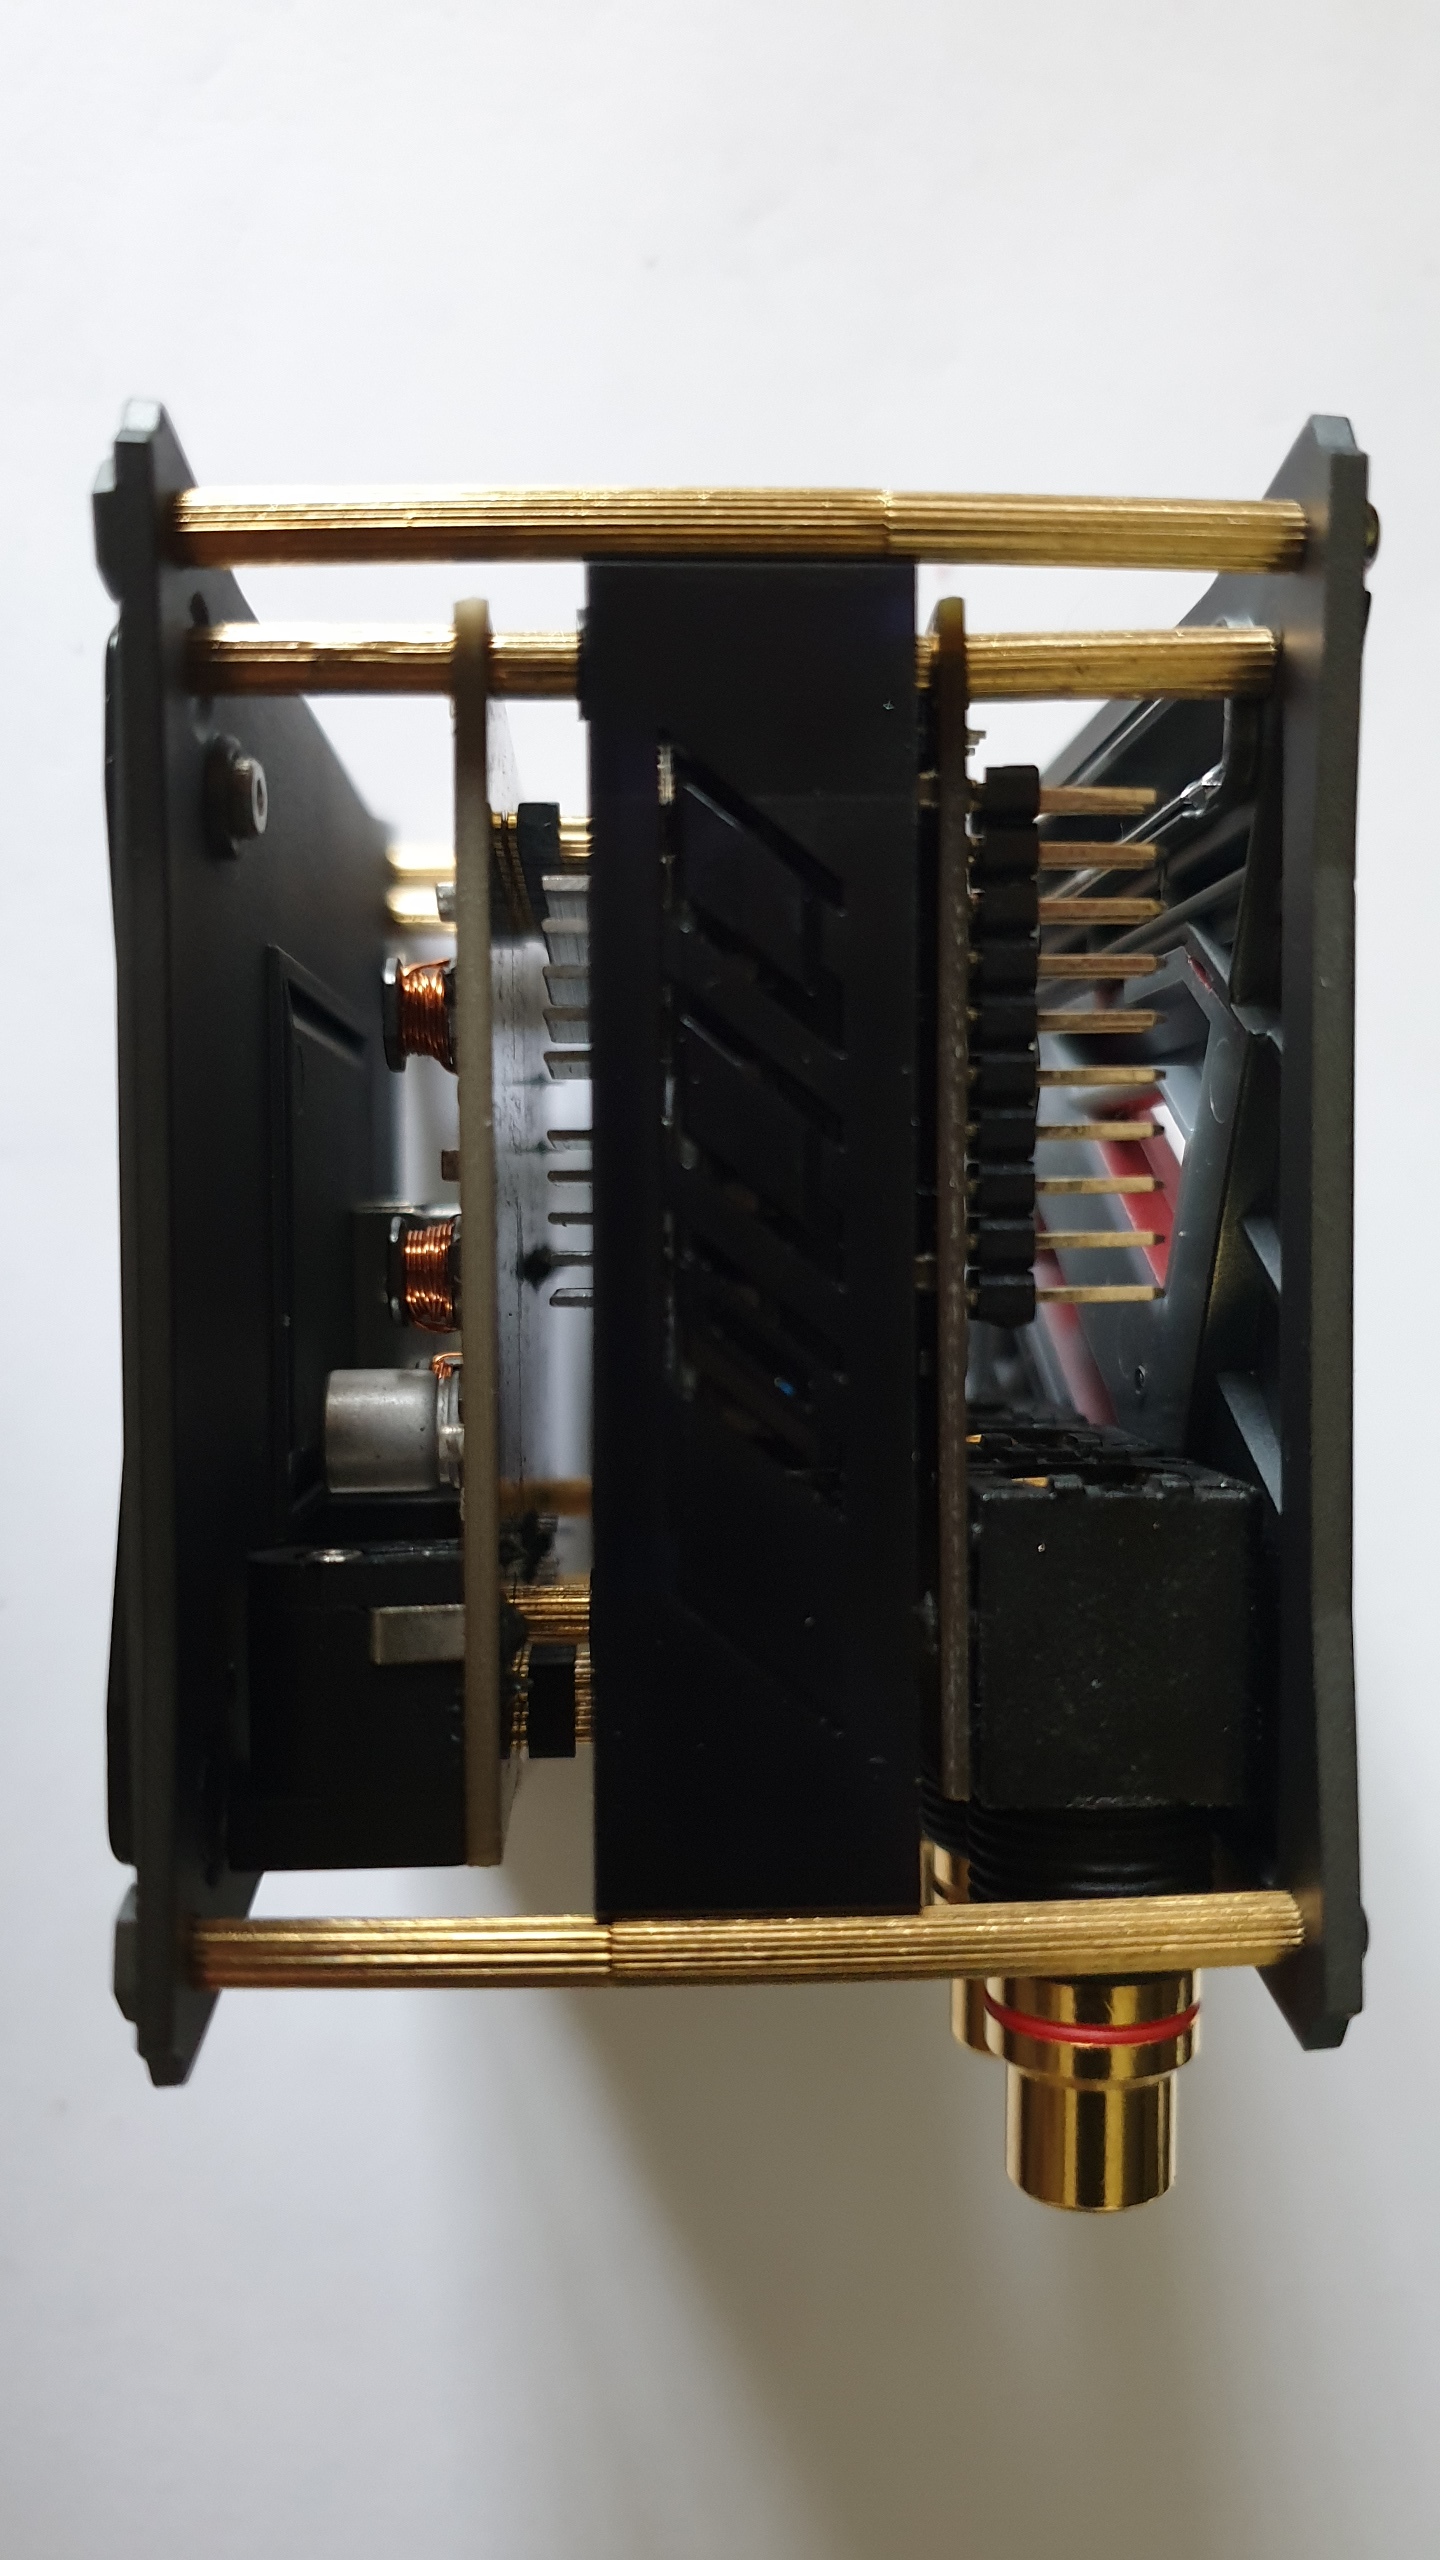
Rear side (notice that M2x48+3 brass standoff are slightly curved, this is due to that Khadas DIY-CASE central module is supposed to let pass only M2x20 screws at it’s corners, not a 3mm wide brass standoff…
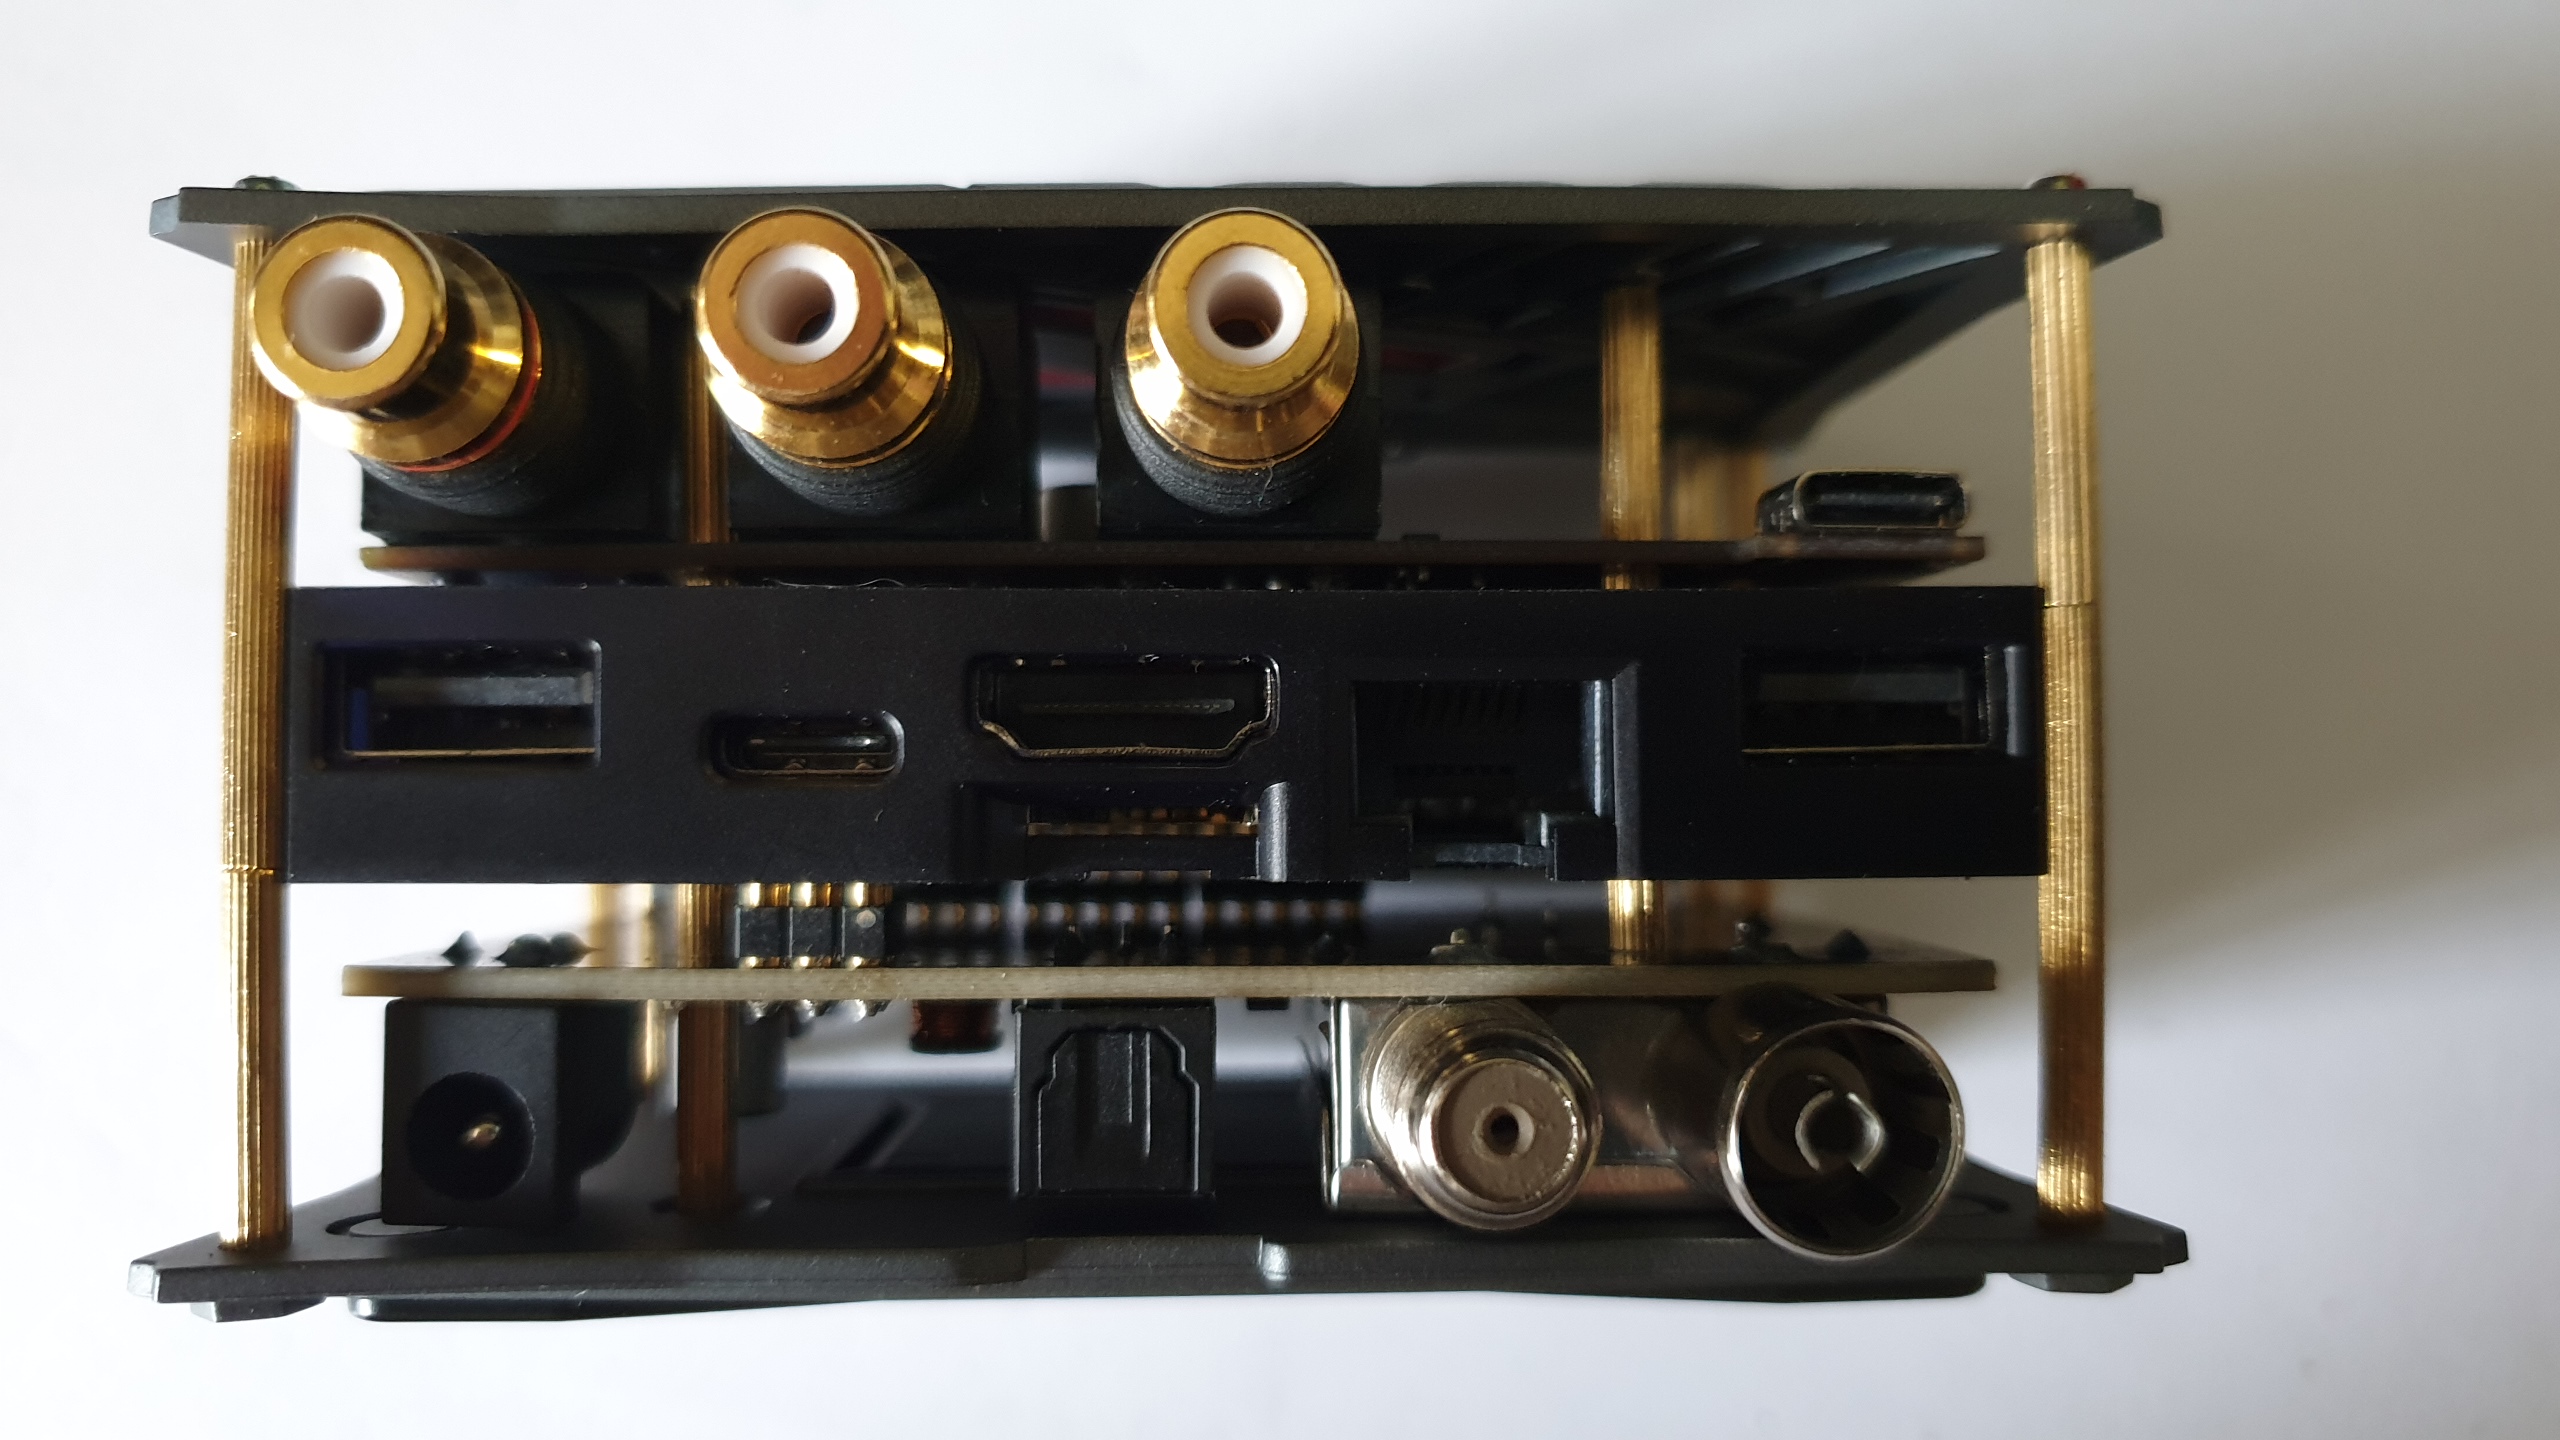
Others sides (same curves)
List of what we needed to :
BOARDS and CASE :
- Khadas VIM2
- SuperDVB VTV board
- Khadas Tone-Board
- Khadas red DIY-CASE (or other color you like)
- Khadas DIY-CASE metal plate
BRASS STANDOFF :
- 4x M2x7+6 (Khadas Tone-Board parts)
- 4x M2x4+3 (ordered)
- 4x M2x12+3 (ordered)
- 4x M2x14+3 (ordered)
- 4x M2x18+3 (ordered)
- 4x M2x30+3 (ordered)
SCREWS :
- 4x M2x4 CHC (ordered)
- 4x M2x10 (cut M2x7) (Khadas DIY-CASE parts)
- 4x M2x20 (cut M2x9) (Khadas DIY-CASE parts)
COSTS :
without boards and case = $1.63
because of my mistake = $1.85
Now you can enjoy VTV DVB-T-S image on TV and TONE-BOARD sound on your DPS power amplifier with a nice old-clock looking Khadas modular assembly !!! …
Have fun !
DerFu