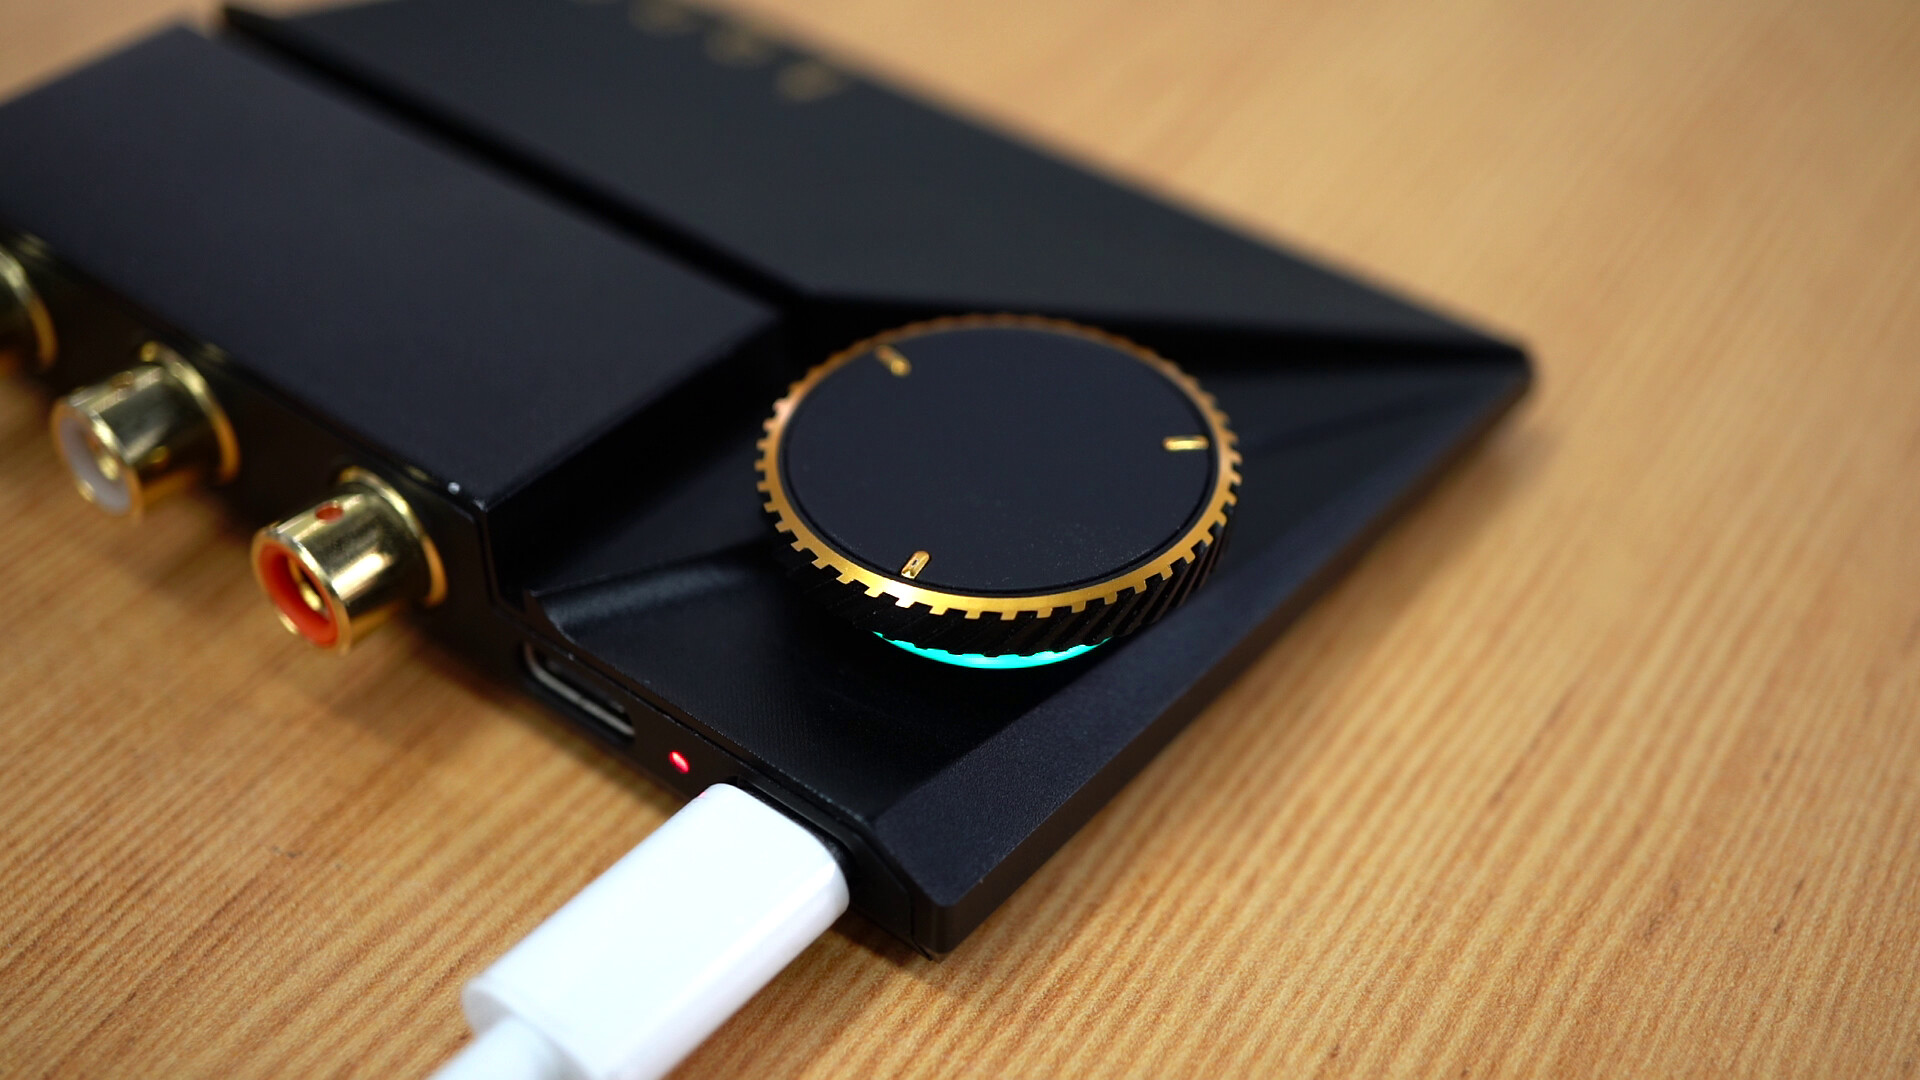
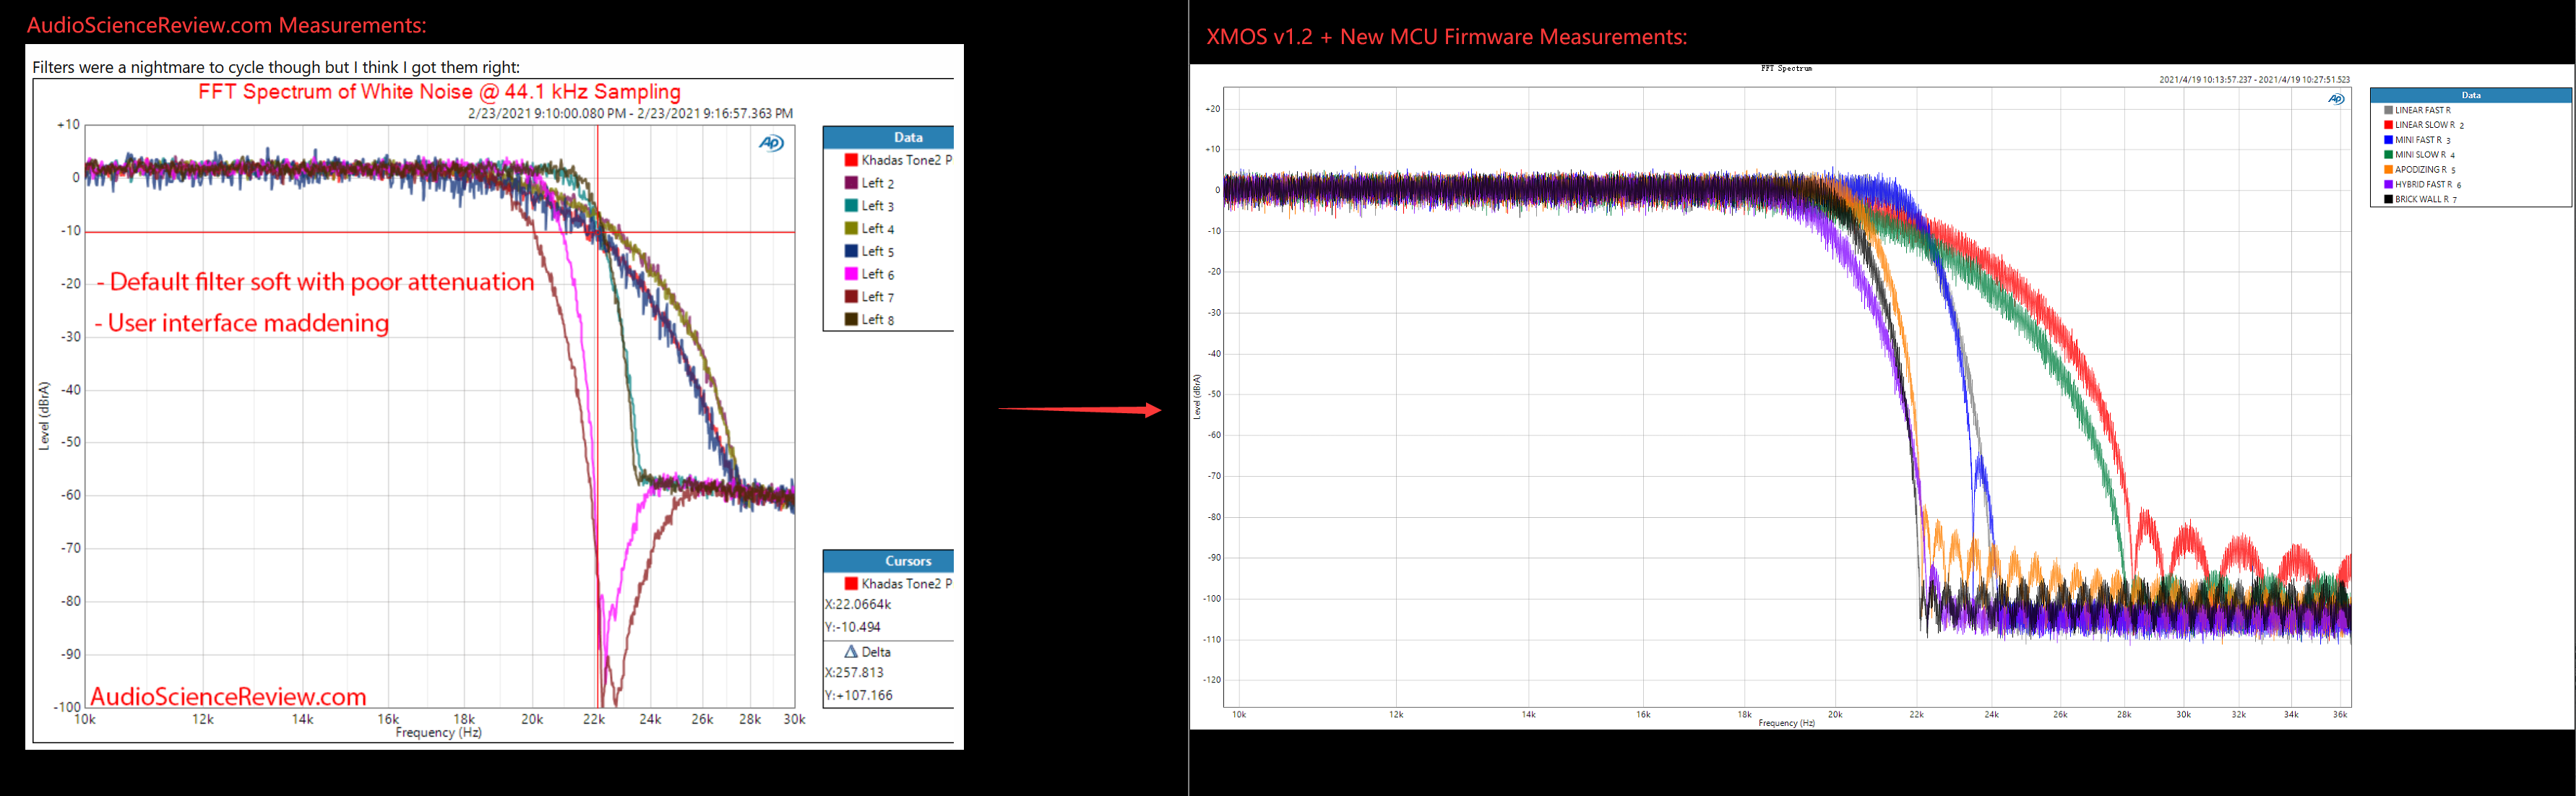
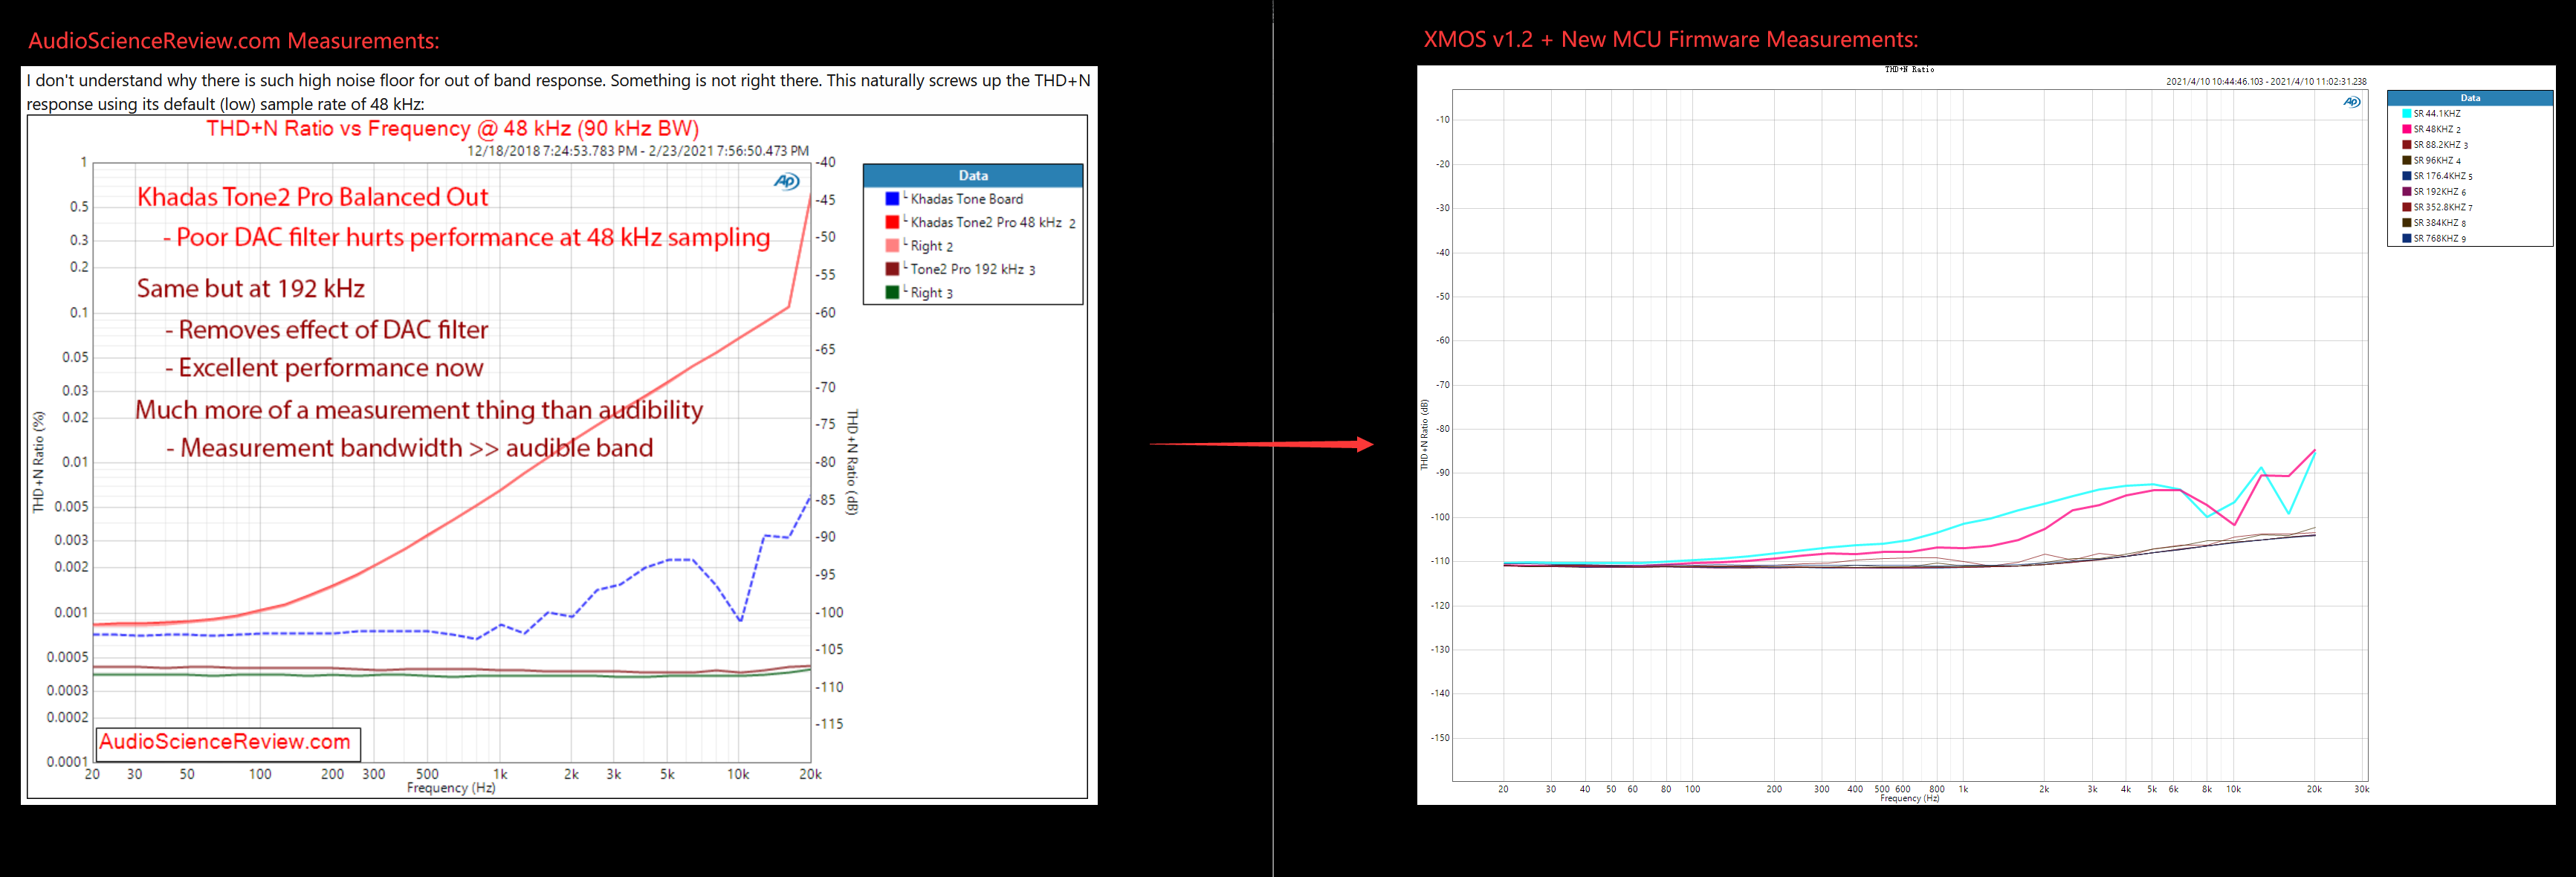
We’re now ready to release the v1.2 XMOS firmware and New MCU firmware for your Tone2 Pro. These two files when used in combination, will fix several issues such as the audio filters, and the high-noise floor at 44.1kHz and 48kHz respectively.
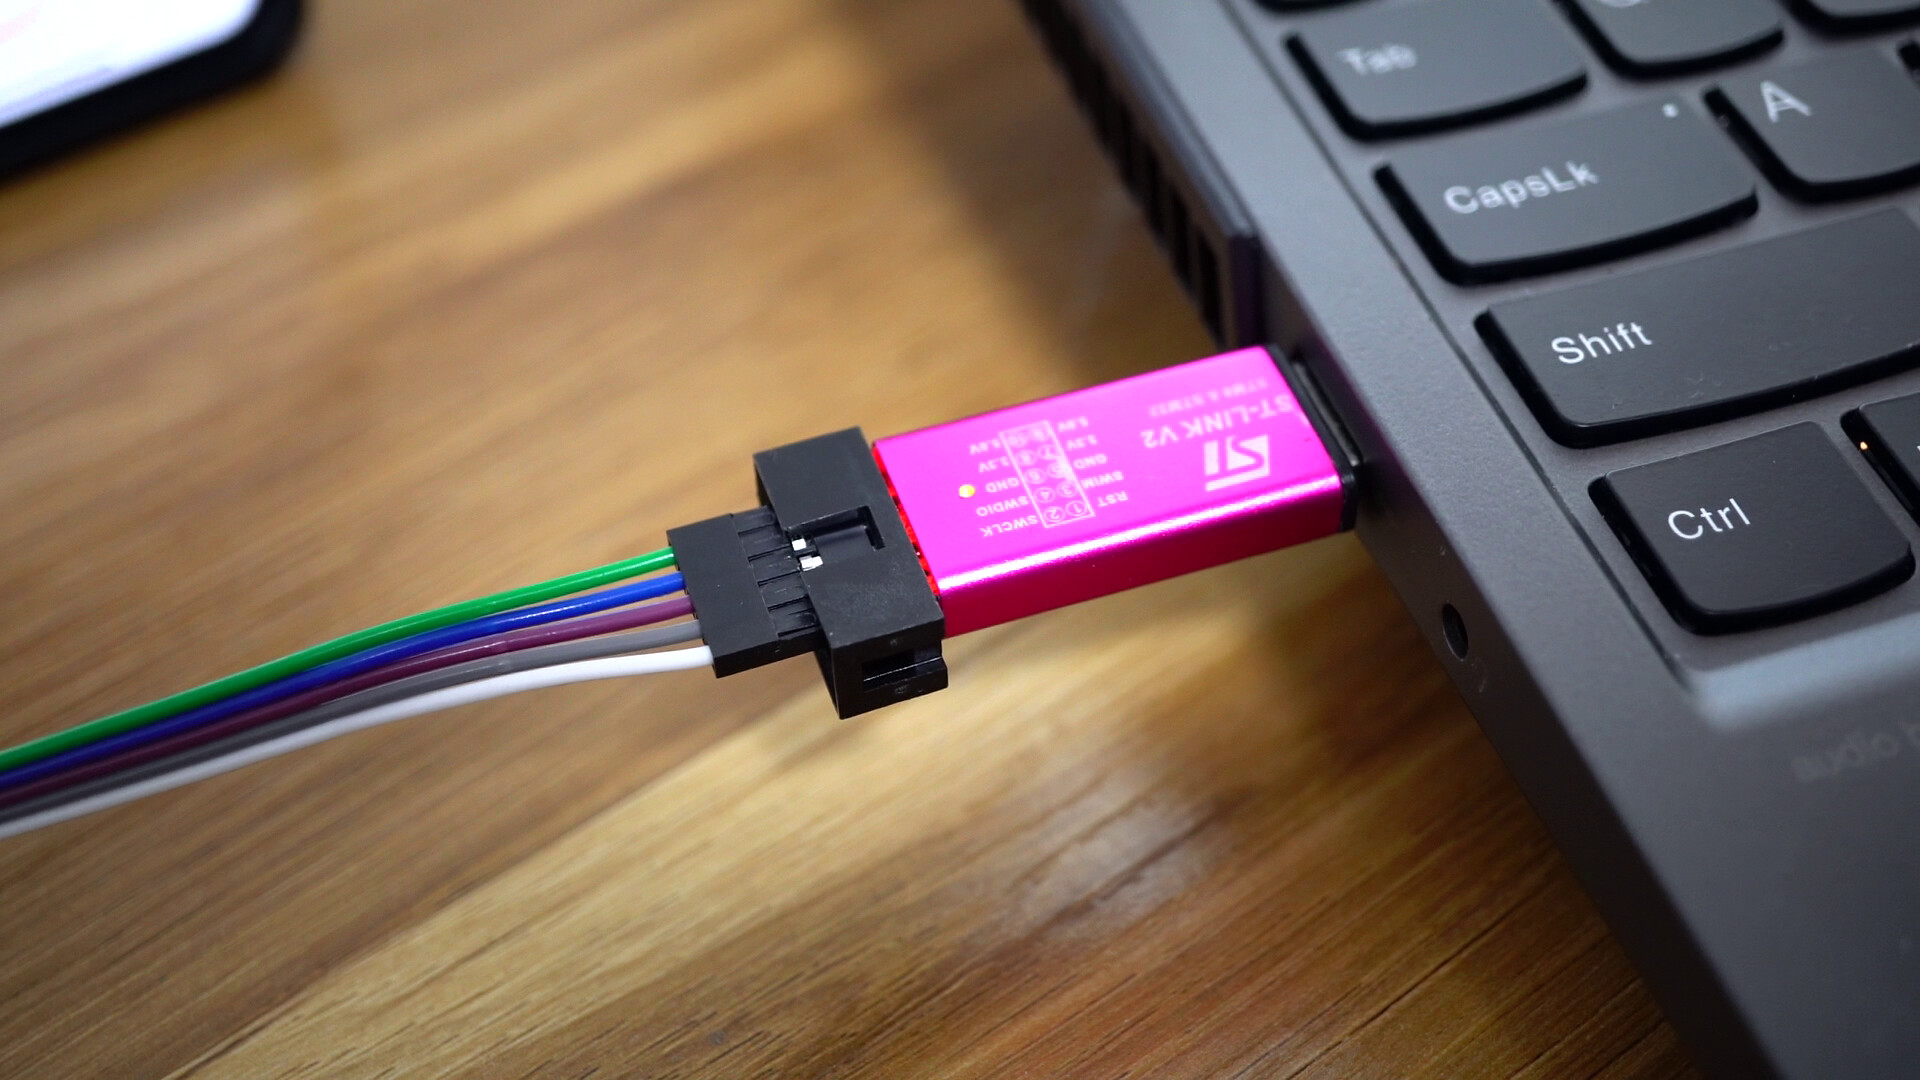
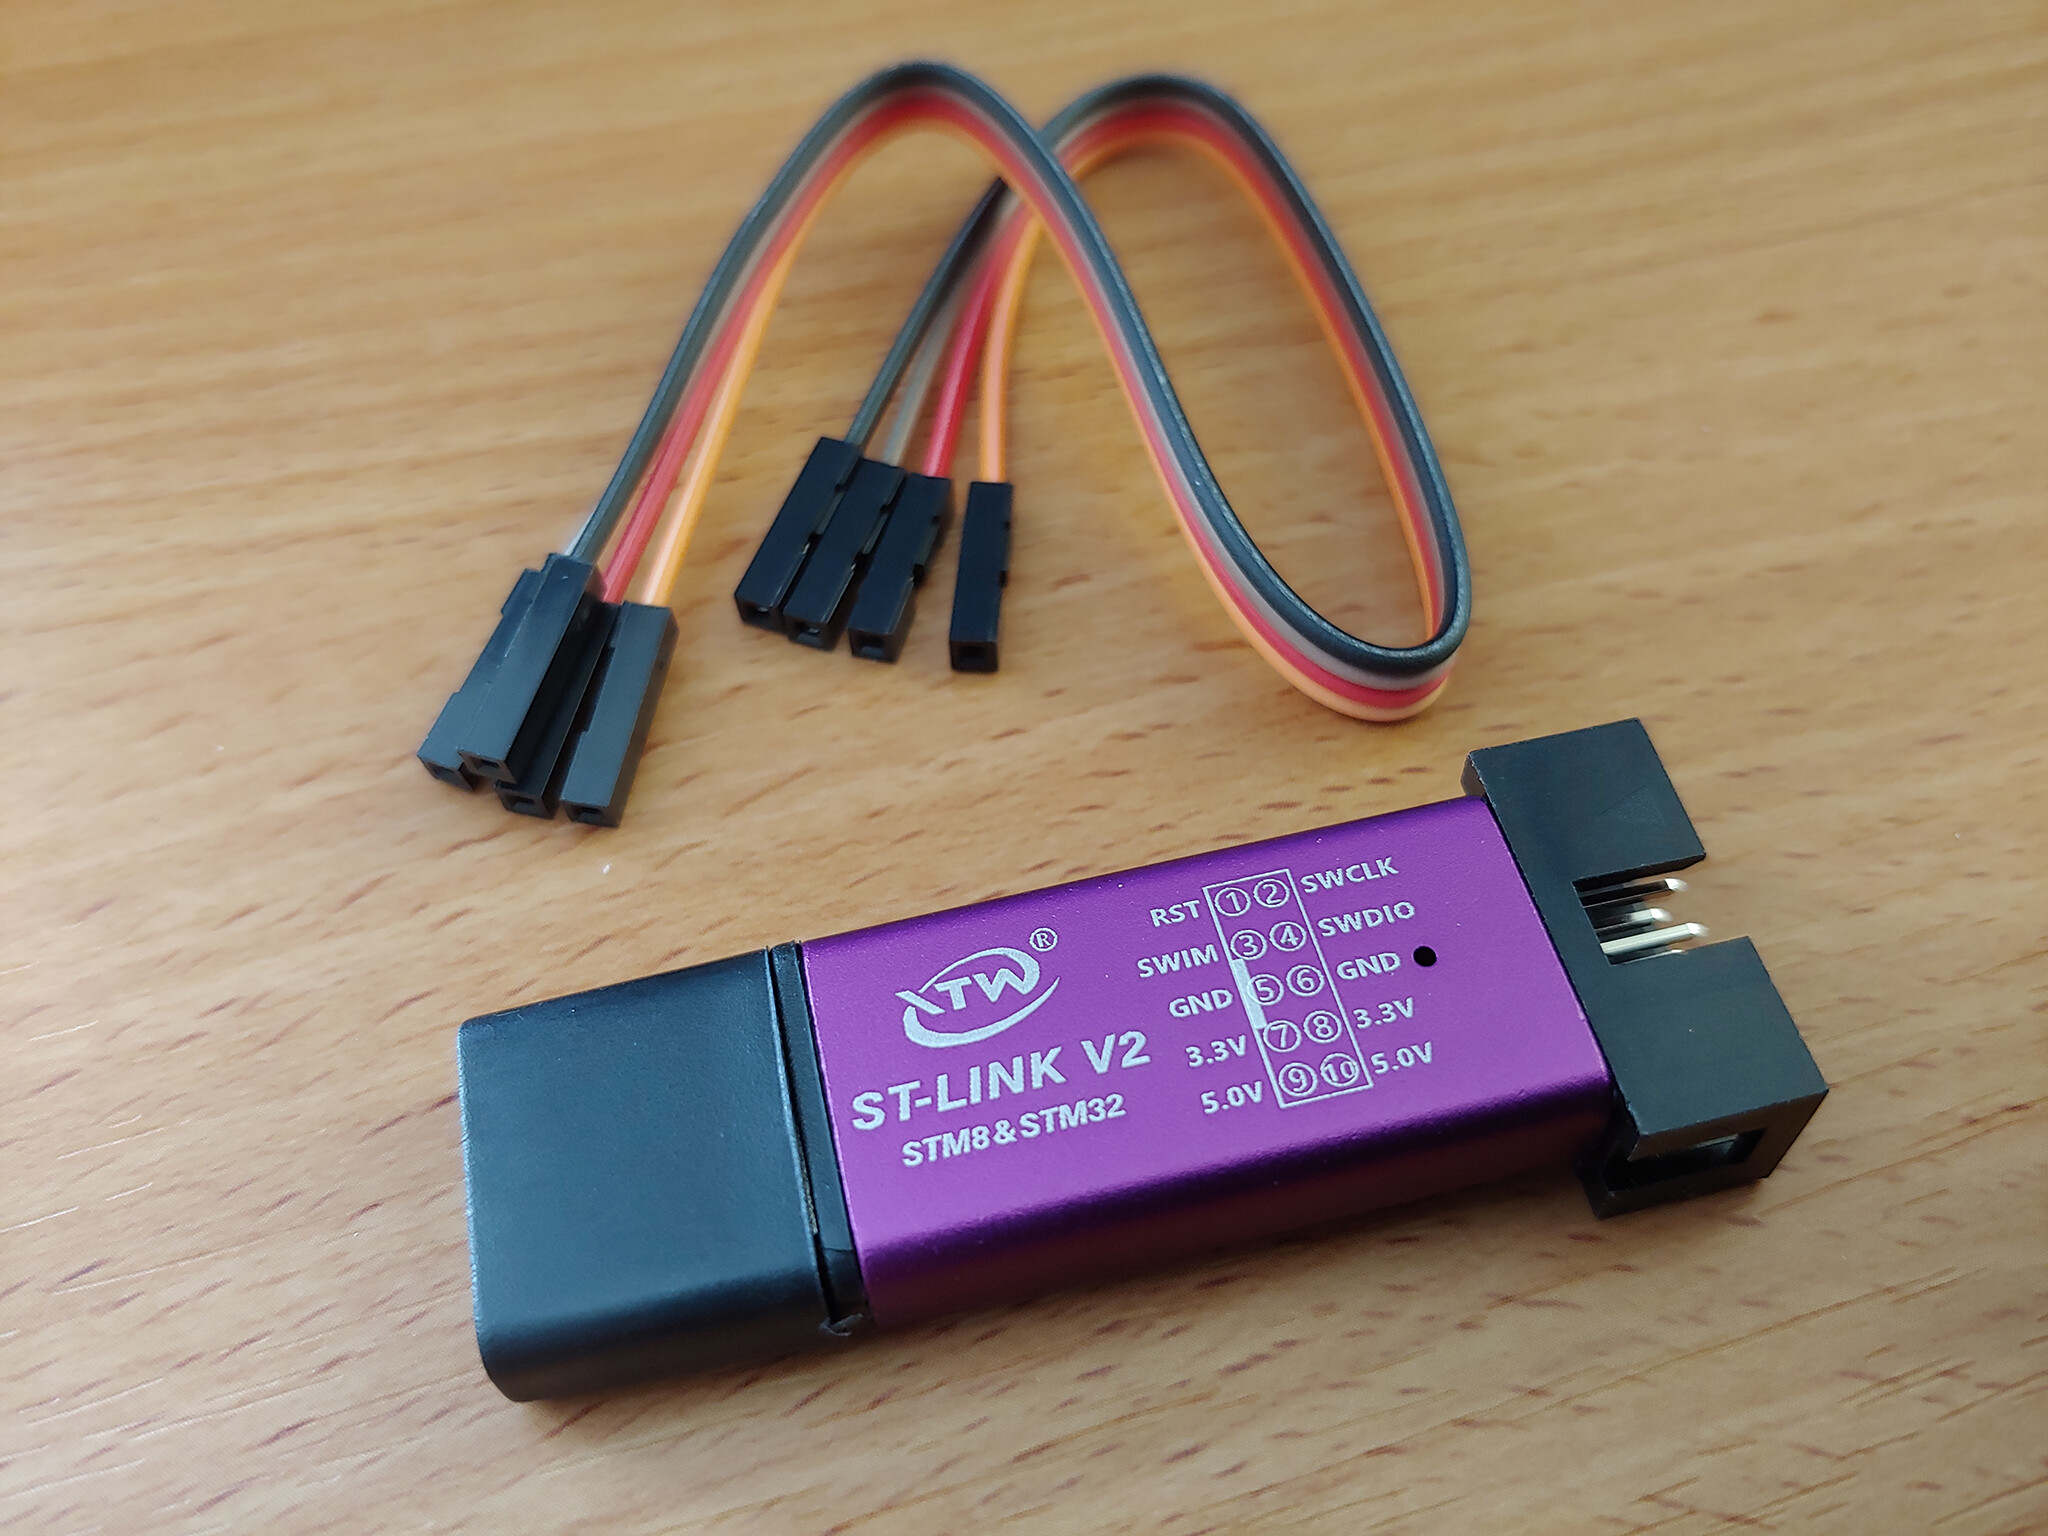
Please note that to perform the MCU upgrade, you’ll need an ST-Link v2 hardware tool. However after this update, subsequent MCU updates can be done over the USB-C port. We will include a link in Khadas Shop (you must provide proof-of-purchase of your Tone2 Pro) for you to get a free ST-Link v2 hardware tool.
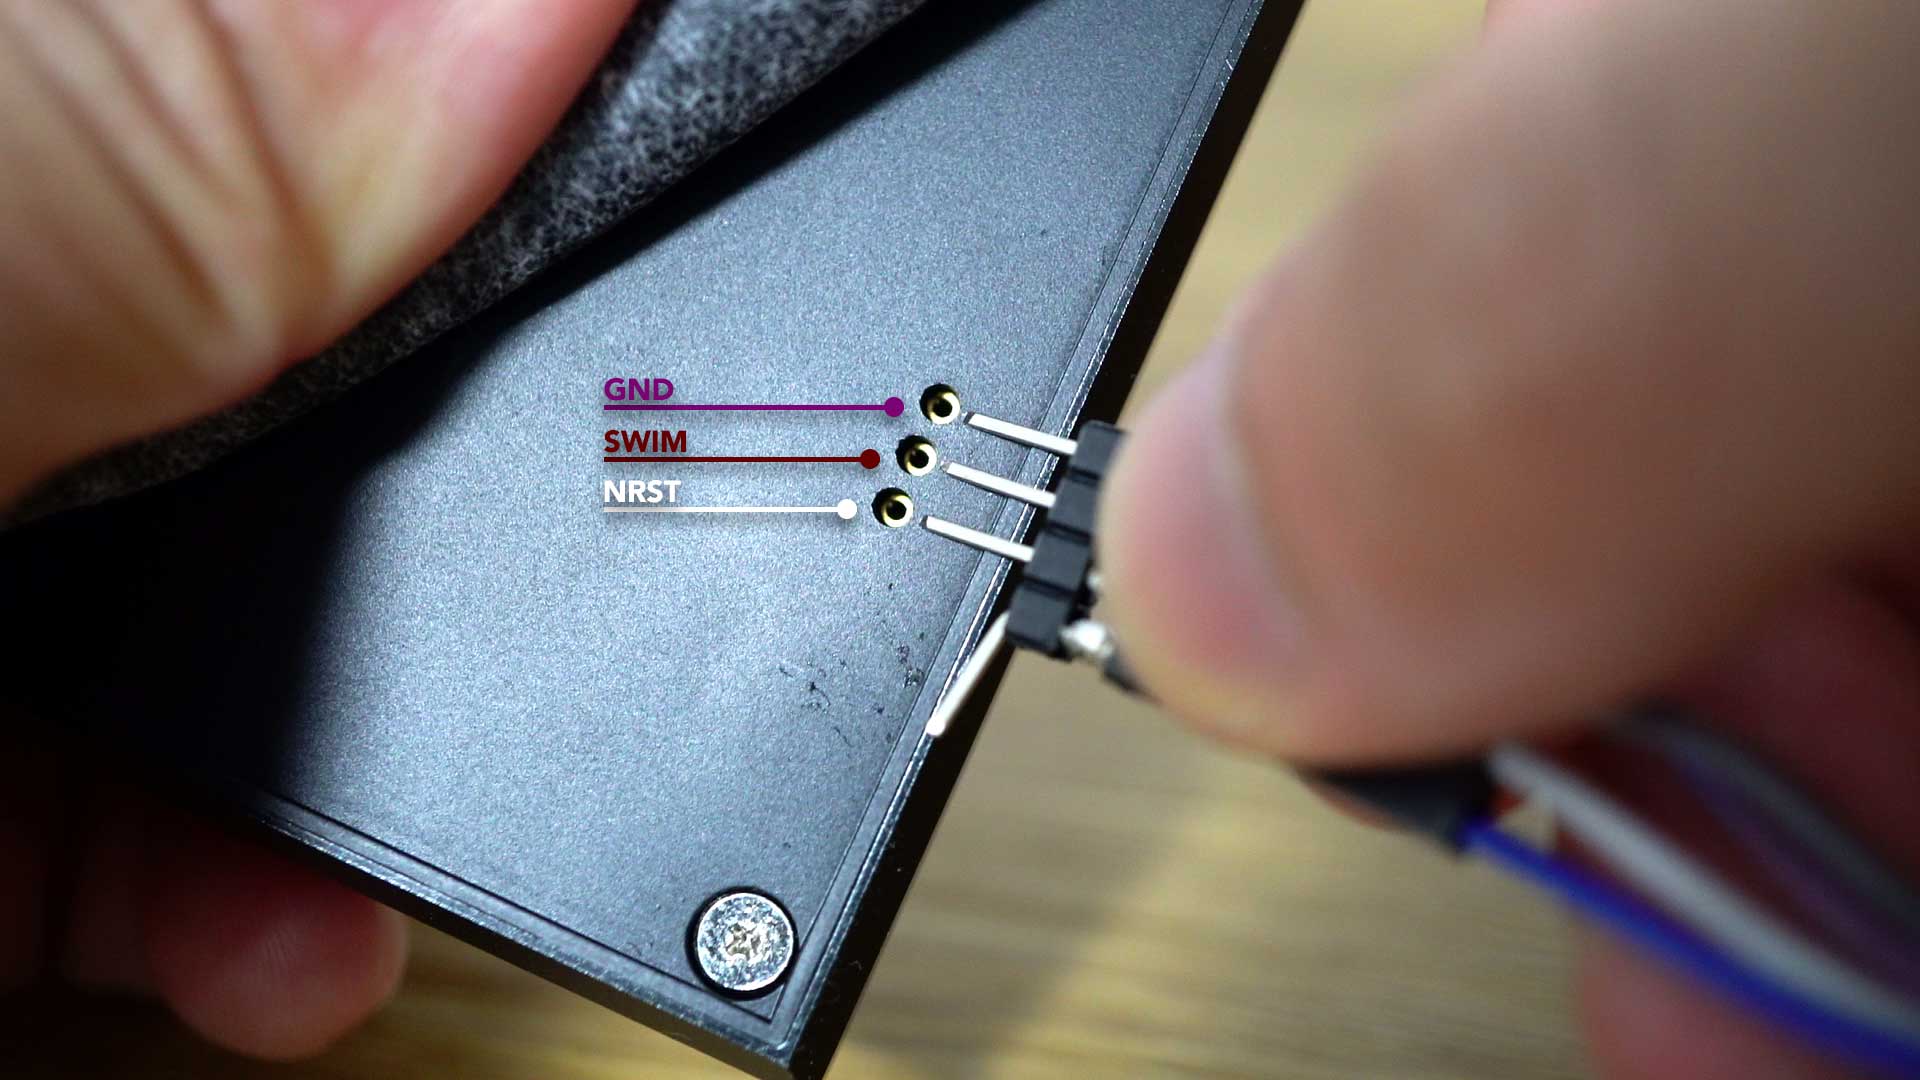
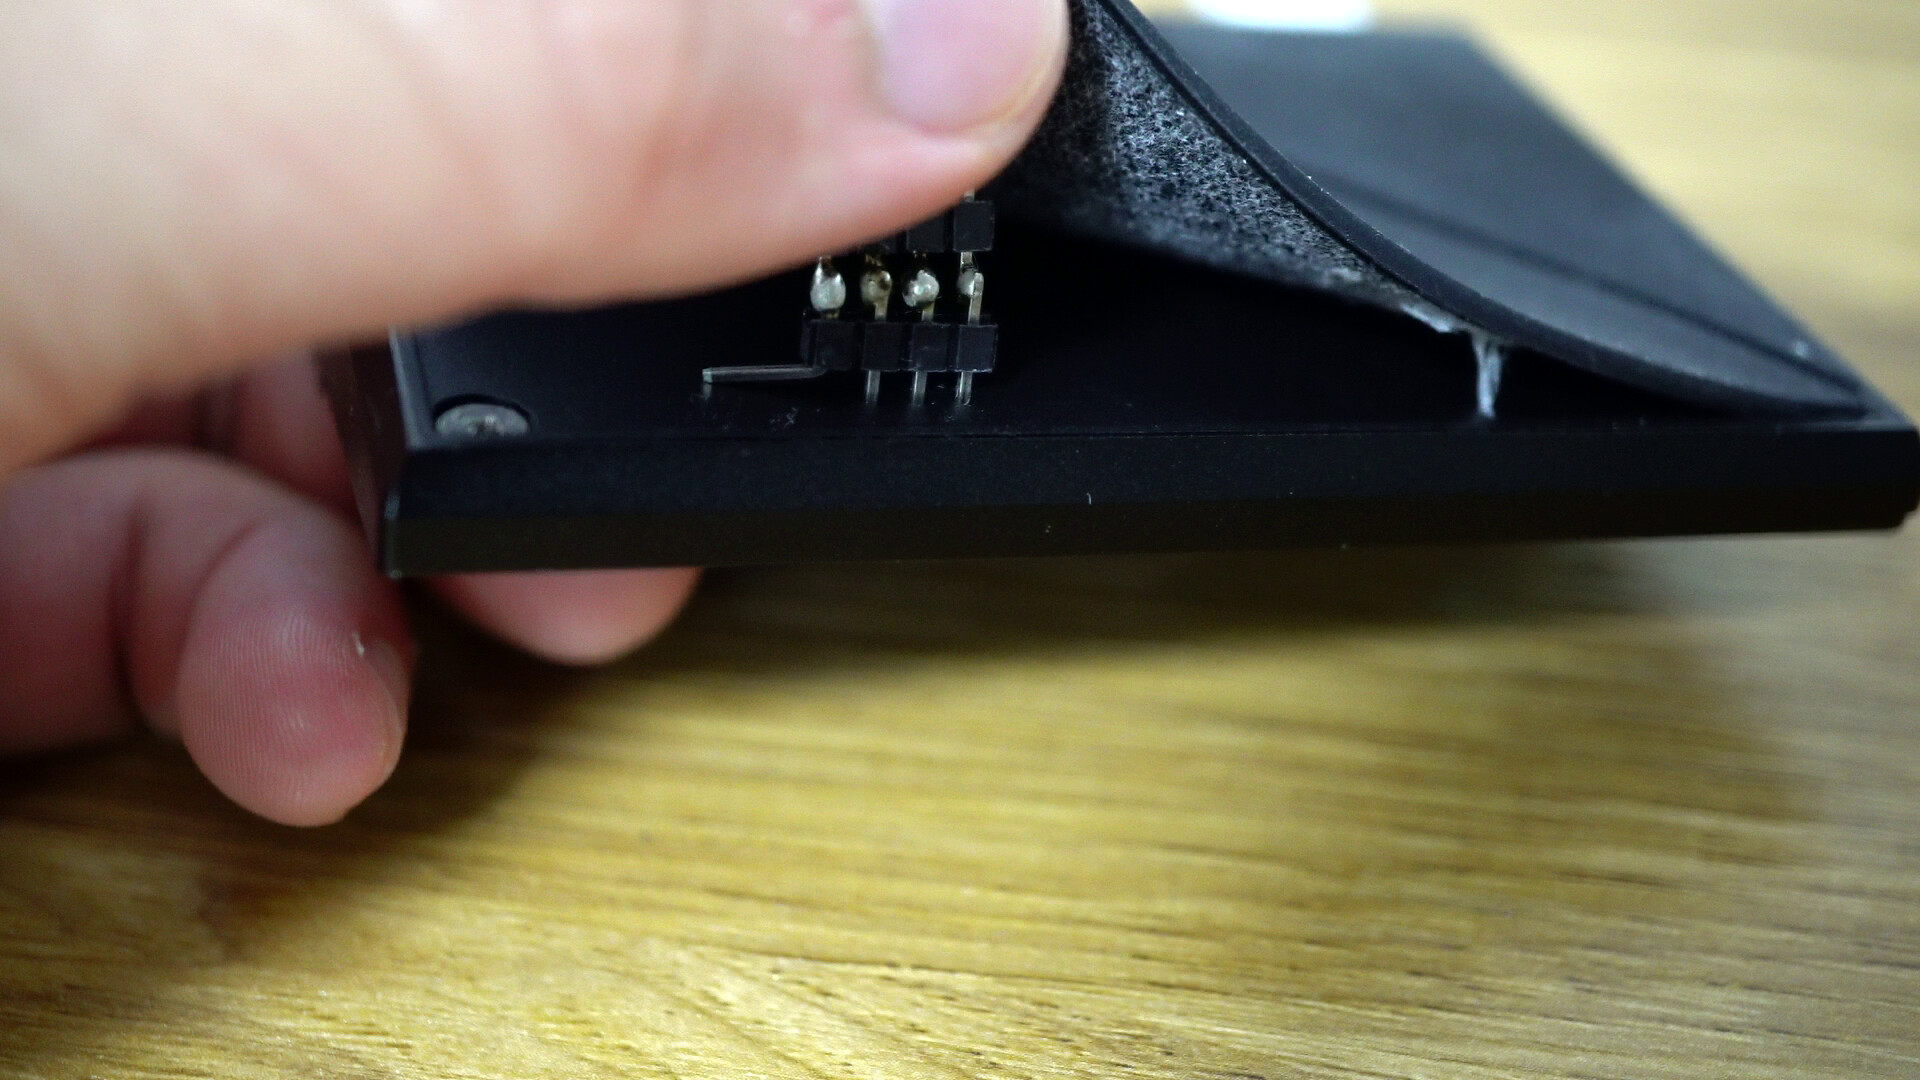
This hardware device plugs into your computer’s USB port, and pokes into the Tone2 Pro’s GPIO pins on the underside. Refer to the MCU update guide below for usage instructions.
Updating the XMOS:
To update the XMOS firmware to v1.2, follow this YouTube video or either of the 3 videos above, as per normal.
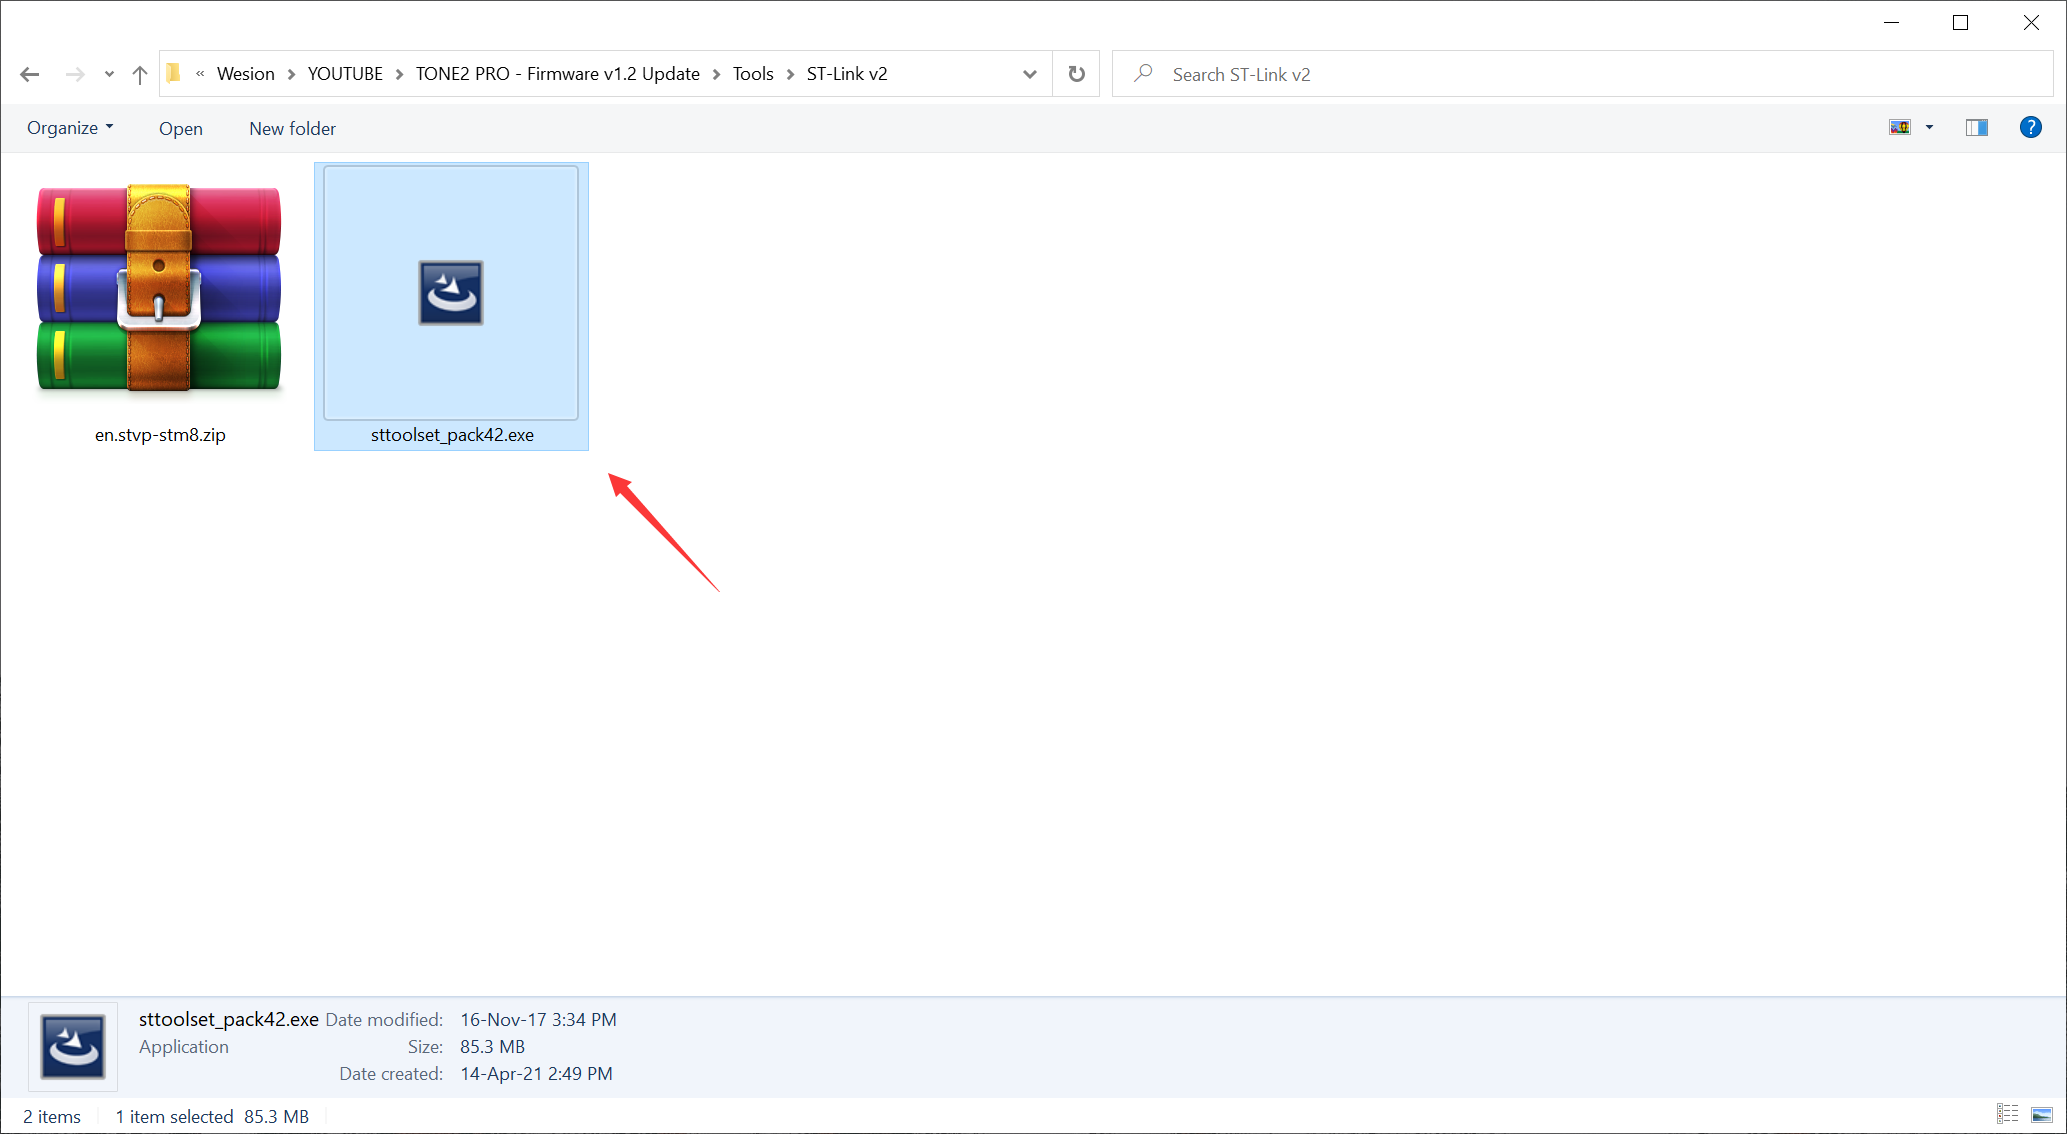
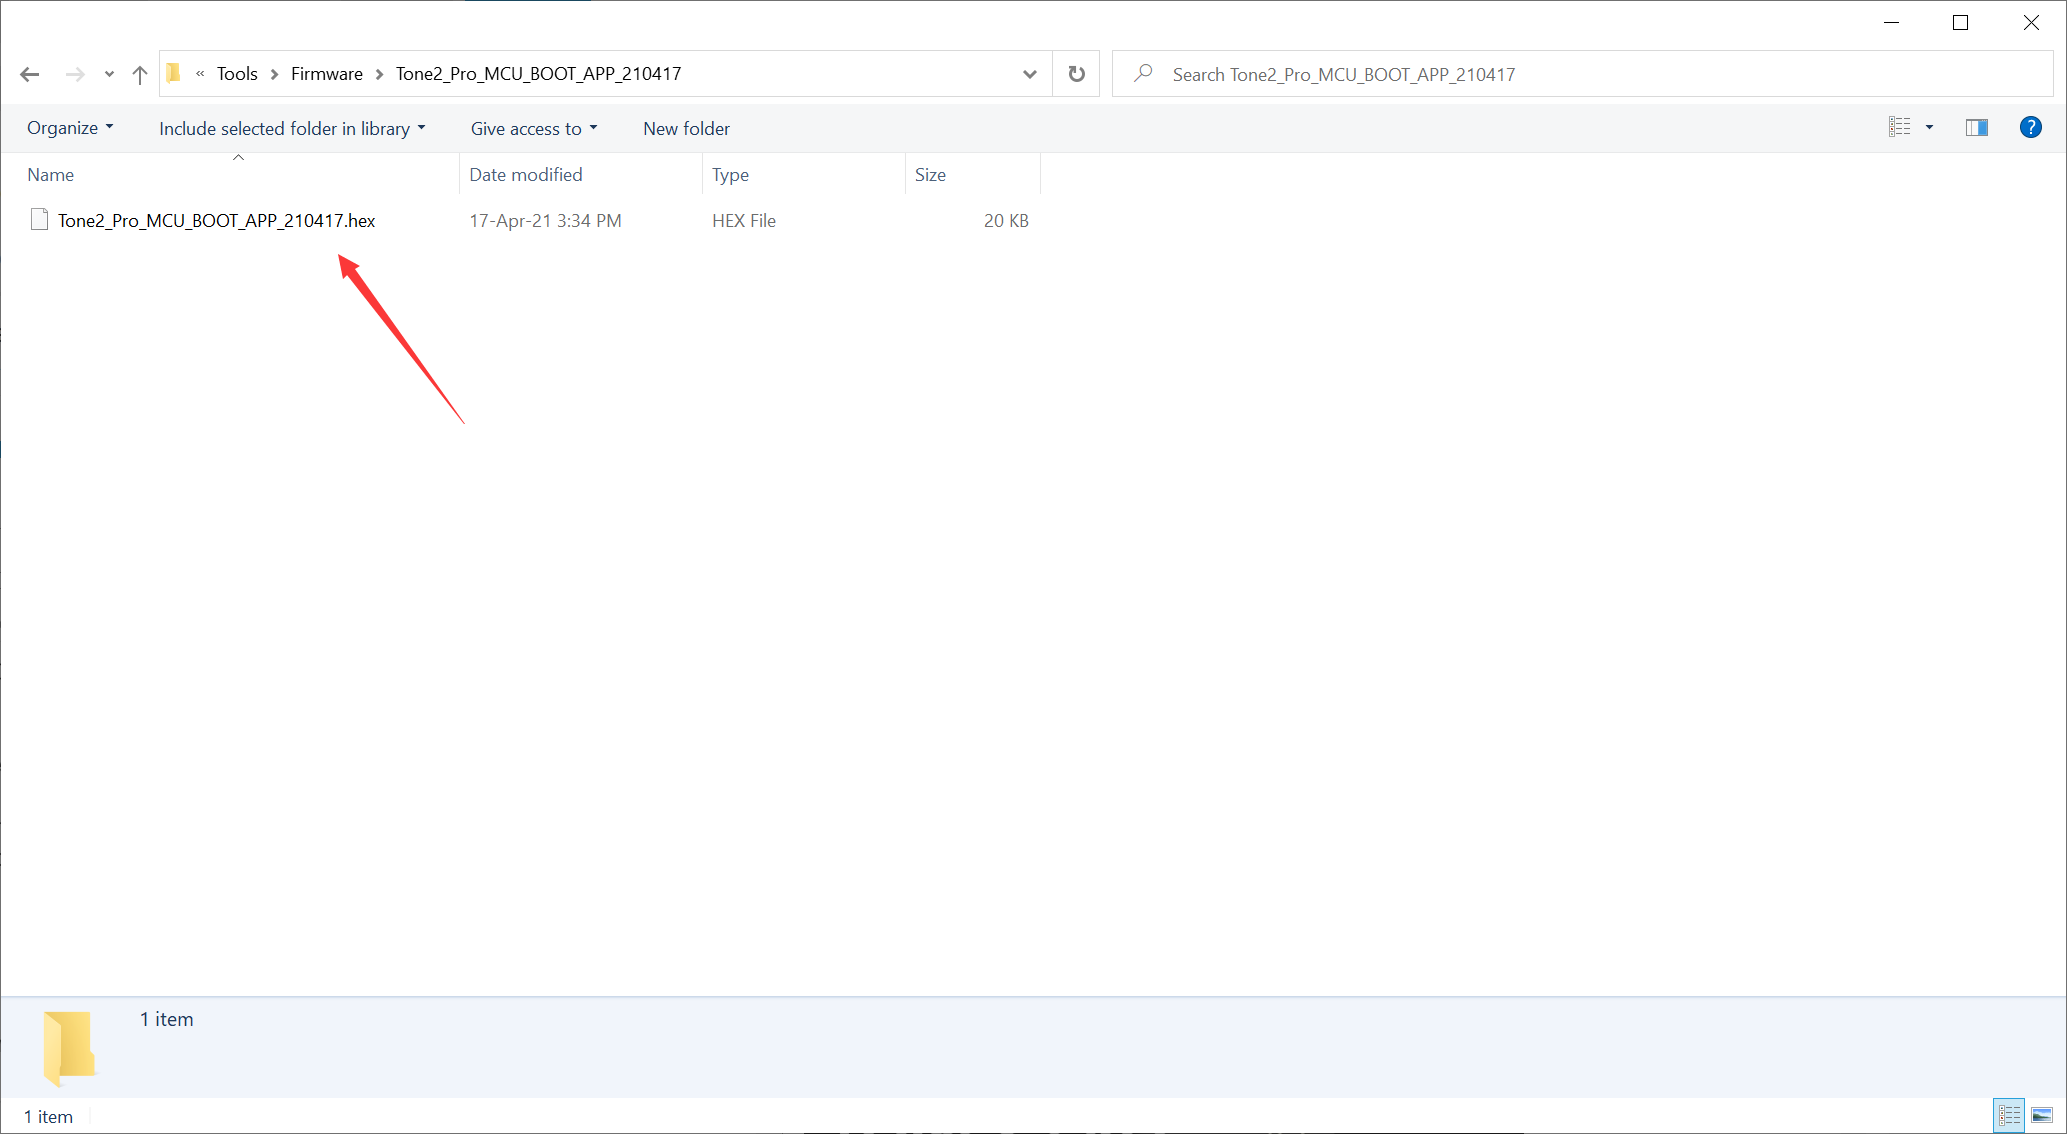
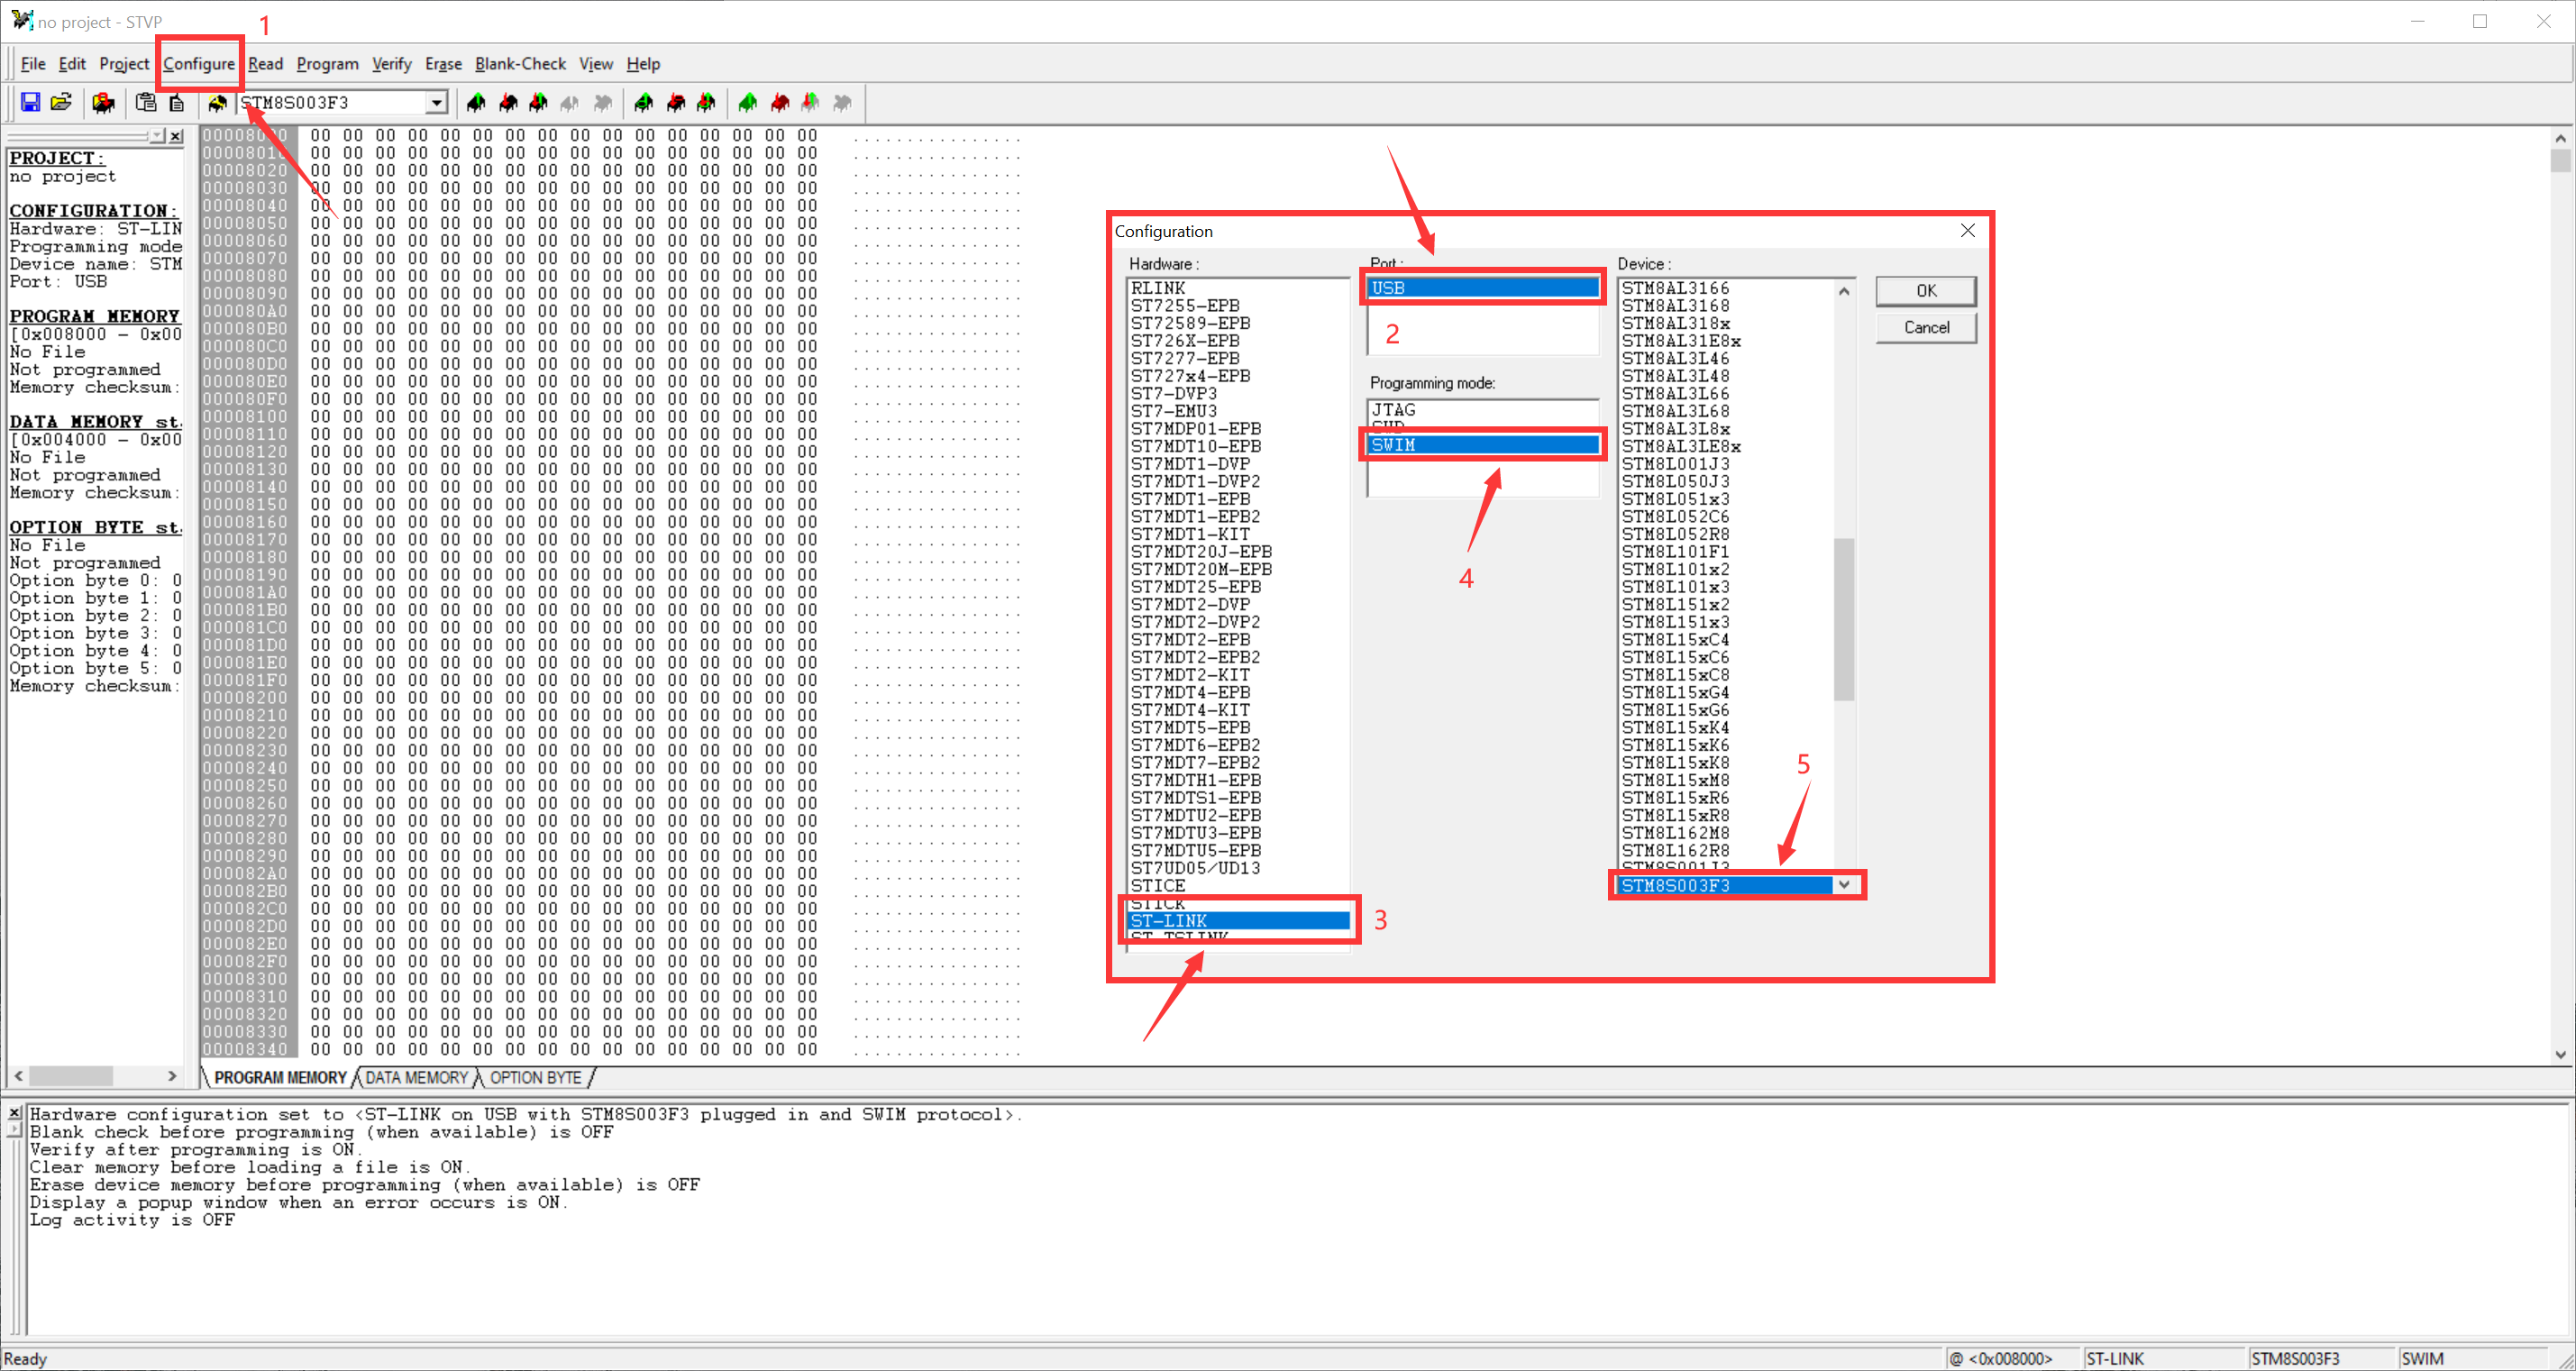
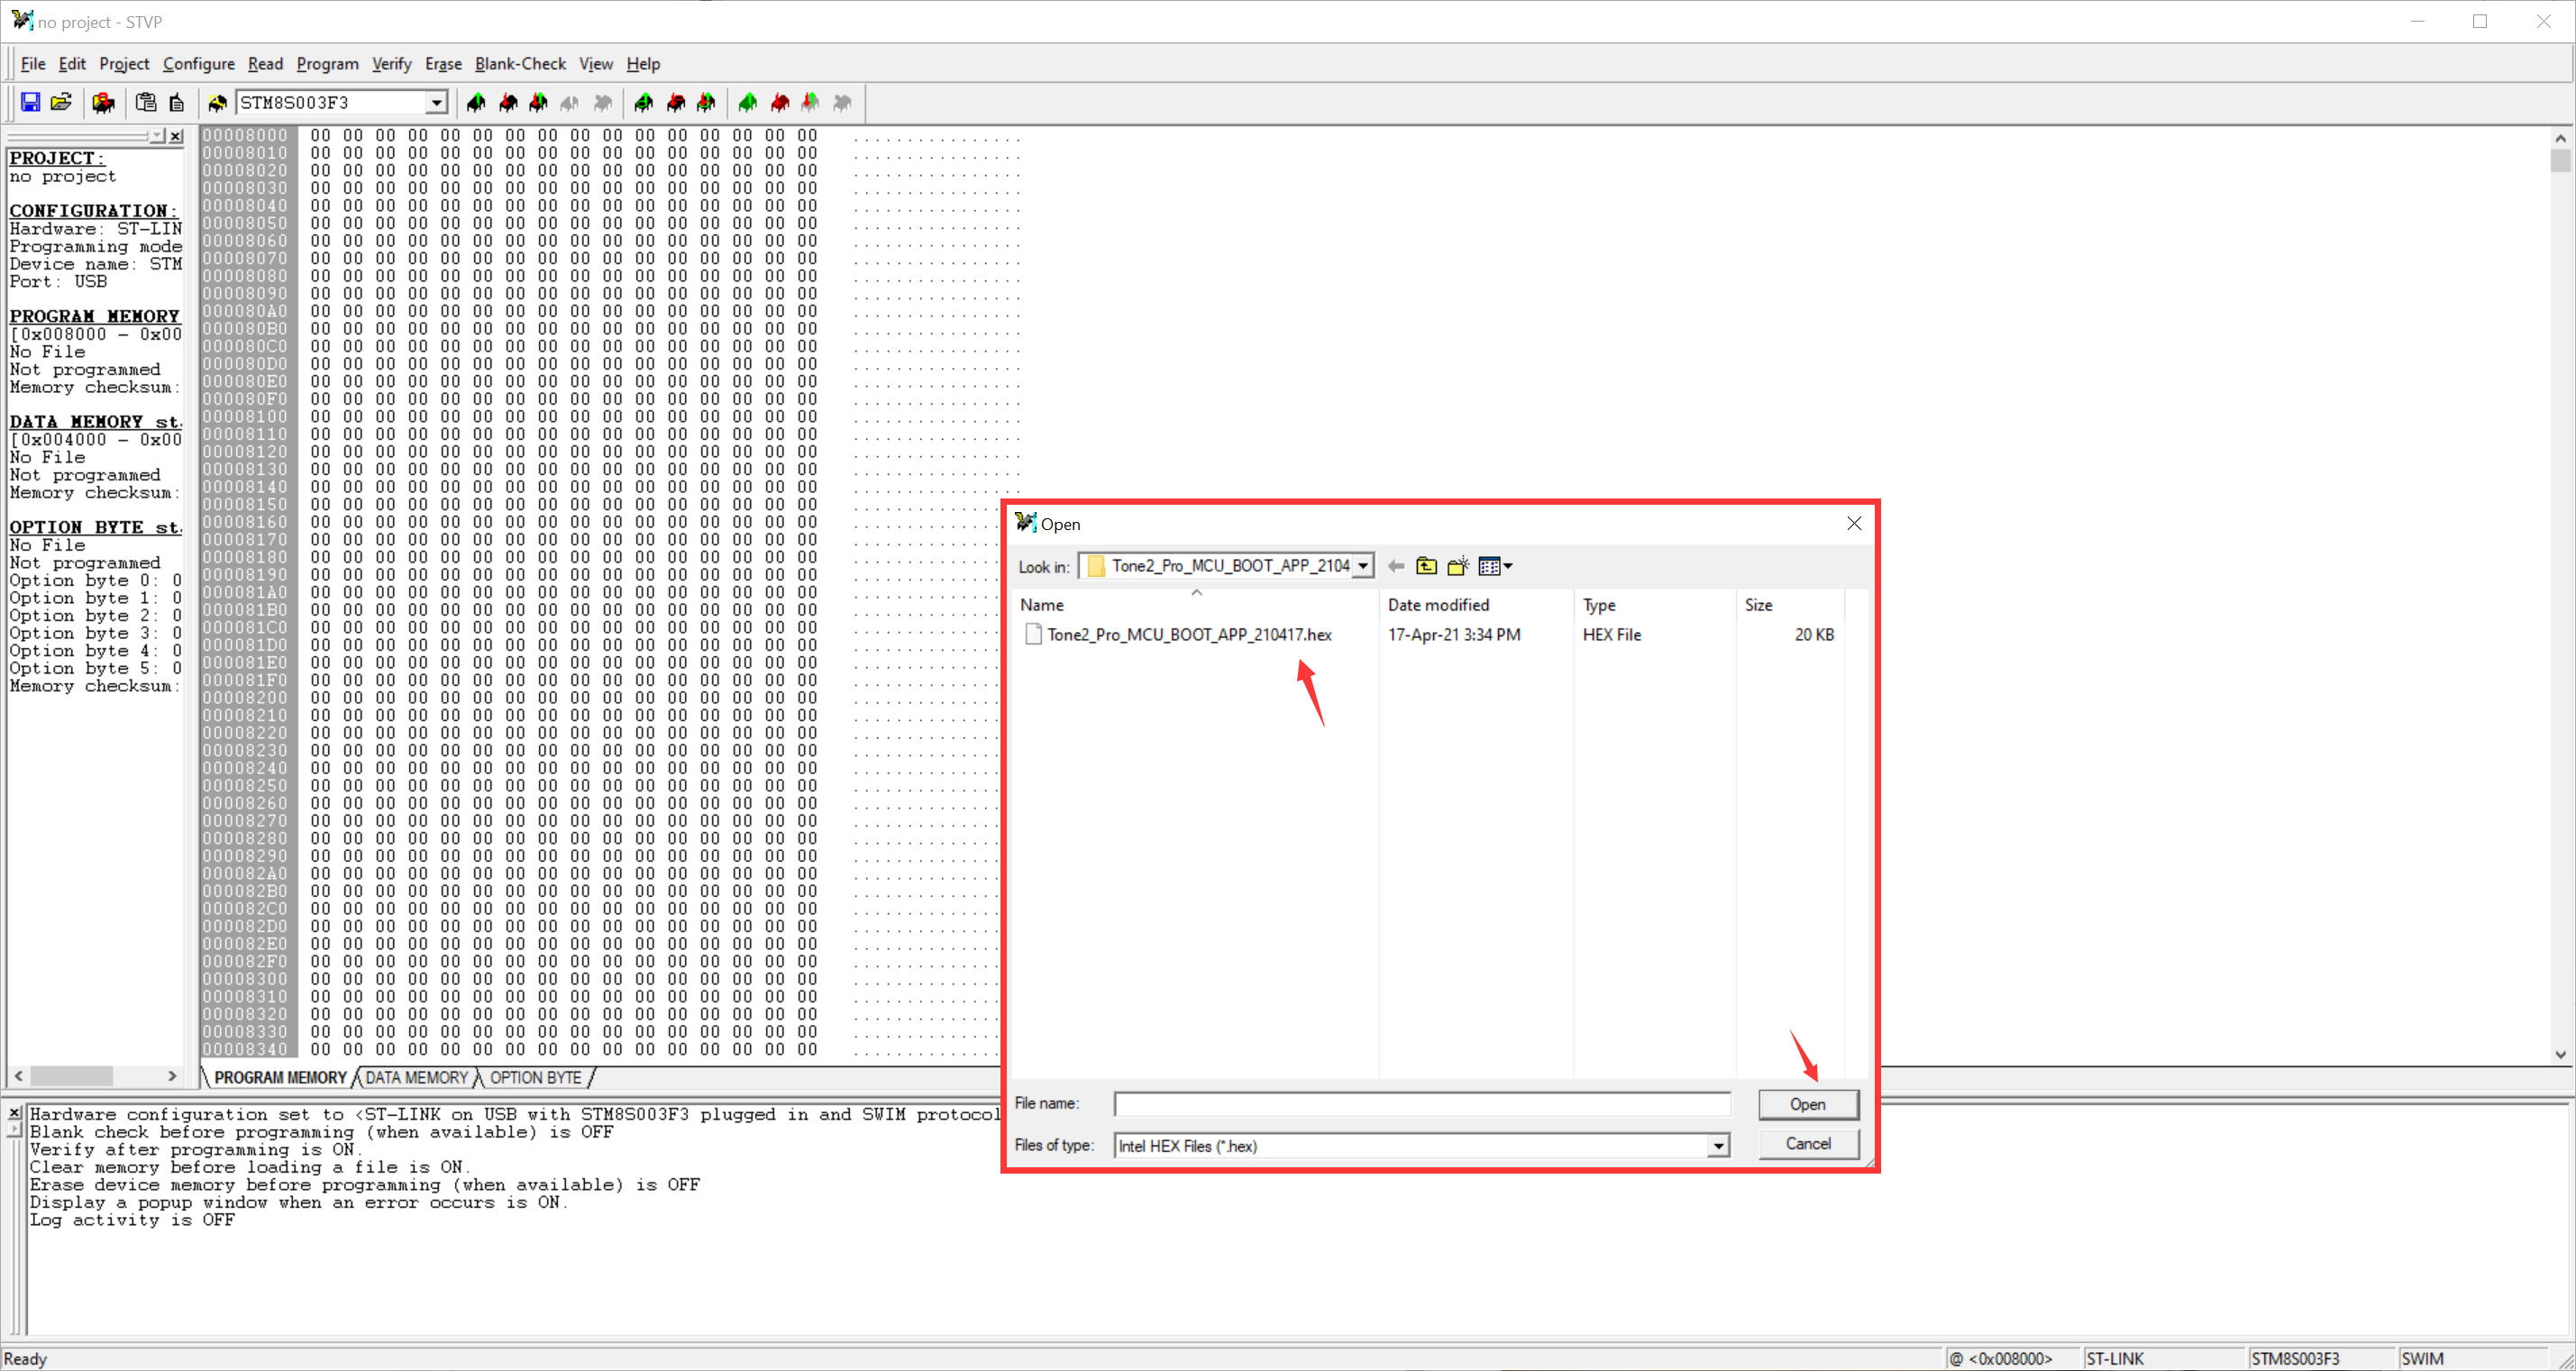
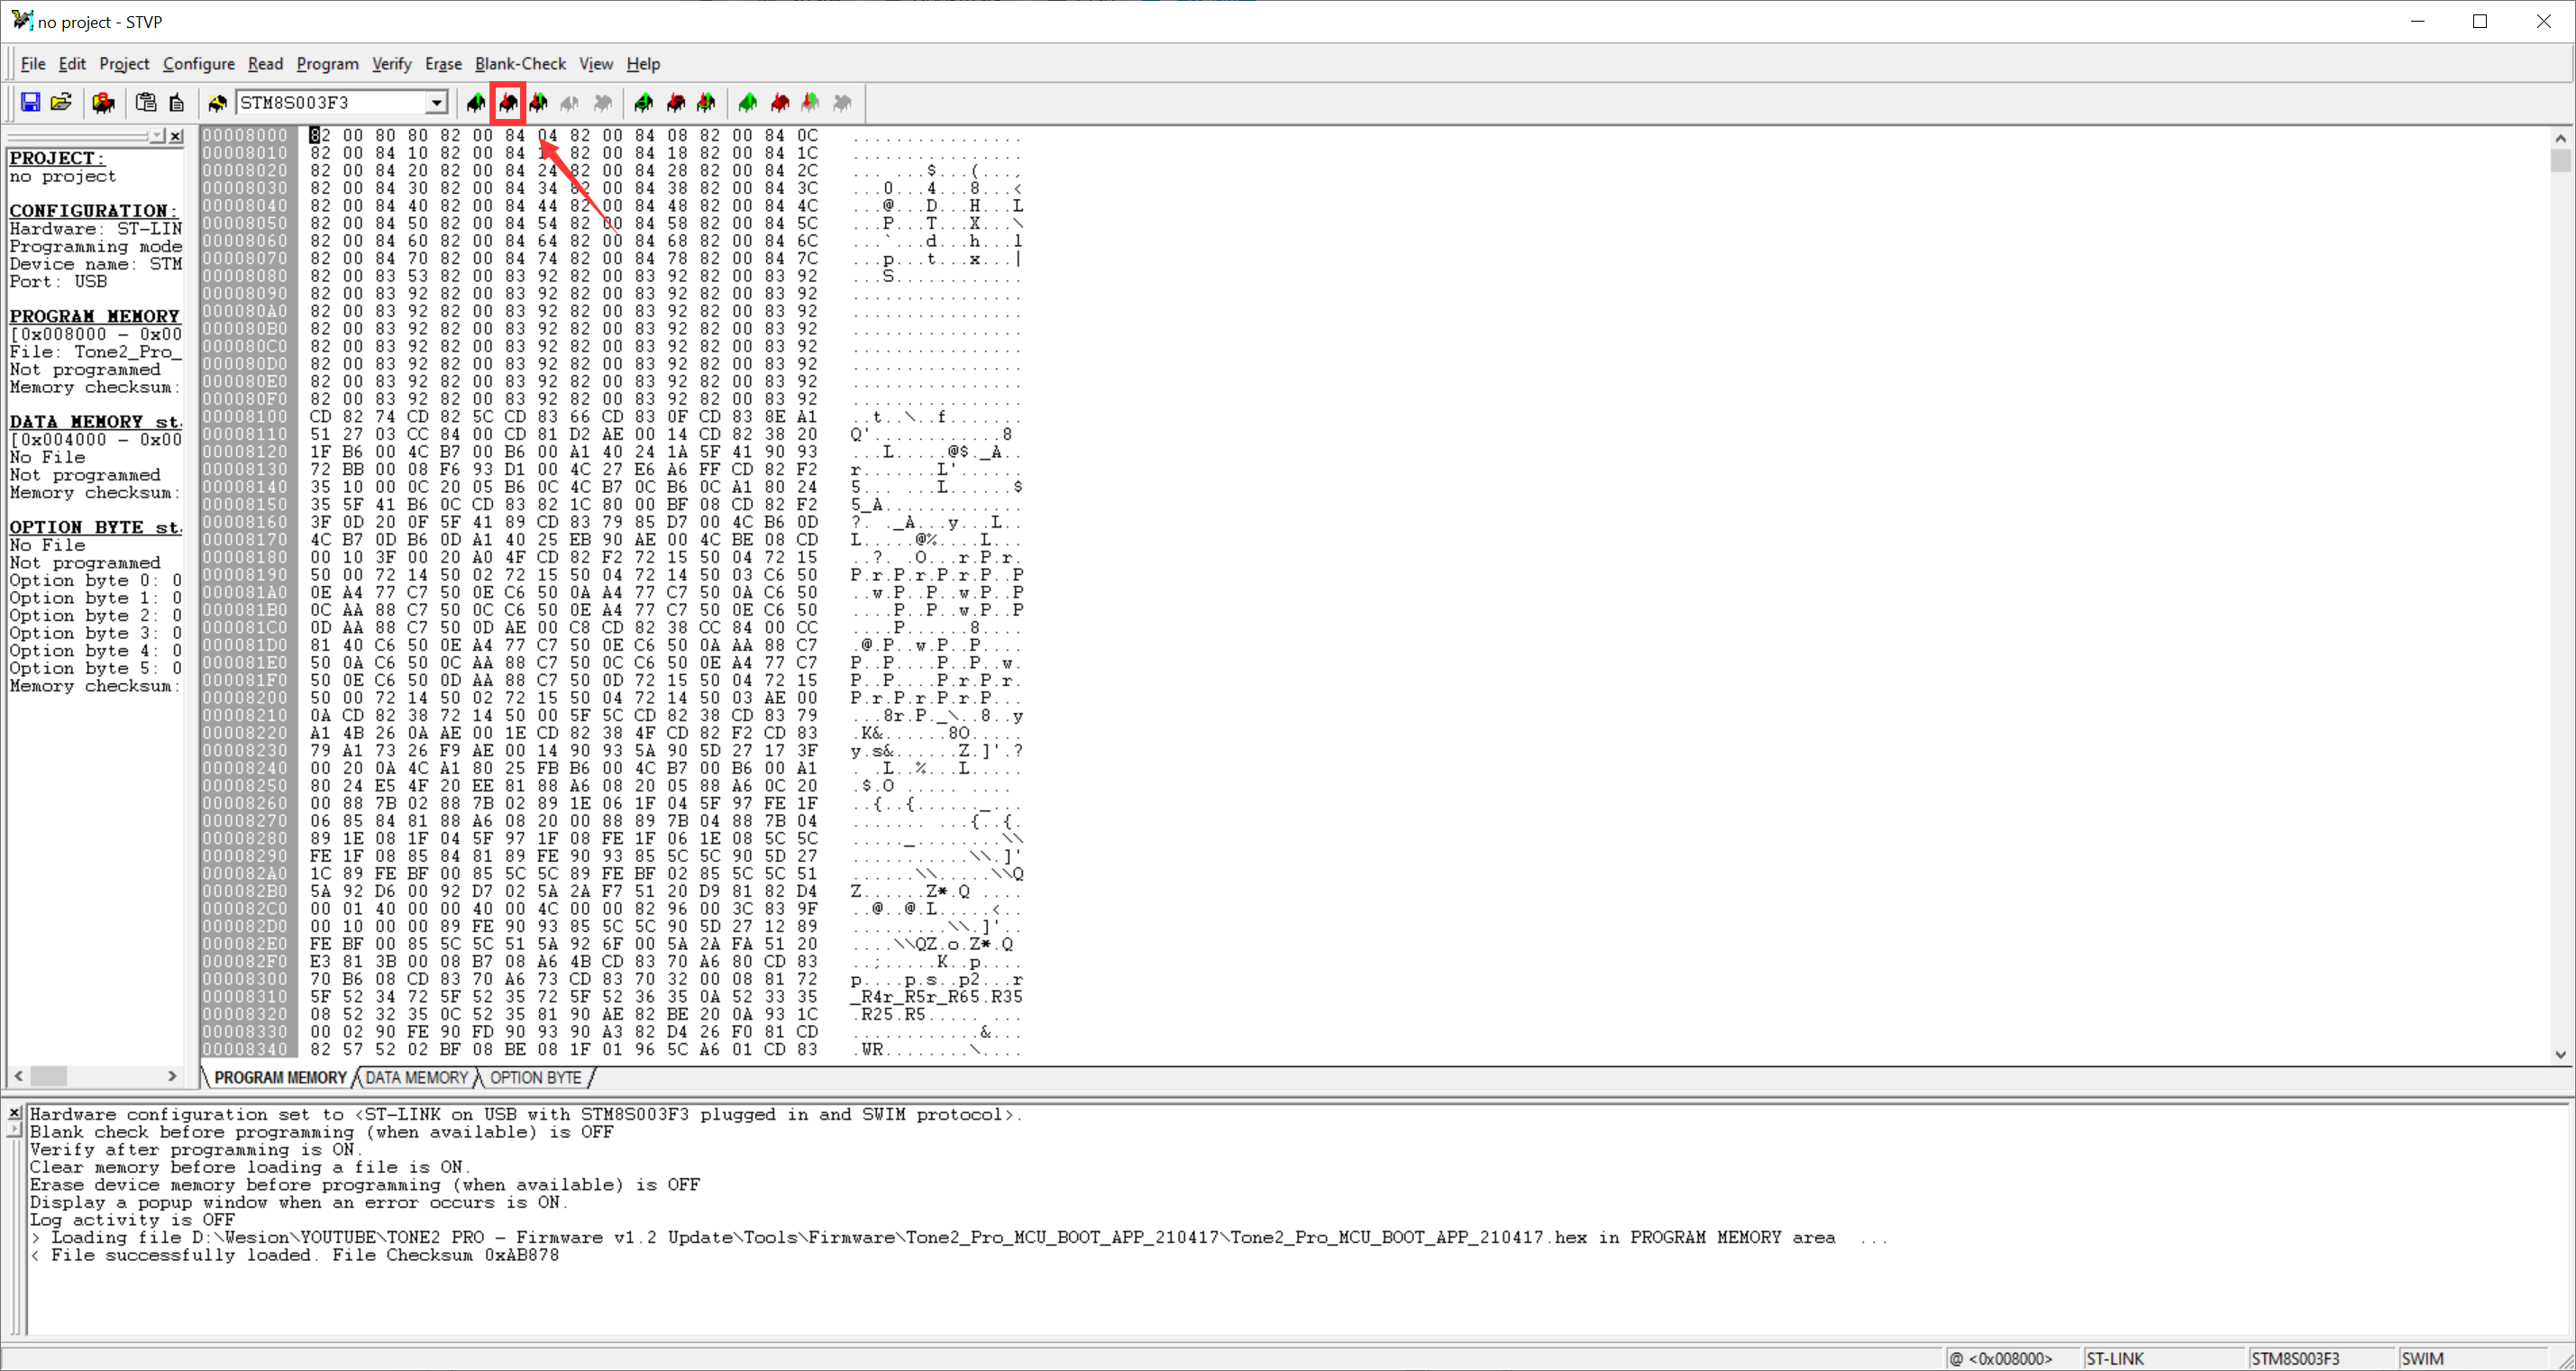
Updating the MCU:
You can refer to this pictorial guide below, or either of the 3 videos above (corresponding to your operating system of choice).
do I need to only plug the wires coming from the ST Link to the Tone2Pro, or is it needed to plug the power (on IS port) on Tone2 Pro at the same time ?
I was wondering the same, but since step 10 says to “Reconnect your Tone2 Pro”, I’m thinking that there should be nothing connected to either USB-C port during the MCU Firmware upgrade.
For me, what’s missing is a step to view the current MCU version so that we can confirm that the upgrade worked.
Right, I thought about it later and it was OK. I did an error but it was bue to bad contact between the pins and Tone2 Pro, I had to put a bit of lateral pressure on cables just above the pin while performing the update.
The software confirms the update as it checks it after updating and says that the firmware is same than the firmware loaded in the software.
What “free tool” are you guys talking about? The ST-Link v2 is a hardware tool that you must purchase if you want to do the MCU update. It’s not free. Links to the software are provided above.
I have my ST-LINK V2; however, the provided cable seems to be missing the three pins required to connect it to the bottom of the Tone2 Pro. Don’t believe I have anything on-hand that will work.
I guess these are the jumpers that I need, but it’s kind-of annoying to have to buy 40 of them when I only need three. Also, this is more than I paid for the actual ST-LINK V2. :-\
They refer to this. I assume because the tool is necessary to bring the board up to date, Khadas may offer a free tool to those who purchased the first or second batch boards, in the interest of good will.
Do you have, or have access to any old motherboards or soundcards? These same size pins will be used on them and many other devices. If you solder, you could make jumper pins by tinning some wire.
That would be nice, but many early adopters got a bit of a break in the price for taking a risk on a new product. This sort of thing comes with the territory, I suppose.
I’ve already ordered that 40-pack of pins. Should be here tomorrow.
It’s great that a video tutorial will be out soon; however, if @tsangyoujun would update his post above to indicate that the Tone2 Pro requires power (USB or I2S) during the MCU update, we’d be set. From his post, this was not clear, but it sounds like you are saying that connecting power to either of the USB-C ports is required.
I’ll report back on how the process goes once my jumpers are in. Thanks.
")
")
")

")