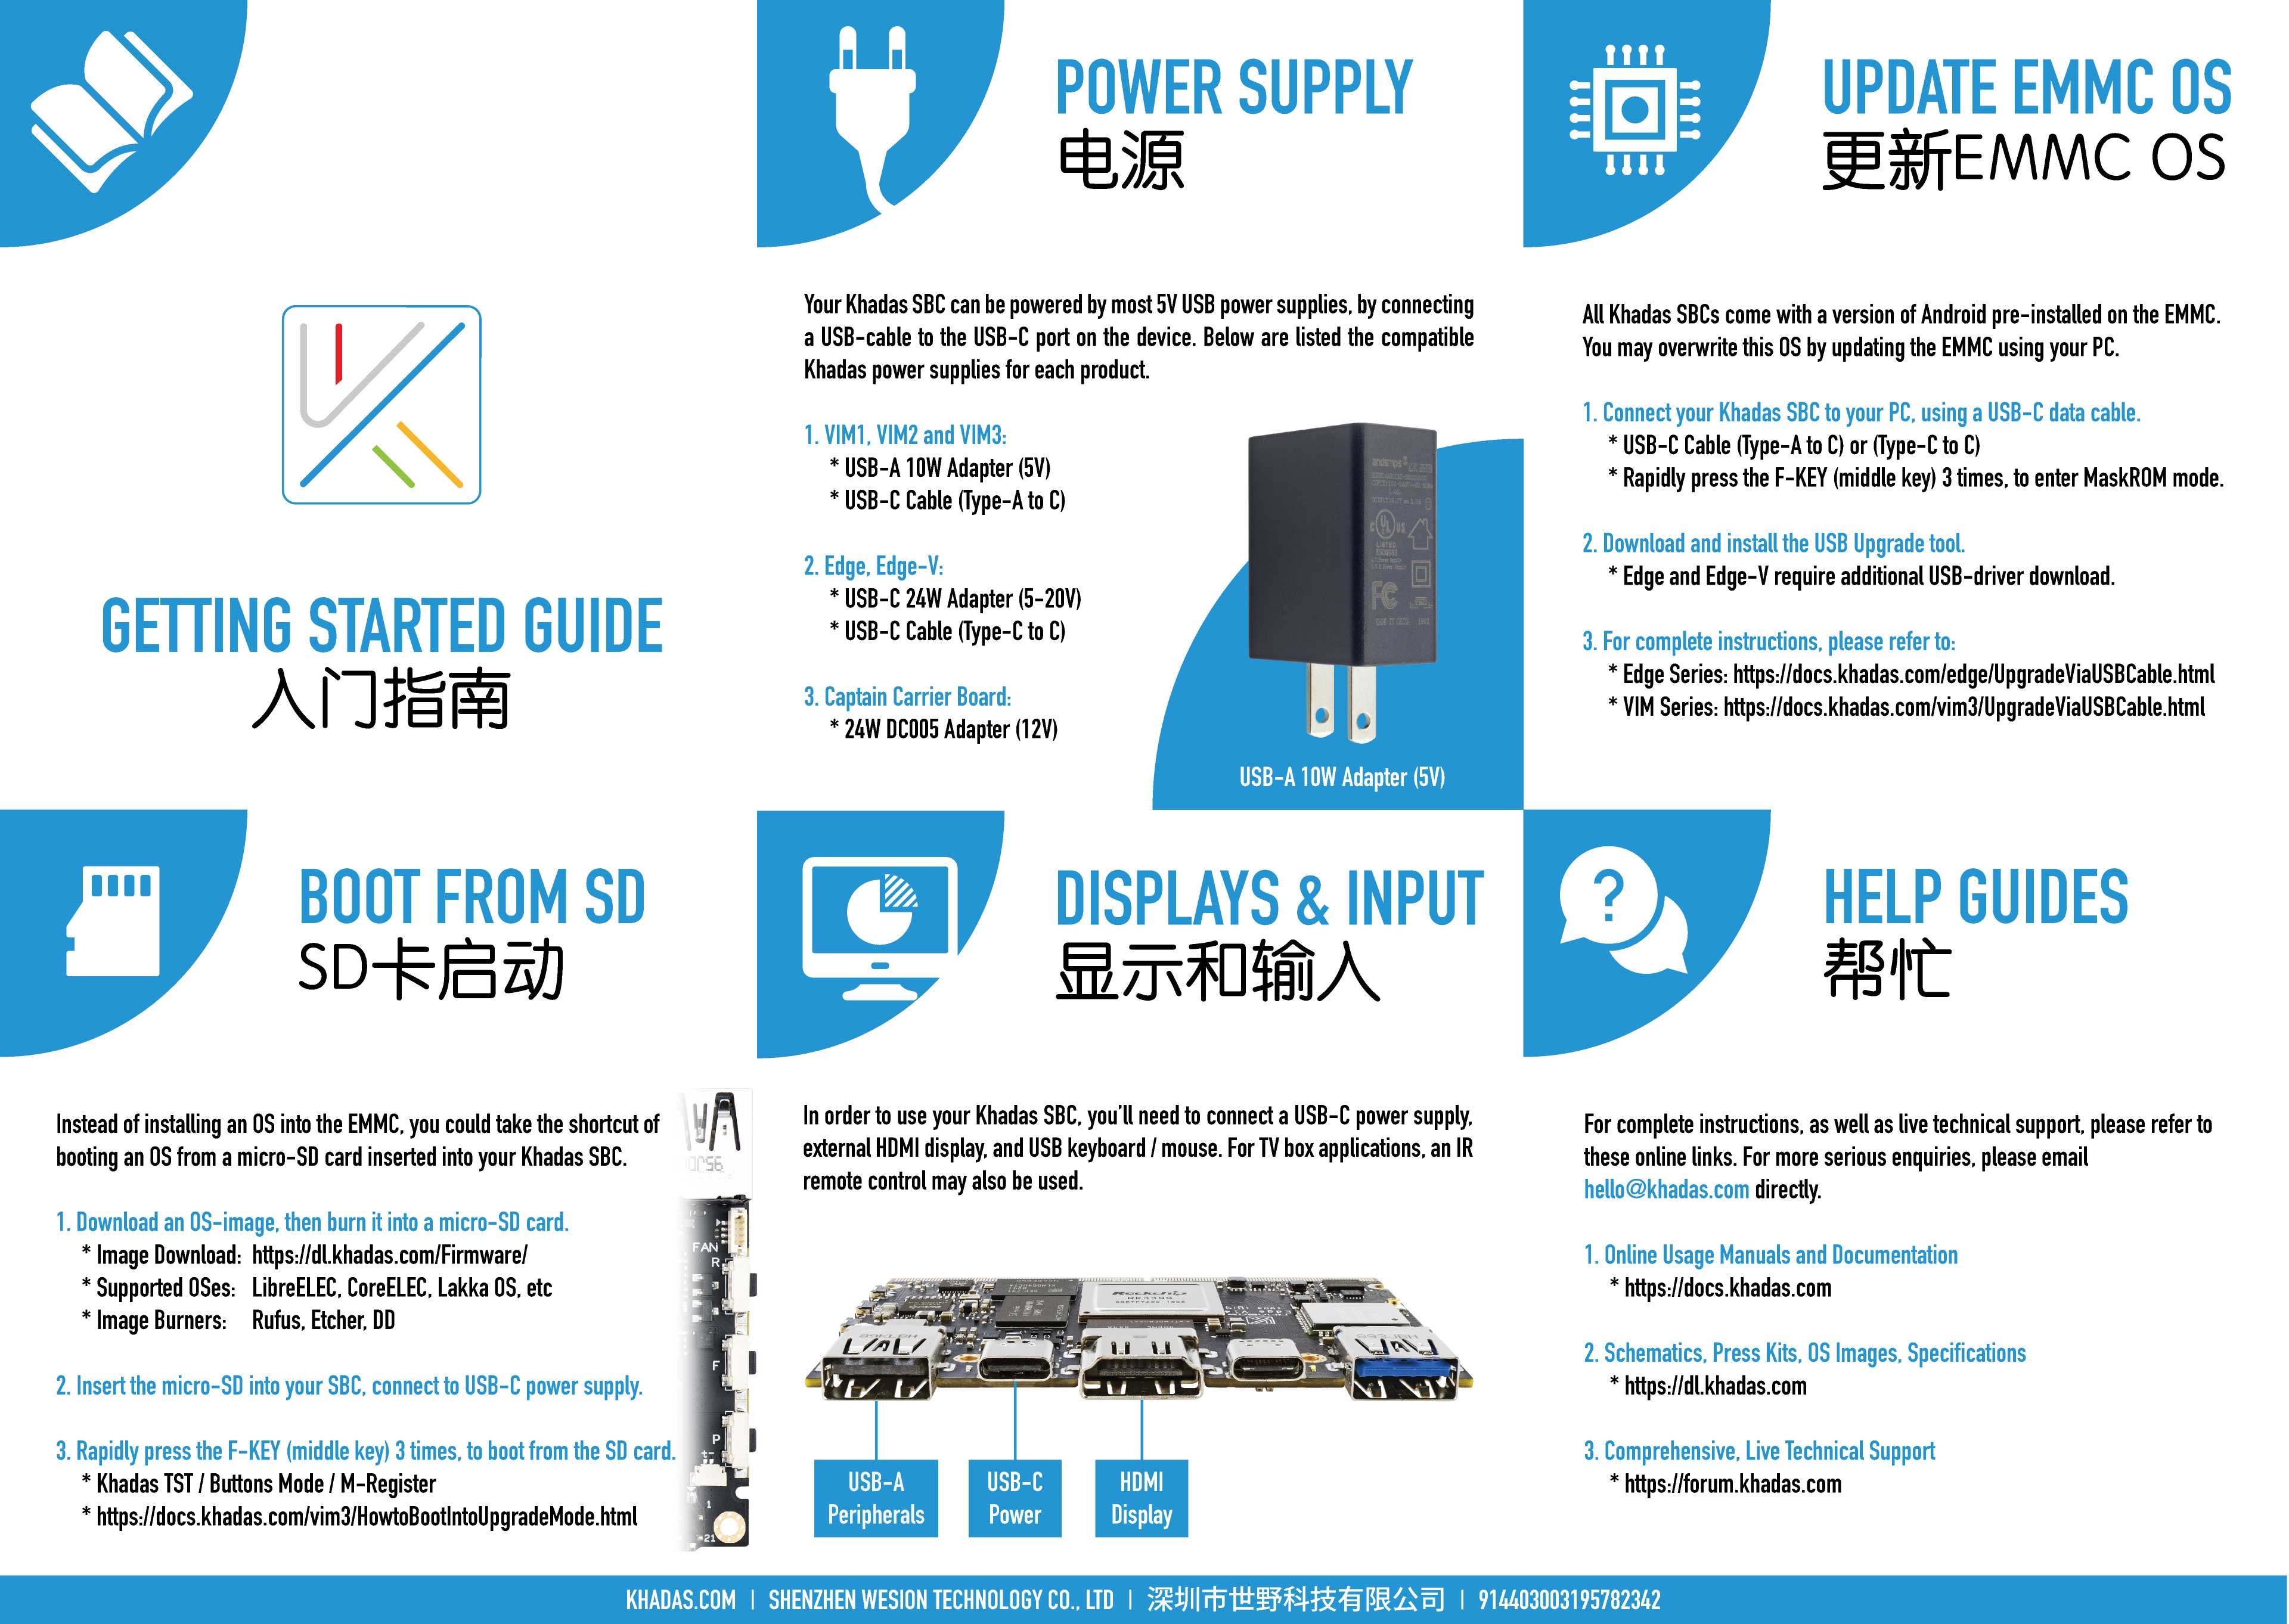
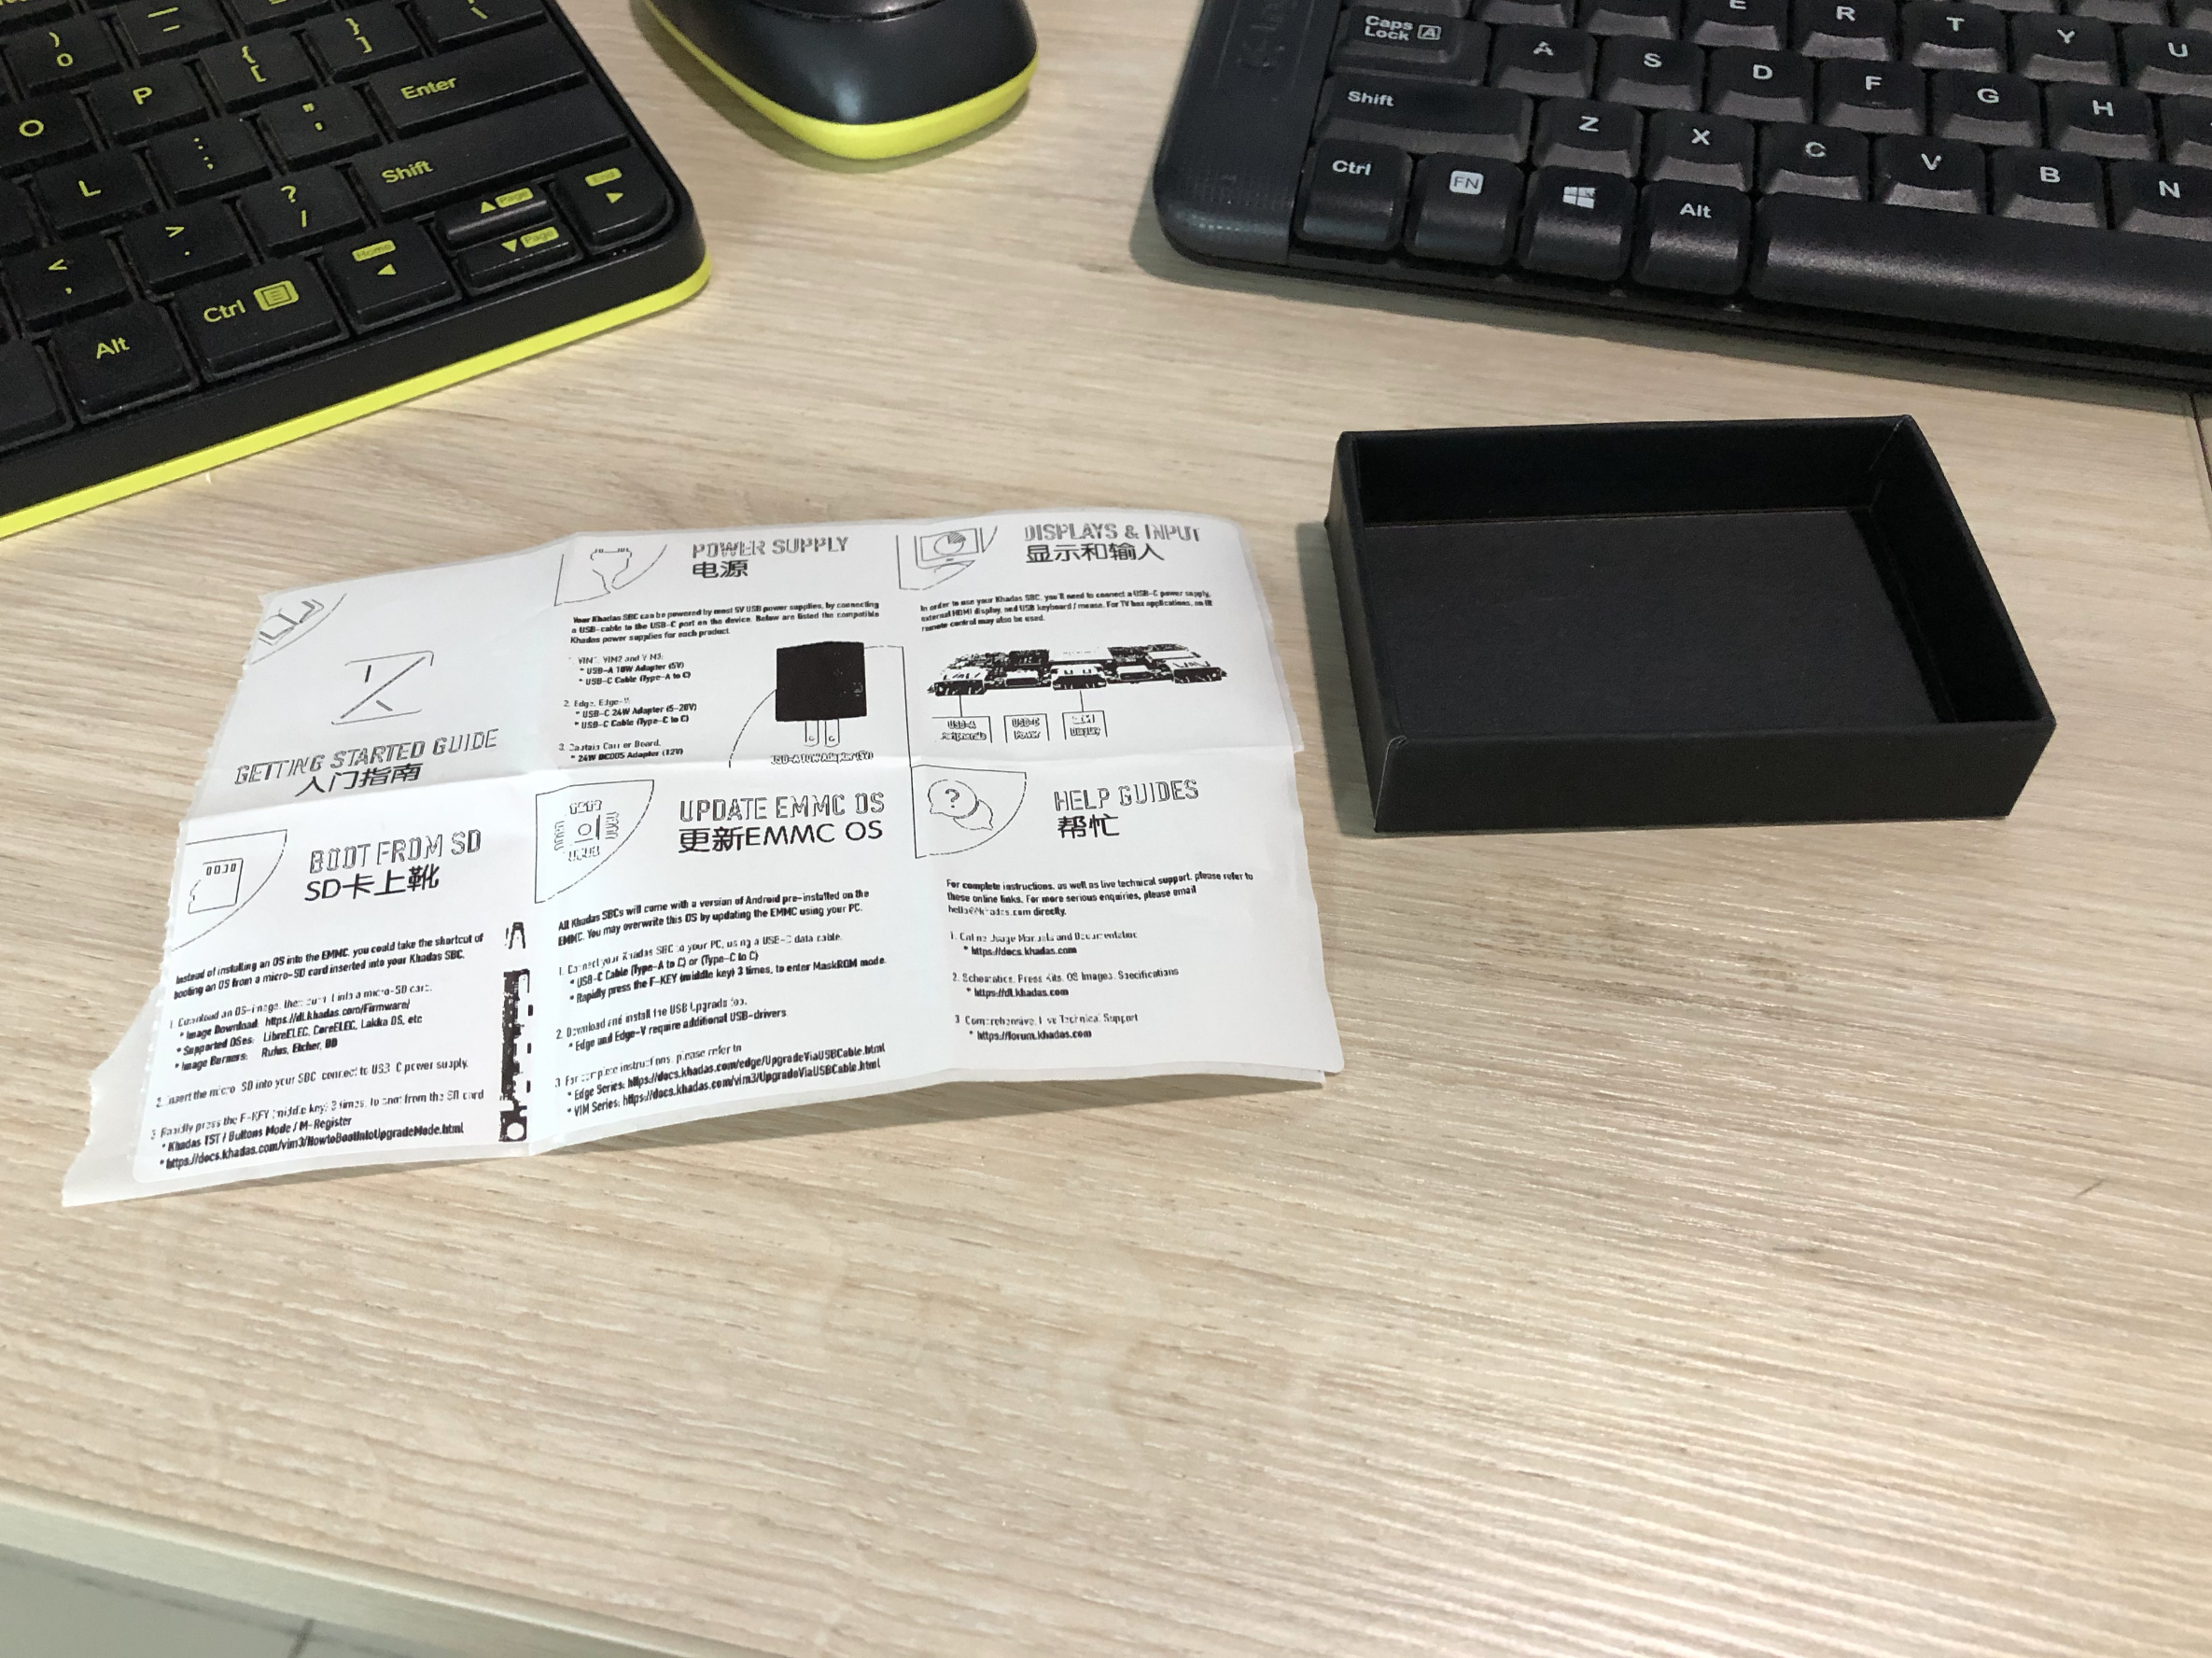
We are toying with the idea of making a small (148mm x 105mm) user manual for beginner Khadas users, likely in English and Chinese, that will be placed into the product box. Please have a look and let us know your thoughts.
It is meant as a “universal manual” for all Khadas products, which is a very tall order if you think of it…everything you need to get started in something no larger than a human hand. So we’re attempting to gather people’s feedback, in order to build an approximation of the frequently asked questions, that should be included.
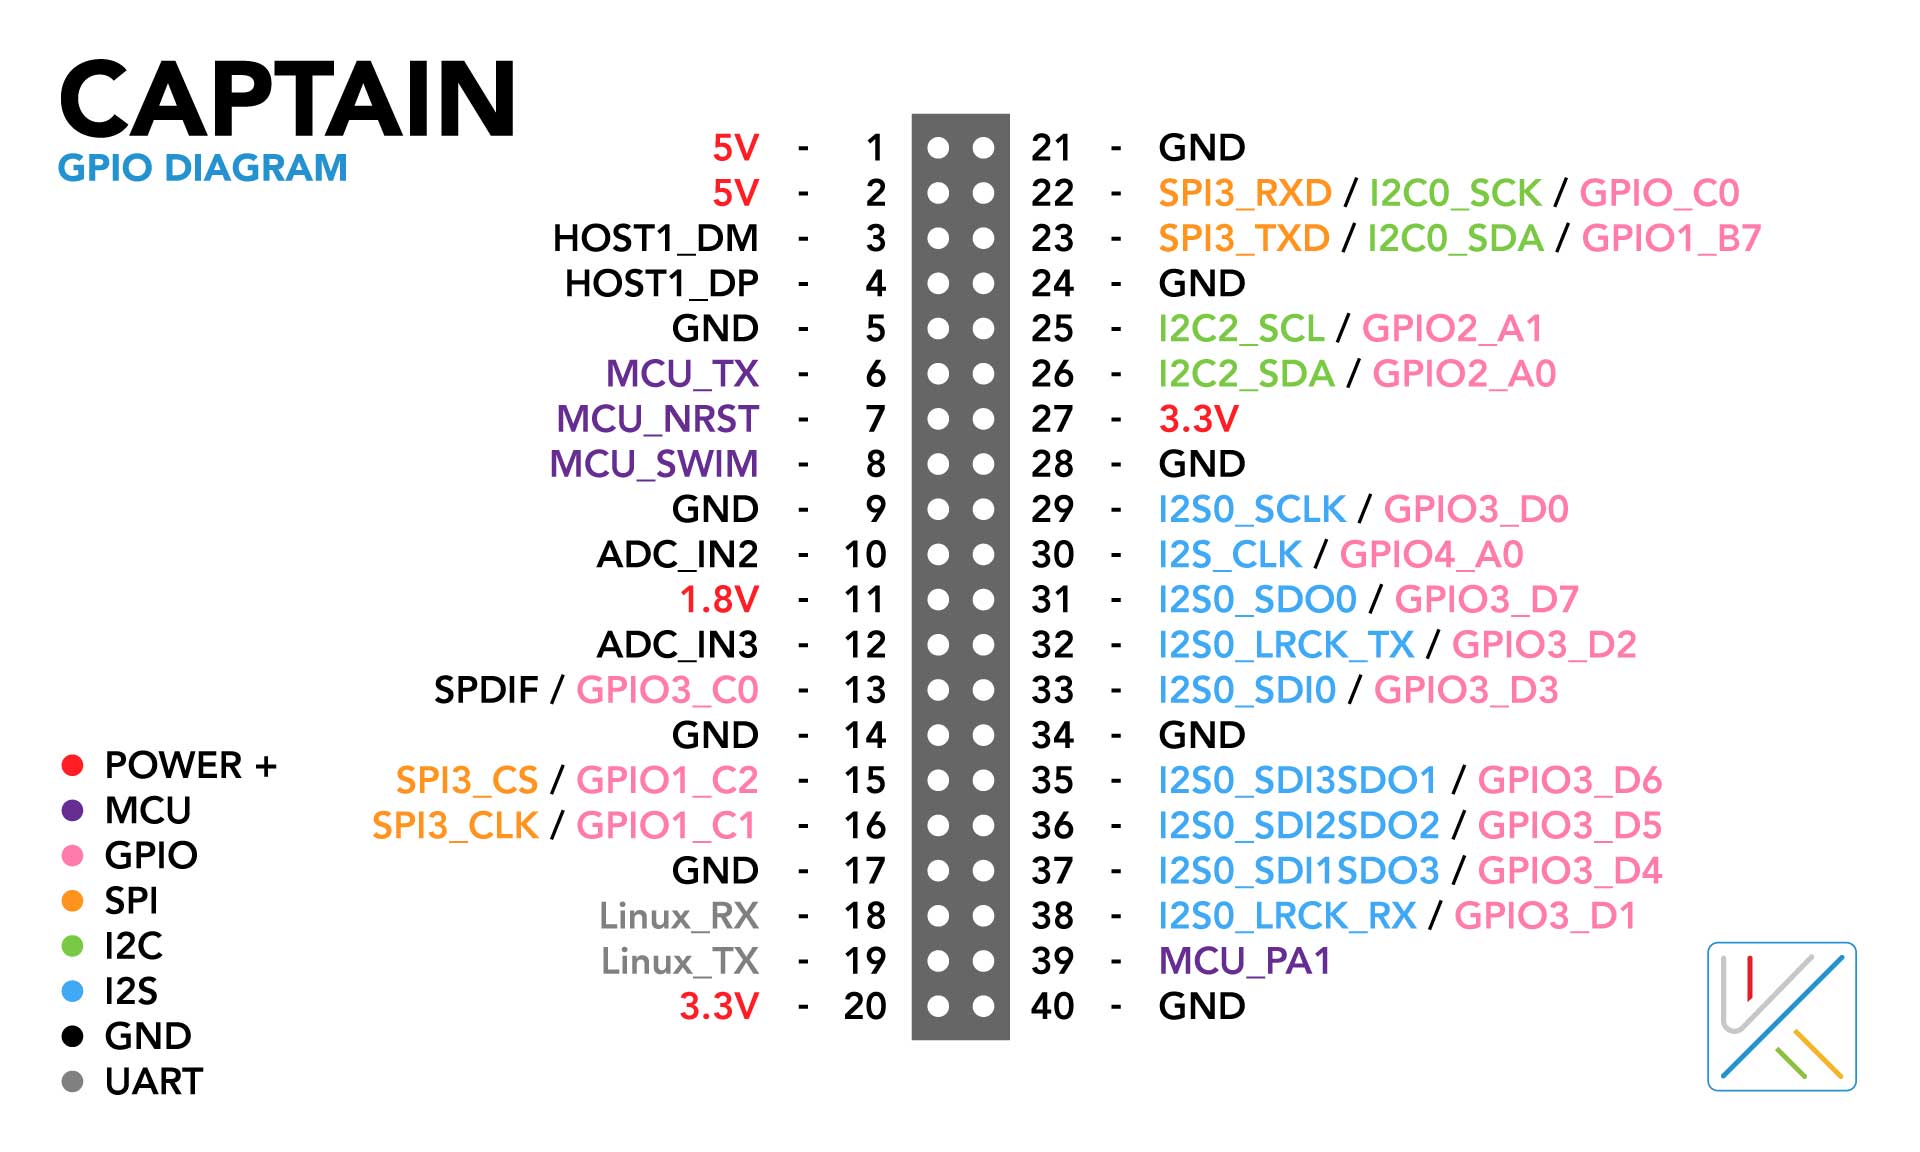
The idea is good, but it is more suitable for older people. Young people do not read paper instructions now; they are watching YouTube. And the Khadas products are consumed mainly by young people and adult men. It is advisable to make video instructions - this will bring more success and user convenience and help the sale of goods. In paper form, I would put with the goods the pinout pinout diagrams + stickers on the case with the port designation. Thanks for the good product!
If the guide doc does not provide help info in Chinese, you don’t need to have the titles in English and Chinese. So remove the Chinese text and have more space for English text.
Videos are incredibly inefficient and are not easily searchable for specific information. You end up watching an entire 30 min video just in case it might have contained a single sentence worth of information that you needed to find (and often enough it does not, so all that time spent ends up flushed down the toilet). With a manual, you can look up the information instantly, perhaps read it in less than a minute or so.
Videos are useful when you need to see something being done that is not easily described in writing (assuming they are edited to be brief), but otherwise they waste valuable time.
Perhaps “older” people are not really so old fashioned and out of touch and just want to get things done quickly and efficiently without wasting time that could be spent on other things? Life is short, time wasted cannot be replaced. (:D)
Great idea!
Just tried booting my new EDGE-V from SD, with an Ubuntu image. Must have messed up on the key sequence to get into ‘upgrade’ mode because nothing happened, except for some LED changes. Now, the EDGE-V won’t boot and there’s no HDMI signal.
Came here hoping to find instructions regarding LED codes, a key press sequence guide, and/or info on boot ‘modes’, after searching Khadas site for over an hour.
Thanks for asking.
btw, If you need a test dummy to ensure your instructions are fool-proof, I’m your guy.
Thanks for the quick reply. Yes, that’s the document I was following. Near the bottom, there’s a link to “How To Boot Into Upgrade Mode”, with the following instructions:
"### Keys Mode (U-Boot is Running)*
Power on VIM1.*
Long press the Power key without releasing it.*
Short press the ‘Reset’ key and release it.*
Count to 10 seconds and release the ‘Power’ key to enter into upgrade mode"
But, the instructions stop there. Is U-Boot already running in the firmware at power on?
Should there be HDMI output during the upgrade mode?
Also, I noticed that your prototype manual provides a different key sequence (3 quick presses of the Function key) in order to boot from the micro-SD card firmware.
At the moment, there’s a solid red LED and white heartbeat LED. When I attempt your 3 press sequence, the blue LED will light briefly, then it returns to solid red & white heartbeat.
Should I try the USB-C cable method to erase and re-image the eMMC?
Thanks for your assistance.
You forgot to rename the .dtb file in your SD card, for example if you’re booting CoreELEC on a VIM3, you’ll need to rename the .dtb file to the one that says VIM3.
In rare cases, the user had previously erased his EMMC, and there is no Android OS installed, and so it can’t enter the multiboot mode (rare, since all VIMs out-of-the-box have Android pre-installed)
Thanks again for you reply.
1: Yes, that’s the doc I referred to. It mentions Multiboot mode, U-boot mode, Serial Mode, Upgrade mode, Maskrom mode, TST mode, and Upgroup mode. But, in most cases, it only explains how to initialize those modes without explaining what to do once in those modes or what kind of visual feedback the user should see to confirm progress.
2: I was trying to microSD boot into Edge_Ubuntu-lxde-bionic_Linux-4.4_arm64_SD-USB_V20190830.img, which was burned onto the microSD with Balena Etcher. It contains a /dtb folder with the Khadas dtb files. I assume that it is not necessary to rename Khadas dtb. (didn’t see any instructions about renaming dtb images)
3: Yes, Android was pre-installed on the eMMC. But, quit working after my failed attempt to boot from the SD card. Would be nice to understand what caused it, so I don’t do that again. But, now that I’m here, how do I get out of this mess?
There is a combination of button pushes that erases the eMMC. Maybe that was done by accident.
Using a PC, the USB-C to A cable and the USB Burning Tool will get you back in business.
See here for guide. See here for firmware.
Aha, that explains what happened to the eMMC. That’s good to know. Are those key sequences documented somewhere? A table would be very helpful.
Yes, I managed to use AndroidTool to erase and reimage the eMMC with
Edge_Ubuntu-lxde-bionic_Linux-4.4_arm64_EMMC_V20190830.img
But, it has display sync issues, so I’m downloading the previous DTB. Hopefully, that will solve the display issue.
Meanwhile, with that partial success, I tried and succeeded in booting Ubuntu from SD card.
So, things are looking much better, today.
Thank you for the guidance and putting me back on track. I hope my documentation suggestions are helpful.
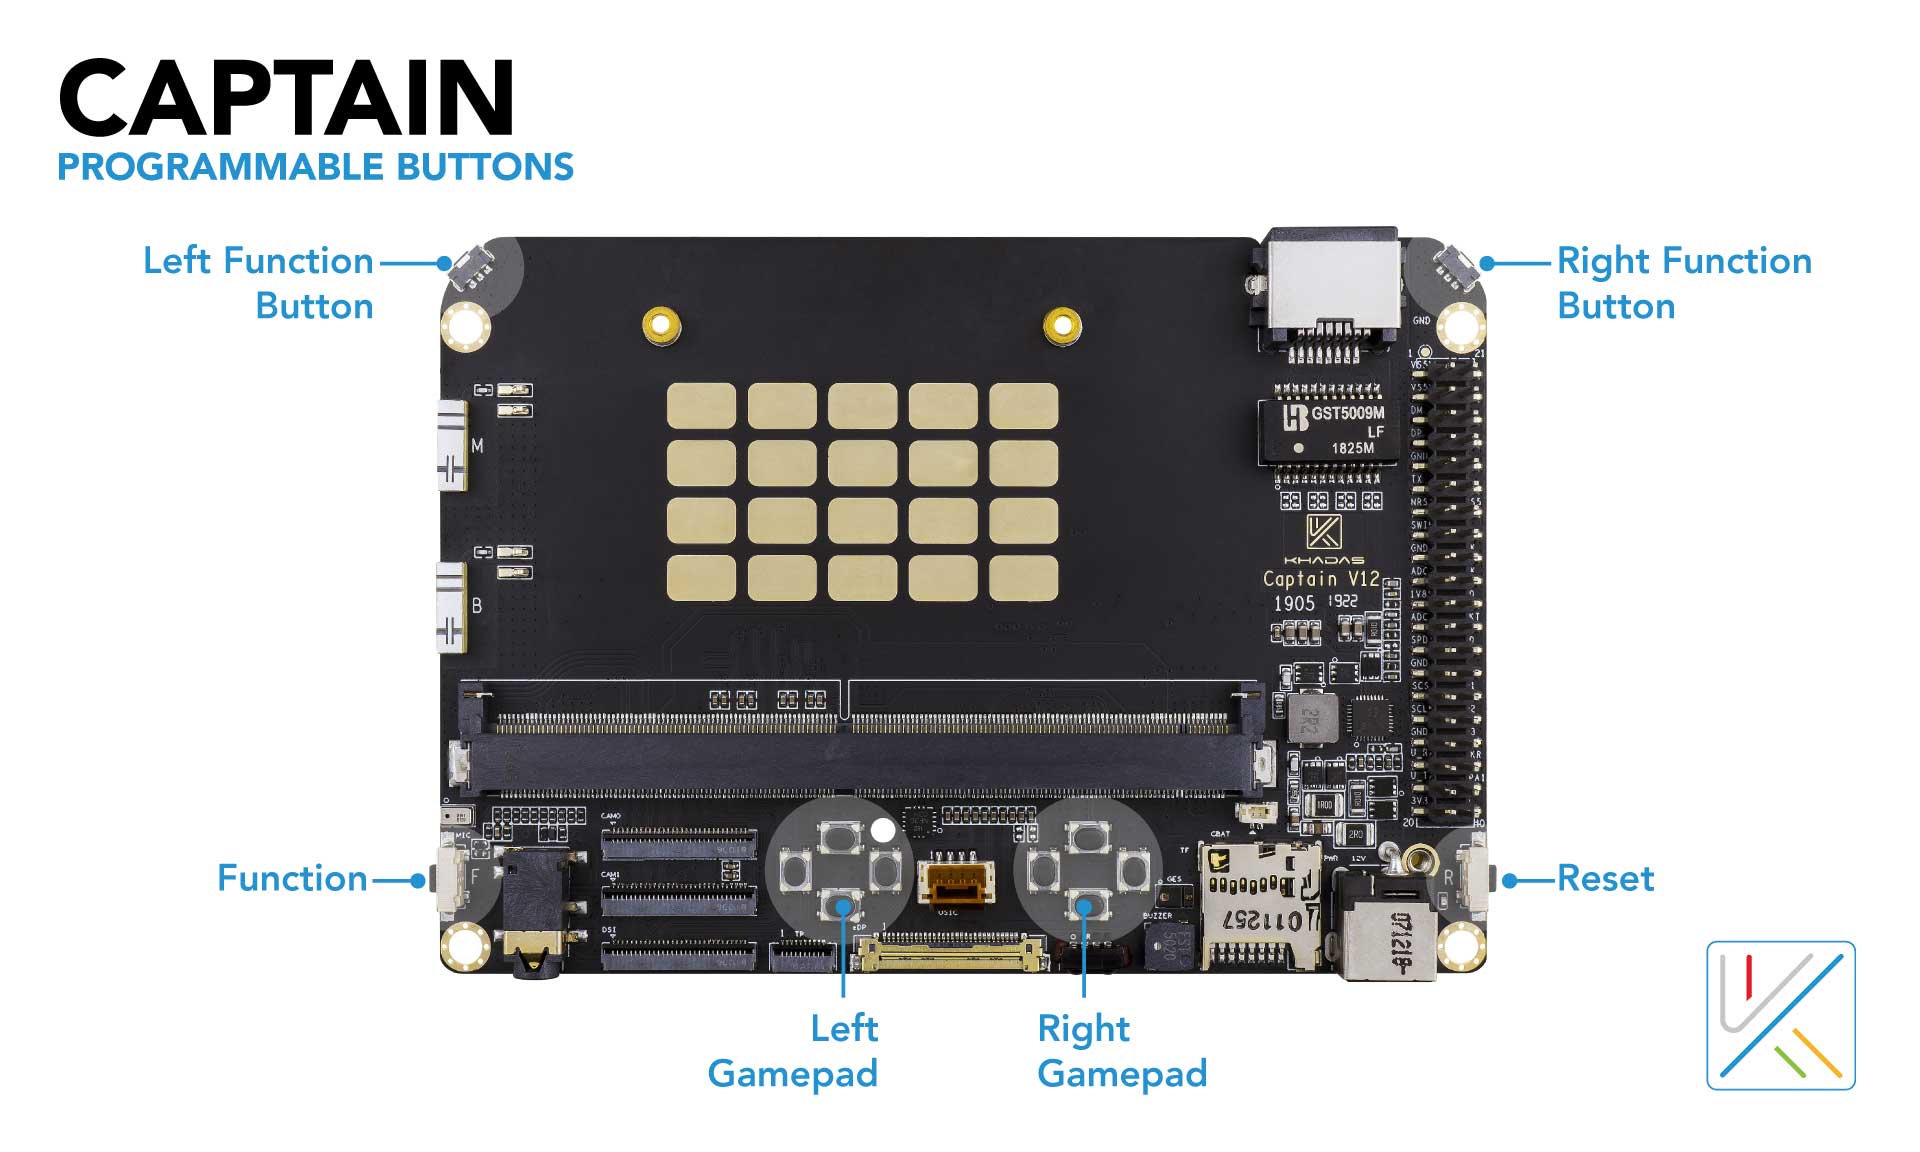
Thanks. Just thought other new customers would wonder, “What do these three buttons do?” A concise function table in the Beginners Guide would answer that.
Thanks for your help.
Thanks for your feedback @TheHermit. Yes maybe the manual should just contain tables / diagrams of the GPIO, button presses, etc. And then just add links for more complicated procedures.