[How to] Debian Stretch + Linux 4.9 from scratch (w/download, EMMC only)

In this guide we will create a minimal Debian 9.0 (Stretch) system update image from scratch. I will cover everything from cloning the repositories, to compiling the kernel, creating a rootfs.img, ramdisk.img, logo.img, and finally packing the update.img.

This will probably look daunting at first. Just follow my directions step-by-step and you’ll be ok.

Requirements

  • Khadas VIM w/USB C cable
  • Windows PC (to flash the update.img)
  • Reasonably powerful machine for building/compiling

Short on time?

Download a prebuilt version of this ‘ROM’ from Mediafire
http://www.mediafire.com/file/wrj0toot2f37fbk/debian-stretch-2017-06-25-update.7z

1. Setting up your build machine


  1. Install Ubuntu 16.04 Server edition. Debian 8 (Jessie) should also work, possibly with a few minor tweaks. Anything with GCC 6 will cause u-boot to not compile, so unfortunately Ubuntu 17.04 and Debian 9 are out (ironically).

  2. Login and run the following:

sudo apt install build-essential git-core gcc-arm-none-eabi gcc-aarch64-linux-gnu bc python qemu qemu-user-static binfmt-support debootstrap libc6:i386 libstdc++6:i386

2. Clone the repositories


mkdir ~/project && cd ~/project
git clone https://github.com/khadas/u-boot --depth 1 -b ubuntu
git clone https://github.com/khadas/linux --depth 1 -b ubuntu-4.9
git clone https://github.com/khadas/utils.git
git clone https://github.com/khadas/images_upgrade.git

3. Compile u-boot


cd ~/project/u-boot
make kvim_defconfig
make -j8 CROSS_COMPILE=aarch64-linux-gnu-

4. Compile the kernel


cd ~/project/linux
make ARCH=arm64 kvim_defconfig
make -j8 ARCH=arm64 CROSS_COMPILE=aarch64-linux-gnu- Image kvim.dtb modules

5. Build the rootfs


First we must to create a “virtual disk” to hold the operating system:

cd ~/project
truncate --size 500M rootfs.img
mkfs.ext4 -F -L ROOTFS rootfs.img
sudo mkdir /mnt/kvimrootfs
sudo mount -o loop rootfs.img /mnt/kvimrootfs

Next, let’s install a minimal version of debian stretch (this will take a while):

sudo debootstrap --arch=arm64 --foreign stretch /mnt/kvimrootfs
sudo cp -a /usr/bin/qemu-aarch64-static /mnt/kvimrootfs/usr/bin/
sudo chroot /mnt/kvimrootfs /debootstrap/debootstrap --second-stage

Some basic tweaks to make the operating system usable:

# User account
USERNAME=khadas
PASSWORD=khadas
sudo chroot /mnt/kvimrootfs adduser --disabled-password --gecos "" $USERNAME
sudo chroot /mnt/kvimrootfs usermod -aG sudo $USERNAME
echo "$USERNAME:$PASSWORD" | sudo chroot /mnt/kvimrootfs chpasswd

# Serial console
sudo chroot /mnt/kvimrootfs ln -s /lib/systemd/system/serial-getty\@.service /etc/systemd/system/getty.target.wants/serial-getty@ttyS0.service

# Packages
sudo chroot /mnt/kvimrootfs bash -c "echo 'nameserver 8.8.8.8' > /etc/resolv.conf"
sudo chroot /mnt/kvimrootfs apt update
sudo chroot /mnt/kvimrootfs apt install --yes --no-install-recommends sudo fbset htop network-manager initramfs-tools openssh-server

# Hostname
sudo chroot /mnt/kvimrootfs bash -c "echo KhadasVIM > /etc/hostname"

# Display initialization script (taken from the khadas ubuntu mate image)
sudo tee /mnt/kvimrootfs/etc/initramfs-tools/scripts/local-top/khadas_init.sh <<EOF >/dev/null
#!/bin/sh

fbset -fb /dev/fb0 -g 1920 1080 1920 2160 32
echo 1080p60hz > /sys/class/display/mode

echo 0 > /sys/class/graphics/fb0/free_scale
echo 1 > /sys/class/graphics/fb0/freescale_mode
echo 0 0 1919 1079 > /sys/class/graphics/fb0/free_scale_axis
echo 0 0 1919 1079 > /sys/class/graphics/fb0/window_axis

echo 0 > /sys/class/graphics/fb1/free_scale
echo 1 > /sys/class/graphics/fb1/freescale_mode

echo 0 > /sys/class/graphics/fb0/blank
echo 0 > /sys/class/graphics/fb1/blank

echo heartbeat > /sys/class/leds/red/trigger
EOF
sudo chmod +x /mnt/kvimrootfs/etc/initramfs-tools/scripts/local-top/khadas_init.sh

Don’t unmount the rootfs just yet – we need to make the initrd first! :slight_smile:

6. Build the initrd


cd ~/project/linux
sudo make -j8 ARCH=arm64 CROSS_COMPILE=aarch64-linux-gnu- INSTALL_MOD_PATH=/mnt/kvimrootfs modules_install
sudo chroot /mnt/kvimrootfs mkinitramfs -o /boot/initrd.img $(cat ~/project/linux/include/config/kernel.release)
sudo mv /mnt/kvimrootfs/boot/initrd.img ~/project

You will see a few errors about the khadas_init.sh script in your console. Don’t worry, they are expected.

7. Clean up the rootfs


sudo chroot /mnt/kvimrootfs apt clean
sudo rm -f /mnt/kvimrootfs/usr/bin/qemu-aarch64-static
sudo sync && sudo umount /mnt/kvimrootfs
sudo rm -rf /mnt/kvimrootfs

8. Pack the ramdisk.img


cd ~/project
./utils/mkbootimg --kernel linux/arch/arm64/boot/Image --ramdisk initrd.img -o ramdisk.img
rm -f initrd.img

9. Pack the logo.img


cd ~/project
wget https://meyer.io/dl/khadasvim/debian-bootup.bmp
./utils/logo_img_packer debian-bootup.bmp logo.img
rm -f debian-bootup.bmp

Mirror: http://www.mediafire.com/view/spf59pp7q9ui82t/debian-bootup.bmp

10. Fix the symlinks in image_upgrade


cd ~/project/images_upgrade
ln -f -s ../u-boot/fip/u-boot.bin u-boot.bin
ln -f -s ../u-boot/fip/u-boot.bin.sd.bin u-boot.bin.sd.bin
ln -f -s ../u-boot/fip/u-boot.bin.usb.bl2 u-boot.bin.usb.bl2
ln -f -s ../u-boot/fip/u-boot.bin.usb.tpl u-boot.bin.usb.tpl
ln -f -s ../linux/arch/arm64/boot/dts/amlogic/kvim.dtb kvim.dtb
ln -f -s ../rootfs.img rootfs.img
ln -f -s ../ramdisk.img ramdisk.img
ln -f -s ../logo.img logo.img

11. Pack the system update image :tada:


cd ~/project
./utils/aml_image_v2_packer -r images_upgrade/package.conf images_upgrade update.img

Now you can transfer this image over to a Windows PC and flash it using Amlogic’s USB Burning Tool.

Quick tip: you can easily put the Khadas VIM in upgrade mode by following these steps,

  1. Press and hold the first button (closest to the GPIO pins).

  2. Quickly press the third/reset button (closest to the I/O ports).

  3. Continue holding down the first button for at least 10 seconds.

Notes

  • The filesystem will be limited to 500MB until you run sudo resize2fs /dev/rootfs
  • Khadas (or Amlogic): if you’re reading this, we really need proper EDID & KMS support. This “khadas_init.sh” script is a garbage fire.
11 Likes

Good job and thanks for sharing.

@numbqq follow up.

Curious to know what your thoughts are on this @Gouwa

Agree on this:

  • the default hdmi output resolution should be settled by reading EDID information automatically
  • Users can change the resolution through a graphic menu when boot into system.

thank you:
these instructions are much clear on how to build a complete debian from source to kvim update.img;
i was not so familiar with debian stretch;
could we find a way for the resulting system to update only its kernel instead of redoing all steps from number 8 and up ?

to the 7 people who did already download, deployed and booted this debian-stretch-2017-06-25-update.7z from link before,
can you please report here on what is working ok and what is not (yet) ??

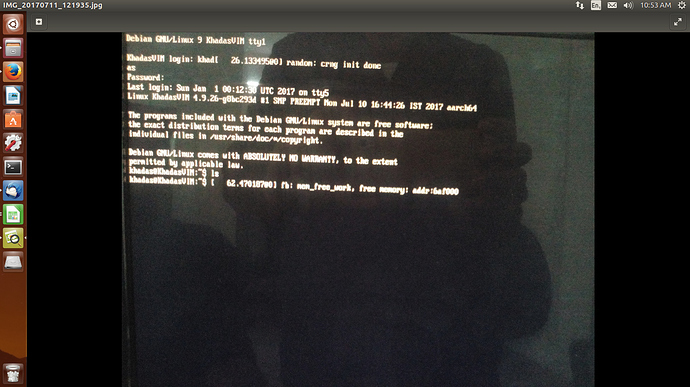
I deployed this image, and booted it;
but I was not able to use my serial cable to monitor boot sequence, is this normal ?

Then I restarted the vim while connected to a HD ready tv, in this case I could see the boot sequence ending with a clear screen and asking for boot credentials…so far so good
credentials entered using my usb logitech k400R keyboard (i thought usb was not working yet :hushed: , now i need to switch keyboard to french layout before i can really test more.
i tried “sudo dpkg-reconfigure keyboard-configuration” but got error and i have no connectivity for now to install packages :weary:

Hi mmeyer,
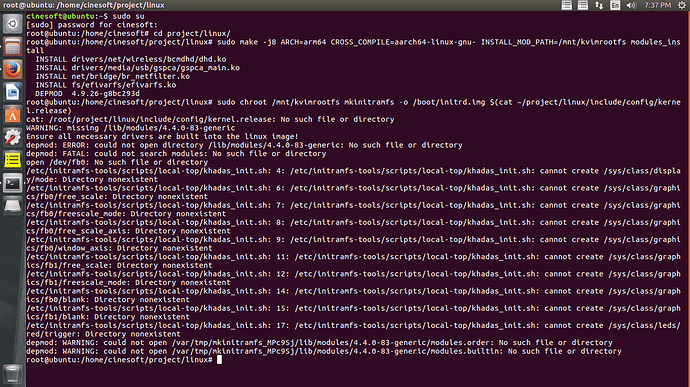
Please help me i am stuck on building the initrd. It shows some errors .

root@ubuntu:/home/cinesoft/project/linux# sudo chroot /mnt/kvimrootfs mkinitramfs -o /boot/initrd.img $(cat ~/project/linux/include/config/kernel.release)
cat: /root/project/linux/include/config/kernel.release: No such file or directory
WARNING: missing /lib/modules/4.4.0-83-generic
Ensure all necessary drivers are built into the linux image!
depmod: ERROR: could not open directory /lib/modules/4.4.0-83-generic: No such file or directory
depmod: FATAL: could not search modules: No such file or directory
open /dev/fb0: No such file or directory
/etc/initramfs-tools/scripts/local-top/khadas_init.sh: 4: /etc/initramfs-tools/scripts/local-top/khadas_init.sh: cannot create /sys/class/display/mode: Directory nonexistent
/etc/initramfs-tools/scripts/local-top/khadas_init.sh: 6: /etc/initramfs-tools/scripts/local-top/khadas_init.sh: cannot create /sys/class/graphics/fb0/free_scale: Directory nonexistent
/etc/initramfs-tools/scripts/local-top/khadas_init.sh: 7: /etc/initramfs-tools/scripts/local-top/khadas_init.sh: cannot create /sys/class/graphics/fb0/freescale_mode: Directory nonexistent
/etc/initramfs-tools/scripts/local-top/khadas_init.sh: 8: /etc/initramfs-tools/scripts/local-top/khadas_init.sh: cannot create /sys/class/graphics/fb0/free_scale_axis: Directory nonexistent
/etc/initramfs-tools/scripts/local-top/khadas_init.sh: 9: /etc/initramfs-tools/scripts/local-top/khadas_init.sh: cannot create /sys/class/graphics/fb0/window_axis: Directory nonexistent
/etc/initramfs-tools/scripts/local-top/khadas_init.sh: 11: /etc/initramfs-tools/scripts/local-top/khadas_init.sh: cannot create /sys/class/graphics/fb1/free_scale: Directory nonexistent
/etc/initramfs-tools/scripts/local-top/khadas_init.sh: 12: /etc/initramfs-tools/scripts/local-top/khadas_init.sh: cannot create /sys/class/graphics/fb1/freescale_mode: Directory nonexistent
/etc/initramfs-tools/scripts/local-top/khadas_init.sh: 14: /etc/initramfs-tools/scripts/local-top/khadas_init.sh: cannot create /sys/class/graphics/fb0/blank: Directory nonexistent
/etc/initramfs-tools/scripts/local-top/khadas_init.sh: 15: /etc/initramfs-tools/scripts/local-top/khadas_init.sh: cannot create /sys/class/graphics/fb1/blank: Directory nonexistent
/etc/initramfs-tools/scripts/local-top/khadas_init.sh: 17: /etc/initramfs-tools/scripts/local-top/khadas_init.sh: cannot create /sys/class/leds/red/trigger: Directory nonexistent
depmod: WARNING: could not open /var/tmp/mkinitramfs_MPc9Sj/lib/modules/4.4.0-83-generic/modules.order: No such file or directory
depmod: WARNING: could not open /var/tmp/mkinitramfs_MPc9Sj/lib/modules/4.4.0-83-generic/modules.builtin: No such file or directory
root@ubuntu:/home/cinesoft/project/linux#

please take a look on screen shot
.

@Ajithbalakrishnan , in your case, the faulty instruction is :
cat ~/project/linux/include/config/kernel.release

this instruction fails on your computer at this point maybe because you run the command as root and not as cinesoft!

I’ve booted.
Ethernet and HDMI seem to work ok.
Built in bluetooth in none functional. Any tips on getting this to work would be great.

Hi,
We are facing an error while executing the command

sudo chroot /mnt/kvimrootfs mkinitramfs -o /boot/initrd.img $(cat ~/project/linux/include/config/kernel.release)

we got the response like given below

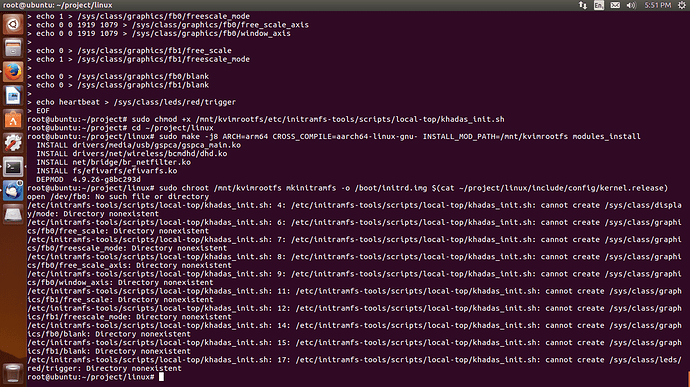
root@ubuntu:~/project/linux# sudo chroot /mnt/kvimrootfs mkinitramfs -o /boot/initrd.img $(cat ~/project/linux/include/config/kernel.release)
open /dev/fb0: No such file or directory
/etc/initramfs-tools/scripts/local-top/khadas_init.sh: 4: /etc/initramfs-tools/scripts/local-top/khadas_init.sh: cannot create /sys/class/display/mode: Directory nonexistent
/etc/initramfs-tools/scripts/local-top/khadas_init.sh: 6: /etc/initramfs-tools/scripts/local-top/khadas_init.sh: cannot create /sys/class/graphics/fb0/free_scale: Directory nonexistent
/etc/initramfs-tools/scripts/local-top/khadas_init.sh: 7: /etc/initramfs-tools/scripts/local-top/khadas_init.sh: cannot create /sys/class/graphics/fb0/freescale_mode: Directory nonexistent
/etc/initramfs-tools/scripts/local-top/khadas_init.sh: 8: /etc/initramfs-tools/scripts/local-top/khadas_init.sh: cannot create /sys/class/graphics/fb0/free_scale_axis: Directory nonexistent
/etc/initramfs-tools/scripts/local-top/khadas_init.sh: 9: /etc/initramfs-tools/scripts/local-top/khadas_init.sh: cannot create /sys/class/graphics/fb0/window_axis: Directory nonexistent
/etc/initramfs-tools/scripts/local-top/khadas_init.sh: 11: /etc/initramfs-tools/scripts/local-top/khadas_init.sh: cannot create /sys/class/graphics/fb1/free_scale: Directory nonexistent
/etc/initramfs-tools/scripts/local-top/khadas_init.sh: 12: /etc/initramfs-tools/scripts/local-top/khadas_init.sh: cannot create /sys/class/graphics/fb1/freescale_mode: Directory nonexistent
/etc/initramfs-tools/scripts/local-top/khadas_init.sh: 14: /etc/initramfs-tools/scripts/local-top/khadas_init.sh: cannot create /sys/class/graphics/fb0/blank: Directory nonexistent
/etc/initramfs-tools/scripts/local-top/khadas_init.sh: 15: /etc/initramfs-tools/scripts/local-top/khadas_init.sh: cannot create /sys/class/graphics/fb1/blank: Directory nonexistent
/etc/initramfs-tools/scripts/local-top/khadas_init.sh: 17: /etc/initramfs-tools/scripts/local-top/khadas_init.sh: cannot create /sys/class/leds/red/trigger: Directory nonexistent
root@ubuntu:~/project/linux# ^C
root@ubuntu:~/project/linux#

Please take a look at the screen shot

I successfully generated an update.img with some tweaks for my taste but I am not able to install it to the device (Khadas VIM - not pro).
Both my and the image you have uploaded to mediafire are failing to install.

Also, the only way I can boot to upgrade mode is MRegister Mode(Maskrom Mode).

What exactly is failing is that when I press start after like 2 seconds the device boots and starts android (that I have installed)

Here is a log: https://pastebin.com/4F7ncRCC

What am I doing wrong?

hi all,
i have created the update.img file. I have created an bootable emmc and flased it in hardware. But i didnt see any gui. I am getting command line interface. Please give me your opinion. i have tried to install gnome .But i couldn’t. Please help me why it is so?

Please provide the printing log .
Thanks

Do you have a TTY-USB tool? Can you provide the serial log and not the burn tools log for me?
Thanks.

Hi terry,
I couldn’t take the printing log. Please help me to take it. Am attaching the image of desk top.

About how to install ubuntu mate desktop, you can refer to the post

Hi Terry,
I need to create an .img file which has Gui. I believe u have seen the image. Is that the same image file which you have made this guide for.

You can look the reply from Gouwa

Hi, here’s the log: https://pastebin.com/5KVcHXbV

After this point, log freezes and the device starts Android from eMMC