Get the Creality ender 3, Hands down one of the best affordable 3D printer,
Guarantee will do any job well, has so many good reviews
Product page here
Get the Creality ender 3, Hands down one of the best affordable 3D printer,
Guarantee will do any job well, has so many good reviews
Product page here
similar to the release of hot air so that it is not sealed at all
Oh Ok, kind of like a pressure release mechanism but for heat, nice design choice
Can anyone provide the .stl form of the VIM3, it is in .stp form and I can’t use it in my software,
@tsangyoujun could you convert it for me in solidworks?
This model : https://dl.khadas.com/Hardware/VIM3/CAD/VIM3_3D_Model_V200327.zip
Thanks, 
@Electr1 hello! Sorry I didn’t see your posts in here, for some reason the forum didn’t email me - maybe too busy with the video!
I’ve attached 3 STL files in this zip archive:
Download: Final_Assembly_01_stl.zip
I personally feel people who edit files in polygonal-format are extremely talented. It is very challenging. In the old days I used to use this free open source software: http://www.wings3d.com/
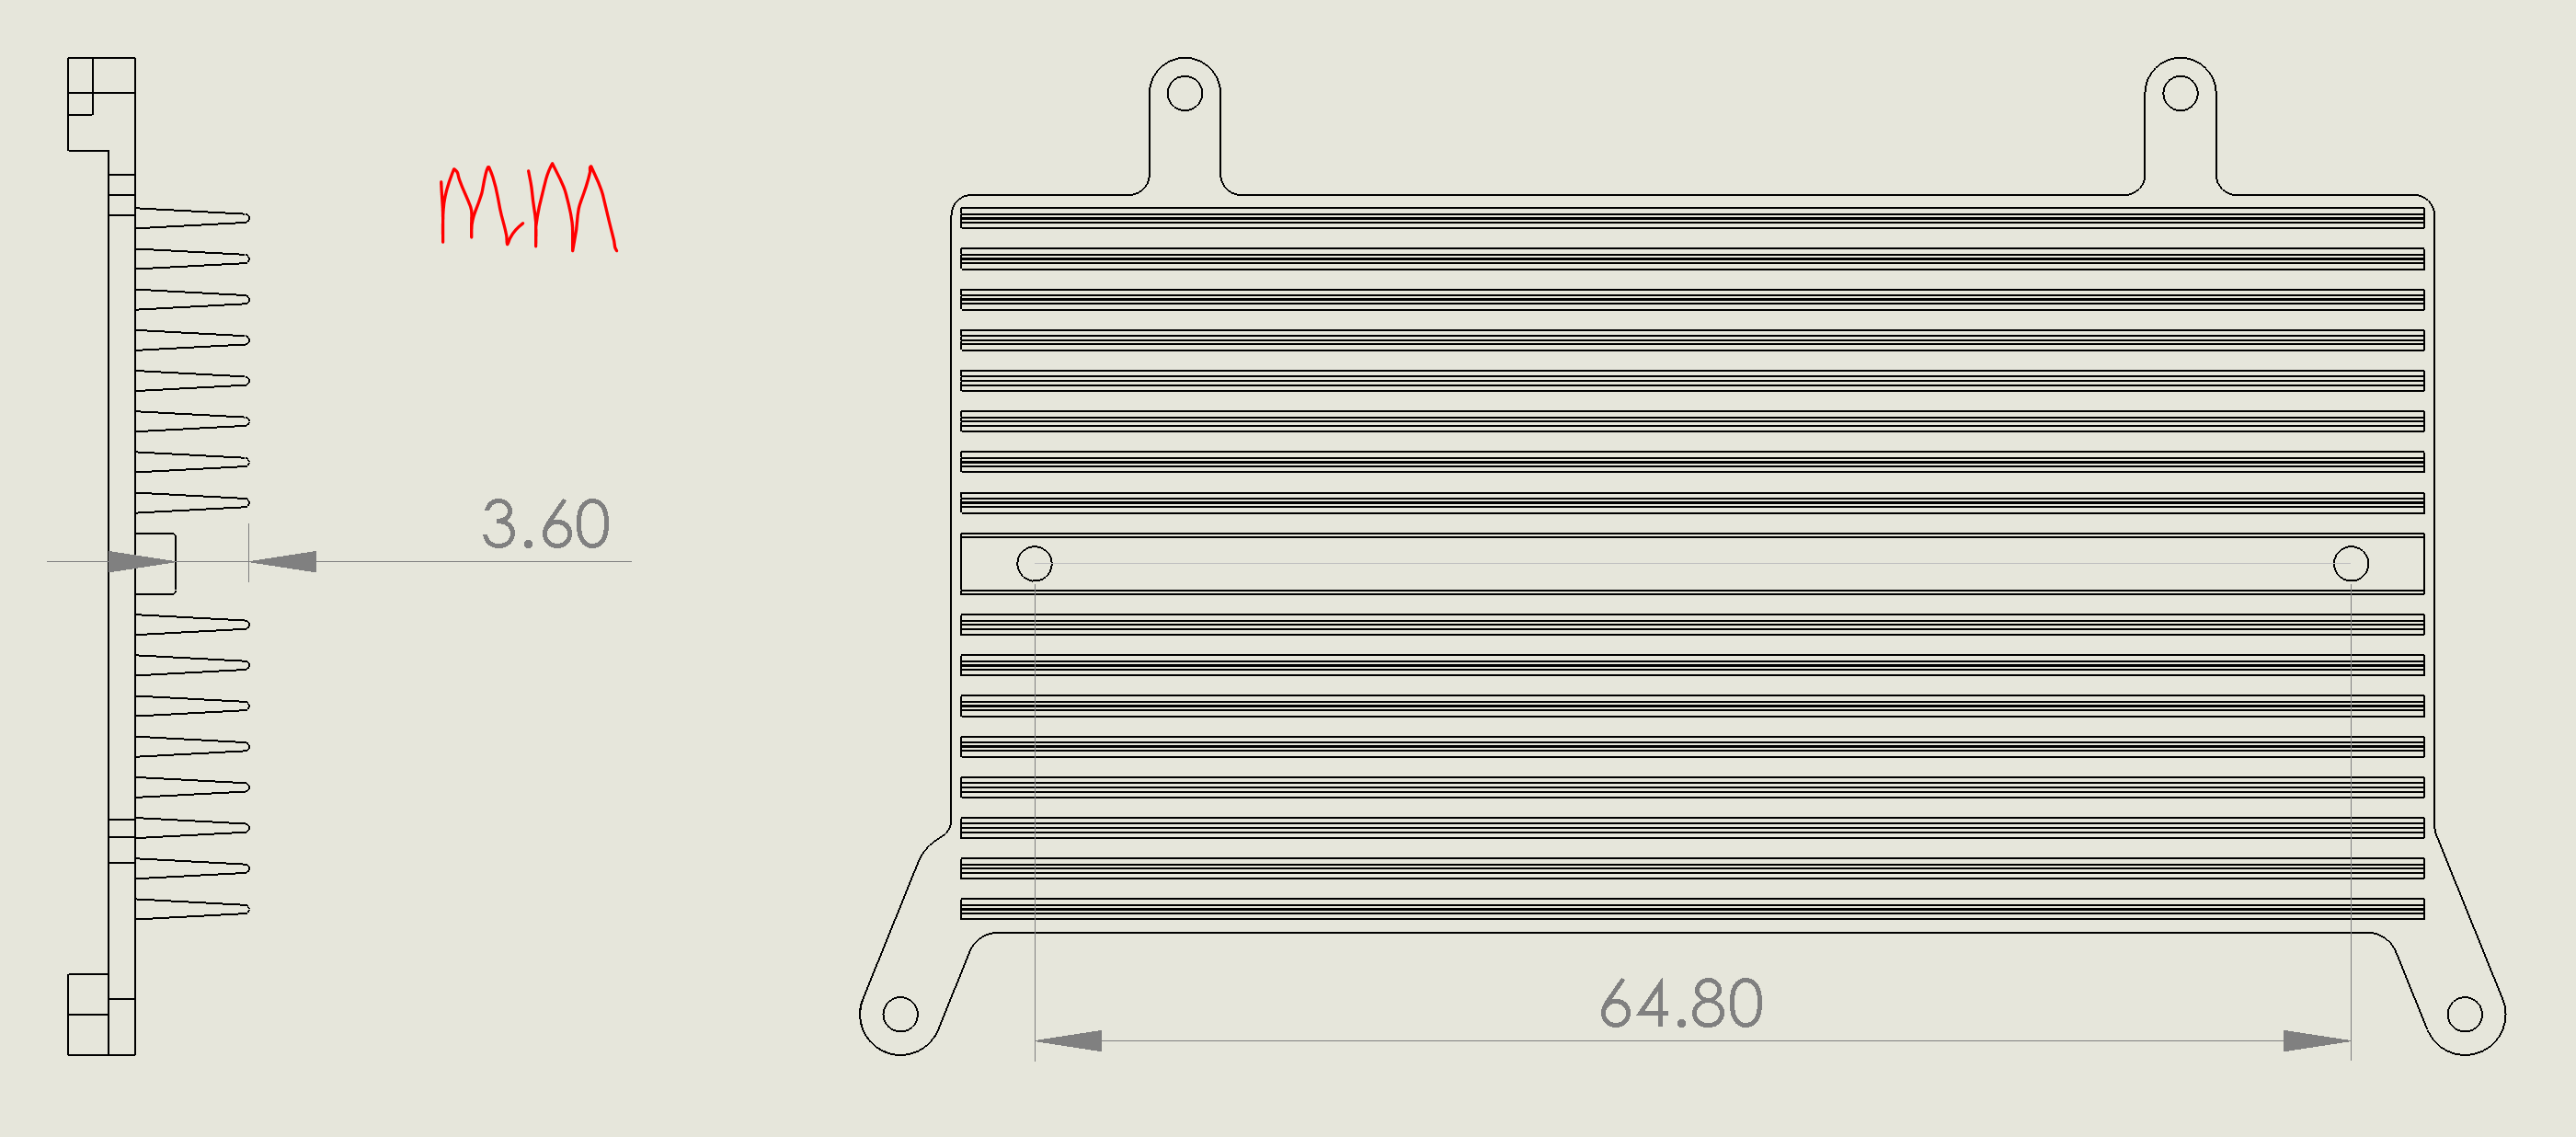
Yes that’s an M2 screw mount, for mounting things on to the top of the heatsink. Here’s a drawing to show you the hole distance, as well as the depth of the center spine.
Well I wouldn’t really say talented, I don’t know how to use Regular CAD  , I have ‘zero’ idea of the controls and other functions, That’s why I am using Tinkercad which is not really for professionals, Actually its more for young children
But thanks for the .stl files though. I am work on something for the VIM3, like an Armor case
will be published soon
Regarding 3d-printable hinges and other stuff, I often take inspiration / reference from:
Many many examples there, also the guys there often use sub-division/polygonal modelers like the one you are used to.
Things to look out for:
3D printing still remains a rather dark-art, not well documented, rather than a science. Unless you’re using those industrial grade printers, hobbyist devices are fickle creatures. ![]()
Hmm, I saw some designs there a few times too, but all that was there wasn’t suitable for our case design, either bulky or way too bendy, I took some inspiration from there though, will design something new and better ![]()
Yep totally, I have faced those monsters once and, Boyyy… did it not go as per plan ![]()
Ah TinkerCAD, I would like to teach that to my colleagues, great for beginners, but the website is really slow when accessed from China.
I recommend you get started straight away on AutoDesk Fusion 360. Sign-up as a startup, and you get 1-year free.
Sub-division / polygonal modelers are more for artists and animators. It will be a pain to export anything to a 3d printer, especially if your part is scale/unit-sensitive.
Hmm, I will give it one more shot,
I am a bit lazy at learning  , and like putting my existing expertise to learn out of my mistakes and previous experience,
Anyway, I have still got that model coming up 
Stay tuned for It…
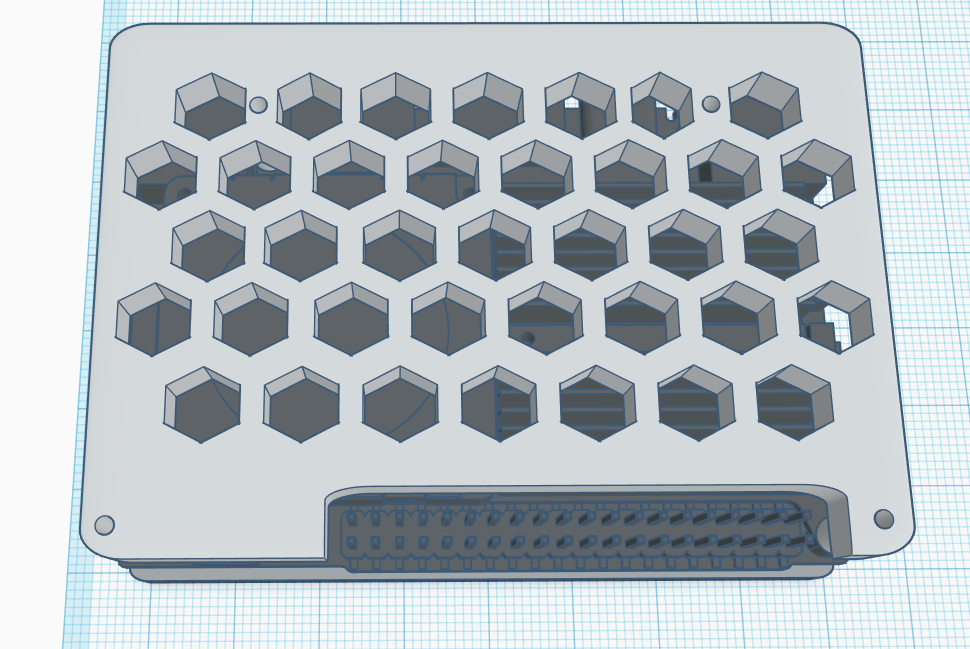
Hey guys , here is my first proper Case for the VIMx,
It was designed as two parts with the Bottom part to be made of CNCed Aluminium and the
Top part 3D printed,
The bottom part acts to protect the bottom of the SBC and be a Heatsink at the same time
The top part is just a cover and and protects the Fan + Heatsink or just the heatsink,
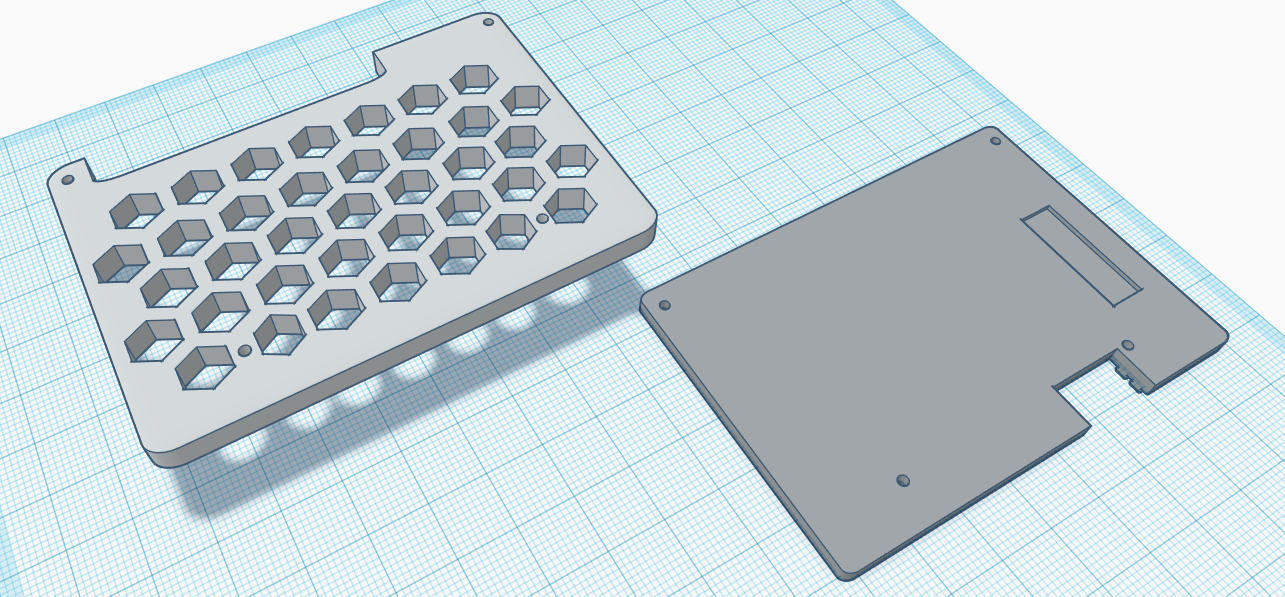
here are some pics of the design
when full assembled,
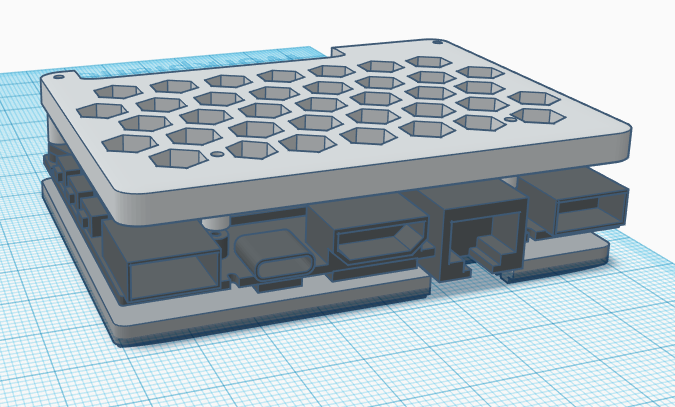
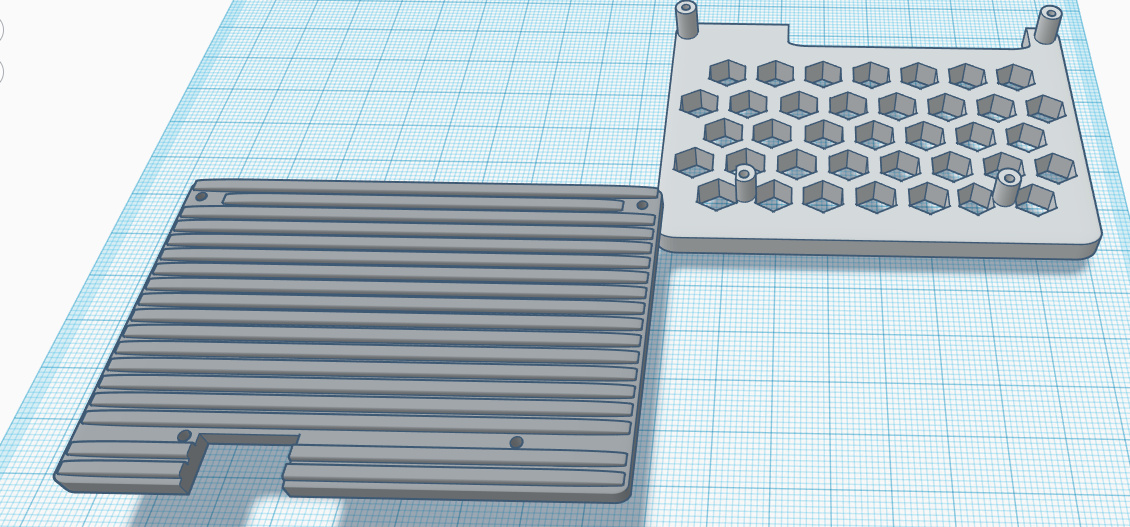
Take a look at each part a bit more,
Just apply thermal pads to the bottom metal part, but rectangular thermal strips would fare better with
Tell me if you guys like It, give me your thoughts about it, something that could be better, something that need more work, I will release final file once it is fully completed. 
Good day!
well done, well modeled
as I understand it, your version without a display

Yep, I tried something related to this topics actual name “Case for the VIM3 and M2X”, Im sure you could squish the M2X into that sandwich somehow
Just make sure you have really Looong… M2 screws for that situation
Aww yea, I like your design! Reminds me of the Japanese “Kawaii Style”, whereby everything has to look “tasty” somehow.
These key holders somehow have to look like food items:

Yes, the japanese designers have a knack for making stuff look cute  ,
,
Speaking of Japanese, and sandwich ,and Food, this came to my mind at first thought,
 very sandwichy
But… I am not sure how tasty my sandwich of plastic and metal, with a filling of silicon would be…
Probably crunchy
Don’t mind me, just putting my Ideas here
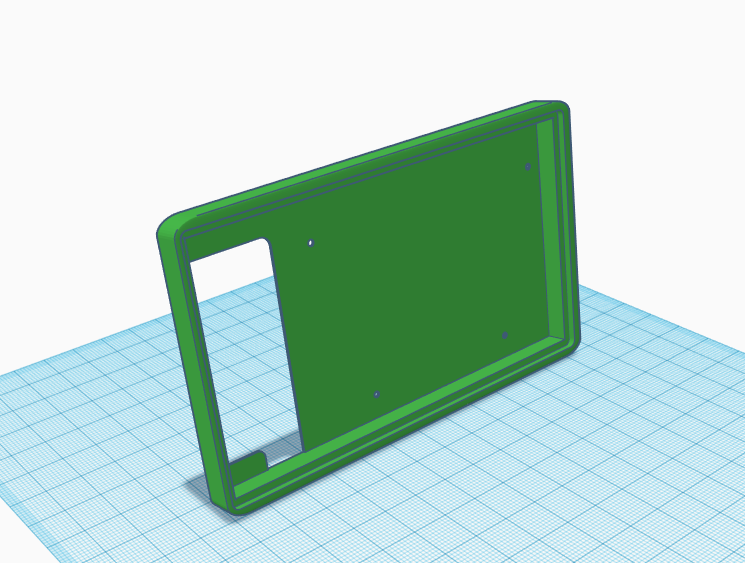
I see a lot if guys with the Touchscreen, without it having a safe protective cover, so here is just another little design that you can 3D print to protect your touch screen from bumps and bruises on those delicate glass corners
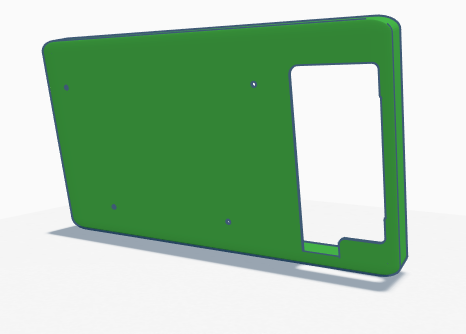
Also includes mounting points for VIMs if you wanted to connect that to the back of the Case,
I made this design to be a kind of a cover aimed at the touch screen, ask me and I can modify it to your liking, Hinge, vents etc.
You can check out the Kap Case 2’s design for reference, regarding the screen cover.
The orange FPC connects to a daughter board inside the cover, but there’s a black FPC cable that requires routing.
Thanks, I will see that as well 
when will we see a Kap case like system for the VIMs, I want one soon 
With battery etc.
Are there any 3D printed case designs for the VIM with the new M2x Expansion Board?