Anyone successfully flashed Linux on VIM3L without bricking it?

Hi,

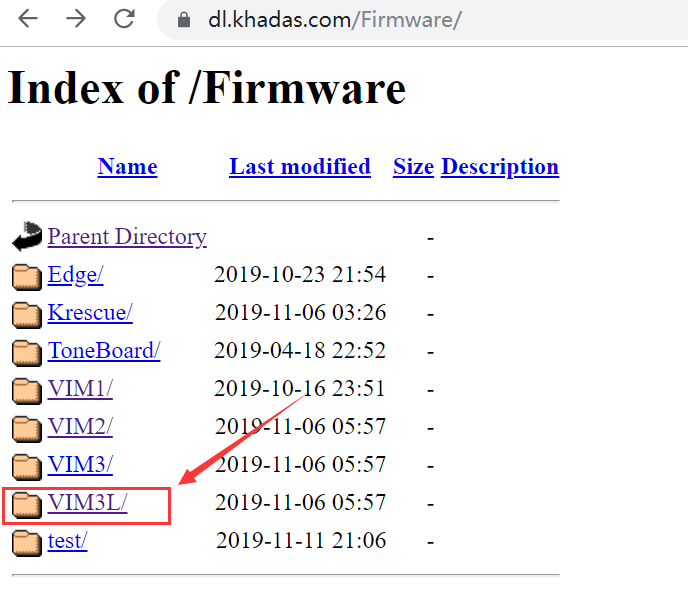
I received my two VIM3L boards. They come pre-flashed with Android which I have no use for and wanted to install Linux. I downloaded the ubuntu-server images from 20190830 with kernel 4.9.

I tried the method using the power key at boot to make the boot loader boot from the SD, on the serial console I saw it mentioned bzImage and initrd, but it immediately rebooted in loops on this, so I suspected a bad image. I tried the burn-tool method with the eMMC image, but it ends in error very early at ā€œRunning u-boot: [KO]ā€.
I initially suspected some bad libusb stuff like the issues which usually plague rockchip devices, and tried 2 different machines with different distros (ubuntu 18.04 & slack 14-current) but got the exact same result. Also, the serial port definitly shows some activity.
After all these tests, one of the boards does not even boot to android anymore, it stops very early, I suspect the boot loader was erased and not reflashed. I traced what the burn-tool does, ultimately it calls the ā€˜updateā€™ utility with a few more arguments, nothing fancy. Sadly this one is binary only and doesnā€™t seem to support dumping one deviceā€™s flash to rewrite it on the other one.

Iā€™m now particularly cautious on the second one as I donā€™t want to brick it as well.

Still this u-boot KO message bothers me, because if I canā€™t boot from the SD and cannot flash over USB, what options am I left with ?

Also on the bricked one I noticed something strange, during the very early boot messages, it says itā€™s configuring the A53/A73 clocks to 24 MHz. Itā€™s an A55, are we certain weā€™re using the appropriate boot code there ? Could it be that the proposed images are not compatible with VIM3L and only support VIM3 ? If so where could I find a working VIM3L linux image ? Iā€™d just like to get a working shell and install compilers and a few regular tools and for now it seems particularly complicated I must confess :frowning:

Thanks in advance for any hint or better, pointer to a known working image.

Hi Willy:
Yep, the image not compatible due to different SoC. Linux images for VIM3L below:
https://dl.khadas.com/Firmware/VIM3L/

In your case, you have to follow the instructions below and use the TST mode to enter into upgrade mode:

Have fun!

Thank you Gouwa! Iā€™m downloading the eMMC image (the only one present there) and will retry this morning. I suspected something like this, though I followed the links in the wiki, but some pages are shared between several boards and some (like the image one) should indeed be specific.

So itā€™s exactly the same result. Iā€™ve run it under bash -x to see what was done:

Burning image '/dev/shm/vim3l-ubuntu-xfce.img' for 'VIM3' to eMMC...
+ /g/mirror/khadas-utils/aml-flash-tool/flash-tool --img=/dev/shm/vim3l-ubuntu-xfce.img --parts=all --wipe --soc=g12a --reset=y
Unpacking image [OK]
Initializing ddr ........[OK]
Running u-boot [KO]

The ā€œRunning u-bootā€ phase lasts maybe 10 seconds. On the console, nothing happens at this step, it remains stuck on this after the ā€œInitializing ddrā€ phase:

TE: 300782754

BL2 Built : 19:17:49, Jul 31 2019. g12a ge9a9000 - zhiguang.ouyang@droid07-sz

Board ID = 8
Set cpu clk to 24M
Set clk81 to 24M
Use GP1_pll as DSU clk.
DSU clk: 1200 Mhz
CPU clk: 1200 MHz
Set clk81 to 166.6M
DDR driver_vesion: LPDDR4_PHY_V_0_1_18 build time: Jul 31 2019 19:17:43
board id: 8
Cfg max: 4, cur: 1. Board id: 255. Force loop cfg
DATA transfer complete...
fw parse done
DATA transfer complete...
AML DDR FW load done
DATA transfer complete...
PIEI prepare done
LPDDR4 probe
ddr clk to 1608MHz
DATA transfer complete...

dmc_version 0001
Check phy result
INFO : ERROR : Training has failed!
Cfg max: 4, cur: 2. Board id: 255. Force loop cfg
ddr probe id done
DATA transfer complete...
fw parse done

Tracing further shows that after extraction, the following is done to upload the DDR training code:

/g/mirror/khadas-utils/aml-flash-tool/tools/linux-x86/update write /tmp/aml-flash-tool-PC0E/DDR.USB 0xfffa0000 0x10000

This one succeeds. Then the code is run:

/g/mirror/khadas-utils/aml-flash-tool/tools/linux-x86/update run 0xfffa0000

Iā€™m instantly seeing this on the serial console so I think itā€™s the direct result of the above:

Board ID = 8
Set cpu clk to 24M
Set clk81 to 24M
Use GP1_pll as DSU clk.
DSU clk: 1200 Mhz
CPU clk: 1200 MHz
Set clk81 to 166.6M
DDR driver_vesion: LPDDR4_PHY_V_0_1_18 build time: Jul 31 2019 19:17:43
board id: 8
Cfg max: 4, cur: 1. Board id: 255. Force loop cfg
DATA transfer complete...
fw parse done
DATA transfer complete...
AML DDR FW load done

It seems to be the ā€œbl2_codeā€ operation which fails.

Now it looks very much like a timing issue, as I kept a copy of the temporary files in /tmp to try to perform the bl2_code operation again, and it gave varying results, including one case where u-boot indeed appeared on the screen:

PIEI prepare done
LPDDR4 probe
ddr clk to 1608MHz
DATA transfer complete...

dmc_version 0001
Check phy result
INFO : End of CA training
INFO : End of initialization
INFO : Training has run successfully!
Check phy result
INFO : End of initialization
INFO : End of read enable training
INFO : End of fine write leveling
INFO : End of Write leveling coarse delay
INFO : Training has run successfully!
Check phy result
INFO : End of initialization
INFO : End of read dq deskew training
INFO : End of MPR read delay center optimization
INFO : End of write delay center optimization
INFO : End of read delay center optimization
INFO : End of max read latency training
INFO : Training has run successfully!
1D init succeed
DATA transfer complete...
Check phy result
INFO : End of initialization
INFO : End of 2D read delay Voltage center optimization
INFO : End of 2D write delay Voltage center optimization
INFO : Training has run successfully!

channel==0
RxClkDly_Margin_A0==97 ps 10
TxDqDly_Margin_A0==106 ps 11
RxClkDly_Margin_A1==0 ps 0
TxDqDly_Margin_A1==0 ps 0
TrainedVREFDQ_A0==29
TrainedVREFDQ_A1==0
VrefDac_Margin_A0==27
DeviceVref_Margin_A0==29
VrefDac_Margin_A1==0
DeviceVref_Margin_A1==0


channel==1
RxClkDly_Margin_A0==97 ps 10
TxDqDly_Margin_A0==106 ps 11
RxClkDly_Margin_A1==0 ps 0
TxDqDly_Margin_A1==0 ps 0
TrainedVREFDQ_A0==27
TrainedVREFDQ_A1==0
VrefDac_Margin_A0==25
DeviceVref_Margin_A0==27
VrefDac_Margin_A1==0
DeviceVref_Margin_A1==0

 dwc_ddrphy_apb_wr((0<<20)|(2<<16)|(0<desc_buf = 0x0000000073e4ca70
aml_priv->desc_buf = 0x0000000073e4edb0
SDIO Port B: 0, SDIO Port C: 1
InUsbBurn
[MSG]sof
Set Addr 27
Get DT cfg
Get DT cfg
set CFG

After this I seem to be able to issue bulkcmd commands. Iā€™m now dissecting flash-tool to see what is needed to properly write to this board step by step :-/

So here are the steps Iā€™m currently executing:

  1. after the ā€œrunning u-boot [KO]ā€ message, I assumed the DDR training code had done its job and was not needed anymore. I extracted the image again:
$ mkdir /tmp/vim3l
$ aml-flash-tool/tools/linux-x86/aml_image_v2_packer -d /dev/shm/vim3l-ubuntu-xfce.img /tmp/vim3l

Then I issued a few times the bl2_code operation until the output from the serial console showed U-boot:

$ aml-flash-tool/tools/linux-x86/update bl2_boot /tmp/vim3l/DDR.USB

Then I uploaded the dtb according to what flash-tool does for platform g12a:

$ aml-flash-tool/tools/linux-x86/update mwrite /tmp/vim3l/_aml_dtb.PARTITION mem dtb normal
file size is 0x15074
AmlUsbTplCmd = download mem dtb normal 0x15074 rettemp = 1 buffer = download mem dtb normal 0x15074
AmlUsbReadStatus retusb = 1
Downloading....
[update]Cost time 0Sec            
[update]Transfer size 0x15074B(0MB)
AmlUsbBulkCmd[download get_status]
[AmlUsbRom]Inf:bulkInReply success
[update]mwrite success

Then wiped disk:

$ aml-flash-tool/tools/linux-x86/update bulkcmd "disk_initial 1"
AmlUsbBulkCmd[disk_initial 1]
[AmlUsbRom]Inf:bulkInReply success

Then wrote the dtb partition:

$ aml-flash-tool/tools/linux-x86/update partition _aml_dtb /tmp/vim3l/_aml_dtb.PARTITION
file size is 0x15074
AmlUsbTplCmd = download store _aml_dtb normal 0x15074 rettemp = 1 buffer = download store _aml_dtb normal 0x15074
AmlUsbReadStatus retusb = 1
Downloading....
[update]Cost time 0Sec            
[update]Transfer size 0x15074B(0MB)
AmlUsbBulkCmd[download get_status]
[AmlUsbRom]Inf:bulkInReply success
[update]mwrite success

Then wrote the u-boot partition, which according to image.cfg should be DDR.USB:

$ aml-flash-tool/tools/linux-x86/update partition bootloader /tmp/vim3l/DDR.USB           
file size is 0x137b70
AmlUsbTplCmd = download store bootloader normal 0x137B70 rettemp = 1 buffer = download store bootloader normal 0x137B70
AmlUsbReadStatus retusb = 1
Downloading....
[update]Cost time 0Sec            
[update]Transfer size 0x137b70B(1MB)
AmlUsbBulkCmd[download get_status]
[AmlUsbRom]Inf:bulkInReply success
[update]mwrite success

Then I issued the data & cache part wiping commands (only the first one didnā€™t fail but I assume this is expected as a catch-all method to get any board clean) :

$ aml-flash-tool/tools/linux-x86/update bulkcmd "setenv firstboot 1"
$ aml-flash-tool/tools/linux-x86/update bulkcmd "save"
$ aml-flash-tool/tools/linux-x86/update bulkcmd "rpmb_reset"
$ aml-flash-tool/tools/linux-x86/update bulkcmd "amlmmc erase data"
$ aml-flash-tool/tools/linux-x86/update bulkcmd "nand erase.part data"
$ aml-flash-tool/tools/linux-x86/update bulkcmd "amlmmc erase cache"
$ aml-flash-tool/tools/linux-x86/update bulkcmd "nand erase.part cache"

The wrote the remaining partitions (logo and rootfs):

$ aml-flash-tool/tools/linux-x86/update partition logo /tmp/vim3l/logo.PARTITION    
file size is 0xddd40
AmlUsbTplCmd = download store logo normal 0xDDD40 rettemp = 1 buffer = download store logo normal 0xDDD40
AmlUsbReadStatus retusb = 1
Downloading....
[update]Cost time 0Sec            
[update]Transfer size 0xddd40B(0MB)
AmlUsbBulkCmd[download get_status]
[AmlUsbRom]Inf:bulkInReply success
[update]mwrite success

$ aml-flash-tool/tools/linux-x86/update partition rootfs /tmp/vim3l/rootfs.PARTITION 
file size is 0xf1400000
AmlUsbTplCmd = download store rootfs normal 0xF1400000 rettemp = 1 buffer = download store rootfs normal 0xF1400000
AmlUsbReadStatus retusb = 1
Downloading....
[ 31%/ 1196MB] (...)
[update]Cost time 382Sec            
[update]Transfer size 0xf1400000B(3860MB)
AmlUsbBulkCmd[download get_status]
[AmlUsbRom]Inf:bulkInReply success
[update]mwrite success

And finally issued ā€œburn completeā€:

$ aml-flash-tool/tools/linux-x86/update bulkcmd "burn_complete 1"
AmlUsbBulkCmd[burn_complete 1]
usbReadFile len=512,ret=-5 error_msg=Input/output error
[AmlUsbRom]Err:return len=-1 < strLenBusy 11
[AmlUsbRom]Inf:bulkInReply 
ERR: AmlUsbBulkCmd failed!

At this time the board reboots. YES!

Ubuntu 18.04.3 LTS Khadas ttyS0

Khadas login: 

:slight_smile:

2 Likes

And FWIW it worked for the second board as well. The first phase is difficult, I had to re-upload an d re-run the DDR training code by hand before issuing bl2_code. Also bl2_code definitely needs to be issued twice. The first time emits a few lines and hangs. The second time really boots. Hopefully I wonā€™t need these anymore, but Iā€™m leaving the info here for those who would run into the same trouble. Thanks again Gouwa for your help, it definitely helped me eliminate some wrong directions!

Hi,
does this description of your experience with VIM3L mean that it is impossible to write the Ubuntu image into eMMC with the burning tool for Windows?

How did you power your VIM3L during installation, from the normal USB port of your Linux PC?

Itā€™s good to know that there is a way to get the image burned even though the process seems to be fragile/unstableā€¦ But there should be a better way too. Gouwa, any suggestions perhaps?

Regarding Windows, I donā€™t know since I havenā€™t met this operating system for many years now, so I cannot even guess how that would work there.

For the PSU it was a USB adapter that I know can reliably deliver about 2.4A so it was not an issue. I wouldnā€™t be scared about the burning process, the board is still very recent and the CPU even more. Itā€™s acceptable to have a few hickups at the beginning, and quite frankly it was possible to recover, which is all that matters. I asked here because I already felt the upload process was more or less ā€œunbrickableā€ so in the worst case youā€™d meet some initial difficulties. It could just be a matter of timing with a USB port or anything. Overall while Iā€™ve already had easier experiences with other boards once they had been sold for a year or so, this one was pretty good compared to those that require proprietary formats, signing, JTAG or whatever mess to recover :slight_smile:

And Gouwa was very prompt to respond, which is another bonus.

Quite frankly if you have a bit of experience with SBCs, do not hesitate, this one is really good, itā€™s just still a bit young an still needs some packaging work (e.g. last time I checked there was still only the eMMC image and not the SD one). If however itā€™s your first SBC, you may prefer to wait for everything to be completely ready (howtos, images etc), which should be a matter of days, maybe weeks in the worst case. But thatā€™s nothing unreasonable at all IMHO.

tried to burn the VIM3L image ( https://dl.khadas.com/Firmware/VIM3L/Ubuntu/EMMC/VIM3L_Ubuntu-xfce-bionic_Linux-4.9_arm64_EMMC_V20190917.7z) but failed.

The same burner on the same Win PC (and the same USB port) has been good for VIM1. The burner shows ā€œconnectedā€ before pressing START, no external power used.

The end of the log file below, does it explain anything to anybody?
[Inf]ā€“Burning thread HUB1-6 start
[Inf]ā€“Open device handle \?\usb#vid_1b8e&pid_c003#5&521a615&0&6#{a5dcbf10-6530-11d2-901f-00c04fb951ed} 0x0000085c
[Inf]ā€“Connect path=USB xHCI Compliant Host Controller/P0/P5
[Inf]ā€“Start burningā€¦
[Inf]--------------ERASE BOOTLOADER------------
[Inf]ā€“3-2-0-0
[Inf]-------------Download DDR.USB-----------
[Inf]ā€“3-2-0-0
[Inf]ā€“Control write pll reg1 0xfffa0000:0x000000b1
[Inf]ā€“Control write pll reg1 0xfffa0000:0x00005183
[Inf]ā€“Control write pll reg1 0xfffa0000:0x000000b1
[Inf]ā€“Control write pll reg1 0xfffa0000:0x00005183
[Inf]ā€“Write initial succeed
[Inf]ā€“Upload encrypt at 0xff800228
[Inf]ā€“ulValue = 0xa0f83180
[Inf]ā€“Read encrypt value succeed

No idea. I think Khadas should really urgently provide a micro-SD image for the VIM3L. This would alleviate the need for these unreliable tools because one would just have to use a regular ā€œddā€ or an equivalent on windows and there would be no such issue anymore.

Note that there is the krescue SD image which should work fine. I suppose itā€™s usable to manually flash the eMMC image. I found it mentioned in this thread here: VIM3L: booloader fail: DDR training error

hi plz read this one
https://forum.khadas.com/t/krescue-take-full-control-of-your-vim-device/5945/40

krescue - under active developing and testing

we can share new images for VIM3L (and other VIM boards ) very very soon - ( already we have ubuntu coreelec openwrt images )

plz wait - i will try do it on this week!

PS: installation process must be very easy and fast :wink:

3 Likes