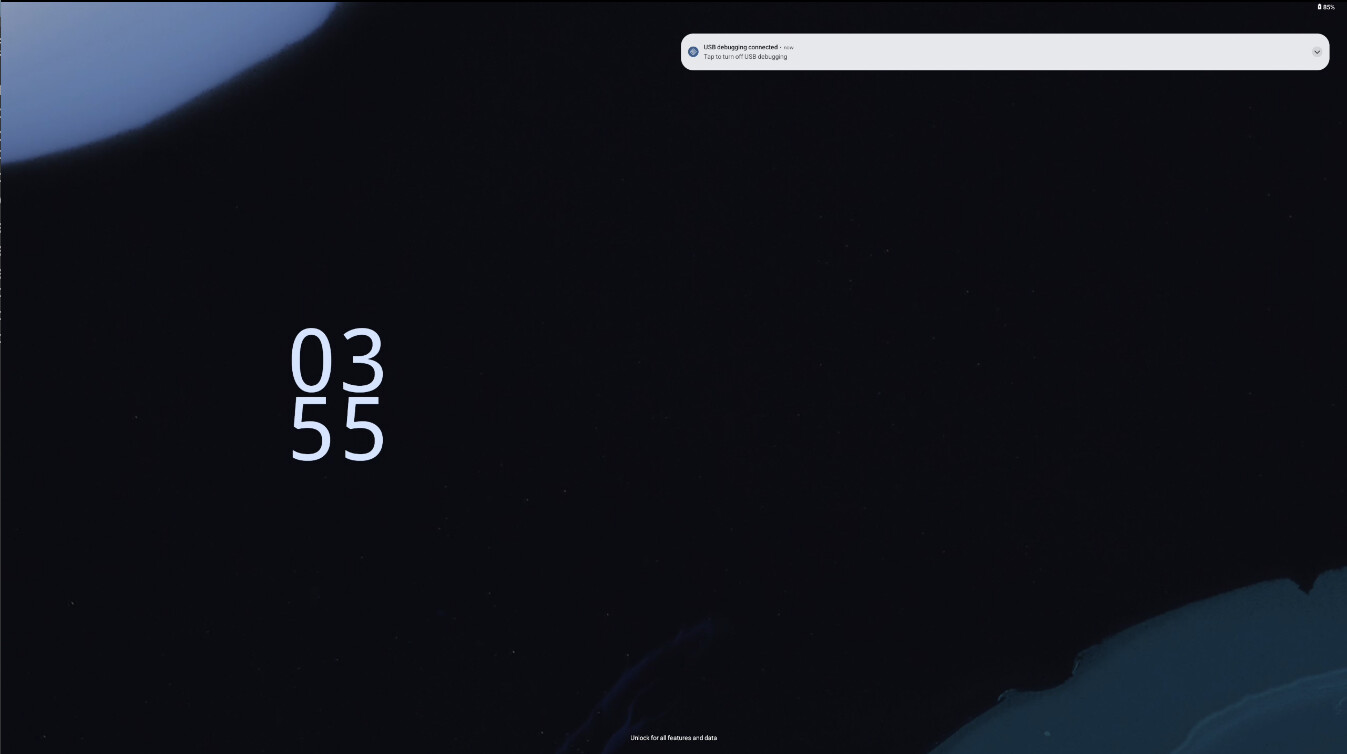
Android 16 is internally codenamed “Baklava”.This naming choice marks a departure from the traditional alphabetical order of dessert-themed codenames which had been a hallmark of earlier Android versions. “Baklava” is the sixteenth and latest major release of Android, the mobile operating system developed by the Open Handset and led by Google. The first developer preview was released on November 19, 2024. The first beta was released on January 23, 2025.Google released the final version on June 10, 2025.

Now, we can enjoy the latest “Baklava” on VIM3/VIM3L.
Code Download and Compilation
Obtaining the Code
mkdir khadas-aosp-16 && cd $_
repo init -u https://gitlab.baylibre.com/baylibre/amlogic/atv/aosp/manifest.git -b yukawa-android-16
repo sync
./device/amlogic/yukawa/fetch-vendor-package.sh
Compiling the Code
- VIM3
export TARGET_VIM3=true
export TARGET_USE_TABLET_LAUNCHER=true
source build/envsetup.sh
lunch yukawa-bp2a-userdebug
m
- VIM3L
export TARGET_VIM3L=true
export TARGET_USE_TABLET_LAUNCHER=true
source build/envsetup.sh
lunch yukawa-bp2a-userdebug
m
Supported Lunch Targets
| Android Lunch | Android Version |
|---|---|
| yukawa-bp2a-userdebug | TV Debug (VIM3/VIM3L) |
We also support the following build flags to enable optional features:
- TARGET_KERNEL_USE=6.12|mainline : Select Kernel version (default is 6.12)
- TARGET_VIM3=true : Build for VIM3 Board
- TARGET_VIM3=true`: Build for VIM3 board
- TARGET_VIM3L=true : Build for VIM3L Board (Default target)
- TARGET_BUILTIN_EDID=true : This option allows to preload 1920x1080 EDID structure
- TARGET_USE_TABLET_LAUNCHER=true : Use tablet launcher instead of Android TV launcher
Extension
Building the Android Kernel
Android is built around the Linux kernel. By default, the boot.img for Android is constructed from the binary kernel image located in the following directory:
~/src/khadas-aosp-16/device/amlogic/yukawa-kernel/6.12
Below are instructions for rebuilding and customizing the Linux kernel for Android.
Android 16 supports two kernel versions:
- 6.12 (default): Stable Android kernel 6.12
- mainline: Latest mainline kernel for development
Fetching the kernel code
For kernel 6.12 (default):
mkdir ~/src/khadas-kernel-6.12/ && cd $_
repo init -u https://gitlab.baylibre.com/baylibre/amlogic/atv/aosp/kernel/manifest.git -b yukawa-android16-6.12
repo sync
For kernel mainline:
mkdir ~/src/khadas-kernel-mainline/ && cd $_
repo init -u https://gitlab.baylibre.com/baylibre/amlogic/atv/aosp/kernel/manifest.git -b yukawa-mainline
repo sync
Building the Kernel
In this section, we assume that we already have a fully built Android source code tree located at:
~/src/khadas-aosp-16/
Building Everything from Scratch
For the 6.12 kernel (default):
cd ~/src/khadas-kernel-6.12/
export destdir=~/src/khadas-aosp-16/device/amlogic/yukawa-kernel/6.12
tools/bazel run //yukawa-device:yukawa_dist -- --destdir=$destdir
For the mainline kernel:
cd ~/src/khadas-kernel-mainline/
export destdir=~/src/khadas-aosp-16/device/amlogic/yukawa-kernel/mainline
tools/bazel run //yukawa-device:yukawa_dist -- --destdir=$destdir
Rerun this command for incremental rebuilding.
Defconfig/menuconfig Changes
To configure the kernel using menuconfig:
tools/bazel run --config=local //common:yukawa_with_kgdb_config -- menuconfig
Alternatively, you can manually edit the arch/arm64/configs/amlogic_gki.fragment file.
Rebuilding All Associated Android Images
To test the changes made to the kernel, we must rebuild the relevant Android images:
boot.img: Contains the kernel binary file and the main device tree
vendor.img: Contains the kernel modules
To rebuild the Android images, perform the following:
cd ~/src/khadas-aosp-16/
source build/envsetup.sh
lunch yukawa-bp2a-userdebug
m bootimage vendorimage
Flashing the kernel
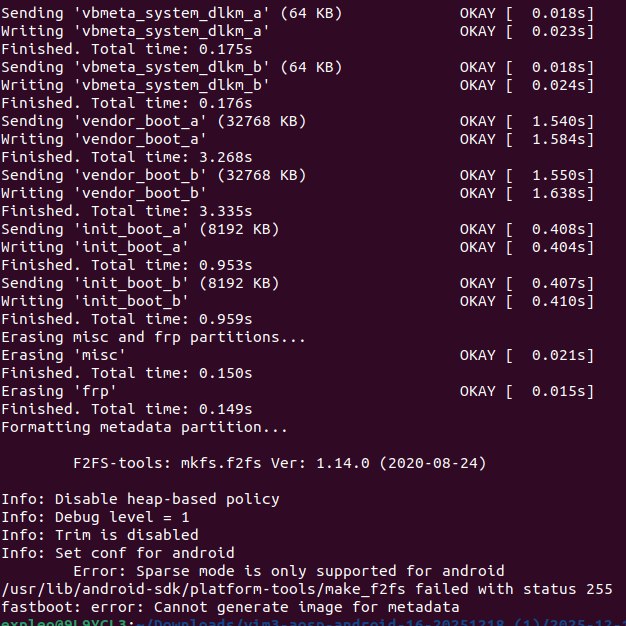
With GKI and Android 16, flashing only the kernel is not sufficient. You need to reflash the entire device using the flash script:
cd $ANDROID_PRODUCT_OUT
adb reboot fastboot
./flash.sh
Bootloader
Obtaining Code
git clone https://gitlab.baylibre.com/baylibre/amlogic/atv/u-boot.git -b u-boot/v2026.01-rc1/integ bootloaders
Building
Install build dependencies:
sudo apt install gcc-aarch64-linux-gnu bc bison build-essential curl u-boot-tools flex git libssl-dev python3 python3-pip wget -y
pip3 install pyamlboot --user
Download the FIP package and generate the script:
cd bootloaders/
wget <package_file>
wget https://gitlab.baylibre.com/baylibre/amlogic/atv/aosp/device/amlogic/yukawa/-/raw/master/bootloader/scripts/generate-bins-new.sh
Unpack the FIP package:
tar xvf <package_file>
Generate the U-Boot image with the following command:
export CROSS_COMPILE=aarch64-linux-gnu-
make khadas-vim3_android_ab_defconfig|khadas-vim3l_android_ab_defconfig
make -j"$(nproc)"
Generate the FIP binary file:
chmod +x generate-bins-new.sh
./generate-bins-new.sh <fip-directory> u-boot.bin
Flashing Bootloader
Flash the result:
fastboot flash bootloader uboot-bins/u-boot.bin
fastboot erase bootenv
fastboot reboot bootloader
If partition table update is required after reboot:
fastboot oem format
Firmware Download
For this purpose, we will provide firmware for each version. If you wish to skip the compilation, you can click the links below to download the images directly.
20251218:
Flashing Method
For optimal results, the VIM3/VIM3L should be directly connected to the host PC. Avoid using USB hubs, as they often do not provide enough power to the board. Below, I will demonstrate the flashing process using VIM3.
After downloading the firmware and extracting it.if the image file is obtained from the compiled code, it will be located in the khadas-aosp-16\out\target\product\yukawa directory.
First time flashing method:
The flashing will be done using the pre-built pyamlboot tool, which requires a Ubuntu system for flashing.
- Install pyamlboot via pip
pip3 install pyamlboot
Alternatively, refer to pyamlboot for other methods.
- Set the board to USB upgrade mode:
1- Power up the VIM3
2- Press the F button quickly 3 times within 2 seconds, then release the button
The power LED (blue) will flash for about 3 seconds. After the power LED (blue) goes out, the board will enter upgrade mode.
- Flash Android Bootloader
# For VIM3
export BOOTLOADER_NAME=u-boot_kvim3_ab.bin
# For VIM3L
export BOOTLOADER_NAME=u-boot_kvim3l_ab.bin

cd ~/src/khadas-aosp-16/out/target/product/yukawa/
boot-g12.py ${BOOTLOADER_NAME}
The bin file path is: khadas-aosp-16\out\target\product\yukawa
- Start U-Boot and run fastboot
After the board resets, interrupt U-Boot again and enter fastboot mode:
=> fastboot 0
U-Boot should run fastboot, then
fastboot oem format
fastboot flash bootloader ${BOOTLOADER_NAME}
fastboot erase bootenv
- Flash Android Images
Flash Android Images using the automated script:
cd ~/src/khadas-aosp-16/out/target/product/yukawa
./flash.sh
After executing the ./flash command, the device will reboot. Press the R (reset) button to continue flash.
- Reset U-Boot environment to default values
Interrupt the U-Boot autoboot by pressing any key, then run the following commands to reset the environment:
=> env default -a
=> saveenv
=> reset