Hi @Spikerguy
After starting the system with SD card, it can be installed on eMMC.
To do this, you need to login as root and run the bsdinstall utility.
In the process, bsdinstall will install a new U-boot on the eMMC.
Keep this in mind
Hi @Spikerguy
After starting the system with SD card, it can be installed on eMMC.
To do this, you need to login as root and run the bsdinstall utility.
In the process, bsdinstall will install a new U-boot on the eMMC.
Keep this in mind
Amazing,
I just booted in freebsd the latest image on megacloud is working and I have intenet working on 1gb port.
Time to work on freebsd.
UPDATE: Flashed img to emmc using our Manjaro Emmc installer on sd card and now I have a working FreeBSD on emmc and it
UPDATE2: @microdude you fan script seems to work fine on the latest freebsd image.
Thanks for the response.
Hi!
New FreeBSD-13.0-RELEASE-p2 Images for KHADAS-EDGE available for download.
STATUS:
Download from: PersonalBSD.org » Downloads
Via ssh login
Username: admin
Password: admin
Welcome to the FreeBSD Community!
Nice this works fine.
The new FreeBSD splash screen is wonderful.
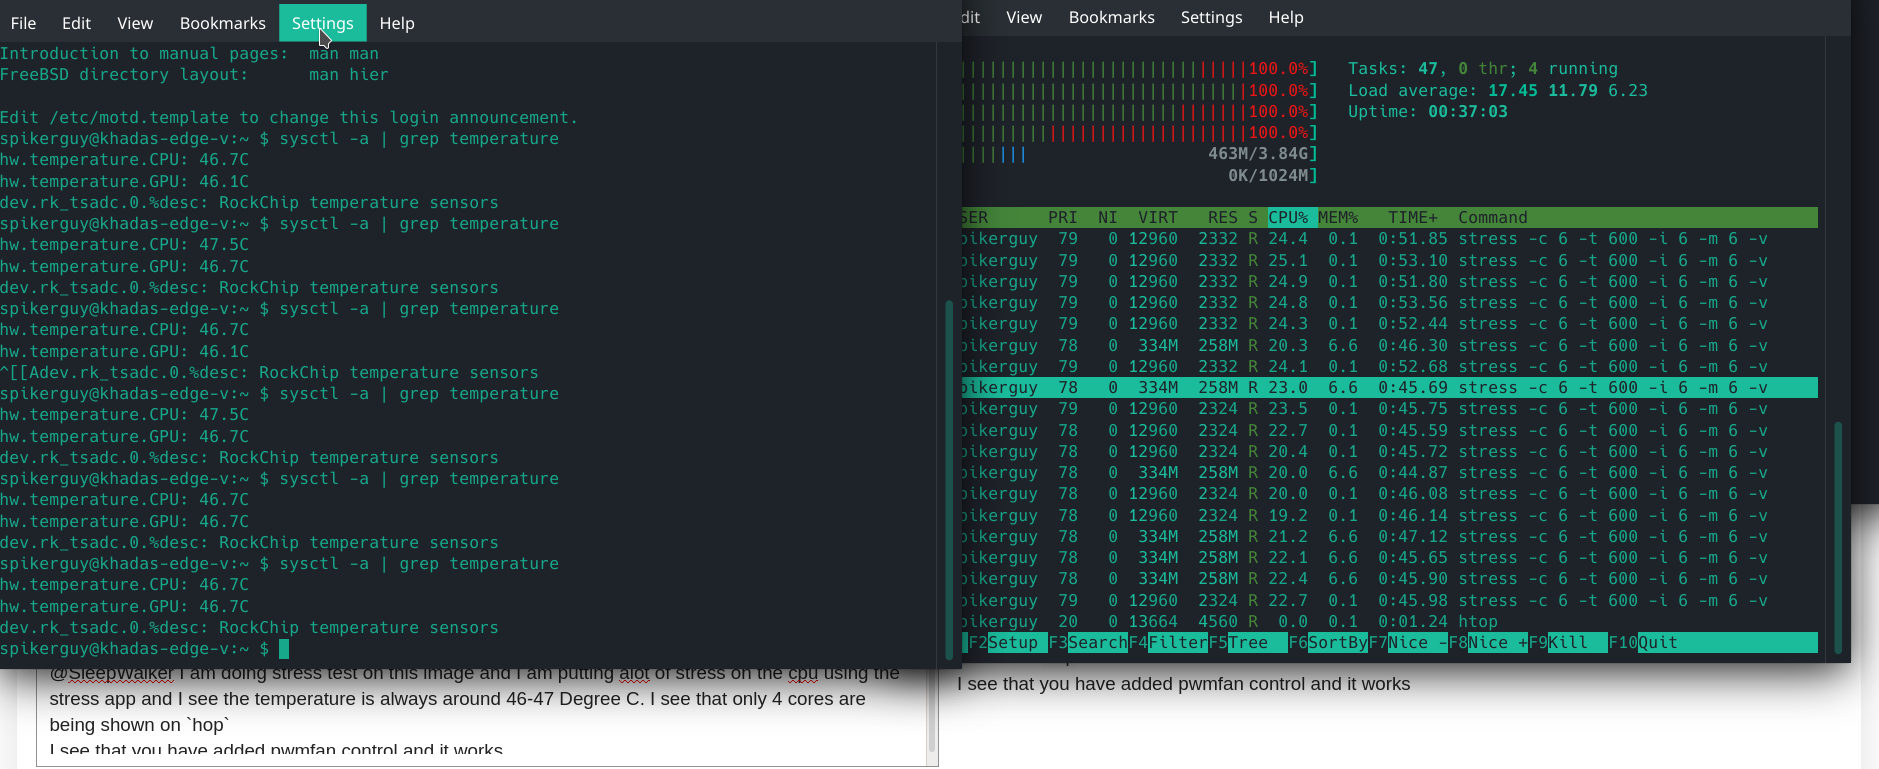
@SleepWalker I am doing stress test on this image and I am putting alot of stress on the cpu using the stress app and I see the temperature is always around 46-47 Degree C. I see that only 4 cores are being shown on hop
I see that you have added pwmfan control and it works. Either you have dropped the cpu frequency or have done some amazing thermal script. As I am aware that Rk3399 get hot alot when all cpu’s are under stress.
Image here.
Thanks.
Nice. Thanks
Currently it is building kernel-toolchains and then will build generic kernel and try it on rk3328 device.
Fan works fine when under load.
Nice work. Thanks.
Well done guys, @SleepWalker I have a small question,
what would it take to port this to Amlogic boards?
I was reading on the BSD forums that some were able to port it for themselves for the S912 but no one had a successful build,So what is the feasibility of getting Unix to work on the VIMs, What do we need that’s missing ?
Thanks so much @SleepWalker 
Hello Khadas community!
New Years, a new FreeBSD XFCE DESKTOP installation image is available
for download on the new site. https://personalbsd.org
HDMI audio works now !!!
You can get your FreeBSD XFCE DESKTOP audio experience on Khadas EDGE.
All six cores are working now.
Good luck everyone.
PS:
I will be pleased if you leave comments about your experience and my images on this forum,
or on my website https://personalbsd.org/#respond
hi @SleepWalker tnx for your work
i will check it soon !
Happy new Year
Hi there,
Is there a more recent image? The last drop is a year old. Does that mean no more development, or does everything work now?
EDIT: Oops, just saw your comment about a more up-to-date image, thanks @SleepWalker
By the way, will you be feeding your work up-stream?
better to ask @SleepWalker about last images
i just share at https://dl.khadas.com/Firmware/Krescue/images/
@hyphop What are the Krescue images?
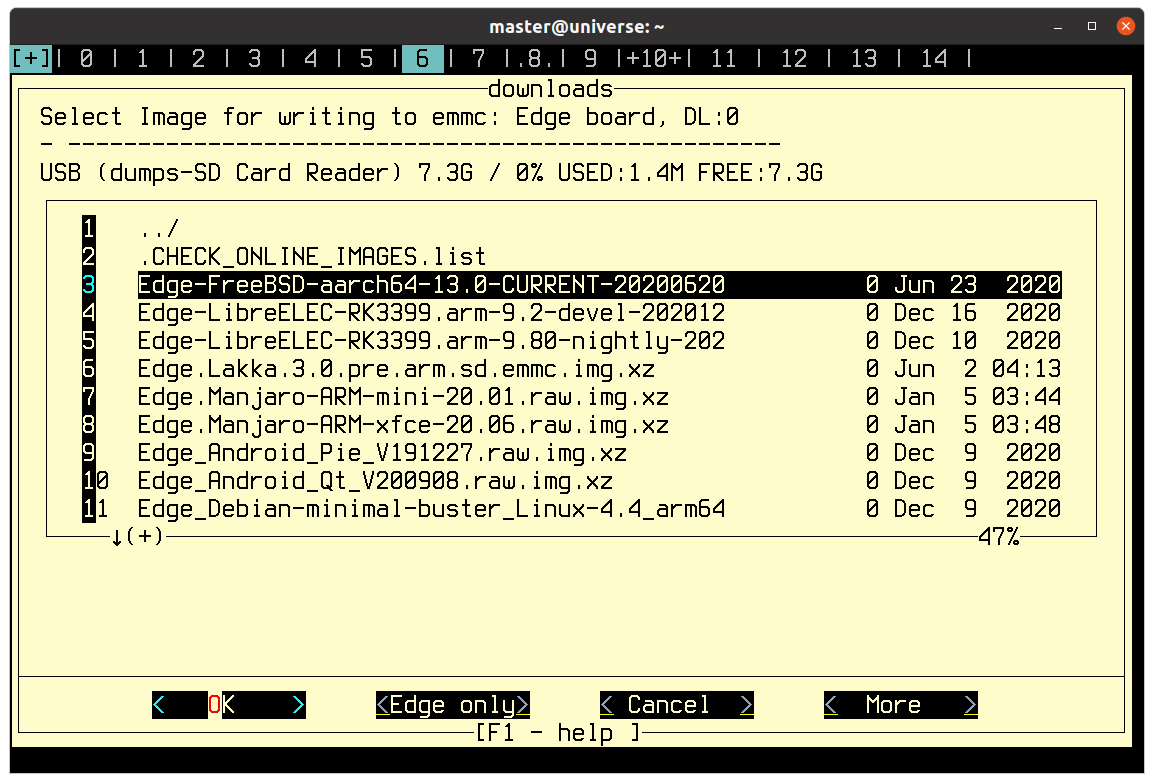
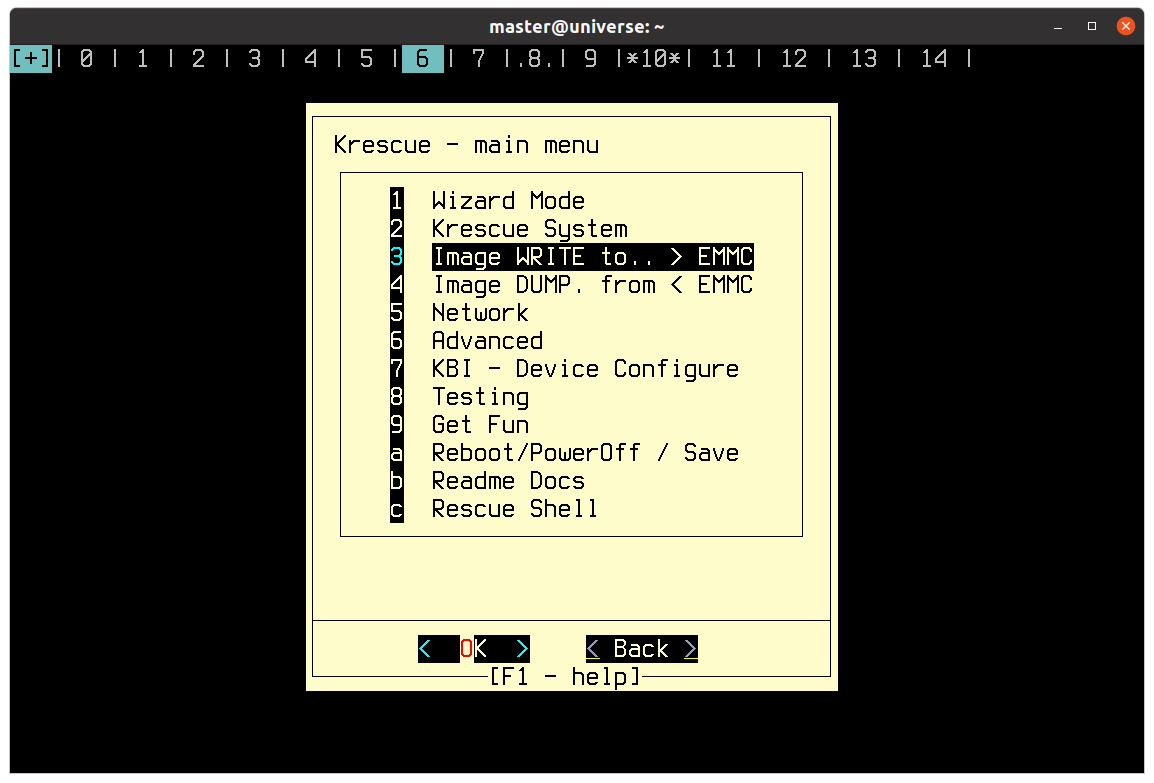
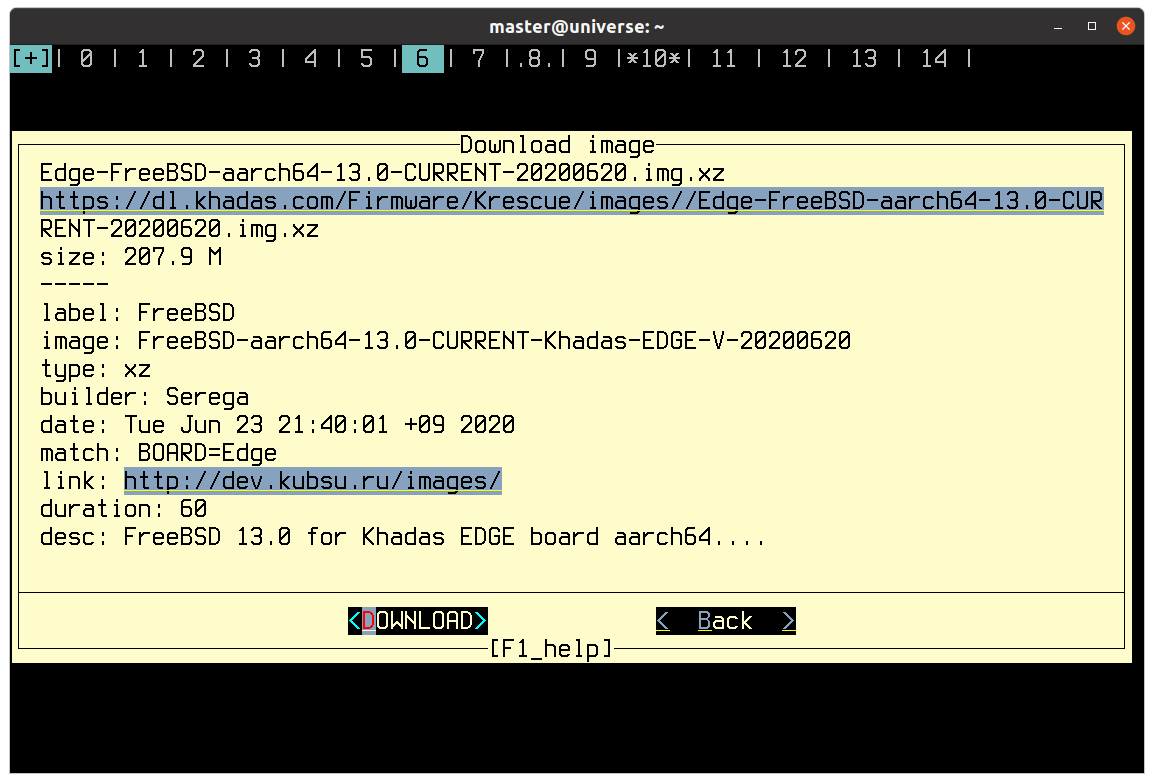
images collection which can be writted via Krescue (https://dl.khadas.com/Firmware/Krescue/system/README-rescue-begin.txt) directly to emmc
some images *.xz just compressed raw images and can be writed by simple dd
(for example FreeBSD image)
Hello everybody!
FreeBSD 13.0-RELEASE certainly works on Khadas-EDGE-V.
You just need a custom U-boot to run.
You can download the latest custom build of FreeBSD 13.0-RELEASE here.
https://personalbsd.org/?page_id=2
It includes some differences from the official one, for example, there is an HDMI-AUDIO driver.
The image also contains all the source code and a modified bsdinstall utility.
It allows you to install the system on eMMC, USB or NVMe, after starting from the SD CARD.
Latest image for Khadas-EDGE-V
https://personalbsd.org/images/FreeBSD-aarch64-13.0-RELEASE-Khadas-EDGE-20210630.img.xz
@SleepWalker
Thanks. You say the source code in in the image and bsdinstall utility, can you please explain how that works?
Also, what format do I use on my NVMe and how do I install and boot from it? Cheers.
If you run my image from SD card you will have HDMI and USB keyboard and mouse.
After that, you can manually install it on eMMC or NVMe.
But I advise you to start by just trying the default install mode.
You can simply run bsdinstall and follow the instructions in the installation menu.
You can choose where to install the system.
You will be presented with a choice of all connected devices.
It will write u-boot to EMMC even if you selected NVMe or USB as destination disk.
This will allow the system to boot directly from USB or NVMe
when you finish installing the system and remove the SD card.
At the moment my bsdinstall only allows the creation of a ZFS root FS but this is actually the best choice.
After installing the system, you can install the applications you need.
For example, to install MATE, you need to run the command
pkg install xorg mate lightdm lightdm-gtk-greeter lightdm-gtk-greeter chromium firefox vlc libreoffice
I wish you success
Many thank @SleepWalker Looking forward to the arrival of my board.
@SleepWalker
My Edge-V board just arrived.
It booted into Android fine, except the video flickers on my wide screen monitor. I will investigate that further when I get FreeBSD on the card.
I am following the video on installing an image over WiFi using krescue.
I am having trouble booting up Krescue off the SD card. It gets halfway through the boot, then stalls. Seems it is still trying the MMC card. Do I have to erase the MMC first, If so, how do I do that.
PS: Where do I find instructions for the normal “bsdinstall”, I don’t see any information on how to use that anywhere on the web site.
Cheers
Download latest image from PersonalBSD.org » Downloads
Burn FreeBSD Image to SD CARD
Insert SD CARD into Khadas-EDGE
And I follow the next instruction
Function key without releasing it.