The motivation for adding an network gadget for me is to have an improved RDP experience in addition to other things.
Here are the steps to add a Windows 10 compatible network gadget
Step 1 : Upgrade packages. this will pull in the otg-device overlay
$ sudo apt update && sudo apt dist-upgrade -y
Step 2 : Enable OTG device mode
$ sudo nano /boot/env.txt
append otg-device if it is not already to overlays=, example
overlays=uart3 pwm_f i2c3 otg-device
CTRL+s and CTRL+x to save and exit
Step 3 : Reboot
$ sync && sudo reboot
Step 4 : Add RNDIS gadget setup script.
$ sudo nano /usr/local/bin/rndis-gadget
Copy and paste the following “/usr/local/bin/rndis-gadget”. CTRL+s and CTRL+x to save and exit.
#!/bin/sh

#

# Create Windows 10 compatible RNDIS USB Gadget

#
. /etc/fenix-release
GADGET=/sys/kernel/config/usb_gadget/g1

if [ -d $GADGET ]; then

echo “Exiting… RNDIS Gadget exists”

exit 0

fi
F_RNDIS=$GADGET/functions/rndis.0

SERIAL="$(grep Serial /proc/cpuinfo | grep -o -P ‘.{0,12}$’)"

MAC="$(echo ${SERIAL} | sed ‘s/(\w\w)/:\1/g’ | cut -b 2-)"

MAC_HOST=“12$(echo ${MAC} | cut -b 3-)”

MAC_DEV=“02$(echo ${MAC} | cut -b 3-)”

UDC="$(ls /sys/class/udc/ | awk ‘{print $1}’)"
mkdir $GADGET
echo “0x1d6b” > $GADGET/idVendor  # Linux Foundation

echo “0x0104” > $GADGET/idProduct

echo “0x0100” > $GADGET/bcdDevice

echo “0x0200” > $GADGET/bcdUSB
echo “0xEF” > $GADGET/bDeviceClass

echo “0x04” > $GADGET/bDeviceSubClass

echo “0x01” > $GADGET/bDeviceProtocol
# Set Strings

mkdir $GADGET/strings/0x409

echo $SERIAL  > $GADGET/strings/0x409/serialnumber

echo “Khadas” > $GADGET/strings/0x409/manufacturer

echo $BOARD   > $GADGET/strings/0x409/product
# Create Config

mkdir $GADGET/configs/c.1

mkdir $GADGET/configs/c.1/strings/0x409

echo “RNDIS Gadget” > $GADGET/configs/c.1/strings/0x409/configuration

echo “500” > $GADGET/configs/c.1/MaxPower

echo “0x80” > $GADGET/configs/c.1/bmAttributes #  USB_OTG_SRP | USB_OTG_HNP
# Create RNDIS function

mkdir $F_RNDIS

echo $MAC_HOST > $F_RNDIS/host_addr

echo $MAC_DEV > $F_RNDIS/dev_addr
# OS Descriptors

echo “1” > $GADGET/os_desc/use

echo “0xbc” > $GADGET/os_desc/b_vendor_code

echo “MSFT100” > $GADGET/os_desc/qw_sign

mkdir -p $F_RNDIS/os_desc/interface.rndis

echo “RNDIS” > $F_RNDIS/os_desc/interface.rndis/compatible_id

echo “5162001” > $F_RNDIS/os_desc/interface.rndis/sub_compatible_id
# Bind function to configuration

ln -s $F_RNDIS $GADGET/configs/c.1/

ln -s $GADGET/configs/c.1/ $GADGET/os_desc
# Enable the Gadget

echo $UDC > $GADGET/UDC
echo “Done creating RNDIS USB Gadget…$(cat $F_RNDIS/ifname)”

exit 0
Step 5 : Make ‘rndis-gadget’ executable
$ sudo chmod +x /usr/local/bin/rndis-gadget
Step 6 : Add systemd service file
$ sudo systemctl edit --force rndis-gadget.service --full
Copy and paste the following into the editor. CTRL+s and CTRL+x to save and exit.
[Unit]

Description=RNDIS over USB

DefaultDependencies=no

After=systemd-update-utmp-runlevel.service
[Service]

Type=oneshot

ExecStart=/usr/local/bin/rndis-gadget

RemainAfterExit=true
[Install]

WantedBy=sysinit.target
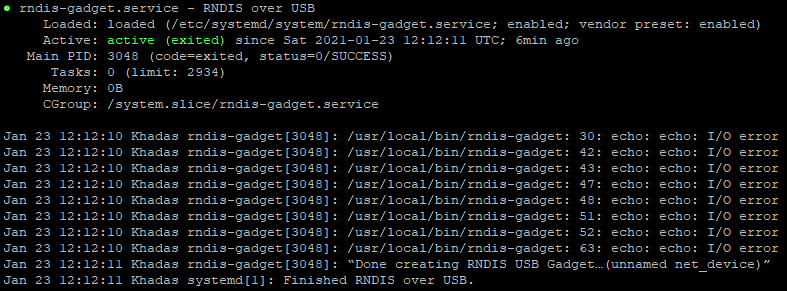
Step 7 : Test 'RNDIS over USB’
$ sudo systemctl start rndis-gadget.service
$ ip a to confirm usb0 shows up.
On your PC, check if the VIM is listed as “Remote NDIS Compatible Device” under the Device Manager->Network adapters
Step 8 : Enable ‘RNDIS over USB’ on boot
$ sudo systemctl enable rndis-gadget.service
WE ARE NOT DONE YET
The final step is to decide who is going to provide the IP address to both the VIM and the PC it is connected.
Pick one of the following three options
Option 1. Static IP for both VIM and PC (Easy)
$ echo $'# RNDIS Gadget\nallow-hotplug usb0\niface usb0 inet static\naddress 192.168.10.100\nnetmask 255.255.255.0\ngateway 192.168.10.1' | sudo tee /etc/network/interfaces.d/interface.rndis
On your Linux/Mac/Windows PC setup the network interface to static IP with following
Address: 192.168.10.101
Netmask: 255.255.255.0
Gateway: 192.168.10.1
Option 2. PC providing the IP to VIM
$ echo $'# RNDIS Gadget\nallow-hotplug usb0\niface usb0 inet dhcp' | sudo tee /etc/network/interfaces.d/interface.rndis
Windows : Use “Internet Connection Sharing”
Linux Network Manager : Set the interface “Shared Connection” feature
Option 3. VIM providing the IP to PC (Instructions not complete)
Add interface usb0 to NetworkManager managed devices
$ sudo sed -i '/unmanaged-devices/{/,except:interface-name:usb0/! s/$/,except:interface-name:usb0/}'
Create NetworkManager connection
$ sudo nmcli connection add type ethernet ifname usb0 ipv4.method shared ipv6.method ignore con-name local-rndis
Reboot for the changes to take effect.