Hello All,…
In addition to all the topics on the subject that I could read on the forum, here is a “short” and “quick” summary of my 2 Khadas heatsink mods :
In all these mods I use aluminum adhesive tape, sometimes insulating adhesive tape to prevent elecric contact between boards and also plastic plate for hot air flow deviation…
VIM2 v1.2 active cooling system mod :

VIM2 v1.2 + old VIM2 v1.2 heatsink + old VIM2 v1.2 cooling fan + plastic plate (air flow deviation)…
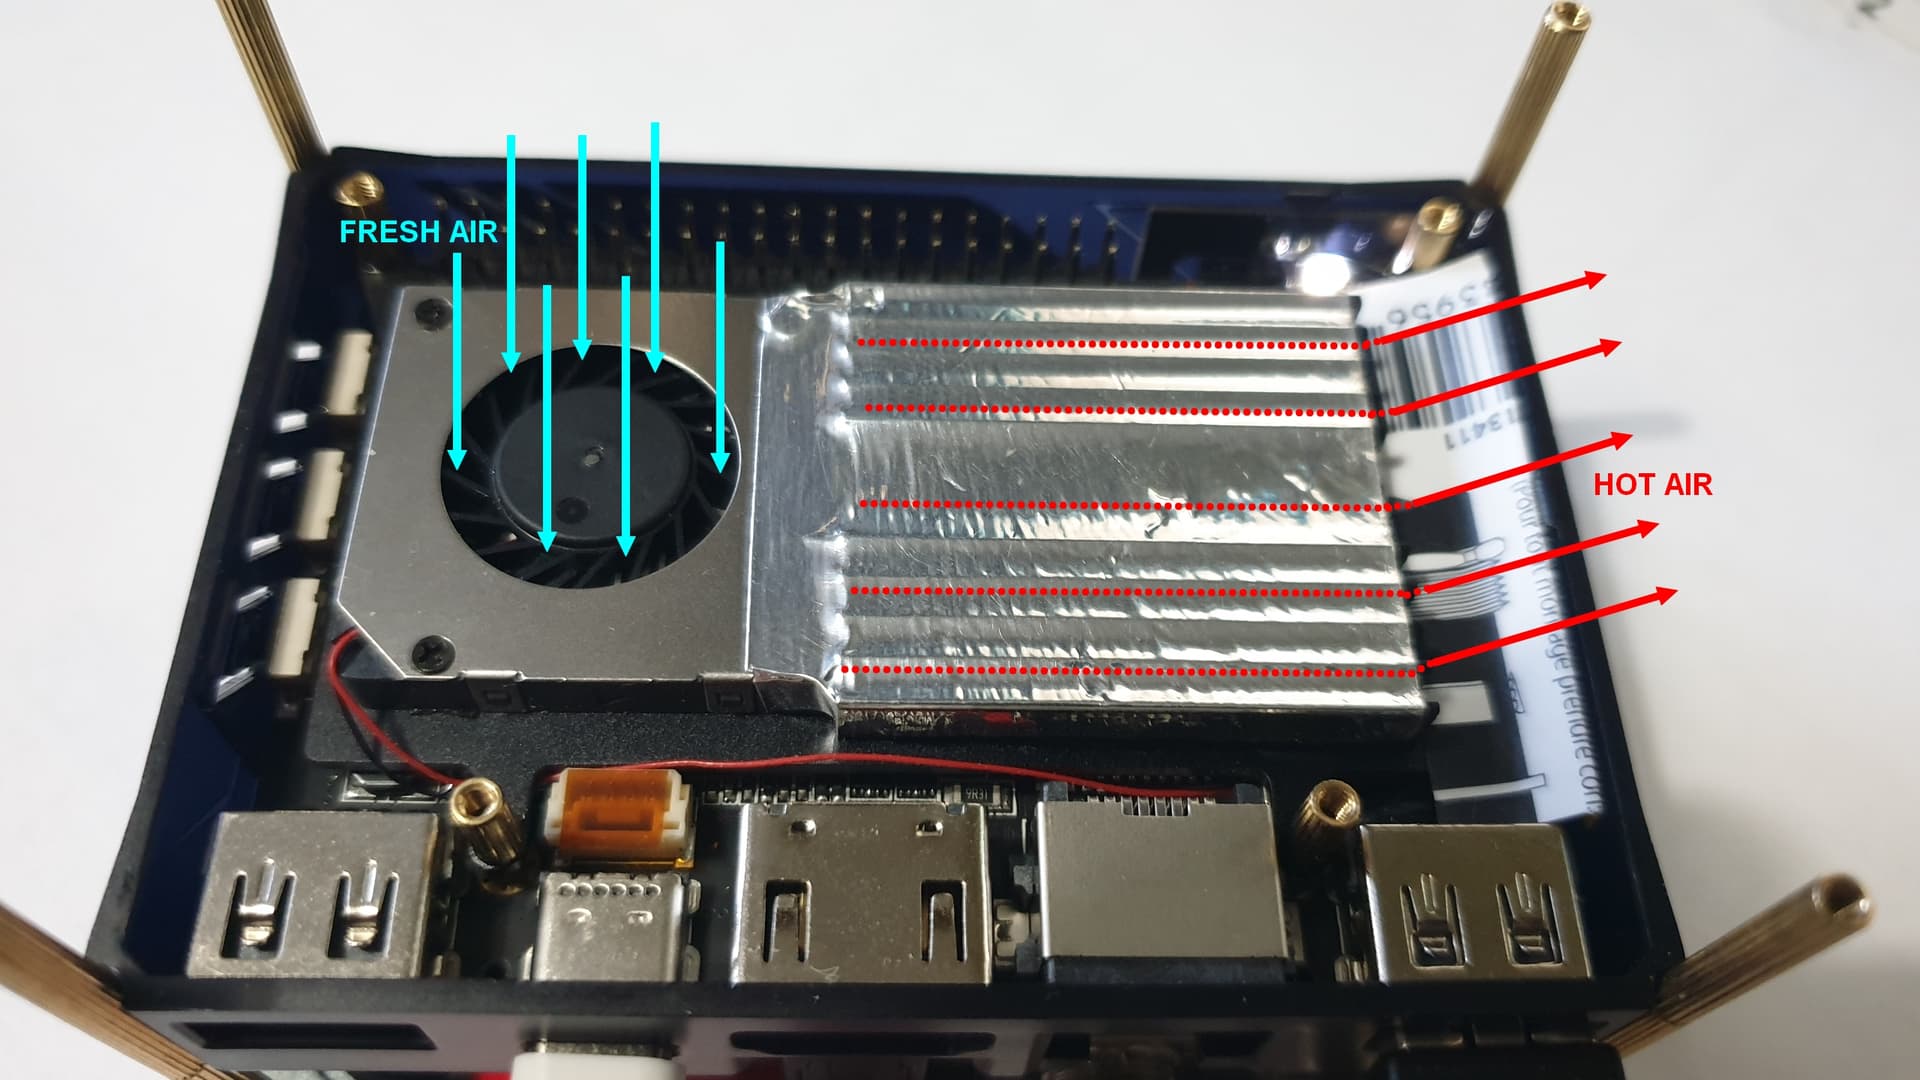
Air flow enters by the upper fan side, and get originally out in front of the Wifi antenna…
Bending the plastic plate to guide the hot air flow above the Wifi antenna…

Air flow comes out between the TONE1 and the DIY-Case side…
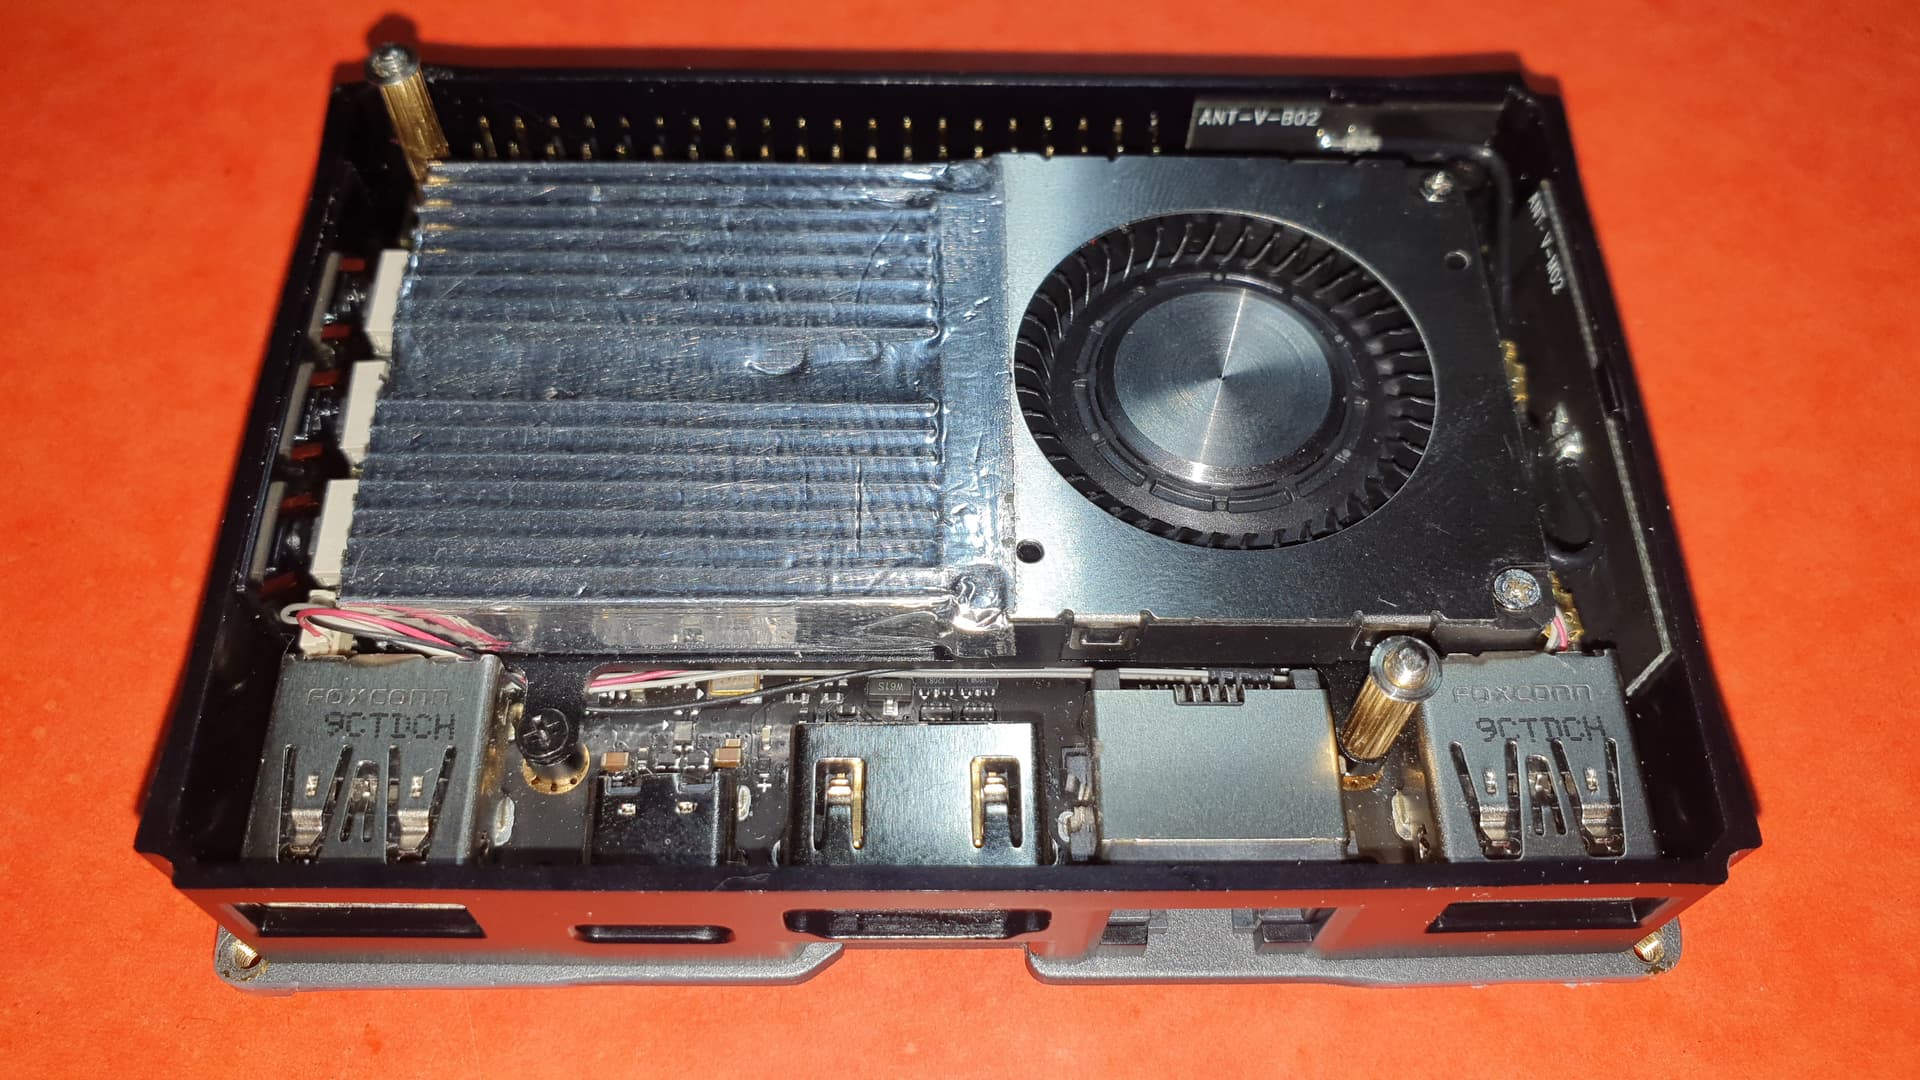
VIM2 v1.4 active cooling system mod :
VIM2 v1.4 + New VIMs heatsink + 3705 cooling fan + insulating adhesive tape (avoid contact between TONE1 and VIM heatsink)
Plastic plate for air flow deviation is no more needed sine Khadas has abandoned couple old VIM2 v1.2 heatsink-old VIM2 v1.2 cooling fan because air flow get out of the DIY-Case by the 3 buttons grid.
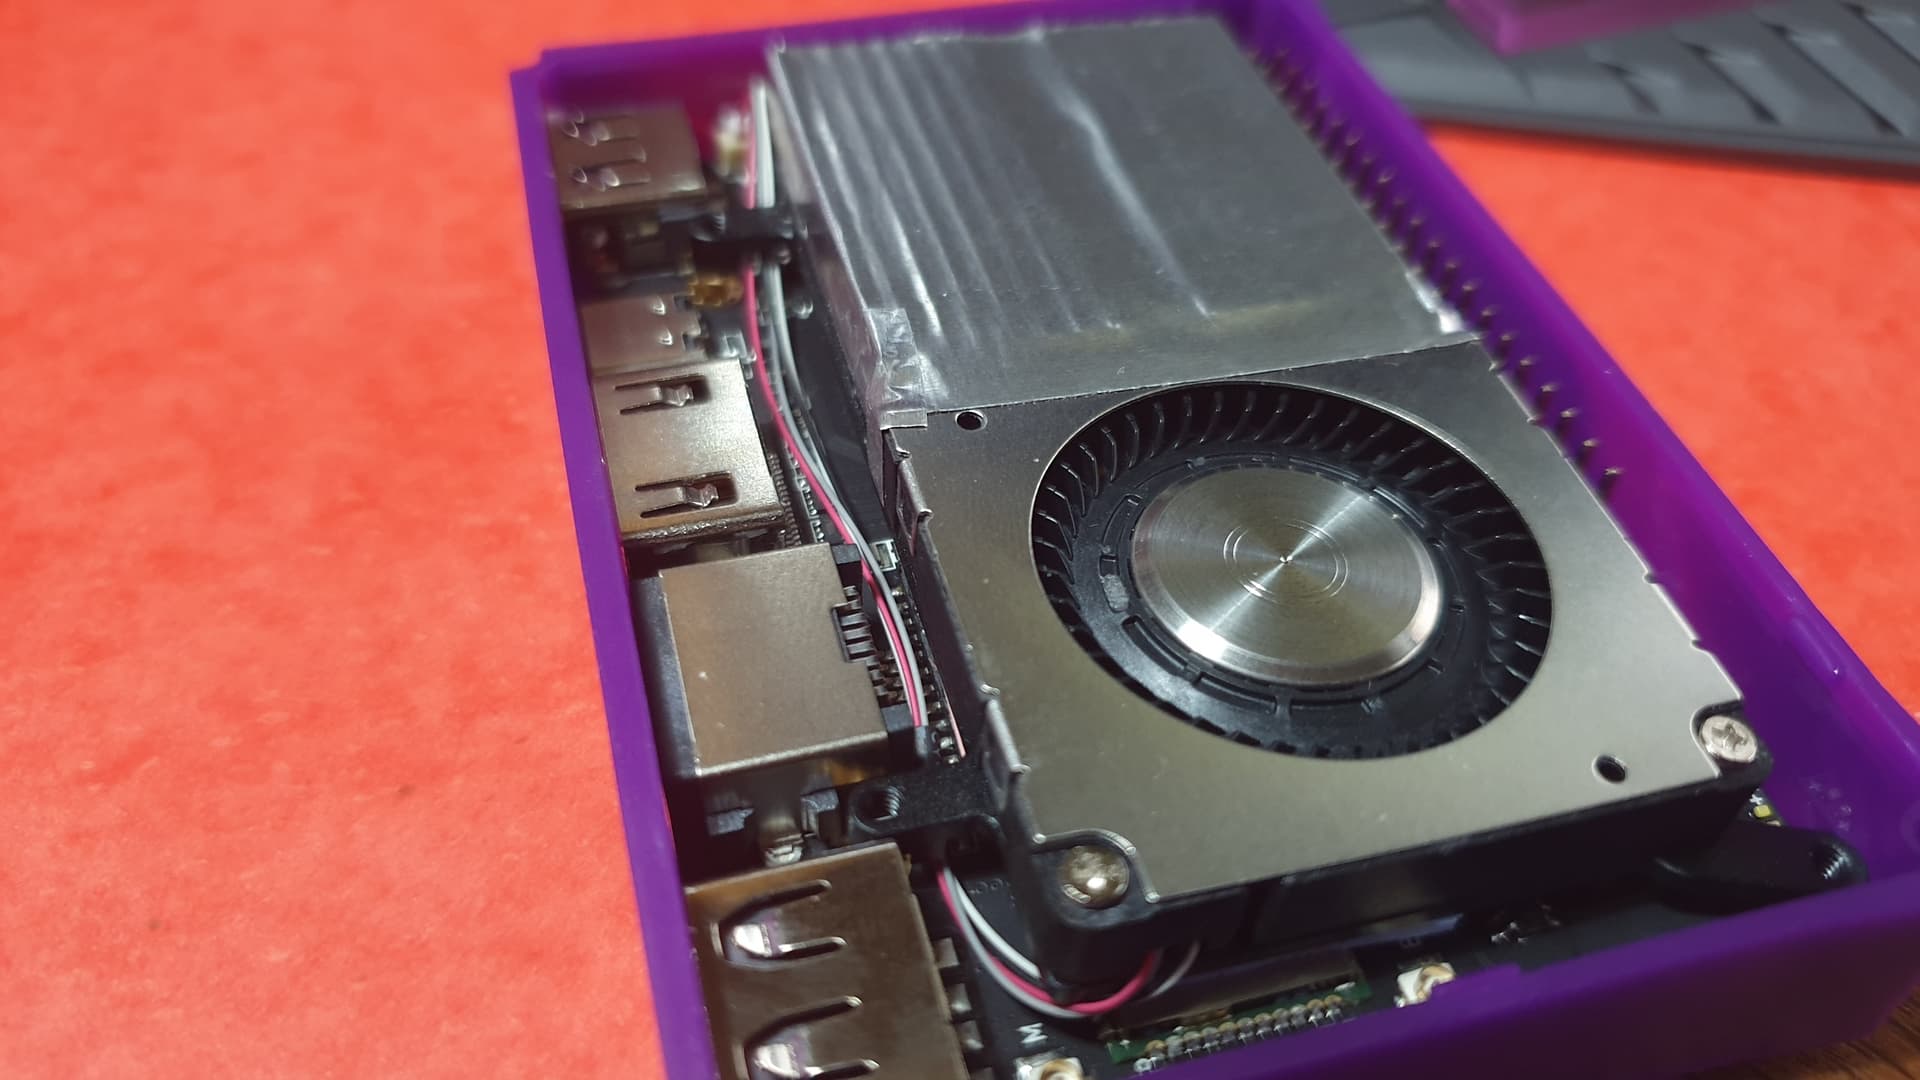
VIM3 v1.2 active cooling system mod :

VIM3 v1.2 + New VIMs heatsink + 3705 cooling fan :
As with VIM2 v1.4 cooling system, the plastic plate for air flow deviation is no more needed.
HOW TO PROCEED :
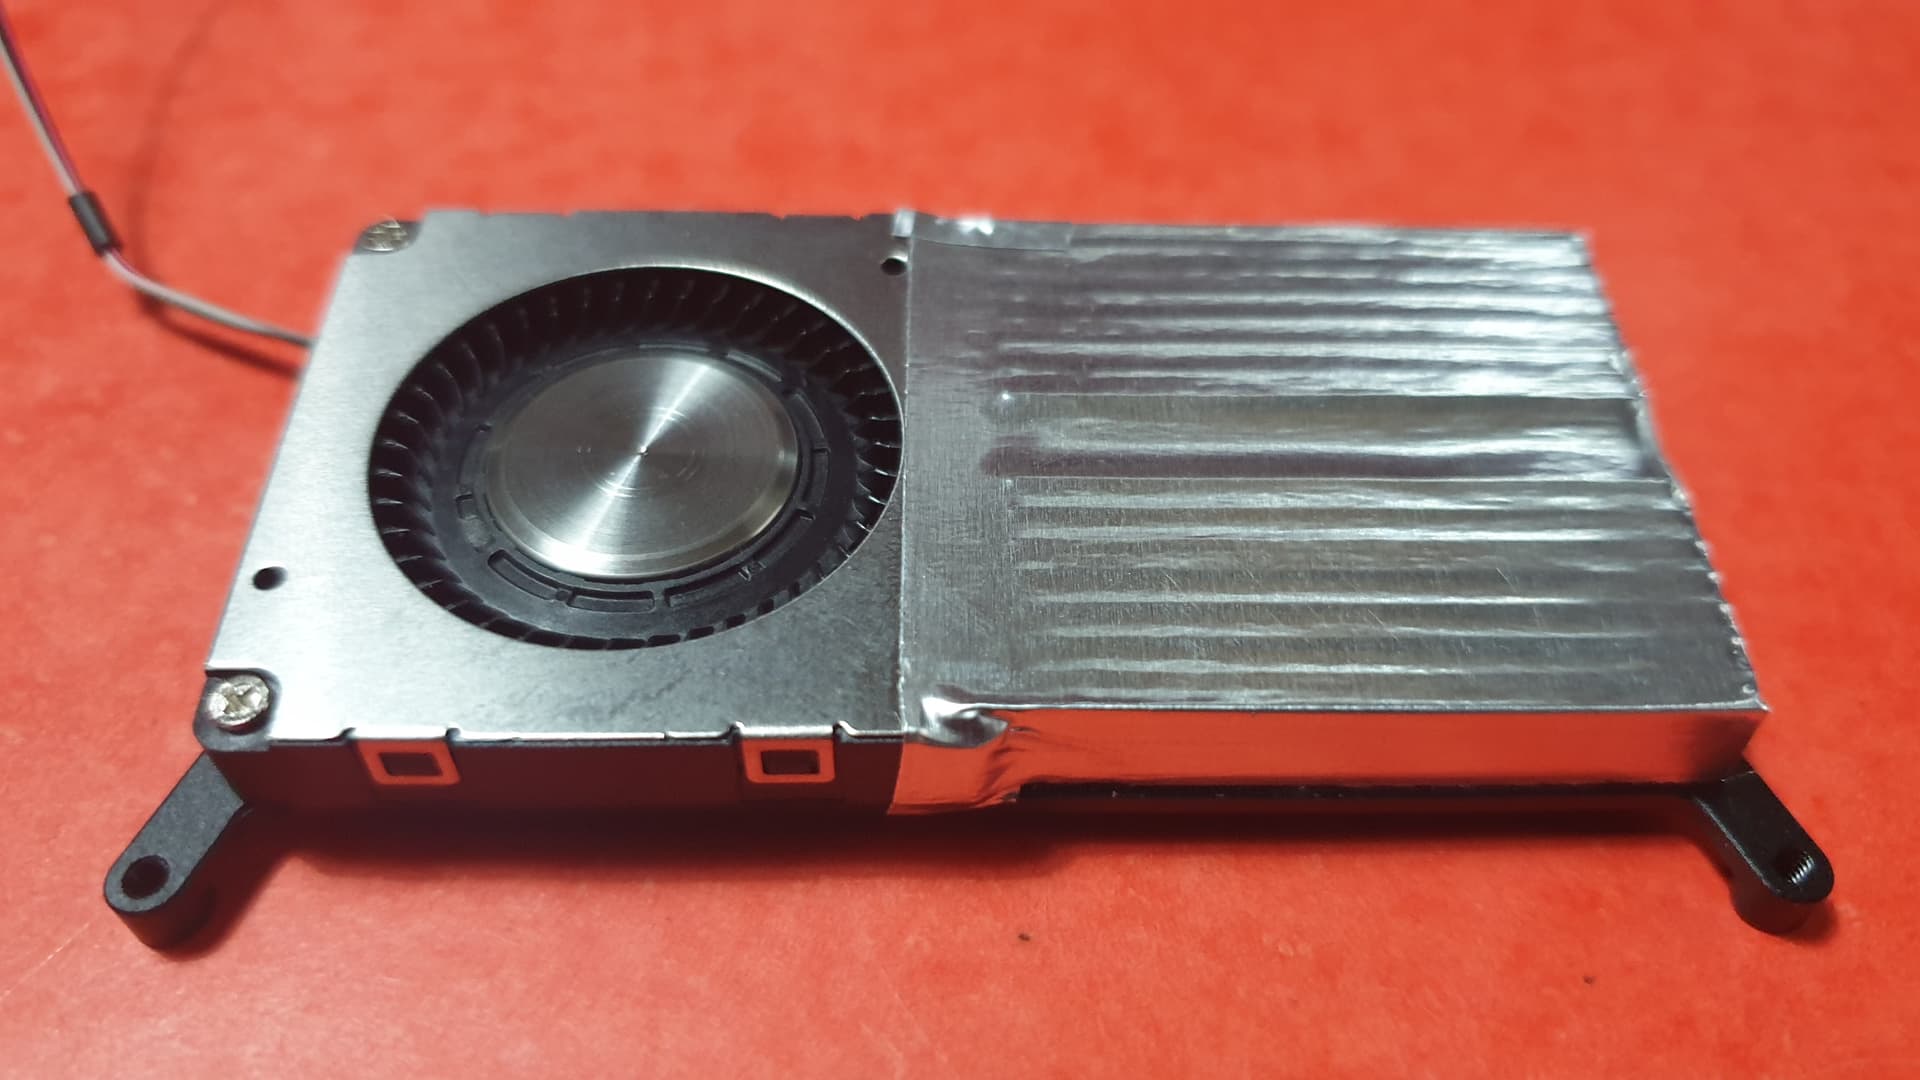
New VIMs heatsink and 3705 cooling fan MOD
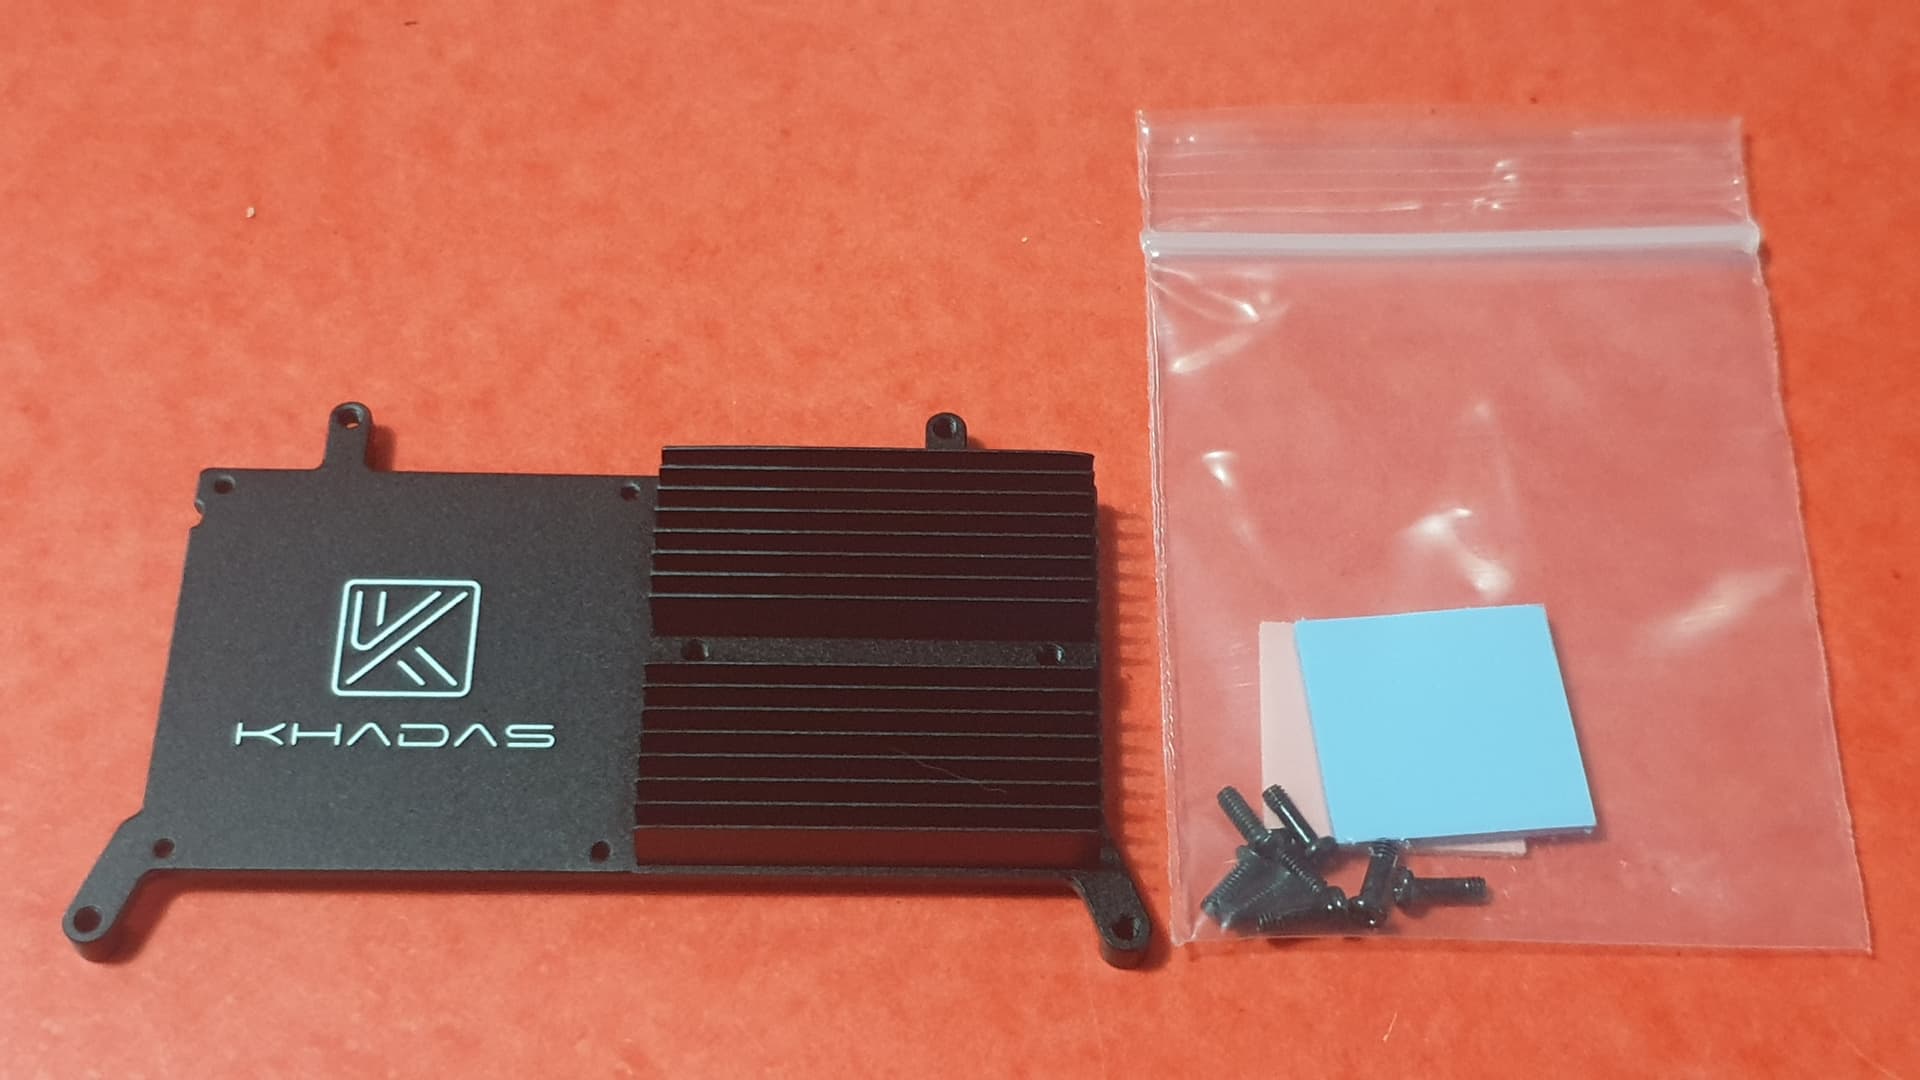
Order one New VIMs heatsink (old VIM2 v1.2 heatsink doesn’t exist anymore)…
…and one 3705 cooling fan (old VIM2 v1.2 cooling fan doesn’t exist anymore too)…
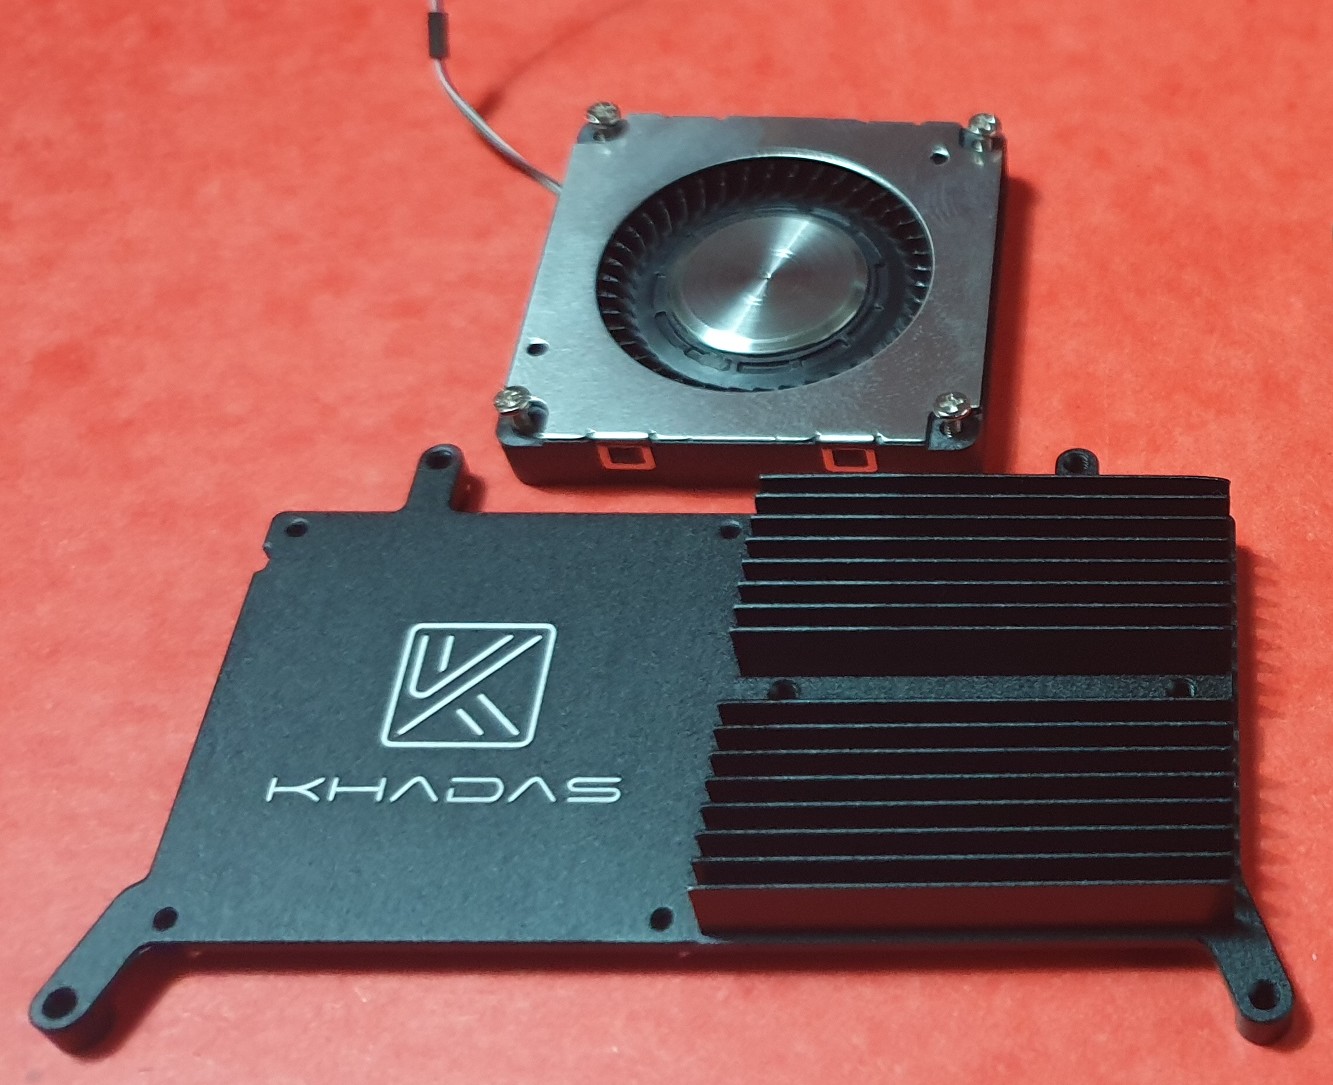
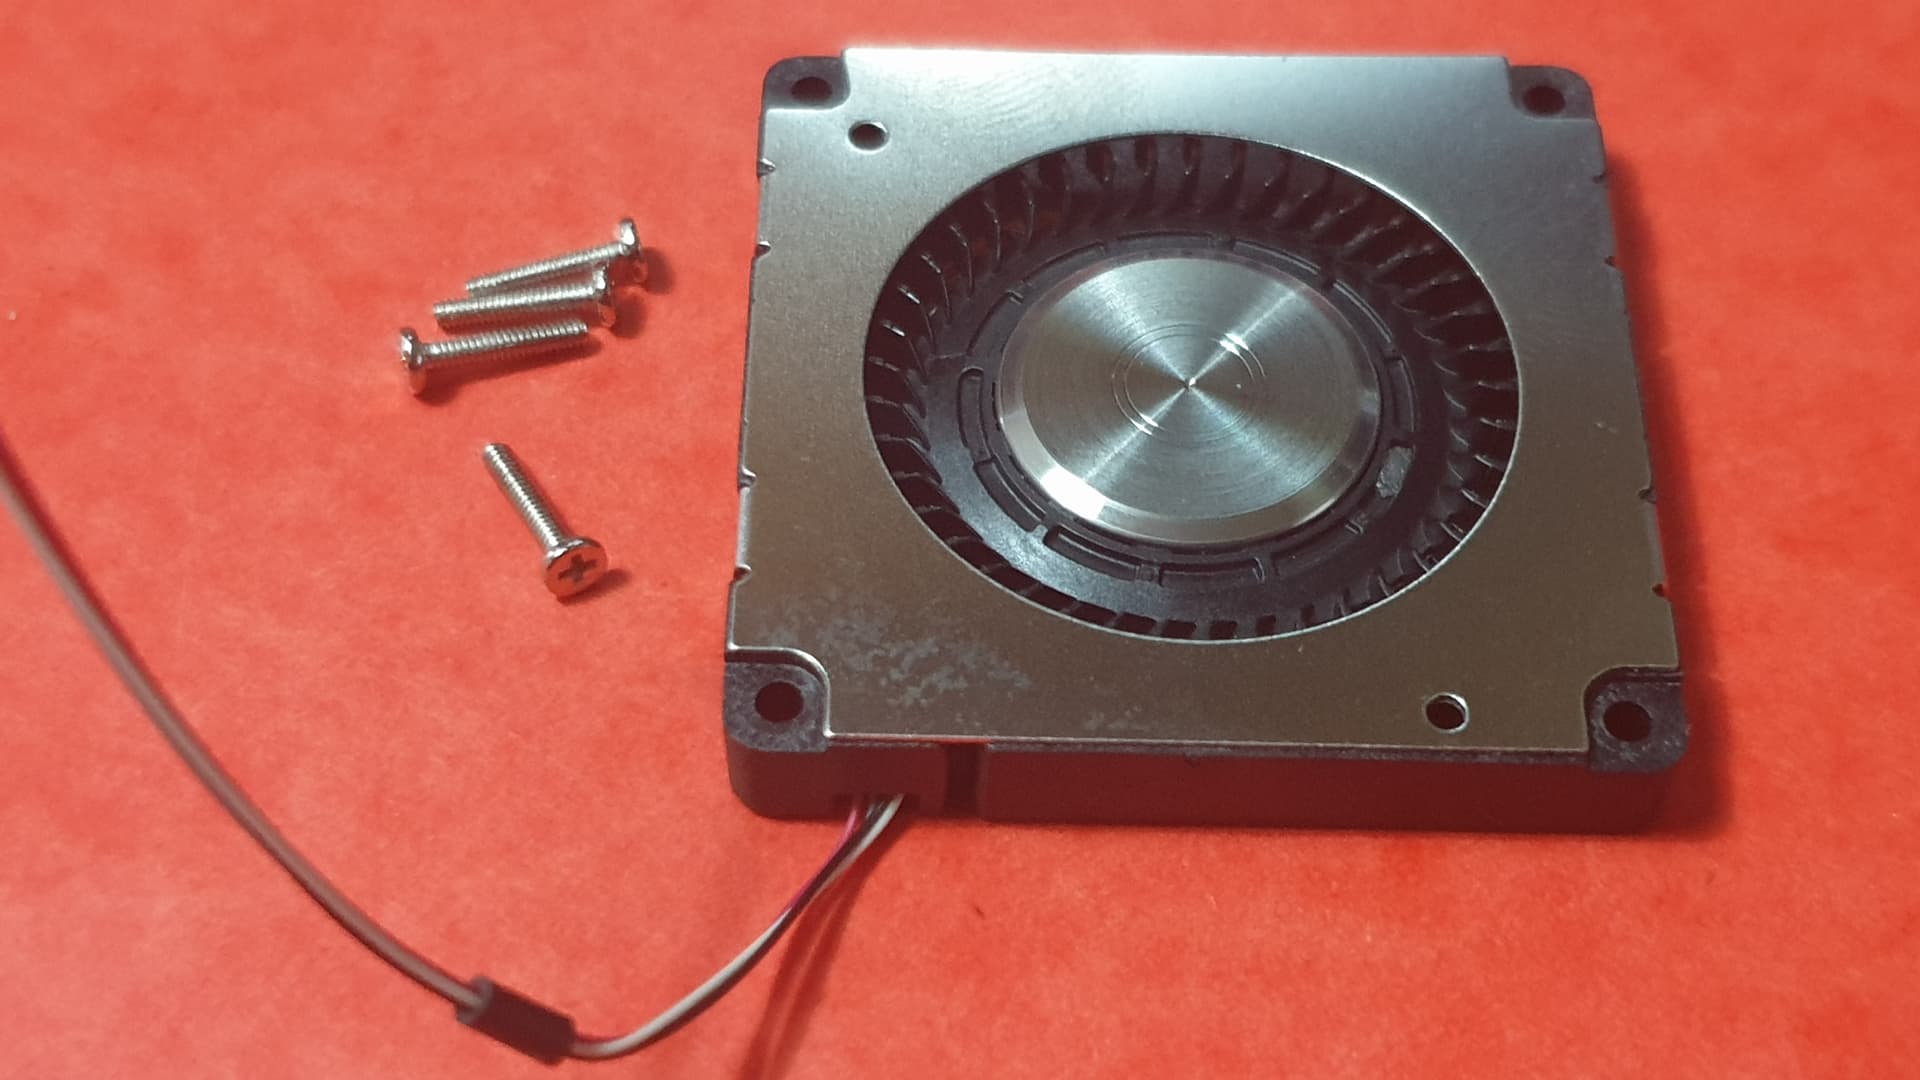
Mount the 3705 cooling fan on the New VIMs heatsink with the four screws provided…
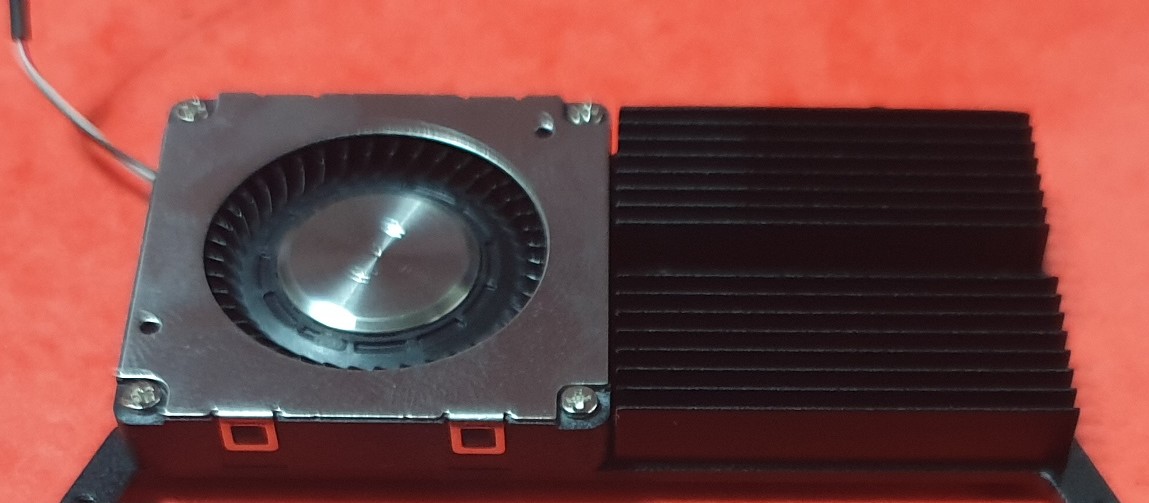
Be carefull, wire has to be in the upper left corner because the fresh air flow exhaust is on the right side
 …
…
Cut an 8cm long aluminium adhesive tape and stick straddling both New VIMs heatsink and 3705 cooling fan sides…

Apply firmly the adhesive on the sides of the New VIMs heatsink and on the 3705 cooling fan to perfectly match their shapes…
Cut the excess with a cutter…
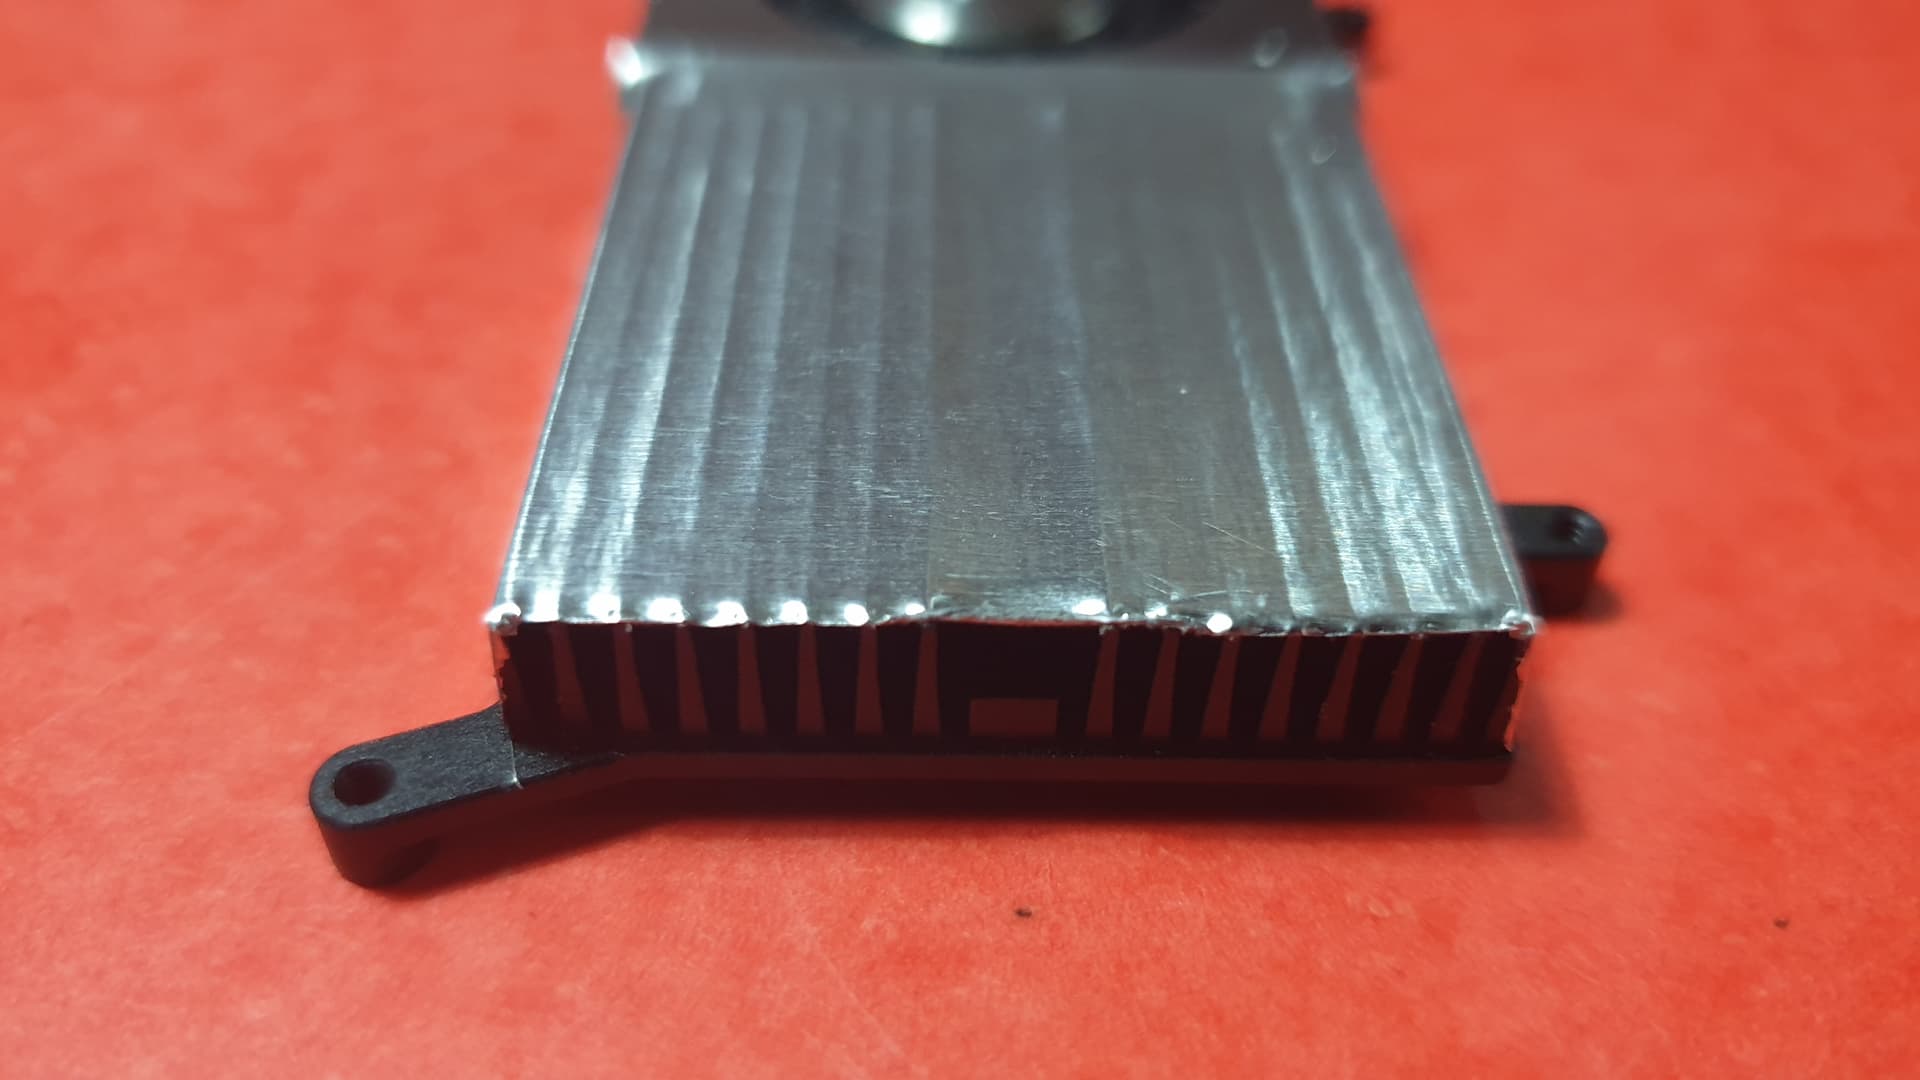
Soften the cuts with the back of the nail to prevent them from being sharp…

If like me you tore the adhesive in one place,…

…you can repair the tear with a patch, or replace it all…
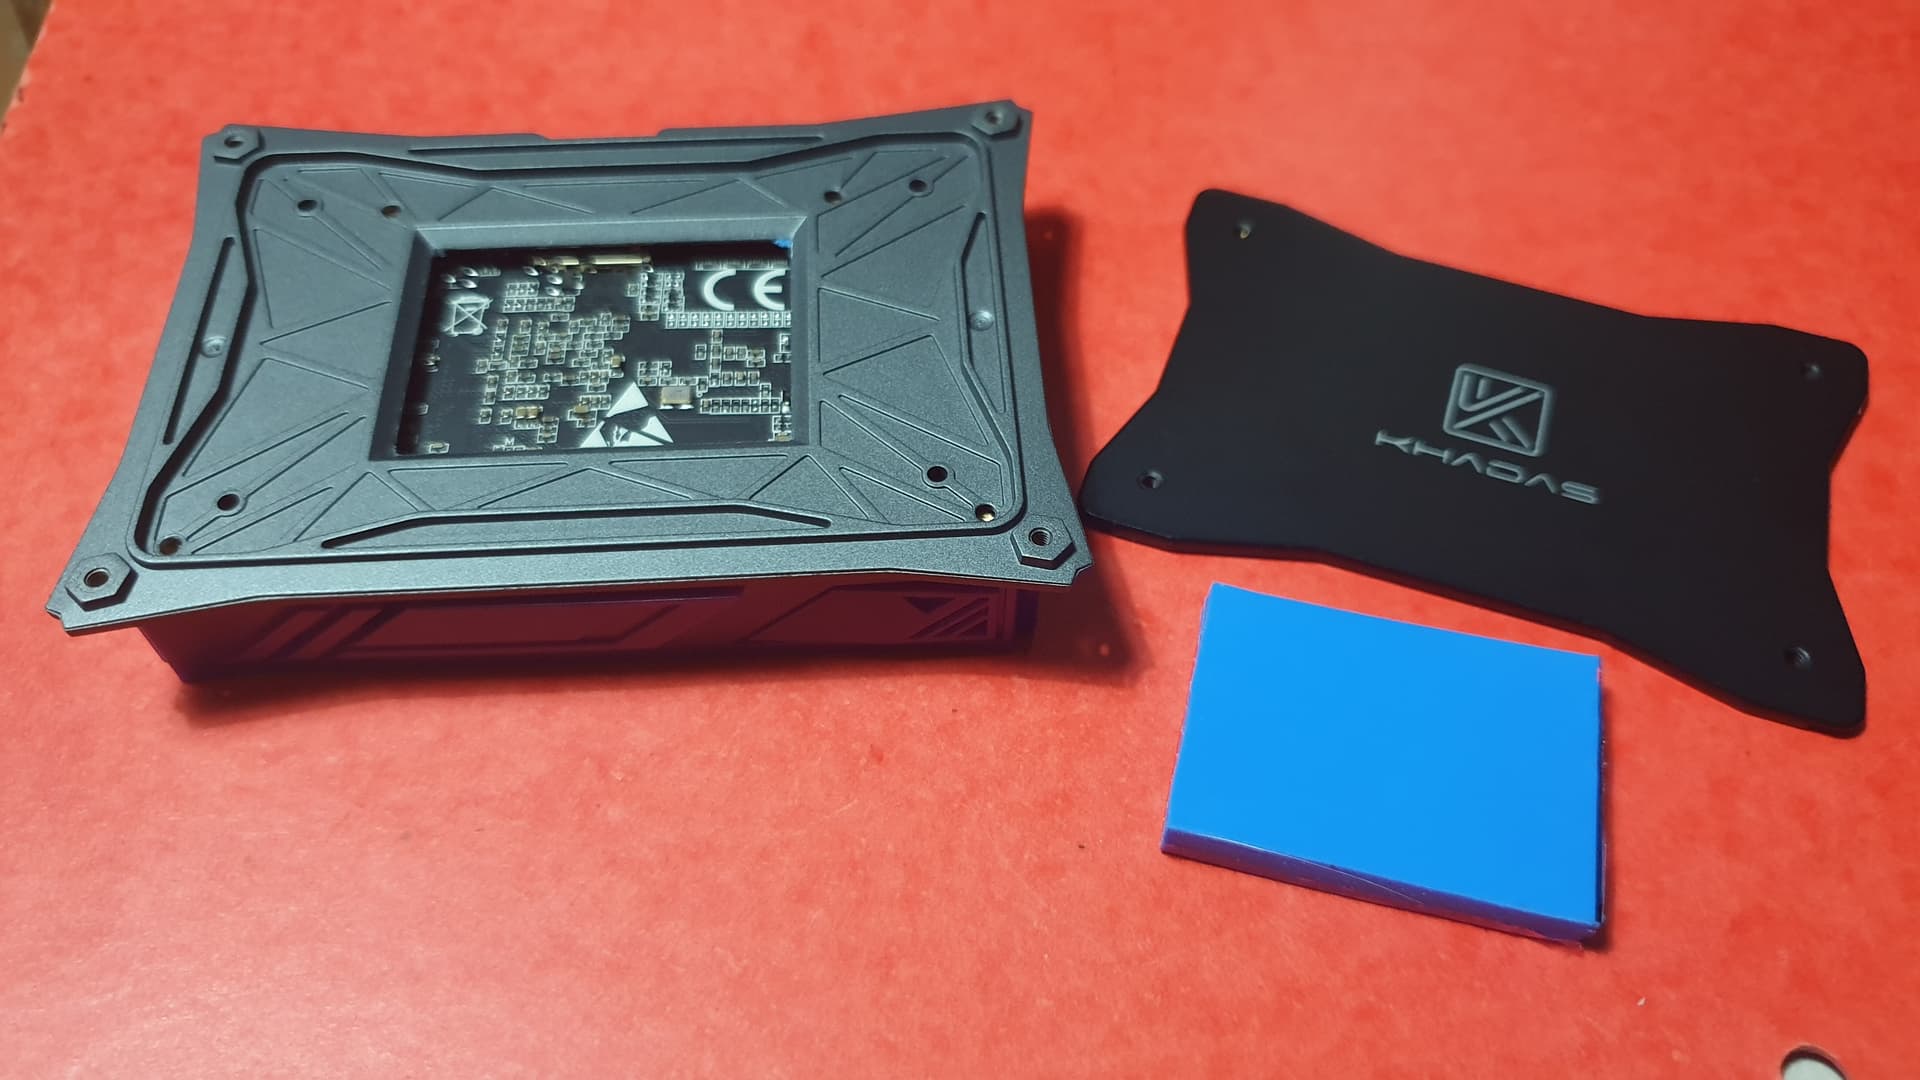
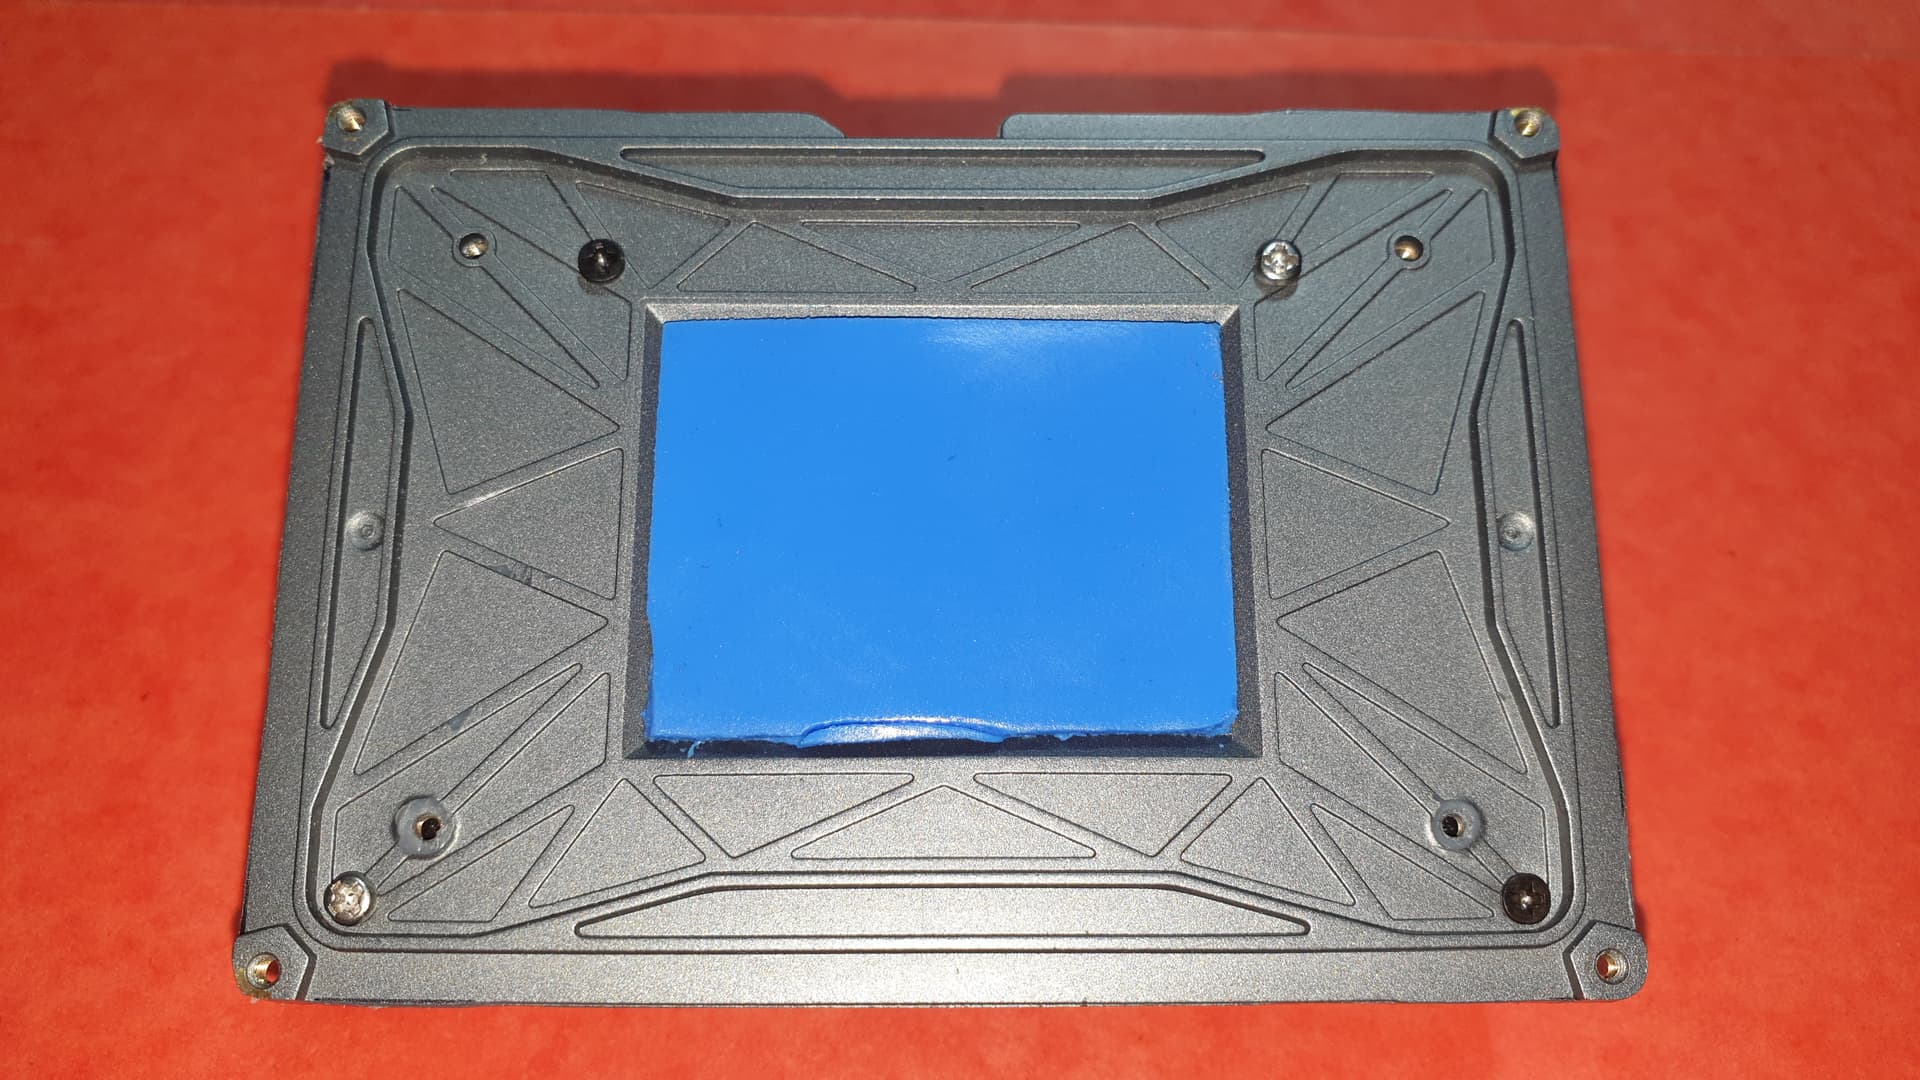
SOC and neighboring ships thermal paste placement :
Khadas New VIMs heatsink comes with screws and 2 pieces of thermal paste, they are planned to go to the SOC and neighboring ships…
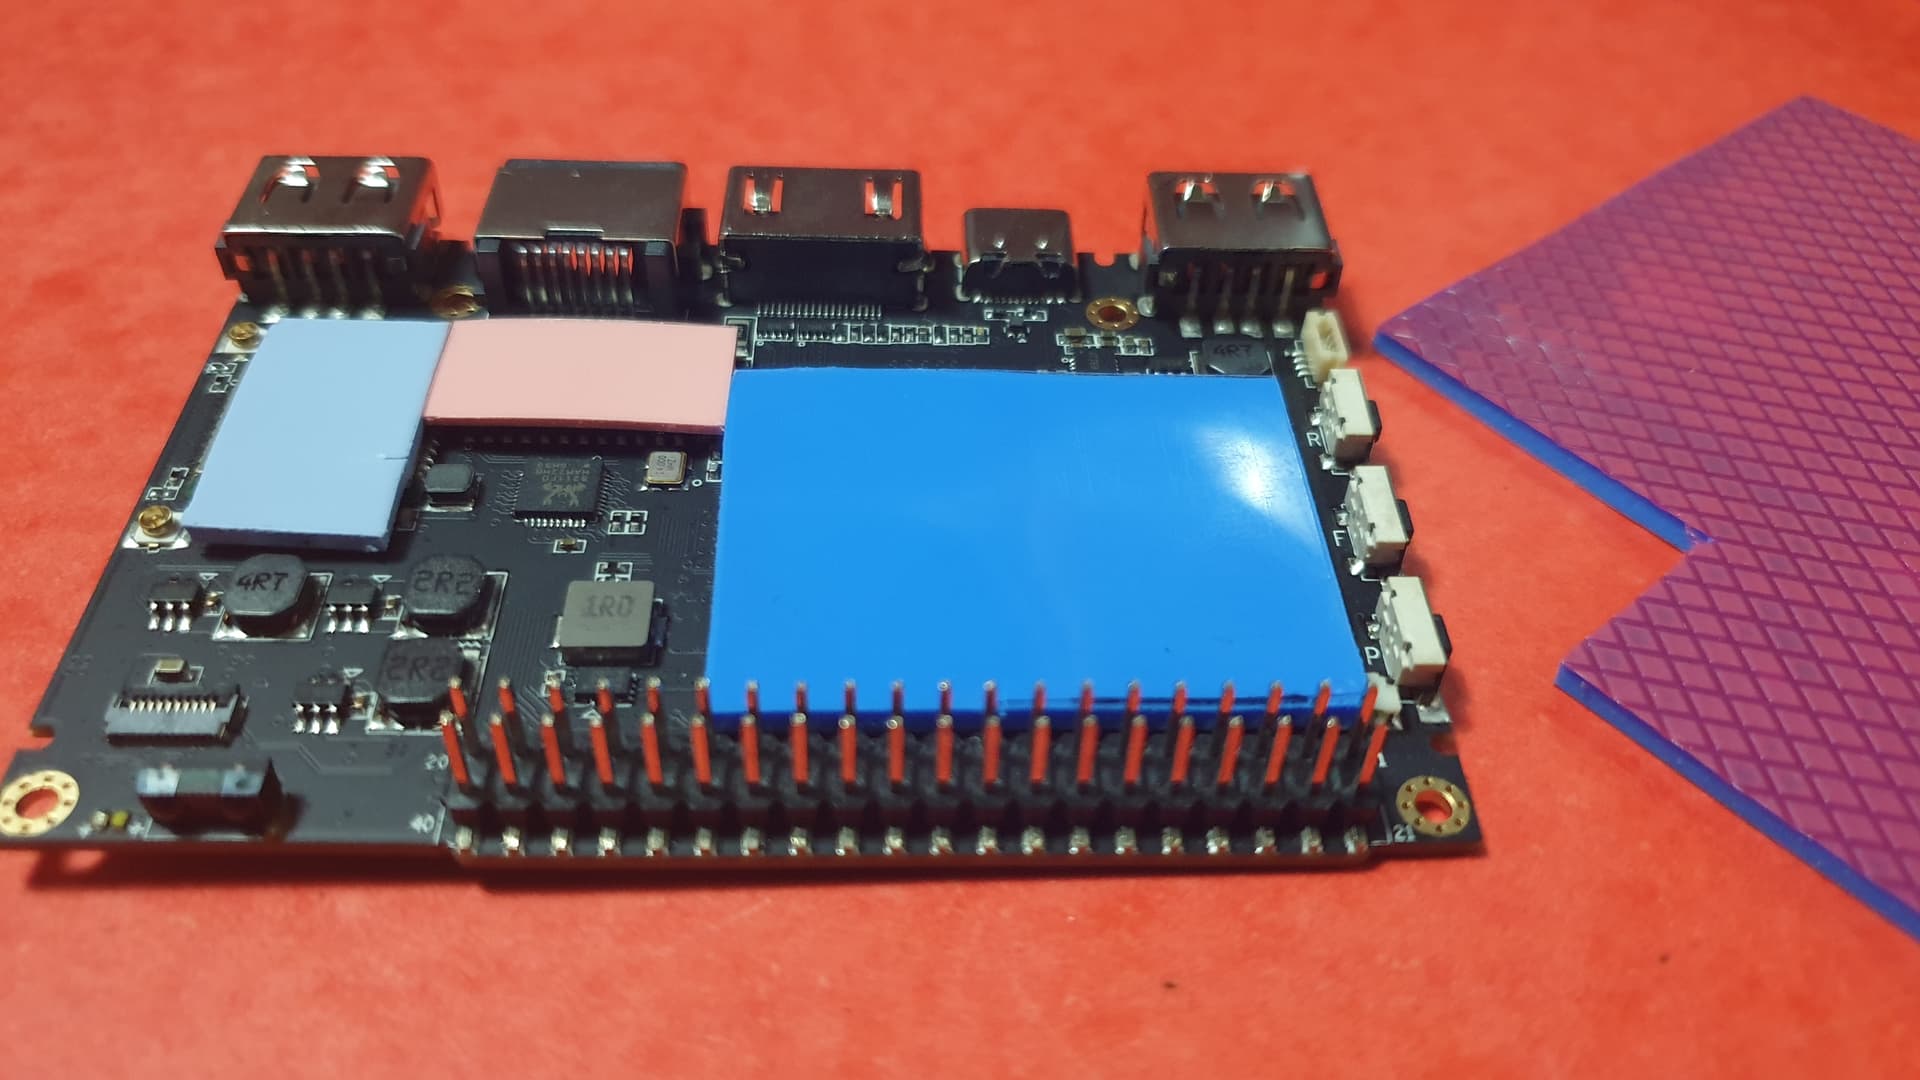
Personnaly I arranged them like this because I have 2mm thermal paste for the SOC and neighboring ships (1.5mm would have been more practical).
BONUS :
If like me, you also have available some 5mm thicknesses thermal paste, you can achieve additional heat dissipation by…
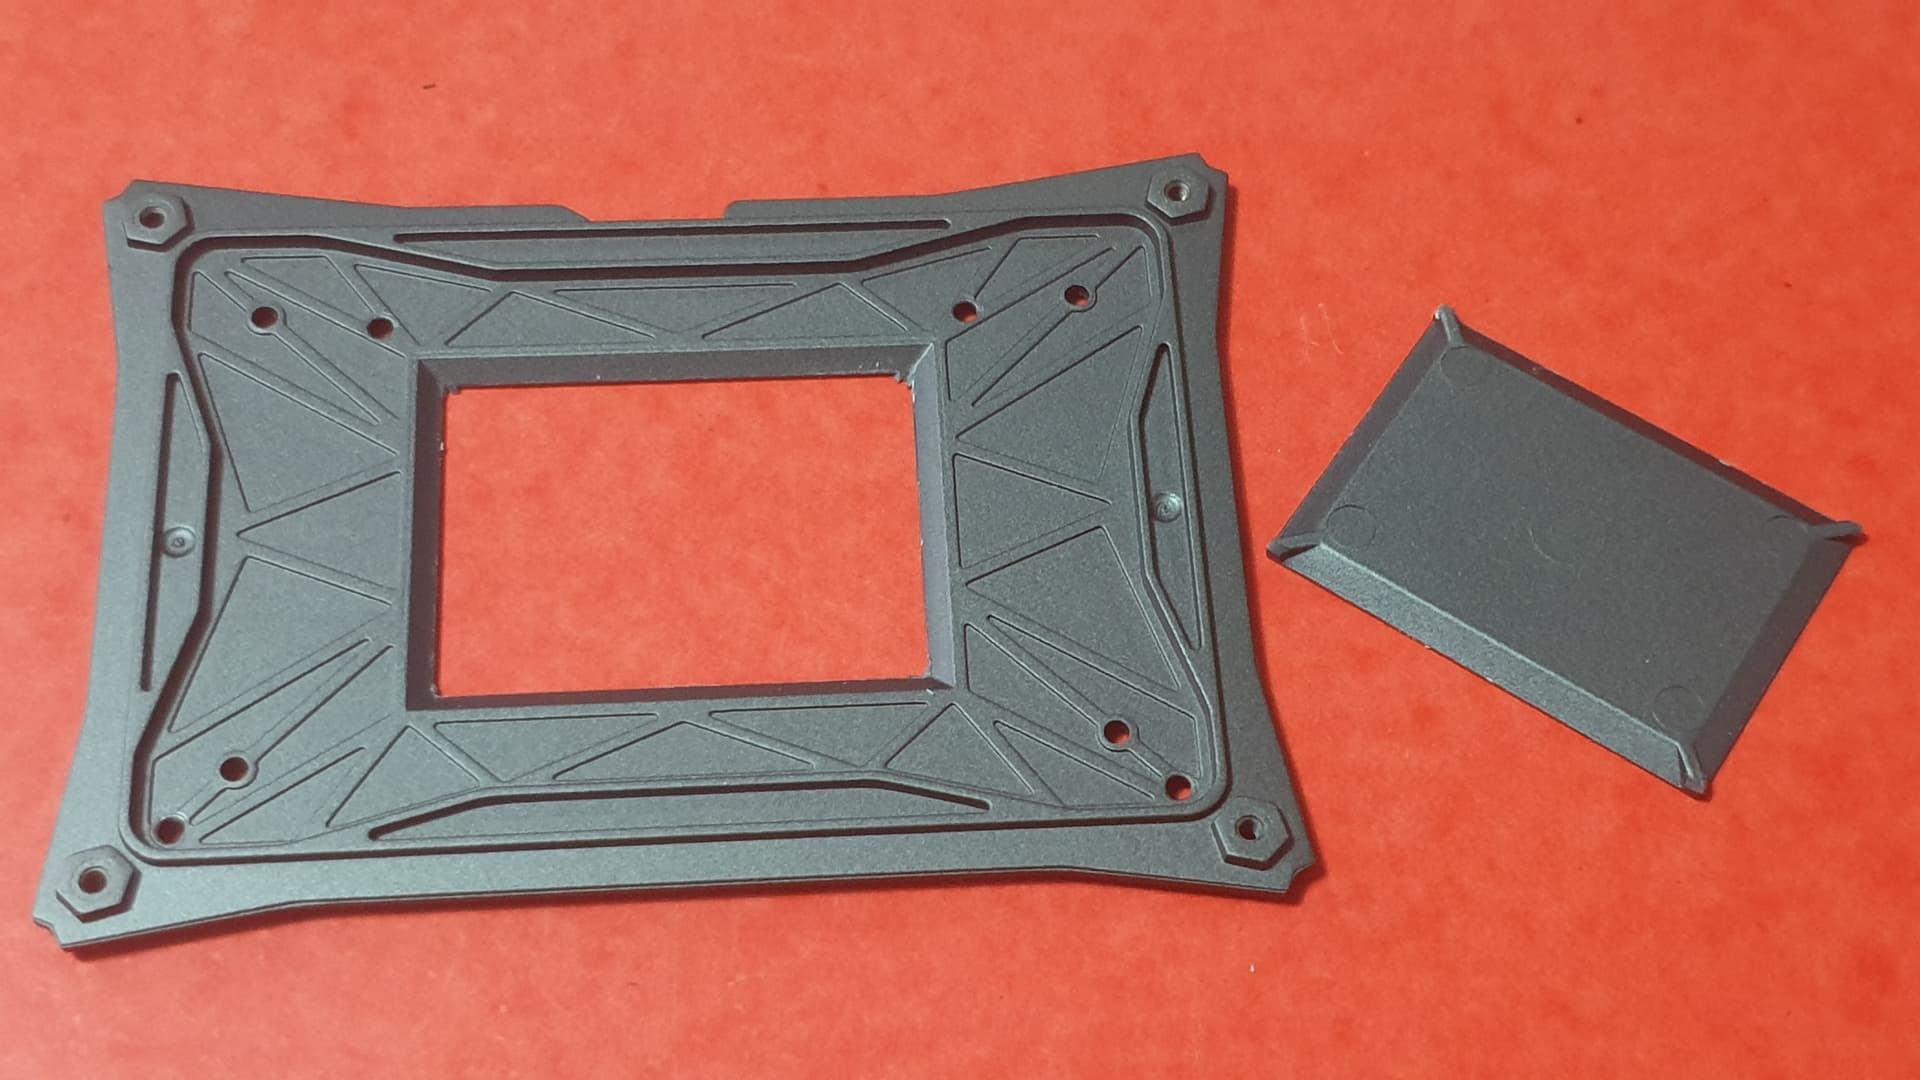
…cutting the lower central part of the DIY-Case…
…and place this paste between the VIM board and the DIY-Case metal plate
normaly provided with the DIY-Case but also orderable separately…
Thanks to these mods, we dissipate on average 5 additionals degrees compared to a non mod VIM conventional active SOC heat dissipation…
Hop this will be usefull for someone …
Tchüss @+ …
Fred…
