是一个关于mobilenettf的转换例子,我就是用这个里面的**.sh来输出我的yolo 模型vnn_fruitdetect.c和.h的文件,然后我把生成的vnn_fruitdetect.c和你们gitlab给的yolo_v3 demo里面的vnn_yolov3.c这个函数做对比,会多出image process部分,如下:
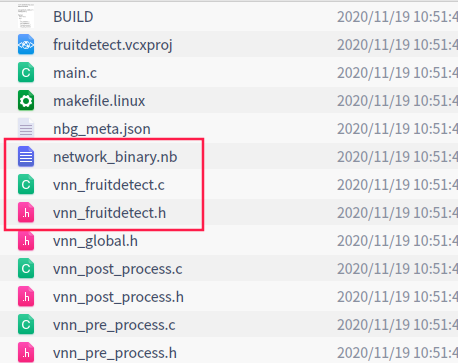
vnn_fruitdetect.c(详细内容可点开查看)
/****************************************************************************
*   Generated by ACUITY 5.11.0
*   Match ovxlib 1.1.21
*
*   Neural Network appliction network definition source file
****************************************************************************/
/*-------------------------------------------
                   Includes
 -------------------------------------------*/
#include <stdio.h>
#include <stdlib.h>

#include "vsi_nn_pub.h"

#include "vnn_global.h"
#include "vnn_fruitdetect.h"

/*-------------------------------------------
                   Macros
 -------------------------------------------*/

#define NEW_VXNODE(_node, _type, _in, _out, _uid) do {\
        _node = vsi_nn_AddNode( graph, _type, _in, _out, NULL );\
        _node->uid = (uint32_t)_uid; \
        if( NULL == _node ) {\
            goto error;\
        }\
    } while(0)

#define NEW_VIRTUAL_TENSOR(_id, _attr, _dtype) do {\
        memset( _attr.size, 0, VSI_NN_MAX_DIM_NUM * sizeof(uint32_t));\
        _attr.dim_num = VSI_NN_DIM_AUTO;\
        _attr.vtl = !VNN_APP_DEBUG;\
        _attr.is_const = FALSE;\
        _attr.dtype.vx_type = _dtype;\
        _id = vsi_nn_AddTensor( graph, VSI_NN_TENSOR_ID_AUTO,\
                & _attr, NULL );\
        if( VSI_NN_TENSOR_ID_NA == _id ) {\
            goto error;\
        }\
    } while(0)

// Set const tensor dims out of this macro.
#define NEW_CONST_TENSOR(_id, _attr, _dtype, _ofst, _size) do {\
        data = load_data( fp, _ofst, _size  );\
        _attr.vtl = FALSE;\
        _attr.is_const = TRUE;\
        _attr.dtype.vx_type = _dtype;\
        _id = vsi_nn_AddTensor( graph, VSI_NN_TENSOR_ID_AUTO,\
                & _attr, data );\
        free( data );\
        if( VSI_NN_TENSOR_ID_NA == _id ) {\
            goto error;\
        }\
    } while(0)

// Set generic tensor dims out of this macro.
#define NEW_NORM_TENSOR(_id, _attr, _dtype) do {\
        _attr.vtl = FALSE;\
        _attr.is_const = FALSE;\
        _attr.dtype.vx_type = _dtype;\
        _id = vsi_nn_AddTensor( graph, VSI_NN_TENSOR_ID_AUTO,\
                & _attr, NULL );\
        if( VSI_NN_TENSOR_ID_NA == _id ) {\
            goto error;\
        }\
    } while(0)

// Set generic tensor dims out of this macro.
#define NEW_NORM_TENSOR_FROM_HANDLE(_id, _attr, _dtype) do {\
        _attr.vtl = FALSE;\
        _attr.is_const = FALSE;\
        _attr.dtype.vx_type = _dtype;\
        _id = vsi_nn_AddTensorFromHandle( graph, VSI_NN_TENSOR_ID_AUTO,\
                & _attr, NULL );\
        if( VSI_NN_TENSOR_ID_NA == _id ) {\
            goto error;\
        }\
    } while(0)

#define NET_NODE_NUM            (1)
#define NET_NORM_TENSOR_NUM     (3)
#define NET_CONST_TENSOR_NUM    (0)
#define NET_VIRTUAL_TENSOR_NUM  (2)
#define NET_TOTAL_TENSOR_NUM    (NET_NORM_TENSOR_NUM + NET_CONST_TENSOR_NUM + NET_VIRTUAL_TENSOR_NUM)

/*-------------------------------------------
               Local Variables
 -------------------------------------------*/

/*-------------------------------------------
                  Functions
 -------------------------------------------*/
static uint8_t* load_data
    (
    FILE  * fp,
    size_t  ofst,
    size_t  sz
    )
{
    uint8_t* data;
    int32_t ret;
    data = NULL;
    if( NULL == fp )
    {
        return NULL;
    }

    ret = fseek(fp, ofst, SEEK_SET);
    if (ret != 0)
    {
        VSILOGE("blob seek failure.");
        return NULL;
    }

    data = (uint8_t*)malloc(sz);
    if (data == NULL)
    {
        VSILOGE("buffer malloc failure.");
        return NULL;
    }
    ret = fread(data, 1, sz, fp);
    return data;
} /* load_data() */

vsi_nn_graph_t * vnn_CreateFruitdetect
    (
    const char * data_file_name,
    vsi_nn_context_t in_ctx,
//删除了下面的图像处理部分
    const vsi_nn_preprocess_map_element_t * pre_process_map,
    uint32_t pre_process_map_count,
    const vsi_nn_postprocess_map_element_t * post_process_map,
    uint32_t post_process_map_count
    )
{
    vsi_status              status;
    vsi_bool                release_ctx;
    vsi_nn_context_t        ctx;
    vsi_nn_graph_t *        graph;
    vsi_nn_node_t *         node[NET_NODE_NUM];
    vsi_nn_tensor_id_t      norm_tensor[NET_NORM_TENSOR_NUM];

    vsi_nn_tensor_attr_t    attr;
    FILE *                  fp;
    uint8_t *               data;
//删除了下面的图像处理部分
    uint32_t                i = 0;
    char *                  use_img_process_s;
    int32_t                 enable_pre_post_process = 0;


    ctx = NULL;
    graph = NULL;
    status = VSI_FAILURE;
    memset( &attr, 0, sizeof( attr ) );

    fp = fopen( data_file_name, "rb" );
    if( NULL == fp )
    {
        VSILOGE( "Open file %s failed.", data_file_name );
        goto error;
    }

    if( NULL == in_ctx )
    {
        ctx = vsi_nn_CreateContext();
    }
    else
    {
        ctx = in_ctx;
    }

    graph = vsi_nn_CreateGraph( ctx, NET_TOTAL_TENSOR_NUM, NET_NODE_NUM );
    if( NULL == graph )
    {
        VSILOGE( "Create graph fail." );
        goto error;
    }
    vsi_nn_SetGraphVersion( graph, VNN_VERSION_MAJOR, VNN_VERSION_MINOR, VNN_VERSION_PATCH );
    vsi_nn_SetGraphInputs( graph, NULL, 1 );
    vsi_nn_SetGraphOutputs( graph, NULL, 2 );

/*-----------------------------------------
  Register client ops
 -----------------------------------------*/


/*-----------------------------------------
  Node definitions
 -----------------------------------------*/

    /*-----------------------------------------
      lid       - nbg_0
      var       - node[0]
      name      - nbg
      operation - nbg
      input     - [320, 240, 3, 1]
      output    - [20, 15, 48, 1]
                  [40, 30, 48, 1]
    -----------------------------------------*/
    NEW_VXNODE(node[0], VSI_NN_OP_NBG, 1, 2, 0);
    node[0]->nn_param.nbg.type = VSI_NN_NBG_FILE;
    node[0]->nn_param.nbg.url = data_file_name;


/*-----------------------------------------
  Tensor initialize
 -----------------------------------------*/
    attr.dtype.fmt = VSI_NN_DIM_FMT_NCHW;
    /* @input_0:out0 */
    attr.size[0] = 320;
    attr.size[1] = 240;
    attr.size[2] = 3;
    attr.size[3] = 1;
    attr.dim_num = 4;
    attr.dtype.fl = 7;
    attr.dtype.qnt_type = VSI_NN_QNT_TYPE_DFP;
    NEW_NORM_TENSOR(norm_tensor[0], attr, VSI_NN_TYPE_INT8);

    /* @output_19:out0 */
    attr.size[0] = 20;
    attr.size[1] = 15;
    attr.size[2] = 48;
    attr.size[3] = 1;
    attr.dim_num = 4;
    attr.dtype.fl = 1;
    attr.dtype.qnt_type = VSI_NN_QNT_TYPE_DFP;
    NEW_NORM_TENSOR(norm_tensor[1], attr, VSI_NN_TYPE_INT8);

    /* @output_26:out0 */
    attr.size[0] = 40;
    attr.size[1] = 30;
    attr.size[2] = 48;
    attr.size[3] = 1;
    attr.dim_num = 4;
    attr.dtype.fl = 1;
    attr.dtype.qnt_type = VSI_NN_QNT_TYPE_DFP;
    NEW_NORM_TENSOR(norm_tensor[2], attr, VSI_NN_TYPE_INT8);


/*-----------------------------------------
  Connection initialize
 -----------------------------------------*/
    node[0]->input.tensors[0] = norm_tensor[0];
    node[0]->output.tensors[0] = norm_tensor[1];
    node[0]->output.tensors[1] = norm_tensor[2];

    /* nbg_0 */


    graph->input.tensors[0] = norm_tensor[0];
    graph->output.tensors[0] = norm_tensor[1];
    graph->output.tensors[1] = norm_tensor[2];

//删除了下面的图像处理部分
    use_img_process_s = getenv( "VSI_USE_IMAGE_PROCESS" );
    if( use_img_process_s )
    {
        enable_pre_post_process = atoi(use_img_process_s);
    }
    if( enable_pre_post_process )
    {
        if( pre_process_map_count > 0 )
        {
            for( i = 0; i < pre_process_map_count; i++ )
            {
                status = vsi_nn_AddGraphPreProcess(graph, pre_process_map[i].graph_input_idx,
                                                   pre_process_map[i].preprocesses,
                                                   pre_process_map[i].preprocess_count);
                TEST_CHECK_STATUS( status, error );
            }
        }

        if( post_process_map_count > 0 )
        {
            for( i = 0; i < post_process_map_count; i++ )
            {
                 status = vsi_nn_AddGraphPostProcess(graph, post_process_map[i].graph_output_idx,
                                                     post_process_map[i].postprocesses,
                                                     post_process_map[i].postprocess_count);
                 TEST_CHECK_STATUS( status, error );
            }
        }

        status = vsi_nn_SetupGraph( graph, TRUE );
        TEST_CHECK_STATUS( status, error );
    }
    else
    {
        status = vsi_nn_SetupGraph( graph, FALSE );
        TEST_CHECK_STATUS( status, error );
    }

    if( VSI_FAILURE == status )
    {
        goto error;
    }

    fclose( fp );

    return graph;

error:
    if( NULL != fp )
    {
        fclose( fp );
    }

    release_ctx = ( NULL == in_ctx );
    vsi_nn_DumpGraphToJson( graph );
    vnn_ReleaseFruitdetect( graph, release_ctx );

    return NULL;
} /* vsi_nn_CreateFruitdetect() */

void vnn_ReleaseFruitdetect
    (
    vsi_nn_graph_t * graph,
    vsi_bool release_ctx
    )
{
    vsi_nn_context_t ctx;
    if( NULL != graph )
    {
        ctx = graph->ctx;
        vsi_nn_ReleaseGraph( &graph );

        /*-----------------------------------------
        Unregister client ops
        -----------------------------------------*/


        if( release_ctx )
        {
            vsi_nn_ReleaseContext( &ctx );
        }
    }
} /* vsi_nn_ReleaseFruitdetect() */
所以为了保持和你们vnn_yolov3.c的一致性(你们demo的代码我看图像处理部分,是在yolo_v3_process.c里面的),我就删了vnn_fruitdetect.c里面关于图像处理部分的代码。是不是我用的2_export_cae_code.sh哪里有问题
 )
)